Despite all the protection systems, automatic updates and other electronic signatures, even the latest, tenth version of Windows continues to corrupt system files with enviable consistency. The reasons are varied - from errors by Microsoft engineers who sent a poorly tested patch to release, to errors in installing drivers and malicious viruses.
Let's start with the operating features of Windows 10 and the protection methods implemented by MS.
Checking the integrity of system files in Windows 10
Basics of System File Protection
In Windows 10, files necessary for the system to operate are protected by two mechanisms at once - SFC and DISM.
- Sfc.exe restores unstable files by checking against the standard system image;
- Dism.exe works directly with the reference image, assessing the extent of damage and correcting its condition.
Both files are standard and come with all versions of Win10 by default.
Windows File Protection automatically protects SFC and DISM files
In addition, files are automatically protected by the Windows File Protection system, which appeared in Windows Vista. The technology is based on backing up old versions of a file before installing a new one and automatically rolling back if something goes wrong. WFP is enabled by default in all versions of the OS, although its capabilities are much more modest than Microsoft would like to believe.
Even several layers of protection do not provide absolute guarantees and system files are still deleted, damaged during updates, or simply erased due to hardware problems. What should be done in such cases?
Solution 2: Check your hard drive
If your hard drive has file system errors that have caused file corruption, you can scan your drive to recover damaged files.
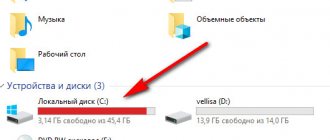
Step 1: Open File Explorer > right-click on the HDD/SSD you want to scan > select Properties .
Step 2: On the Tools > click the Check in the Check for Errors .
Step 3: You can then select “ Scan disk ” if you want, or “ Repair disk ” if errors were found.
Step 4: Wait for “ Error Checker ” to scan the selected hard drive. If errors are found, you may be asked to restart your computer. If no errors are found, you can close all open windows and continue using your computer as usual.
Application of SFC
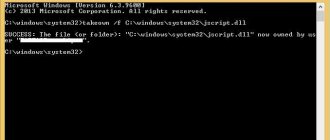
Most advanced Win10 users are familiar with the sfc application from the command line with the /scannow modifier. Run as administrator, it will fix most minor errors related to system files.
To run the scan, you must:
- Open the Run menu window. The easiest way to do this is by simultaneously pressing “Win + R” on the keyboard.
Open the “Run” menu window - Type the command “cmd” in the menu and press “Enter”. This will open a command prompt under the current user.
Type the command “cmd” in the menu and press “Enter”Important! Make sure your account has administrator rights; without them, the system scan will fail.
- In the window that appears, enter “sfc /scannow/”. You should wait for the results of the check.
In the window that appears, enter the command and wait for the test results
If you did not start Windows under the administrator system account, then press “Win + X” and select “Command Prompt (Admin)” from the menu that appears.
To run the command line as an administrator, press “Win + X” and in the menu that appears, select “Command Prompt (Admin)”
This will help resolve insufficient rights and access denial issues when performing a scan.
The main disadvantage of this method is that SFC cannot access files that are already in use. This means that in case of more serious difficulties, the application will have to be launched from another shell - for example, from a bootable flash drive or a second system installed on the computer. The easiest way is to use the recovery environment: a special mode that is used to fix system errors when it cannot boot.
Why is this necessary?
If the OS constantly slows down and freezes, programs do not open, applications do not start, and error messages appear every now and then, then there are serious problems. If problems arise with the device, it is recommended to scan important service files, that is, check their integrity. Before this procedure, it is advisable to run the antivirus and troubleshooter from the Settings console.
There are simple ways to restore Windows components using built-in (native) and third-party utilities. When you activate such tools, the system will scan Windows, find damaged elements and repair them on its own. After such resuscitation, PC performance will improve and data processing speed will increase.
Important! In addition to the recovery procedure, you can use another method that allows you to download the missing file from the dll, exe, sys libraries. A database of all service components available in Windows is presented on the Winbindex website.
Recovering from external media
There are several ways to get to “Recovery Mode”. The most reliable way is to boot from a flash drive or disk on which the official Win10 distribution is located.
- After starting the installation procedure, after selecting the Russian language, the inscription “System Restore” will appear at the bottom left.
Click on “System Restore” - Clicking it leads to this window.
Window with “Advanced parameters” - Next, launch the command line and enter the following set of commands:
- diskpart;
- list volume;
- exit;
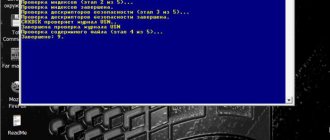
- sfc /scannow /offbootdir=C: /offwindir=C:Windows.
We use a set of commands to tell the command line from the boot disk exactly where the system that needs repair is located
This is necessary in order to indicate to the command line from the boot disk exactly where the system that needs repair is located. C:Windows is the default, but in principle the installation folder can be anywhere.
The duration of the scan depends on many parameters: from the speed of the flash drive to the level of problems in the system being scanned.
Note! Please note that while the underscore on the last line is blinking, the computer is not frozen and is doing work.
How to restore files from a specified source using the RestoreHealth option
Sometimes it happens that damage to the operating system is much wider and affects the Windows Update service. In this case, the RestoreHealth parameter will not be able to repair damage to the image because the system cannot connect to Microsoft servers. In this situation, you should perform another operation - specify the path to the Windows installer, from which “working” files will be downloaded without using the Internet and the update center.
To do this, you need the Windows 10 installer on a DVD, flash drive, or ISO image format. The latter can be downloaded via the Media Creation Tool app for Windows 10.
Download the version for Windows 10 (32 or 64 bit), run the application and follow the wizard to download the ISO to your computer. After the image is downloaded and saved, go to the Explorer window and double-click on the ISO file with the installer to mount it. In the This PC window, check which letter was assigned to the mounted image (for example, the letter "E").
If you have a bootable DVD or USB drive with Windows 10 installed, then you don’t need to download anything - just insert the disk or connect an external drive, and see what letter was assigned to this drive in the “This PC” section.
After the drive with the Windows installation is detected by the system and we know the letter, it is time to use the appropriate DISM parameter, which will indicate the path to this media. To do this, enter the following command:
Please note again that if in our case, the DVD, flash drive or ISO image is assigned a letter other than “E”, then change it in the above command. After pressing Enter, the damaged component store files will be restored from the original Windows Installer to the specified path.
Solution 5: Change the format to fix corrupted files
If you open a damaged Excel or Word document and find that there is no data in it, you can try to recover the damaged Excel or Word document by saving it in a different format.
Step 1: Open the damaged Word or Excel file and select " Save As ".
Step 2: Select " Web Page " from the available file formats. Make sure the entire Excel file is selected and click Save.
Step 3: Locate the saved file and right-click on it, select Open With > Microsoft Office Excel .
Step 4: If the file opens normally, go to “ Save As ” and select Excel .xls or .xlsx format. This way the damaged Excel file will be restored.
Solution 4: Run a CHKDSK alternative
EaseUS CleanGenius is a convenient, safe and easy computer repair tool. This is a great alternative to the CHKDSK command. Use this tool to fix a damaged file system in one click.
1. Download and install EaseUS Data Recovery Wizard on your computer.
2. Use the installed program to search and recover lost data. Select the disk partition or folder from which your data “disappeared”. Then click the "Scan" button.
3. When the scan is completed, find the files and folders you need in the list of results.
Select them and click the "Restore" button. When choosing a location to save the recovered data, do not use the same drive that you scanned!
2
Solution 6: Use an online file recovery tool
You can also recover damaged files using an online file recovery tool. This approach to file recovery is easy to use. Typically, you just need to download the corrupted file, perform a repair, and then download the corrected documents.
However, this type of software has the following disadvantages:
- The confidentiality of file data cannot be guaranteed. Third parties may retain the file you upload for their own purposes.
- The recovery rate is usually low.
- The cost is expensive. Most online recovery tools require a fee, such as $10 per document.
So think twice before fixing corrupted files using an online tool. If you want to give it a try, OnlineFile.Repair is a good option.


