NT Kernel & System is one of the standard system processes in Windows 10 that can begin to load the CPU due to certain glitches related to drivers, services or third-party software. This makes it necessary to solve the problem, since it becomes practically impossible to use the computer. This is exactly what we will talk about next, having analyzed all the available methods.
Method 1: Check your computer for viruses
First, we want to dwell on the possible threat of infection of the operating system with viruses. Such files often operate in the background, interfering with any services or any system processes, including the NT Kernel & System, which causes an abnormal load on the component. It is unlikely that an ordinary user will be able to check the behavior of the process manually, so he will have to turn to special software or online services that scan the system for threats and remove them. Read more about the fight against computer viruses in another material on our website by clicking on the link below.
Read more: Fighting computer viruses
Method 2: Installing drivers for the last connected hardware
This method should be paid attention to by all users who have just connected some new equipment to their PC and have since encountered an increase in the load on the NT Kernel & System. This may be due to the fact that the appropriate drivers were not installed and the device is not functioning correctly. We recommend that you definitely find the appropriate files and add them to Windows. If you are a novice user and do not yet fully understand how exactly drivers are installed, read about this in a separate guide from another of our authors below.
Read more: Installing drivers in the Windows 10 operating system
How to fix the problem
As usual, there are many ways to unload the processor and free up memory. As for computer slowdowns caused by the NT Kernel&Systems process, it’s worth trying several effective options.
Cleaning system junk
No matter how zealous the owner of a desktop PC or laptop is, over time, a lot of garbage accumulates in the operating system - registry entries about long-deleted programs, configuration files, logs, etc. If you get rid of everything unnecessary, there is a possibility that the normal operation of the computer will recover.
How to clean your PC:
- go to “My Computer” (via the “Start” panel or from the desktop, which usually has such an icon);
- Click on the tab named “Uninstall or change a program”;
- We carefully study the list, especially pay attention to the “Last used” column, if present. If you come across a program that you no longer need, feel free to delete it. It is better not to touch unfamiliar programs;
- We use the popular free utility CCleaner to clean the disk and OS. If you don’t have it installed, don’t be lazy, download and install it, you will definitely need it in the future. You don't need to configure anything there. Just run it, click on the “Analysis” button, and when it’s finished, click on the “Cleaning” button.
Before restarting your computer, it is advisable to perform a procedure that will unload your hard drive. Click on “Start”, then go to the “All Programs” tab, look for the “Standard” tab, and in it – “Service”. This is where the Disk Defragmentation utility hides. But keep in mind that the procedure can take hours, especially if the disk is large and contains a huge number of small files.
Rolling back the drivers
Installing or connecting new equipment is usually accompanied by the installation of drivers for it - programs that completely or partially take over control of the operation of this equipment. Sometimes these drivers turn out to be incompatible with existing Windows components, and if their libraries are not integrated with system services correctly, conflicts are possible due to which NT Kernel&Systems begins to work abnormally, taking over all PC resources.
It is very difficult, almost impossible, for the average user to track which drivers caused the problem. But there is a way out - roll back the operating system to a date before the problems appeared. You need to know the date approximately - if normal operation is not restored, you need to roll back to an earlier date.
How it's done:
- launch “Control Panel”;
- Click on the “System Security” tab;
- in the “Support Center” menu, select the submenu “Restore the previous state of the PC”;
- in the new window, click on the “Start system recovery” button;
- on the warning screen it says: “System Restore will help fix problems that are slowing down your computer,” so click the “Next” button;
- select the appropriate date and click “Next”.
The recovery procedure may take a long time, and the computer will reboot. And most importantly: all programs and applications that you installed after this date will be lost and will need to be installed again. But there is good news: user data (music, photos, movies, documents) will not be deleted.
As a result of the restoration, drivers that you may not even know about will be removed. In a word, the OS should start working as it did before the “brakes” appeared.
You shouldn’t be afraid to use recovery - you can return to the previous state at any time if something doesn’t suit you.
Reducing the load by turning off
Recovery is considered a very reliable, but drastic way to solve problems. Not everyone likes it, and it doesn’t always help - especially if you have disabled this function or there are few control points, and they are all fresh.
But you also have an alternative option - simply disable this process in the “Task Manager” and observe how the operating system behaves.
But even if you are convinced that there are no problems without the utility, you cannot remove NT Kernel&Systems; you need to look for the reason that caused the computer to freeze.
You can try to disable the automatic launch of other programs and services by typing msconfig in the search and launch programs console, and then in the “Startup” and “Services” tabs, unchecking those programs that you think are not always needed. You can run them as needed.
Method 3: Rollback the installed driver
This option also applies only to certain categories of users, namely those who encountered the problem in question after updating a specific driver. Most often, this is due to the fact that the new version of the software is not optimized by the developers themselves and does not function entirely correctly in the operating system. This can be fixed by rolling back to the previous version of the driver, which is done like this:
- Right-click on the “Start” button and in the context menu that appears, go to “Device Manager”.
- Expand the section corresponding to the newly installed driver.
- Right-click on the line and select “Properties”.
- Go to the Driver tab.
- Click the “Roll Back” button and confirm applying the changes.
After rolling back the driver, it is recommended to restart the computer for all changes to take effect. Now you can start monitoring CPU load with the NT Kernel & System service. If this does not help, proceed to the following methods.
How to solve a problem with System process activity that is preventing your computer from working properly
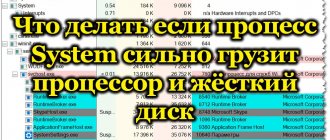
The problem inherent in the Windows 8 system with the activity of the System process, which loads system resources, has migrated to both the upgrade version of Windows 8.1 and the current Windows 10. The System process can load the disk, processor or RAM by 95-100%. However, it is not necessary that the computer be low-power. The problem occurs even among owners of devices with powerful hardware.
In the Task Manager of Windows 10 that has not yet been updated to the Anniversary Update, the System process may appear under the name "System and Compressed Memory." But no matter how this process appears in the task manager of different versions of Windows, its executable file is ntoskrnl.exe.
Problematic activity in the System process may occur periodically when performing certain user or system tasks. But there are also cases when this process consistently loads the disk, processor or RAM, regardless of what operations are performed on the computer. Below we will look at what this process is, why it can load system resources, and how the issue of its problematic activity is resolved.
We also recommend that you look at what to do if the processor begins to be heavily loaded by Antimalware service executable.
Process System
The System process is an important component of Windows; its executable file, ntoskrnl.exe, is the kernel file of the operating system. System is responsible for many system functions. It cannot be completed; Windows simply will not work without it. For this process, the options for changing priority in the system task manager are not even available.
Why does the System process load the processor, disk, or consume a lot of RAM?
There are many reasons why the System process may be active with a load on the processor, hard drive, or RAM. Among them, in particular, are: a weak or overheated processor, a slow or error-prone hard drive, severe fragmentation of the latter or the presence of bad sectors in it, the operation of individual antiviruses and firewalls, problems with Windows updates, the penetration of malware, etc. The reason The way the System process uses large amounts of RAM in Windows 8.1 and 10 is to improve the performance of these systems by compressing data and placing it in RAM instead of dumping it into the page file.
Before proceeding with the radical methods outlined below to combat the activity of the System process, you need to check the hard drive for errors and bad sectors. It would also be a good idea to measure the processor temperature, especially if the computer has been cleaned of dust for a long time. At elevated temperatures, the processor can block new processes to protect itself from combustion. If resource-intensive antivirus products are installed on a low-power computer, for example, from Eset, Dr.Web, Kaspersky Lab, you need to test the behavior of the System process without them. If the assumption is confirmed, we will have to resort to defending lighter alternatives. By the way, Kaspersky Anti-Virus provides for setting the priority of using hardware resources.
If you see System process activity that consumes system resources immediately after installing Windows, you should wait until the disks are indexed and updates are installed. Reinstalling Windows due to problematic activity of the System process will not give positive results in most cases, and this process will again load system resources over time. But perhaps the problem will be solved if it occurred in 64-bit Windows on a computer with less than 4 GB of RAM, and 32-bit Windows is selected for reinstallation.
The following methods for solving the problem with System process activity will affect important system settings. Before using these methods, it is advisable to create a restore point or backup of Windows. Not all of these methods will be effective in every specific case; they need to be tested separately. Administrator rights are required to use the methods.
Most of the ways to combat System activity will involve disabling Windows system services. You can get to the Services snap-in either in the Windows 8.1 and 10 task manager,
or by entering into the internal search field or the Run service:
Opting out of automatic Windows updates
A common cause of System process activity with a load on the hard drive or processor is receiving and installing Windows updates. System in conjunction with active Windows Defender Antimalware Service Executable processes and installing Windows Modules Installer Worker updates can completely paralyze the computer. To absorb all system resources, this trinity sometimes does not even need the activity of third-party user programs. In this case, you can refuse automatic system updates and take complete control of this process. It will be necessary to periodically, for example, leave the computer turned on at night and manually search for and install system updates.
In Windows 8.1, automatic updates are turned off in Update Center inside Control Panel.
There you can also start searching for and installing updates manually.
In Windows 10, the option to completely refuse to install updates, present in earlier versions of the system, has been eliminated, and instead, users have the alternative of deferring updates for non-security related updates.
You can completely opt out of Windows 10 updates by disabling the Windows Update system service. Select it in the “Services” snap-in.
Stop, disable, apply changes.
Disabling indexing of drive C
For the sake of computer performance, you can disable the file indexing service. When searching for files, this operation will take more time, but the system will get rid of a constantly active process that regularly uses processor and RAM resources. In the “Services” snap-in, select “Windows Search”.
We stop the service, disable it, apply the changes.
Next, select “Properties” in the context menu of drive C and uncheck the option to allow its indexing. Click “Apply”.
In the window that appears, indicate the second item - “To drive C: and to all subfolders and files.” Click "Ok". Next, confirm the operation with the “Continue” button. And when a window appears notifying you about errors in changing attributes, click the “Skip all” button.
We wait for the operation to complete and restart the computer.
Disabling the Superfetch service
The SuperFetch service, which appeared in Windows Vista and then migrated to all subsequent versions of the system, is designed to speed up the launch of programs and the opening of files. This service tracks which programs and files the user uses most often and loads them into RAM. Appearing in the task manager as the System process (or “System and Compressed Memory”), the Superfetch service can actively access the hard drive and load it up to 100%. If you disable this service, it may make individual programs and files launch more slowly, but it will eliminate background activities that interfere with your overall computer experience. Superfetch should be automatically disabled on computers with SSD drives, since running this service reduces the life of SSD drives. However, SSD manufacturers recommend checking this point and, if necessary, disabling Superfetch manually.
To disable Superfetch, launch the system registry editor. Enter the following query into the internal search field or the “Run” command:
In the editor window, click the “Edit” menu, then “Find”. Enter the query in the search field:
The search should lead to the registry key:
On the right, double-click the “EnablePrefetcher” parameter and set the number 0 in the “Value” column. Click “Ok”.
We also set the number 0 in the “Value” column of the parameter below – “EnableSuperfetch”. Click "Ok".
Go to the Services snap-in and open the Superfetch service.
Stop the service, disable it, apply the changes.
Method 4: Cleaning your computer from junk
The longer the operating system operates without clearing temporary files and various garbage, the more this affects performance, and various conflicts can arise, leading to various problems, including the one we are talking about today. Therefore, it is recommended to remove such items from time to time, thereby cleaning your PC. For Windows 10, there are several options for achieving this task. We recommend reading about them in another article by clicking on the link below.
Read more: Free up space on the C drive in Windows 10
Method 5: Checking the functionality of the drivers
This method is the most labor-intensive of all those presented in this material, and we recommend switching to it only in a situation where the previously discussed solutions did not bring the desired result. The essence of this method is to check active drivers and their load on the processor and then correct this situation. For many, this will seem like a difficult task, so we have broken it down into stages, describing each of them in detail.
Step 1: Checking driver load via KrView
First of all, you need to check which driver loads the processor the most during its operation. This determines where exactly the bulk of the load falls on the NT Kernel & System process. This task can be accomplished using a special console utility, which is downloaded from the official Microsoft website.
- Follow the link above and start downloading KrView from the developer's website.
- Wait for the download to complete and run the resulting executable file.
- Unpack it and run the installation file from the selected path to perform a simple installation.
- After that, open “Start”, find the “Command Prompt” application there and run it as an administrator.
- Type cd C:\Program Files (x86)\KrView\Kernrates to navigate to the path where the downloaded utility's executable files are located. Change this path if the installation took place in a different location.
- All that remains is to launch the utility, which will scan the system. To do this, enter Kernrate_i386_XP.exe and press Enter.
- Press the Ctrl + C key combination to complete collecting information.
- Among the received lines, find a list of drivers and look at the very first lines. Assess the CPU load to understand which software is having a detrimental effect on system performance.
As you can see, the names of drivers and devices are in an encoded state, which you also have to figure out on your own. To do this, you will have to download separate software, which will be the subject of the next stage.
Step 2: View the driver through Process Explorer
Process Explorer is a utility purchased by Microsoft and distributed free of charge. It is a more advanced version of Task Manager with many useful options. We will use this solution to decrypt the resulting driver code.
- Click the link above and download Process Explorer.
- Open the resulting archive and run the executable file from there to start using the application.
- Pay attention to the top panel. There, find the “View DLLs” button and left-click on it. You can also call this menu using the key combination Ctrl + D.
- Now view the presented block. Here you should find the code name of the driver and find out its supplier in order to figure out which component it belongs to.
Step 3: Update or reinstall drivers
We have just determined which driver loads the system, having a negative impact on the functioning of the process in question. This situation should be dealt with promptly, which can be done by updating or reinstalling the software. First, we recommend checking to see if there is a newer version of this driver. If you cannot find it, you should remove it and install it again. Read more about all this in our other articles.
Read more: Reinstalling drivers in Windows How to update drivers on your computer
Why does NT Kernel&Systems load the processor?
Being an interface between the hardware and software parts of the OS, the process also performs many auxiliary tasks. One of them is managing the operation of third-party applications. From the point of view of the issue we are interested in, it is this component that is responsible for the excessive consumption of computer resources.
Most often, problems appear due to incorrectly installed applications. Sometimes the code of installed programs contains errors related to memory management. There are “curve” drivers, especially those not written by the manufacturer.
It is also impossible to exclude the occurrence of a system failure that occurred for an unknown reason, which is almost impossible to establish if it is isolated. Malicious code can also “load” the system, and the likelihood of this is not so small, especially if the PC has no or weak anti-virus protection. Finally, we take into account such factors as the presence in the system and other registries of “tails” from incorrectly uninstalled programs, and junk files on the hard drive.
In operating mode, the NT Kernel&Systems process works completely unnoticed, but if one of the troubles described above happens, a shortage of free RAM immediately arises, and the processor ends up being loaded at 90-95%.
It is rare, but it happens that this system utility begins to “slow down” due to hardware problems - for example, when the CPU overheats due to dried out thermal paste.
Method 6: Disable unnecessary services
When you install some software on your computer, services are added that are responsible for performing certain actions. Not all of them are necessary for the average user, and sometimes they even cause various problems or significantly increase the load on components. This can also provoke the emergence of the difficulty we are talking about today. We advise you to check the list of third-party services and disable all unnecessary ones to check the effectiveness of this method. You will find help in implementing this task in a separate material on our website by clicking on the following link.
Read more: Disable unnecessary services in Windows 10
Method 7: Checking the integrity of system files
The last option we want to talk about is checking system files for errors. This is done using a utility built into Windows called SFC. Additionally, you may need to run DISM if the SFC component is damaged. DISM fixes problems with this storage, after which the user is required to re-run the scan via SFC. In our other guide, click the link below, you will find all the information you need on this topic.
Read more: Using and restoring System File Integrity Check in Windows 10
Now you know how to fix the problem with CPU load by the NT Kernel & System task in Windows 10, and all that remains is to follow each method in turn to find the effective one as quickly as possible.
We are glad that we were able to help you solve the problem. In addition to this article, there are 12,719 more instructions on the site. Add the Lumpics.ru website to your bookmarks (CTRL+D) and we will definitely be useful to you. Thank the author and share the article on social networks.
Describe what didn't work for you. Our specialists will try to answer as quickly as possible.
Kernel error. General information about the problem
The Kernel-Power error is coded 43. The occurrence of such a problem means that the computer has detected a violation of the system kernel power. It belongs to category 63, which means Windows is unable to process a large number of requests and perform complex operations simultaneously. This is what explains the process of braking and freezing of modern computer arcades. In fact, it is quite difficult to find out the exact problems with Kernel-Power; even the official Microsoft website does not provide specific data.
Is there a treatment?
In the case when the PC freezes, refusing to respond to any mouse or keyboard command, only the reboot mode helps, which can only be entered by long pressing and holding the power button. But this does not guarantee further uninterrupted operation. Most likely, the system will work flawlessly for the first few minutes/hours, and then the problem will reappear. It became clear through experience that a complete reinstallation of the system does not help either. This suggests that the problem is at the level of interaction between the system, software, RAM, ROM and hard drive. Indeed, after reading the recommended requirements on the packaging of the game disc, you can find that the hardware requirements for the game to install, start and run smoothly are quite high. In addition, it is recommended to check whether all cables are connected to the connectors, whether there are any creases, as well as the stability of the power supply.
Windows kernel error. Bios setup
One of the reasons causing Kernel-Power is critical overheating of the processor. This can happen for two reasons:
The first action that needs to be taken in this case is to check the source data of the CPU and reduce any inflated indicators directly related to overclocking. Since such manipulations are quite difficult for most ordinary users, in this case it is recommended to simply roll back to the basic factory settings. If you are not using a laptop, but a simple computer, then you can take out the motherboard and remove the battery for a short time. You can try moving Clear CMOS from the "1-2" position to the "2-3" position for less than a minute, and then return it to its original position. This will also result in a complete reset. True, this method also does not guarantee a solution to the problem.
CPU testing
If Kernel-Power is detected again, it is worth testing the PC's central processor. To do this, download and unpack the special Everest program. With its help, you can find out which components have failed. True, it is impossible to restore through the utility. It is optimal to test using Prime95. Select Just Stress Testing in the Torture Test section options.
Windows kernel error - RAM
Kernel-Power failure may be due to errors in the RAM. There are several ways to check your memory. The first is using a standard system program, entering “mdsched” into the command line and rebooting the system and testing it. This can only be done if you are logged in through an Administrator account. If the check does not reveal any problems, you can resort to the physical method - remove the RAM sticks from their slots one by one each time you reboot the PC. If after a certain removal the computer is unstable, then the problem lies there, and it is worth replacing it with an identical one.
Hard drive problem
Another common problem is that many hard drives do not work well with a 64-bit operating system. Most often, Seagate brand hard drives installed in most modern budget laptops suffer from this. To check, you need to download and install HDD Life or HDD Health and run the corresponding scan. In rare cases, you may need to update your hard drive firmware to the latest version. If the problem is with the hard drive, there can be two solutions - replacing the hard drive or repairing it at the appropriate service centers. True, it does not guarantee that after some time you will not need to purchase a new hard drive. You can try to restore broken hard drive clusters yourself using the HDD Regenerator utility package, but it does not guarantee that the hard drive will be restored to its original state.
Problem with sound and video cards
This problem often occurs if two sound or video cards were installed on the PC. Installed programs try to work with both, which leads to severe failures at the software level. To solve this problem, you should remove one of the chips or correctly configure the parallel operation of two cards.
Network card drivers
The appearance of the Kernel-Power error can be caused by network card drivers not being updated in a timely manner or by improper unpacking and installation. In this case, you can try the following:
Go to the official website of the developer and download the latest version, and then install it. If the version is the latest, completely remove the drivers, then reinstall them and restart the PC.
System update
In order to try to avoid many system errors, it is recommended to allow Windows to update elements on its own automatically. This will not solve hardware-related problems, but system problems will be avoided. Go to Windows Update and check the box next to the desired mode. In this case, preference should be given to full automation to avoid manual actions.
Kernel-Power is a serious and complex error, the specific causes of which have not yet been determined. If none of the above methods gave a positive result, or the problem disappeared for a short period of time and then reappeared, it is recommended to contact customer service.