Windows may not see a newly purchased HDD or an old hard drive when connected to a new PC. Also, the hard drive may suddenly disappear from the system. I will cover all possible causes and troubleshooting methods.
Carry out diagnostics sequentially using the checklist. This way you can eliminate all possible causes one by one and find the problem.
Connecting the drive for the first time
The new HDD may not be recognized by the OS the first time it is connected. To fix this:
- Set the new drive letter in Disk Management.
- Set the correct format. If the file system and connected equipment do not match, reformat the device.
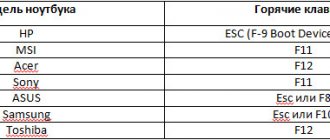
- Check your BIOS settings. To do this, when you boot your computer, press F2 to enter the BIOS. Next, open the Advanced BIOS Features section and select “Boot”. Make sure your new drive is on this list.
Read more in the next section.
Assigning a letter
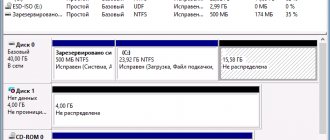
If your PC or laptop does not see one of the hard drive partitions, then the first thing you need to do is go to the special control menu and check whether it is displayed in the corresponding list. If it is there, then it needs to be assigned a letter.
Let's look at the process in order:
- Go to the menu “Control Panel” - “Administration”.
- In the new window, find the “Computer Management” item and double-click on it.
- Another window will open, in its left area we find and open “Disk Management”.
The requested information will be instantly displayed on the screen. It is necessary to look through the local drives, and if there is one that has disappeared, then you need to set the letter.
To do this you need:
Couldn't fix the problem? Contact a specialist for help!
- Right-click on the empty area, and in the context menu select “Change letter... or path...”.
- In the window that appears, click “Add”.
- Select the appropriate letter from the list and save the changes.
- Next, you will see a notification that installed programs may stop working. Click “Yes”.
For the changes to be successfully applied, you need to restart your computer. As soon as the operating system boots, check whether the partition is visible, it should appear under the letter you specified.
Uninitialized HDD
From the previous section, we move on to the next stage - disk initialization. The procedure deletes all data on it and prepares it for use with Windows, after which you can format the hard drive and then save files on it.
If you have assembled a new computer, you do not yet have an operating system, just like another PC at hand, you can initialize it during installation. Go to the BIOS and in the “Advanced BIOS Features” section, put your new disk as the first boot location. Press F10 to save. This only needs to be done if the disk is used as a boot disk. If you are using multiple drives, select one to boot. Then, when installing, Windows itself will prompt you to initialize it.
If you bought and connected a new HDD to an old PC, it will not be visible in the operating system by default. To initialize the drive, format it and assign a letter. To do this, you can use the built-in utility.
Disk Management program
Important: All information on the media will be completely deleted after this procedure.
The procedure is as follows:
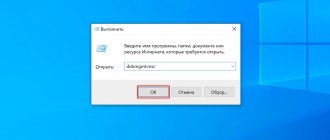
- Press Win+R to open the Run window.
- Enter diskmgmt.msc and press “Enter” or the “OK” button.
- The Disk Management utility will open.
A “not initialized” hard drive is indicated in black and is usually located at the bottom of the list. This means that there is unallocated disk space on the HDD.
- Right-click on this disk. A context menu will open with options for action.
- Select Initialize Disk. The disk initialization window will open.
- Select your hard drive.
- For Windows 10, the partition table must be GPT. For seven - MBR.
- Right-click to create a simple volume on the disk.
- Give it a letter.
- Format the HDD and restart your computer.
Formatting using the command line
Click the start button, type "diskpart" in the search box, and then press "Enter."
Next, in the command line that opens, enter the following commands in turn:
- “list disk” – will show the connected drives.
- “select disk X” will allow you to select the one you need, where X is the letter of your drive.
- "clean" will clear the contents.
- "create partition primary" will create a new partition
- “format fs=ntfs quick” will format the HDD in quick mode.
- "assign letter=G" will assign a letter (in this case G).
- "exit" will close the window.
Creating a new volume
It is likely that when you go to the management menu you will not find the missing area, instead there will be an unallocated part that cannot be assigned a letter; you can only create a new volume:
- To do this, right-click on it, select “Create a simple volume” in the drop-down menu and follow the instructions of the “wizard”.
- At the last step when creating a partition, you need to format it in NTFS, the only way it is readable and writable.
But at the same time, you will completely lose the files stored on it. Therefore, if you do not value them, then feel free to use this method; in other cases, I recommend using the method discussed below.
All processes are analyzed using Windows 7 as an example, but in other versions, Windows XP/8/10, they will be similar.
Wrong format
There are dozens of types of file systems for data storage devices.
For Windows, these are NTFS and FAT32. Any other file systems will not be detected in the Microsoft operating system.
To view data on some disks, you can use third-party software. But to install programs, record and edit files, you need to format your hard drive to NTFS. Read the instructions in the previous section. All data will be erased during formatting.
Damaged cables and connectors
Check the hard drive cables: SATA-Data and SATA-Power. Inspect them and try connecting them to a different port on the motherboard. The presence of abrasions, creases, cracks is a reason for replacement. Connect the HDD with a known good cable to test. If it works fine, buy a new cable.
Cheap motherboards come with low-quality SATA cables. Outwardly, they may be in perfect condition, but data transmission through such loops may be subject to errors.
Incorrect BIOS settings
If the boot parameters in the BIOS are incorrectly set, the computer cannot boot from the media. The words “DISK BOOT FAILURE. INSERT SYSTEM DISK AND PRESS ENTER”, “No Boot device is available, press Enter to continue” and others related to “boot disk”, “hard disk”.
You need to put your boot disk in first place. For this:
- After turning on the PC, press F2 or Del to enter the BIOS.
- Find "Boot" (in older versions "Advanced BIOS Features"/"BIOS Features Setup")
- In the list of boot devices, put your HDD in first place (“1st Boot Priority” / “First Boot Device”).
- Save using F10, problem solved.
Check the SATA operating mode.
- Go to BIOS.
- Depending on the BIOS interface, go to Main , Advanced, or Integrated Peripherals. In the menu, find the setting “SATA Operation”, “Configure SATA As” or “OnChip SATA Type”.
- From the list of options, select "Standard IDE" or "Native IDE" instead of "AHCI"
- Save your settings.
AHCI (Advanced Host Controller Interface) mode. It assumes the implementation of the SATA connection protocol - a serial data transfer interface.
IDE (Integrated Drive Electronics) mode. Allows you to emulate the legacy PATA parallel data interface.
In one of the modes, the connected drive will work as a SATA drive, in the other – as an IDE drive (physically remaining the same SATA). Such a substitution is necessary to ensure maximum compatibility of components and software that does not support the new protocol.
If you installed the operating system in AHCI mode and then switched to IDE, it will not start. Change back or reinstall Windows.
Partition recovery
In almost all cases when a logical partition of a hard drive disappears, it can be returned. For recovery we will use the same Acronis Disk Director. So here's how to do it:
- I will not repeat myself and describe how to create bootable media and run from it, you can read about this above in the previous paragraph.
- We go to the utility interface and select “Recovery Expert” in the menu on the left.
- Click “Next” and select manual mode, then “Next” again.
- Select the unallocated space (highlighted in green) and click “Next”.
- In the “Search Method” window, I recommend specifying “Full”, but in most cases, fast is enough.
- After the missing partition is found, by the way, do not be embarrassed if it has a different letter indicated, Acronis often confuses the names, select it and click “Next”.
- We wait until the status in the “Status” column changes to “Restored”, mark it and click further.
- In the “Recovered Volumes” window, mark our partition and move on.
- All you have to do is click on the “Continue” button to start the process.
- Upon completion of the procedure, exit the LiveCD and start the computer using the installed Windows OS.
The procedure for restoring information from a partition that the PC has stopped seeing can take a significant amount of time. The duration of the process depends on the amount and volume of data available on the disk. Therefore, you should be prepared for the fact that the computer may work for quite a long time.
We hope that the methods we have listed for solving the problem are easy to implement, and you can use them to fix the problems that have arisen.
Insufficient power or cooling
HDD power supply is the most important condition for stable computer operation. We are used to the fact that we need to choose a PC configuration based on the characteristics of the video card and processor. But without a good power supply, none of the components will work properly.
Expert opinion
Egor Razumny
I can assemble and disassemble computers, laptops, tablets, phones. Sometimes successfully. I have mastered the skills of diagnosing breakdowns using Google and Yandex.
I came across this situation when assembling a cheap computer for a home server. I assembled it from the components that were lying around in the pantry. I took the power supply from an old case. As a result, the computer malfunctioned, and I could not understand what the problem was until I began testing all the parts one by one. The culprit turned out to be the power supply. After the replacement, the server still works like a Swiss watch.
Video instructions for checking the power supply.
Cooling is also important. Overheating mainly happens on laptops. But even a stationary computer can fry if there are several HDDs located close to each other in a closed case. You can find out the temperature using the Speccy (free) or Everest Ultimate (paid) program.
Focus on these indicators:
- Normal – 30-45 °C
- High – 45-52 °C
- Critical – more than 55 °C
If Windows cannot start, check the temperature of the components in the BIOS.
Comments 13
A universal method for eliminating computer violations is to restore the system to the moment when everything worked correctly (Programs - Standard).
Vlad probably meant returning to the checkpoint... Option! But there is little information about how it disappeared, maybe you made it (D) hidden, or you lost admin rights. But first, try to return the system (as Vlad advises) to the time of the change... i.e. “Undoing changes using System Restore” in “Help and Support”
return is not possible because The OS has been reinstalled. vista ultimatum
This happened to me. I formatted the D drive and it disappeared. I was able to recover only by completely reinstalling it.
A formatted disk is always visible, but an unformatted one is not. The new disk is unformatted, only BIOS sees it. You write nonsense and mislead people.
If you don’t understand something, then it’s not a fact that it’s nonsense.
As it is written, so I understood
I formatted the D drive and it disappeared - so what do you mean?
I have W7. In the “my computer” folder there is a function “format disk”. When I used it in relation to the “D” drive, it disappeared from the screen. This does not mean that it disappeared at all, but simply ceased to be visible I tried to restore it in Windows, restored it, but it couldn’t return the “C” value. And only after a complete reinstallation of the BIOS program did everything return to its place.
Alexander, we speak different languages.
BIOS always sees a working HDD (formatted and not formatted, broken into parts and not broken)
You formatted the “D” drive and it disappeared - this can’t happen in principle , most likely you just deleted it and it became invisible - that’s ONCE
Secondly it is impossible to return the “D” value to “C” without combining them with special programs such as “Partition Magic” or using WINDOWS disk management tools. You did something wrong, or explained it wrong.
Sorry, but you don’t know the topic well and you need to learn more.
Always happy to help if needed. Contact me.
1. That the disk has become invisible is a fact.
2. As for the meaning of “C”, of course I made a reservation, you need “D”. And you know this.
3. I was never embarrassed to ask for advice if I didn’t understand.
Thanks everyone, I had to reinstall the OS. Of course I lost the information - conclusion: don’t mindlessly press “enter”
istran! Congratulations on reinstalling your OS! “The rich have their own quirks. "
The OS is installed on drive C, and drive D could not be affected
