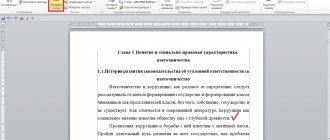
The most popular text editor, MS Word, has built-in spell checkers. So, if the autocorrect function is enabled, some errors and typos will be corrected automatically. If the program detects an error in a particular word, or even does not know it at all, it underlines this word (words, phrases) with a red wavy line.
Lesson: AutoCorrect in Word
Note: Word also underlines words written in a language other than the spelling tool's language with a red squiggly line.
As you understand, all these underlines in the document are needed to indicate to the user the spelling and grammatical errors that have been made, and in many cases this is very helpful. However, as mentioned above, the program also emphasizes words unknown to it. If you do not want to see these “pointers” in the document you are working with, you will probably be interested in our instructions on how to remove underlining errors in Word.
Disable underlining in the entire document
1. Open the “File” menu by clicking on the leftmost button at the top of the control panel in Word 2012 - 2016, or click on the “MS Office” button if you are using an earlier version of the program.
2. Open the “Options” section (formerly “Word Options”).
3. Select the “Spelling” section in the window that opens.
4. Find the “Exception for file” section and check the two boxes next to “Hide... errors only in this document”.
5. After you close the “Options” window, you will no longer see intrusive red underlines in this text document.
Adding a word with an underscore to the dictionary
Often, when Word does not know a particular word, underlining it, the program also offers possible correction options, which can be seen after right-clicking on the underlined word. If the options present there do not suit you, but you are sure that the word is spelled correctly, or you simply do not want to correct it, you can remove the red underline by adding the word to the Word dictionary or skipping its check.
1. Right-click on the underlined word.
2. In the menu that appears, select the required command: “Skip” or “Add to dictionary”.
3. The underline will disappear. If necessary, repeat steps 1-2 for other words.
Note: If you often work with MS Office programs and add unknown words to the dictionary, at some point the program may prompt you to send all these words to Microsoft for review. It is quite possible that thanks to your efforts, the text editor's dictionary will become more extensive.
Actually, that’s the whole secret of how to remove underlining in Word. Now you know more about this multifunctional program and even know how you can expand its vocabulary. Write correctly and do not make mistakes, good luck in your work and training.
We are glad that we were able to help you solve the problem. Thank the author and share the article on social networks.
Describe what didn't work for you. Our specialists will try to answer as quickly as possible.
Versions of Word and compatibility of texts in different versions
Hello, friends! The other day I came across an interesting situation. They prepared a voluminous Word text for me on freelance basis and assured me that everything was done correctly. When I received the text, I opened it and was surprised - the tables were separated, the pictures were misaligned, and the text was full of errors due to the lack of spaces.
A little later, the cause of numerous errors was revealed. It turned out that the performer was working in Microsoft Office Word 2016, and I had Microsoft Office Word 2007 installed. And no matter what I did, the text did not want to be corrected. Of course, it would be possible to do the editing manually, but this is time consuming.
Everything would be clear if you used Word 2003, whose files are displayed in the doc extension. You could use an additional program and that's it. I started looking for solutions to the problem, how to correct errors in Word in all the text on the Internet and on YouTube - I found nothing. And then suddenly the idea of solving the problem came.
I remembered the wonderful free service SmallPDF. Using this service I usually convert presentations from ppt format to pdf. The SmallPDF service converts Word, Excel, JPG and other documents. If you wish, you can find articles on this topic on my blog through the “Blog Search”. Now let's look at the question of how to correct errors in Word in the entire text at once in practice.
How to correct errors in Word in all text at once
To begin with, I took the Word text sent to me with errors (text made in Microsoft Office Word 2016) and converted it into a PDF file through the SmallPDF service. The newly created PDF file looked great - the tables were straight, the pictures were in the correct positions, and the missing spaces disappeared. This is good, but I still needed to work with the text in Word. To do this, it was necessary to return the document back to Word.
There were doubts whether it would be possible to get the correct text in Word. Using the same SmallPDF service, the previously received PDF file was converted back into Word 2007. The text obtained after conversion into Word was smooth, there were no errors, and the pictures were in their place.
To convert Word files to PDF and vice versa, you need to select “All tools” in the SmallPDF service at the top of the page.
Next, simply drag the desired file into the program window and enable conversion. For example, you can use the article on the blog Online ppt to pdf converter.
You can evaluate for yourself how it was before and how it was after in the screenshots presented:
Screen 3.
Screen 4.
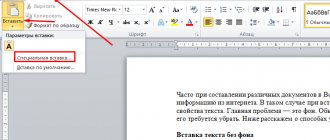
Simple underline
You can make a stripe under the inscription like this:
- Select a fragment.
- On the main menu bar, find the letter “H” with a dash under it. Or press Ctrl+U. You can get rid of the line using the same key combination.
- To print with stripes, click on the “H” icon, write something, and click on “H” again.
The operation itself is quite simple. But this way you can only add an ordinary feature. Here's how to underline text in Word if you want to use different types and colors of stripes:
- Select a fragment.
- Click the small arrow next to the letter "H".
- In the drop-down list, select the color and type: double line, dashed, thick, wavy.
To create a stripe that will stay in place while text is typed over it, do the following:
- Through the “Tables” section (or Insert - Tables, if you have Word 2007), add a grid.
- Write a few words in it.
- Right-click on the frame.
- "Borders and Shading."
- The options will open. On the right there will be an area in which there are settings for the visibility of borders. Leave only the bottom line. It will remain in place even if you delete the text.
- In the same menu, select the type and thickness of the strip.
It can be made simpler:
- After adding a grid, the “Working with Tables” section will appear at the top of the window. In it, go to the “Design” tab.
- Click the arrow next to Borders.
- Leave only the “Bottom Border” option active.
Such stripes are needed when working with HTML documents. This technique is suitable for creating input fields and web forms.
If you want to add lines exclusively to the inscriptions, without affecting the spaces, it is not necessary to customize the appearance of each preposition. Here's how to underline a word in Word:
- Select the text.
- Click on the black arrow next to the letter “C”.
- Item "Others".
- In the Underline box, select Word Only.
AutoCorrect
You can also activate the AutoCorrect feature, which is available in Office programs. This option allows you to automatically correct incorrectly spelled words in accordance with a list manually created by the user. There you can add words that cause you problems in spelling.
To enable auto-substitution, go to the “Options” - “Spelling” - “Auto-Correct Options” section. Check the "Replace as you type" checkbox. In the Replace field, indicate the words or phrases that you have difficulty writing. In the left column, enter the misspelled word, and in the right column, indicate the correct spelling. After adding a sufficient number of words and phrases, click “OK” and save your changes.
Underlining spaces
Sometimes you want the lines to be underneath the spaces. For example, if you are preparing a document for printing, there should be space for entering a first name, last name, or other data. Tables are suitable for this (interaction with them is described above). But there are other ways. Here's how to underline in Word without words:
- The easiest method is to press Shift+ (hyphen; no parentheses). A line will appear. This is not part of the design, but a symbol. All font settings apply to it.
- To change the color of the strip, find the button with the icon in the form of the letter “A” on the menu bar. Click on the arrow next to it and the palette will open.
The underscore is not always suitable for design. You can't type on it - it will move. It is difficult to align with the width of the paragraph. If you have autocorrect enabled, three lines in a row will automatically turn into a border.
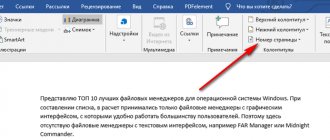
In Word, you can add bars to tab characters. Their markup is easier to customize.
- Press the TAB key. It is located above the Caps Look button. The Word cursor will move.
- It's better to turn on the display of hidden characters so that you can see tabs and not just a bunch of words. To do this, click on the icon on the toolbar that looks like the letter “P” (the button is called “Paragraph”). Or press Ctrl+Shift+* (asterisk). A tab in Word looks like an arrow pointing to the right.
- Select it.
- Press Ctrl+U.
Printing over such lines will also not work. But they are much wider than spaces - it will be easier to align the line with them.
Page Borders
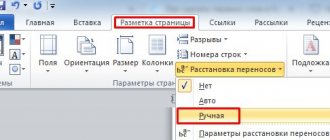
If you type three asterisks or three hyphens in a row in Word, they can become a horizontal line (sometimes you have to press Enter to do this). This autocorrect turns them into a page border. To create a certain type of such a line, you need to do this:
- Enter three equal signs (=) to create a double bar.
- Three asterisks (*) - dotted.
- Three hyphens (-) - simple.
- The bottom three spaces (_) are bold.
These borders are similar to regular underlining. They take up the entire line. They cannot be selected or edited. But you can print over them.
Here's how to remove a line like this:
- Place the Word cursor at the beginning of the line with the stripe.
- Click Delete.
If this method does not help, it is better to do this:
- Section "Page Layout". It's in the menu bar at the top of the window.
- Page Borders button.
- In the Type field, set the option to None. The horizontal line will disappear.
Red, green and blue underline - spell check
Word has a spell checking feature. She marks spelling, punctuation, and stylistic errors with wavy lines. It makes it easier to notice an occasional typo, check the text, and find any flaws. Below is what each band means.
- Red. The word is misspelled or is not in the Office database. Repeats are also indicated in red.
- Green. Errors with grammar, style, punctuation. Extra parentheses. Inconsistent text.
- Blue. Format mismatch.
This feature is usually useful. But if you wrote everything correctly, then the suddenly appearing wavy lines will be annoying and in the way. How to remove underlining in Word if it is added automatically when checking spelling:
- Right-click on the fragment under which the wavy line appears.
- To get rid of it, select “Skip”.
- To have Word remember the selected word and record it in its dictionary, click “Add.”
If you want to completely disable the scan, open the settings:
- Go to the Tools menu - Spelling (in Word 2007, to do this, click on the Office logo in the upper left corner and select “Options” from the drop-down list).
- Uncheck "Automatically check spelling" or o. Auto-check will stop bothering you. But it will be more difficult to find typos.
Word provides a variety of line types to highlight text or draw a horizontal line. Use these features to complete your paperwork.
Removing various lines
Underlining in Word can be different, if by default a standard solid line is used, then if desired, it can be double, wavy, dashed or some other, it can underline exclusively words, while spaces will remain untouched. Depending on how the text is underlined, you will need to remove underlining in different ways.
If text is underlined using Microsoft Word's standard underline feature, you can remove it by doing the following:
1. Select the text from which you want to remove the underline.
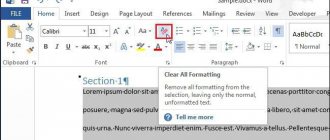
2. Go to the “Home” section and pay attention to the “Font” item.
3. Press the “H” button.
4. Place the cursor after the last character in the document (from where you will begin to write further) and see whether it is worth using this formatting for subsequent text (whether the “H” button is highlighted). If yes, remove the selection and you can write normally.
Some users are bothered by all sorts of green and red underlines that are caused by the automatic spell checking service in the text. In this case, there are two options:
The first is to separately review all corrections and agree/reject them. This is done as follows:
- Right-click on an individual word (or any word in an underlined phrase) under which there is an underline, then select one of the correction items.
- If you think that the correction options are incorrect or the program mistakenly considers a word incorrect, simply click “Add to Dictionary” or “Skip”.
Or you can simply disable the automatic spelling function, done as follows:
1. Click on the “Word” icon or the “File” button in the upper left corner (depending on the version of the program you are using).
2. Select “Options”.
3. Click on "Spelling".
4. Uncheck the items indicated on the screen.
After this, the utility will not automatically check the spelling of the text and, accordingly, you will not see any green or red underlines.
You can find additional ways to remove underlining.
Special types of underlining
The built-in option for checking the correctness of spelling and punctuation marks marks fragments with errors with lines of different colors. A red wavy line means that the word is spelled incorrectly (or it is not present in the Word dictionary), a green wavy line means the punctuation marks need to be corrected.
There are three ways to remove red underlines in Word.
- Check the correct spelling of the word and correct it if there was a typo when typing.
- Place the cursor over the word, click the right mouse button and select one of the options offered by the program in the context menu.
- Refuse correction. To do this, you should also hover the mouse cursor over the word, press the right button and select “Skip” or “Add to dictionary” from the menu. A word included by the user in the dictionary will not subsequently be considered an error.
When checking spelling, you need to pay attention to the language of the document. For example, in a Russian text, the program may mistake English words for being misspelled.
How to remove green underline in Word? Answer: Use the methods described above. The difference is that the application encountered a grammar error.
Working with tables and using automatic conversion
And here, in solving the problem of how to make an underline in Word without words, the table designer comes to the rescue. The solution itself is both simple and universal.
You just need to insert a table with the required number of cells, and then set the display of the borders so that only the bottom ones remain. True, the inconvenience of this method is that the border itself will be much lower than the position of the main text, and you will constantly have to split or merge cells when underlining is simply not required in some line.
Finally, an interesting way is to use borders for the entire line, and it doesn't matter whether there is text there or not. To do this, simply select the appropriate type of border by clicking on the button located in the panel at the top
The line will automatically be set to the entire length of the line. But you can type above such an underline without any problems.
There is another more complex way, which is to draw a line using the built-in graphics tools, but it looks completely irrational. So you can limit yourself to the simplest, even primitive means.
Program settings
A radical way to get rid of colored wavy lines is to disable auto-text checking. This operation is performed through the program settings window. In version 2007 - click on the Office logo, in new versions - go to the "File" menu. Next, you need to remove o on the “Spelling” tab.
So, now the question of how to remove underlining in Word will no longer bother the user. Automatic correction is disabled. But there is also a minus - you will have to look for errors in the document manually.
What to do if all the words in the text are underlined in red?
Word underlines words with spelling errors and typos in red, and it checks each word against its dictionary - if the word is not in the dictionary, it is also underlined in red.
Sometimes you come across files downloaded from the Internet in which every word is underlined. Why this might be:
Reason 1. The author of the text deliberately replaced Russian letters in the text with Latin ones, for example “m” with “m”.
Thus, letters that have the same spelling in the Cyrillic and Latin alphabet - “a”, “o”, “e”, etc. are often changed. This is done, for example, to protect text from copying. Such a replacement can be determined by selecting all the text and changing the font that does not support Cyrillic - in this case, all Russian characters will remain unchanged, but the Latin ones will change.
How to fix?
Having determined that some letters in the text have been replaced from the Cyrillic alphabet to the Latin alphabet, you need to search and replace all the letters. Press the keyboard shortcut CTRL + H - Find - write a Latin letter in the Latin layout (in our case “a”) - Replace with - write a Russian letter in the Russian layout (in our case “a”) - Replace all.
Reason 2. A dictionary for the language in which the text is written is not installed on the computer.
In this case, only the missing dictionary should be installed.
Reason 3: Word incorrectly detected the language in which the text was written.
And it applies a dictionary, for example, of the German language to the Russian-language text. There are no Russian words in the German dictionary; the program considers them incorrect.
To correct it, select the entire text of the file using the keyboard shortcut CTRL + A or on the Home -> Select -> Select all toolbar.
Find your language in the status bar at the bottom of the program window.
Left-click on the name of the language and in the window that opens, select Russian - OK.
Enable tracking changes using the method below, which is specific to your version of Microsoft Word.
- Press Ctrl+Shift+e. This is a keyboard shortcut that works in all versions of Microsoft Word.
- Go to the status bar and click on the “Track Changes: Off” button to change the status to On. You may have to right-click on the status bar to see the Track Changes option. This method works in Word 2007 and Word 2010.
- Go to "Tools" and then "Track Changes" to enable the track changes feature in version 2002 or 2003.
- Follow the sequence of commands: “Tools,” “Track Changes,” “, and then “Highlight Changes,” if using Word 2000 or earlier. You can then check the box next to “Track Changes While Editing” to enable redlining.
- View the redlined parts of the document using the following methods.
- Use the menu in the Tracking group on the Review tab if you have Word version 2007 or 2010. You can compare "Original: Show Markup" with "Final: Show Markup" to see how they differ.
- Oh, if you are using Word 2000 or earlier. To access this feature you need to go to "Tools" then "Track Changes."
Review your changes in a pop-up window by selecting "Final with Markup" or "Original with Markup" in Word 2002 or Word 2003. The results of your choice appear in a small pop-up window along with the document where the changes were made.
- Select one of the suggested changes to the "Track Changes" found in the "Options" submenu in "Tools." This method is intended for versions 2003 and earlier.
Select "Track Changes Options" on the Review tab if you are using the 2007 or 2010 version of Word. Here you can choose which changes you want to display in the document.
In Word, you can emphasize text, spaces, and tabs. Different types of lines are available: wavy, straight, double. There are also page separators and tables. The program uses red, green and blue “waves” to highlight errors and incorrectly formatted text. To use this toolkit, understand how to add these lines, how to change their attributes, and how to remove underlining in Word if it cannot be selected.
Word has several ways to underline text. We will talk about them below.
You can make a stripe under the inscription like this:
- Select a fragment.
- On the main menu bar, find the letter “H” with a dash under it. Or press Ctrl+U. You can get rid of the line using the same key combination.
- To print with stripes, click on the “H” icon, write something, and click on “H” again.
The operation itself is quite simple. But this way you can only add an ordinary feature. Here's how to underline text in Word if you want to use different types and colors of stripes:
- Select a fragment.
- Click the small arrow next to the letter "H".
- In the drop-down list, select the color and type: double line, dashed, thick, wavy.
To create a stripe that will stay in place while text is typed over it, do the following:
- Through the “Tables” section (or Insert - Tables, if you have Word 2007), add a grid.
- Write a few words in it.
- Right-click on the frame.
- "Borders and Shading."
- The options will open. On the right there will be an area in which there are settings for the visibility of borders. Leave only the bottom line. It will remain in place even if you delete the text.
- In the same menu, select the type and thickness of the strip.
It can be made simpler:
- After adding a grid, the “Working with Tables” section will appear at the top of the window. In it, go to the “Design” tab.
- Click the arrow next to Borders.
- Leave only the “Bottom Border” option active.
Such stripes are needed when working with HTML documents. This technique is suitable for creating input fields and web forms.
If you want to add lines exclusively to the inscriptions, without affecting the spaces, it is not necessary to customize the appearance of each preposition. Here's how to underline a word in Word:
- Select the text.
- Click on the black arrow next to the letter “C”.
- Item "Others".
- In the Underline box, select Word Only.
Working with tables and using automatic conversion
And here, in solving the problem of how to make an underline in Word without words, the table designer comes to the rescue. The solution itself is both simple and universal.
You just need to insert a table with the required number of cells, and then set the display of the borders so that only the bottom ones remain. True, the inconvenience of this method is that the border itself will be much lower than the position of the main text, and you will constantly have to split or merge cells when underlining is simply not required in some line.
Finally, an interesting way is to use borders for the entire line, and it doesn't matter whether there is text there or not. To do this, simply select the appropriate type of border by clicking on the button located in the panel at the top
The line will automatically be set to the entire length of the line. But you can type above such an underline without any problems.
There is another more complex way, which is to draw a line using the built-in graphics tools, but it looks completely irrational. So you can limit yourself to the simplest, even primitive means.
How to make an underline in Word in an empty space, and not under the words?
- ____________________________________Like this? Press shift and dash
- nonsense, what does the dash have to do with it - the person asks about the underscore - you need to make it a tab!!! use the enabled non-printable characters icon - then you will see what and how.
- on the "-" button there is a "_" and a line
- use a space or tab to get to this place first, then underline (go to a new line - ENTER) SHIFT + "-" button after zero with shift
- It seems to me that the age of typewriters and their expensive typists is over, and a long time ago. And sequentially poking at the same button is somehow not for the modern user. In human terms, this is done like this: 1. Press TAB, an arrow appears that moves the cursor to a certain length. This is a tab character.2. You can do whatever you want with tabs. Be it an ellipsis in the table of contents (For example, Introduction.... page 3) or UNDERLINED EMPTY SPACE (_______) or filling with dashes (———) or moving the cursor along the line without hitting the spacebar. Click on the ruler at the top, under the command menu. On it there are also such rare numbers drawn through sticks, and the area in which the text is placed is shown in white, the rest in black - on the sides.3. After this, the cursor on the sheet moves to the position that we indicated on the ruler, and a small icon appears on it. Black corner. It shows how long our tabulation is. If you double-click on it, a menu will appear in which you can set various parameters for this empty space. To which she moved the cursor away. Be it alignment, placeholders, and positions (positions are exactly what this little black corner is called. You can set a whole bunch of them for one tab. And you can also change them. This is done on the left in the corner between the vertical and horizontal rulers).
- press shift+minus, I think
- 1. press “H” in front of the place where you want to underline the empty line.2. press TAB and, as described above, play with the tab cursor, determining where to end the underline.
- Just press SHIFT and the dash sign "-"_________
When working with text documents in Microsoft Word, sometimes you need to underline without text. For example, this may be necessary to leave space for a signature or text that must be filled in by hand.
Fortunately, the Word editor has many ways to implement this. In this article we will look at 4 such methods. The material will be relevant for all modern versions of Microsoft Word, including Word 2007, 2010, 2013 and 2016.
Why does Word highlight individual words with squiggly lines?
Microsoft's text editor has spelling and punctuation checking enabled by default. Fragments containing spelling errors are highlighted in red, and punctuation errors in green. The program's built-in dictionary cannot accommodate the full range of existing words in Russian (or any other) language. Therefore, Word mercilessly underlines individual words with red lines, considering their spelling to be erroneous. This is especially true for first and last names of people, names of companies and enterprises, professional terminology and slang expressions.
If there are missing commas in the text, or the syntactic connection of words is broken, then Word will highlight such sentences with a wavy green line. In most cases, this function is very useful, as it allows you to avoid grammatical errors and accidental typos in the created document. But there are times when there is no other choice but to remove the red underline in Word in order to give the text an aesthetic appearance.
Let's sum it up
In this article, we looked at how easy it is to install Windows 10 on a tablet and phone from Microsoft. For many, upgrading a tablet will not cause difficulties, since the device itself is built on a processor with x86 architecture, which is used on laptops and desktop computers. It follows that installing the OS on a tablet looks similar. Installing Windows mobile should not cause any difficulties at all, since the process is very simple. We hope our article will help you install the latest Windows 10 operating system, both on your tablet and smartphone.
Get rid of unnecessary lines in a few clicks
Let's look at several ways to remove red underlining in Word for a single document.
Right-click on the word and select “Skip” or “Skip All” from the menu that appears. In the first case, the underlining will disappear only under one word, in the second, the entire text will be cleared of lines. This option is not the most reliable, since the next time you open the file, the wavy lines may appear again.
Open the menu for the underlined word and select "add to dictionary." Now in any text document created on your computer, this word will be considered written correctly. However, if you change the case ending in a word, Word will highlight it again, noticing the error.
In the upper left corner of the open text editor, click on the “file” button, then “options”, then “spelling”. Here, uncheck the “automatically check spelling” box.
In this case, literacy checks will not be carried out in all documents, and problems with how to remove the red underline in Word will no longer arise. In Microsoft Word versions 2010 and later, it is possible to disable checking only for the current version of the text.
To ensure that the file opens in the same form on other computers or laptops, do not forget to enable edit protection. To do this, in Microsoft Office 2003 or 2007, select “Prepare” from the main menu, then “Mark document as final”; in Word 2010, click on the lock icon and check the desired security option.
The article will tell you how to enable the spell check function in Word.
Many users are interested in why misspelled words are not underlined in red in the Word text editor, and how to fix this error? Let's look at these questions in our review today.
Why does Word underline words in red?
The Word editor underlines many words with a red wavy line
The Word text editor allows you not only to work with text, but also to control various grammatical errors. Some users ask why Word underlines words in red? So, underlining certain words with a red wavy line means that an error has been detected in them (not “soroka”, but “magpie”, etc.).
Those words that the program simply does not know for various reasons may also be underlined: words like “Word” do not seem to exist in the Russian language, but some rather rare/new words may simply not be included in the database programs.
Now, as you can already understand, underlining words in red is necessary to draw our attention to errors, since we ourselves do not notice them when typing quickly. But for the reasons already stated, Word sometimes/often underlines words that are necessary in our case for our text.
Not everyone is pleased to see a document dotted with red. Therefore, in this review we will talk about how to remove red underlining of words in Word.
AutoCorrect
Sometimes we don’t even notice how the text editor corrects our mistakes, for example, automatically changing a small letter to a large letter after a period or making hyperlinks to Internet addresses, substituting the correct word instead of “abracadabra” with typos. Auto-correction does not improve our literacy, but it speeds up and simplifies our work.
If you switch to regular Notepad for a while and try to type at least a page of text there, you will immediately understand how many small and not so small errors Word corrected.
The editor has a built-in list of auto-replacement of some characters and words with others. To view it, go to the menu item “File”, “Options”, “Spelling”, “AutoCorrect Options...”.
To ensure that the correction occurs immediately when typing, check the settings for the presence of a “tick” next to the corresponding item. I also recommend using the “Automatically correct spelling errors” setting.
At the bottom of the window there is a table that lists all the main auto-correction options included in the program.
We can add our own options to the autocorrect list and remove existing combinations of words and symbols.
How to remove red underlines from words in Word?
There are at least two ways to remove red underlines from words in Word:
- Remove the function of underlining misspelled words
- Remove underlining of user-selected words
Let's find out how to use each of these options.
Deactivate the underline feature in Word
- Open the document and go to the “File” item in the toolbar at the top (in older versions of the program you need to click on the “MS Office” button).
Go to "File"
- Next, in the left column of settings that appears, go to “Options”
Go to “Options” on the left panel
- At the next stage we are interested in the “Spelling” item
Click on “Spelling”
- Now scroll the window a little down, pay attention to the options indicated in the red frame in the screenshot - check them and click on “Ok”.
Check the boxes next to the options: “Hide spelling/grammatical errors in this document only.”
- After taking the actions, the red underlines will no longer bother you, but you will also have to notice mistakes in words yourself.
Remove underlining from certain words
After reading another article on this one, you will better understand what red underlines are for and how to use them. In particular, you can correct misspelled words through the context menu, choosing the options offered by the program:
Correcting misspelled words via the context menu
But, if you spell some words incorrectly on purpose, or the program simply doesn’t know some terms yet, then you can add such words to the dictionary and thereby remove the red wavy lines.
To do this, do the following:
- Right-click on the specific word underlined in red. A context menu will open and now notice what you can do next. If you click on “Add to Dictionary,” the word will never be underlined with a red line again until you remove it from the dictionary. If you click on “Skip”, the red line will disappear, but may appear under this word in subsequent times.
In the context menu, select a way to get rid of the red underline under the word
- After the actions you have taken, the red line will disappear (wherever the word appears in the document), and you can do the same operations with other words.
Red underline removed