“I have an iPhone 7 and recently bought a new MacBook Pro. It is said that we can transfer photos from iPhone to MacBook using Photos app and iCloud, but how to do it, which one is better? Please, help".
There are several reasons why you will decide to import iPhone photos to Mac. One common reason is that people need to transfer pictures from iPhone to Mac to free up space.
High quality photos look good but take up more space. So this post will show you some easy ways to transfer photos from iPhone to Mac.
As mentioned above, Apple has introduced several services and features for iOS and Mac, such as the Photos app and iCloud Photo Library, to help users transfer data between iPhone and Mac. In this tutorial, we are going to show you how to transfer photos from iPhone to Mac with ease. If you are ready, let's begin the wonderful journey.
- Part 1: How to Transfer Photos from iPhone to Mac Using iPhone Transfer (Best Way)
- Part 2: How to Import iPhone Photos to Mac Using Photos App
- Part 3: How to Transfer Photos from iPhone to Mac Using iCloud Photo Library
Part 1: How to Transfer Photos from iPhone to Mac Using iPhone Transfer (Best Way)
If you want to transfer photos from iPhone to Mac, the Photos app and iCloud can help. But you must admit that you prefer to check and view the images one by one and then select some of them to copy to Mac. Apeaksoft iPhone Transfer may be the best option you are looking for. It is also the best alternative to iExplorer. Its main features are:
Free Download Free Download
- Easy to use. This iPhone transfer app allows you to save photos from iPhone to Mac computer in one click. This is important for novice users.
- Two-way transmission. With iPhone Transfer, you can download photos from iPhone to Mac, from iPhone to iPhone or iPad, and simply add photos from Mac to iPhone.
- Preview for selective synchronization. It is capable of displaying all the photos saved on your iPad/iPhone/iPod. And you can selectively view, manage, and transfer photos from iPad to Mac.
- No damage to existing photos. The app will not damage or interrupt current photos on your iDevice and Mac during transfer.
- Faster and safer. It uses a physical connection to transfer photos between iPhone and Mac, which is faster and more secure and does not require an internet connection.
- Higher compatibility. iPhone Transfer works for iPhone X/8/8 Plus/7/7 Plus/6/6s/5/5c/5s/4, iPad Pro/Air/Mini or earlier generation and iPod Touch.
- There are two versions: one for Mac OS and the other for Windows 10/8.1/8/7/XP.
In a word, it is the best option to download photos from iPhone to Mac OS. And we use iPhone 7 and MacBook Air as an example to show you the procedure.
How to Transfer Photos from iPhone/iPad to Mac Using iPhone Transfer
Step 1. Get the best iPhone photo transfer app installed on Mac
Download iPhone Transfer for Mac, double-click the installation file, and follow the on-screen instructions to install it on your MacBook Air. There is a special version for Windows PC. Connect your iPhone 7 to your MacBook Air using a USB cable and open iPhoto Transfer. It will recognize your device automatically.
Tip:
1. We suggest you use Apple's Lightning cable or authorized products. Third party cords may cause data loss or damage to the device.
2. If you connect two iOS devices to this computer, this software will help you sync photos between two iOS devices, such as moving photos from iPhone to iPad, etc.
Step 2. Preview iPhone Photos Before Transferring
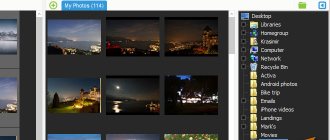
Select the "Photos" option in the left column, all your photos saved on your iPhone 7 will appear in the right detail window. You can preview a thumbnail for each photo. iPhone Transfer also allows you to manage photos before transferring. For example, you can select unwanted images in the details window and click the Delete button with the trash can icon on the top ribbon to get rid of them on iPhone.
Step 3. Transfer Photos from iPhone to Mac
To download photos from iPhone 7 to MacBook Air, select all or some of the photos you want to download, expand the Export to menu at the top of the window, and choose Export to Mac. In the pop-up dialog box, specify a location to save photos from iPhone to Mac. There is another option in the Export to menu - Export to iTunes Library. It could directly upload photos from iPhone to your iTunes library on Mac. You can choose the suitable option according to your requirements.
At this point, besides photos, you can select other data types such as books, SMS, videos, audios, etc., and you will be transferred from iPhone to Mac easily.
Find out more details here: How to Transfer Contacts from iPhone to Mac
This software is not one-pass, it can work as a two-way moving tool. You can add data from your computer to your iOS device. Find out more here: How to put movies on iPad from computer.
Part 2: How to Import iPhone Photos to Mac Using Photos App
Apple introduced the Photos app in the latest version of Mac OS X/11, which works very similar to the Photos app for iOS. As the successor to iPhoto, it also inherits some of iPhoto's useful features, including importing photos from iPhone to Mac. All you need is a USB cable.
How to Import Photos from iPhone to Mac Using the Photos App
Step 1. Use the original USB cable to connect your iPhone to your Mac computer. By default, the Photos app on your Mac should open automatically once you connect your iPhone to your Mac.
Step 2: Unlock your iPhone. And tap "Trust" when prompted to trust this device on the iPhone screen. If your iPhone photos aren't showing up in iPhoto or the Photos app for Mac, you should see your iPhone listed in the left column of the Photos app. Select your iPhone and the photos saved in the Camera Roll will appear in the window.
Moreover, you can also find videos shot on camera and could follow this route to transfer videos from iPhone to Mac.
Step 3: To download photos from iPhone to Mac, go to the "Import" tab on the top ribbon, click the "Import all new photos" button in the top right corner. Alternatively, you can select specific images and click the "Import selected [number]" button to import them to your Mac.
Tip: If you want to delete iPhone photos automatically after transfer, check the box next to “Delete items after import” at the top of the window. The images will then be deleted in Camera Roll after transferring to Mac.
Of course, sometimes you just want to charge your battery by connecting your iPhone to your Mac, but not sync photos from your iPhone to your Mac. Photos won't open automatically once you uncheck "Open photos for this device" in the top left corner.
How to Download Photos from iPhone to Mac Using iPhoto
If you have an older version of MacBook, you cannot find the Photos app, instead iPhoto is a built-in photo gallery app on Mac.
Step 1. Also connect your iPhone to Mac and launch IPhoto if it does not open spontaneously. Thumbnails of your iPhone photos will then appear in the window.
Step 2: To transfer photos from iPhone to MacBook, click the "Import Photos" button. Or you can highlight the photos you want to save on your Mac and click the Import Selected button to complete the transfer.
pros
- 1. iPhoto app and Photos app for Mac are able to automatically detect iPhone photos when your iPhone is connected to your Mac computer.
- 2. This method does not require third-party applications or additional equipment.
- 3. Photos app uses a USB cable to transfer photos and does not need a Wi-Fi network.
- 4. It can organize your photos similar to the Photos app on iOS.
Minuses
- 1. You have to take the lightning cable here and there, which is not convenient.
- 2. This is only possible for photos saved in your Camera Roll.
MacBook for a photographer: advantages
Most professional photographers choose a Macbook as their device for working with images. With its help, you can edit images and constantly transfer them from one device to another thanks to the convenient methods described in our article. It is also worth noting the high-quality Retina display, which is important for those who work with visual content. The processing speed is also at a high level - thanks to the optimized operation of applications and the operating system as a whole.
Part 3: How to Transfer Photos from iPhone to Mac Using iCloud Photo Library
In addition to the Photos app, iCloud Photo Library is another option for copying photos to Mac from iPhone. iCloud transfers photos from iPhone to Mac over the Internet, so it's the right choice if you don't have a USB cable.
How to Transfer Photos from iPhone to Mac Using iCloud Photo Library
Step 1: Unlock your iPhone, open the iOS Settings app on the Home screen, turn on Wi-Fi, and enter your Wi-Fi network credentials. Then return to the Settings screen, go to iCloud > Photos, and toggle the iCloud Photo Library switch to ON. To sync photos to iCloud.
Tip: If you select "Optimize iPhone Storage", the iPhone will not be loaded with all the photos after they are synced to iCloud.
Step 2. Turn on your Mac computer, such as iMac, open the iCloud panel in System Preferences, and turn on iCloud Photo Library.
Step 3. On the other hand, it is better to set up iCloud Photo Library in Photos app as it has more options.
Open the Photos app on your Mac, go to Settings, and activate iCloud Photo Library. Then you will be presented with two options. If you have a large hard drive on your Mac, select the "Download originals on this Mac" option. This will transfer photos from iPhone to iMac/MacBook in original conditions. Otherwise, select Optimize Mac Storage to copy photos from iPhone to Mac at a lower resolution. High-resolution photos will still be saved to iCloud Photo Library.
Once you set up iCloud Photo Library on your iPhone and Mac, your photos will be synced across all your devices as soon as they're online.
How to Import Photos from iPhone to Mac Using iCloud Photo Stream
If iCloud storage is not enough, My Photo Stream is a good alternative to transfer photos from iPhone to MacBook Air/Pro/iMac.
Step 1: Set up My Photo Stream on your iPhone. Go to Settings > Photos & Camera and turn on Upload to My Photo Stream by sliding the slide to the right.
Step 2: Switch to your Mac, open the Photos app, go to Photos > Settings > iCloud and turn on My Photo Stream.
pros
- 1. iCloud Photo Library and iCloud Photo Stream can automatically sync photos across all devices connected to the same account.
- 2. Apple provides 5GB of free storage per account.
- 3. iCloud Photo Stream doesn't take up your iCloud storage.
- 4. This method does not require a USB cable.
Minuses
- 1. If you need more space, you should purchase paid plans, for example $1.99 per month for 50GB. If not, manage and clear your iCloud storage.
- 2. Uploading photos from iPhone to iCloud usually takes more than half an hour.
- 3. iCloud is a web service, so you need a Wi-Fi network to view iPhone photos on Mac via iCloud Photo Library.
- 4. My Photo Stream only stores the 1000 photos you have taken in 30 days.
- 5. An Apple ID and password are required to set up My Photo Stream and iCloud Photo Library.
Part 4. Conclusion
So, we have given you the best methods to transfer videos from iPhone to Mac. To be precise, six different methods have been given with instructions on how to use these tools and platforms. This way, you don't have to worry about which tool to use.
If you are concerned about the size of your video files, you can use iMyMac Video Converter to convert those videos to a lower resolution. Or you can convert them to a higher resolution if you prefer. The tool converts audio and video files without losing quality. Also, if you are using a video for a birthday party, for example, you can use iMyMac Video Converter to edit the video to your liking. When it comes to this tool, the sky is the limit. This is truly a powerful medium!