Few mobile devices offer you better photo quality than the iPhone. From their high pixel resolution to the ease of syncing photos across all Apple products, Apple smartphone cameras are usually the best choice for capturing images.
Unfortunately - because it's so easy to take good pictures - it also means you'll have a lot of them. If you have thousands of images and are running out of space, here's how to organize photos on your iPhone using a few different methods.
How to create a photo album?
How to create a new album
- Open the Google Photos
on your
Android
. - Sign in to your Google account.
- Touch and hold the photo
you want to add to
the album
. ... - At the top of the screen, click the Add icon.
- Select Album
. - album
title if necessary . - Click the Done icon.
How to Organize Photos on Your iPhone by Name
The next best way to organize photos on your iPhone is by name. This is a really convenient way to find photos of you or your friends.
Modern iPhones contain facial recognition software. When you upload a picture, your phone will automatically recognize and recognize different faces. It will then designate each of these unique individuals as a “person.” Using this, Photos will group photos of that person together, regardless of date or event.
However, organizing photos by name requires a little tweaking. Here's how to do it:
- First, go to the Photos app and click Search .
- Under People , you will see a bunch of circles with faces in them. Select one of these faces and you will see a directory of all the images that contain that person.
- You can also see a line that says Nameless Face next to that person's circle. To name them, click on Unnamed Person > Add Name . Enter their name. Then click Next > Done .
Once you name this person, all photos with their face will be automatically tagged and found by name.
If you go to Albums in the Photos section of the app, you will also see that your device automatically creates an album for that user in People & Places .
How to block a gallery on iPhone?
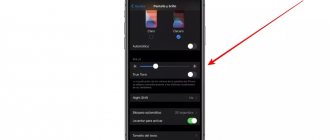
To enable this mode on iPhone, go to “Settings”:
- Select the “Basic” item from the menu list. Find the “Universal Access” settings link.
- We are looking for the option to enable Guided Access.
- We set the mode using an alphanumeric password or using a fingerprint sensor.
Interesting materials:
How to delete photos from SD card? How to delete a photo from a message in a contact? How to delete photos from your phone without the possibility of recovery? How to delete photos from Nokia phone? How to delete photos from a Samsung phone? How to delete photos from your device? How to delete a photo of you on Facebook? How to delete photos from your phone's internal memory? How to delete a photo of me on Facebook? How to delete a photo from your Facebook page?
How to Organize Photos on Your iPhone by Location
Another great way to organize your iPhone photos is by location. However, like the previous organizing method, this one requires some work to prepare.
When you take a photo on your iPhone, the image's metadata automatically records the location of your photo—as long as you have Location Services turned on for your camera.
To enable location services:
- Open the settings app.
- Scroll down to Privacy .
- select Location Services > Camera ,
- Once you're on the camera , tap Allow location access while using the app .
Now that this setting is enabled, your iPhone will automatically geotag new images. It will then sort these photos based on location into a finished album.
To view your photos:
- Go to the Photos app.
- Under Albums > People and Places , click on places .
- On the map, click on the thumbnail of the place you want to view. You will see all the photos from this place.
How to transfer a photo from a gallery to an album?
How to move photos to an album
another photo gallery To do this, find it in the list of
gallery albums
, select it with a checkmark and click the “Move” button at the top of the page.
Then select with the mouse the photo gallery to which you want to move the album
and click “Select”.
Interesting materials:
How to disable Facebook on your phone? How do I disable the Auto Answer feature on my phone? How to disable the Bluetooth function on your phone? How to disable the headphone function on a Xiaomi phone? How to disable geolocation on your phone? How to turn off voice on Samsung phone? How to disable voice assistant on a feature phone? How to turn off voice calls on a feature phone? How to turn off voicemail on a mobile phone? How to turn off voice communication on your phone?
What does the “People” album mean on iPhone?
This album is different from a regular photo folder that you create yourself. The Photos app looks through your photos and recognizes people's faces in the pictures, combining them into a separate album. Each person has their own card, which makes it easy to see all the pictures that include that person. It's much easier than searching through your entire library for pictures.
The “People” album allows you not only to view photos, but also to search for them by name
You can watch the Memories slideshow with the music you prefer. And the ability to personalize allows you to remove unwanted people from collections. Sometimes algorithms cannot recognize people because of the angle or simply because there are no faces in the photo. What to do?
How to manage shared albums
Add subscribers or invite more people
- Select the album you want to share with other people.
- Tap People
- Select + Invite people.
- Add a contact name or number and click Add.
The invitation will be sent again and the recipient can accept, ignore or decline accordingly. You can also share albums with your loved ones who don't use iCloud by turning on public viewing.
Turn on public viewing in iCloud
Open the shared album → People icon → Switch to public website → Click “Share Link” to share the link with anyone.
Add photos and videos to a shared album
You can add photos and videos to a shared album in two ways:
Method 1
Open the shared album → click the + button → select photos or videos → Done → add a comment (optional) → Publish.
Method 2
- In the Photos app, select the photos or videos you want to move to a shared album.
- Click the Share button below.
- Scroll down and select "Add to Shared Album."
- Select a shared album and add a comment if you wish.
- Click "Publish" to add it.
Allow subscribers to add photos or videos to an album
By default, subscribers can add photos and videos to the album. If not, you can enable the setting via the shared album → People icon → Enable subscribers can post the switch. You can disable this feature at any time; just turn it off.
Adding or removing comments to a shared photo
You can also add comments to individual photos later. Open a shared album → select a photo → click Add comment → enter → Send.
To delete a comment, open a photo → tap the comment → touch and hold it and select Delete.
Remove photos and videos from a shared album
If you're the creator of a shared album, you can delete any photos, videos, or comments added by any follower. But other participants can only delete files and comments uploaded by them.
- Open a shared album and click Select in the top right corner.
- Select the images and videos and click Delete (trash can icon).
- Click "Delete Photo" to confirm the deletion.
Note: Anything you delete will be permanently removed from the shared album on your and your followers' devices. However, files that you or other subscribers have saved or downloaded to your library will not be affected.
Saving photos and videos from a shared album
When other followers add photos and videos to your shared album, you can save them to your Photo Library so that later if they delete them, you can still view them in your Photo Library.
- In a shared album, open individual photos or videos, or tap Select to select multiple.
- Click the Share button.
- Select "Save Image" or "Save Video."
Turn notifications on or off
Don't want to be bothered every time someone adds or deletes photos, videos or comments? Here's how:
- Open the shared album → People icon.
- Turn on/off the Notifications switch.
Alternatively, you can tap the three dots icon → Shared Album Details → Turn Notifications toggle on/off.
Manage shared album viewing options
- Open the shared album → the three dots icon.
- Here you can:
- Increase
- Decrease
- Aspect/Square
- Sort by date added, old to new or new to old
- Filter - view all or only photos or videos.
- Slide show
Rename shared album
This can be done in two ways:
- In a shared album → tap the three-dot icon → Rename album → enter a new name → Save.
- From the Albums tab → Shared Albums → View All → tap Edit → tap the album name → enter a new one → Done.
How to remove a follower from a shared album
It is noteworthy that only the creator/owner of the album has the right to remove someone from the public list.
- In the general album → People icon.
- Tap the contact you want to delete.
- Click Remove Subscriber.
How to move photos on your phone to another folder?
To organize your photos and videos into new folders, follow these steps:
- Open Gallery Go. on phone
. - Click Folders
More New
Folder
. - Enter a name for the new folder
. - Select where the folder
. ... - Click OK.
- Select your photos
. - Click Transfer
or Copy.
Organize and search photos
Keep your growing library organized and accessible with Photos. Browse your selected photos in the Photos tab, then use the search bar to find a person, place, or more.
On iPhone, iPad, or iPod touch, Photos organizes your photos into Photos, For You, Albums, and Search. With a completely redesigned Photos tab, it's easy to find, bring to life, share your photos and videos, and sort them by year, month, and day.
When you turn on iCloud Photos, your collection syncs across all your devices for easy navigation through your library. With advanced search capabilities in Photos, you can find photos by person, place, object, or event.
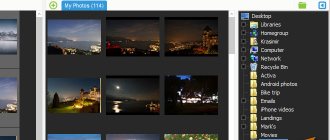
How to Organize Your iPhone Photos on Your Computer
There is another way to organize your iPhone photos: through your iMac or MacBook.
If you have the latest version of macOS on your computer, you should have a built-in utility app called Photos . This app corresponds to the Photos app on your iPhone.
When you download images from your iPhone to your computer, the app should work in a very similar way. Again:
- The Photos app lets you sort your photos by people , places , and date.
- You can tag people's faces to organize their photos by name.
To learn more about this app, check out our tips for getting started with your Mac Photo Library.
,
How to organize photos on your phone?
How to Organize Photos on Android
- Update your photo app. For maximum photo organization, consider using Google Photos as your phone's main photo gallery. ...
- Quickly search for photos. Easily find photos based on people or pets by grouping them by similar faces. ...
- Protect your photos. Backup and sync photos to the cloud for safe storage.
How to create a folder on iPhone on the desktop
Folders can be grouped by specific topics, programs or games. For example, create catalogs with: games, programs for work, leisure, online stores and others.
1. Press your finger on the application icon that you want to place in the directory and do not release it until it begins to “quiver”.
2. Drag it onto the icon of another application, and they will be combined into a new directory. You can rename a directory immediately by clicking on its name.
In the future, you can drag other programs or games into this directory in the same way. To, on the contrary, remove something from the directory, drag it to the home screen.
Interesting! To make the home screen even more convenient, created directories can be moved between desktops. So, you can allocate an entire screen for this.
For you
In the For You section of Photos for iOS, you can see shared album activity, get tips for adding effects to selected photos, and find Share Suggestions—collections of photos perfect for sharing with friends.
The For You section helps you relive your favorite moments with the Memories collection. Photos searches your photos and videos for events, trips, people, and more, then presents them in beautiful collections. This way you can rediscover camping on weekends or big events like a first birthday.
On your Mac, you can find your Memories collections in the Photos app's sidebar.
First of all
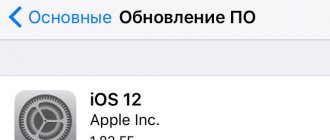
- Update your iPhone, iPad, or iPod touch to the latest version of iOS and your Mac to the latest version of macOS.
- Set up iCloud on all your devices and make sure you're signed in with the same Apple ID.
Enjoy handpicked moments in the Photos tab and sort them by year, month, and day, or select All Photos to view your entire library. See Live Photos and videos come to life as you scroll and browse.
- Years: View your photo and video library content sorted by year. Swipe to see collections.
- Months: View your photos for the month, sorted by memories and location. Tap to play or share a movie of your favorite moments.
- Days: See the best photos of the day and watch videos play as you scroll through your feed. Tap and swipe up on a photo to see its location on a map and the people featured.
- All Photos: View your library, including screenshots and duplicate photos, sorted by when they were taken.
In Power Saving mode, videos and Live Photos will not play automatically.
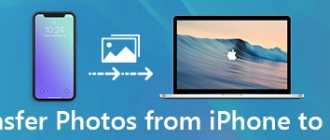
Part 4: Easy Way to Manage and Transfer Photo Albums from iPhone
With Apeaksoft iPhone Transfer , you can easily manage iPhone photos on computer in bulk. It's easy to change photos in iPhone album. You can make an iPhone album by date, size and more. Moreover, you can create, rename and delete albums on iPhone with just clicks. Built-in Photo Manager allows users to manage any photo and album before transferring.
After organizing iPhone albums and photos, you can transfer files between iPhone/iPad/iPod and Windows/Mac freely. For example, you can share albums from iPhone to PC/Mac/other iOS device in a short time. All photo details can be preserved when transferring iPhone albums. The image quality will not be reduced. Meanwhile, other files stored on your iPhone will be safe in the same place.
iPhone Transfer
- Transfer albums, photos, videos, contacts, messages, ringtones, podcasts and other files to iPhone, iPad and iPod.
- Create/rename/delete albums, preview images and photo details in Photo Manager.
- Get Media Servicer to manage, edit and transfer video and audio files from iPhone.
- Work with the latest iOS 14, including iPhone XS/XS Max/XR/X/8, etc.
Step 1
Free to download, install and run iPhone Transfer. Connect your iPhone to your computer via a USB cable. Unlock your iPhone and click Trust.
Step 2
After scanning your iPhone, click "Photos" in the left panel. Select New Album from More Tools to create an album on iPhone. Additionally, you can select "Add to Album", "Rename Album", "Delete Album" and other options from the drop-down list.
Step 3
Right-click any image and select Preview to view details if necessary. Finally, click "Export" to quickly export albums and photos from iPhone to computer or iDevice.
That's it, how to create an album on iPhone in different situations. You can easily categorize all your images. Moreover, you can transfer photos from iPhone to Mac using iPhone Transfer with the above steps. If you want to transfer photos from iPhone to iPad, you need to connect the iPad to the same computer too. For people who store thousands of photos on iPhone, Apeaksoft iPhone Transfer is a reliable photo manager and transfer you shouldn't miss.
How to put a password on a folder?
You won’t be able to put a password on a folder using the iPhone itself. Only a digital unlock code and Touch ID can be used as security measures - however, these measures protect the iPhone as a whole, not an individual directory.
You can create a folder with a password using third-party software. Several applications that are capable of this task are distributed free of charge in the AppStore. The most famous of them is Folder Lock. This program allows you to place important data in its internal storage under a graphic or digital password.
Folder Lock will not be able to “password protect” a folder created on the iPhone desktop. No application can handle this task.
You need to place data in the Folder Lock directory as follows:
Step 1 . Launch the application and set a password. Several forms of password are available - pattern (graphic), PIN (consisting only of numbers), Password (consisting of letters and numbers), Touch ID (fingerprint access).
Step 2 . Enter your email address. Through this address you can restore access to secret directories if you forget your password.
Step 3 . Select the appropriate section according to the type of data you want to hide. For example, if you want to hide photos, click on the “Photos” icon. There is no section intended for storing applications in the list.
Step 4 . Each section contains folder templates - for example, in “Photos” there are directories “Friends”, “Family” and others. You can place data in one of the prepared folders or create a new directory by clicking on the plus button.
Next, click on the folder and use “+” to upload files to this directory.
Step 5 . Remove files downloaded to Folder Lock from built-in iPhone apps.
Thus, only those who know the Folder Lock password or have access to your email can get access to the “hidden” data.
To create “password-protected” folders, you can use other programs from the AppStore:
- Secrets Folder Pro (paid, costs 229 rubles).
- Best Secret Folder (free, installed on iOS 8 and newer versions of the operating system).
- Lock My Folder Free (free, installed on iOS version above 7.0).
What are shared albums and how do they work?
As the name suggests, these albums allow you to share images and videos with others. It's quite secure and private since only people who have the album link can see the content.
Additionally, you can share the album not only within the Apple ecosystem, but also with Android or Windows users. It can also work as a collaborative album, since each party can view it, comment on it, and add content to it.
How many photos or videos can I add to shared albums?
A shared album can contain up to 5,000 photos and videos. You will then have to delete some of the content to make room for new content.
Interestingly, although iCloud Photo Library and Shared Albums are related, they are different functions. And, unlike Photo Library or Photo Stream, shared albums don't count against your iCloud storage.
File types supported in shared albums
Video formats
- HEVC
- MP4
- QuickTime
- H.264
- MPEG-4
In addition, you can add special formats such as live photos, slow motion, slow motion video and memory video. Anyway,
- Images and videos may lose resolution up to 2048 pixels unless they are panoramic images with a resolution of up to 5400 pixels.
- GIF size must be 100 MB or less.
- Videos up to 15 minutes long can support 720p resolution.
Search by photos
Photos makes it easy to find photos of the person or thing you want. You can also search by places and events.
Click the Search tab, then enter your query in the search bar. On a Mac, the search bar is located in the top right corner of Photos.
- People: Find photos of specific people or groups of people in your library. The main thing is to keep the names and faces organized in the People album.
- Places: See all your photos and videos on a map in the Places album. Or enter the name of the place in the search bar to view all your photos and videos from the memorable place.
- Objects: Photos recognizes scenes and objects. Search for something like "lake" and then select a category from the results to see all the matching photos.
- Events: Search for an event, such as a concert you attended a few months ago, and Photos for iOS uses the time and location of your photos and a list of online events to find matching photos.
The Search tab in Photos for iOS also suggests moments, people, places, categories, and groups to search for. Click suggested search options such as "one year ago" or "cats" to view and rediscover the photos.
When searching for photos, all face recognition and scene and object detection are performed entirely on your device. More information about photos and privacy.
Source
The whole truth about photo albums on iPad/iPhone. Sorting photos by albums.
Today we will talk about how to organize photos in albums on iPad and iPhone.
Apple products enjoy the well-deserved love of its fans for a reason. And one of the main arguments in favor of this company is its thoughtful user interface and the stability of the operating system as a whole. Honestly, at the moment, their mobile iOS 5.1.1 is perhaps the best among the competitors for tablets and smartphones.
But, as we know, there are no ideal systems. As it turns out, the seemingly simple task of organizing photos into albums on an iPhone or iPad actually causes a lot of difficulties. This is how to confuse the interface of the standard Photo
- I had to try! I hope in the sixth version of iOS something will change in this regard for the better.
Photo app
iOS is really quite flawed. We are not talking about viewing the photos itself, everything is fine with that, but the organization of storing photos is clearly lame. So, first, let's look at how the iPad or iPhone stores photos.
And here comes the first limitation - it will not be possible to organize a hierarchy of folders and all photo albums will be on the same level. Terribly inconvenient. For example, if you have a lot of photos and you want to organize them by year, and inside by events, then this will not work. To do this, you will have to use additional programs, for example iPhoto, which, among other things, allows you to create photo albums, although the program is paid.
Go ahead. There are several ways to upload photos to iPad/iPhone:
- Using iTunes. We specify the directory with photos and on the iPad, during synchronization, the corresponding albums are created.
- Saving images from the Internet. The photos go into the Camera Roll
. - Through a specialized adapter for reading SD memory cards of the camera.
Whatever method you choose to create albums, you still won’t be able to move photos between them. This is the second, and perhaps the most disgusting and incomprehensible limitation. Although, Apple provided us with some “crutches”, namely the ability to create our own albums directly on the iPad/iPhone.
But even here there was a catch. You can add images to these albums only from existing albums, and the added photos remain in the original albums. As a result, albums created on iPad store links to selected images from other albums rather than the photos themselves, which can be deleted at any time without affecting the original images. When you delete a photo from the original folder (album), it will automatically be deleted from the created album.
It remains to show with an example how to create your own albums on an iPad or iPhone and add photos to them:
1. Open the Photos
and click “Edit” in the upper right corner
2. Click the “New Album” button in the upper left corner and enter its name, then click “Save”
3. Click on the photos you want to place in a new album (marked with blue and white flags). Images can be placed in more than one album (remember that these are just links to already uploaded photos).
At any time, you can add images from other albums to your created album. To do this, click the arrow in the upper left corner and the “Add Photo” button will appear. Then I think you’ll figure out what to do.
Subscribe to the Yandex.Zen channel and be the first to know about new materials published on the site.
If you find the article useful, do not be lazy to like and share with your friends.
About the quality of Apple's branded leather iPhone cases and warranty Ten pre-orders sold out in just a few minutes My Apple Watch suddenly stopped turning on. Something went wrong... Where are the Christmas tree quotes on a Mac keyboard? Apple has released the second major update to iOS 11.2. Finally, the annoying bug with the calculator has been fixed. iPad mini will be presented on October 23