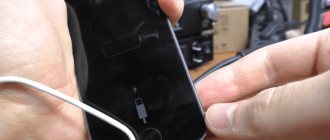
One of the most common problems that iPhone owners encounter is charging problems. If the iPhone does not charge at all or the process is too slow, the reason may be either problems with the software or a malfunction of the phone or charger.
Some defects can be removed yourself; to fix others, it is better to contact a service center or workshop where specialists with a sufficient level of experience work and have the necessary spare parts for different generations of iPhone and equipment.
Why isn't it charging?
Most often, problems with charging the device are caused by the following phenomena:
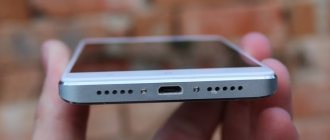
- Foreign objects and debris get into the Lightning connector intended for connecting the charger. If dust, grains of sand, wool, or fine lint gets inside, the gadget charges more slowly, since the plug is positioned incorrectly when connected and there is no good connection at the contact pads.
- Using a USB port instead of a wall outlet. The manufacturer recommends charging the iPhone from a 220V outlet, and using the port only to connect to a computer, but many users find charging from a PC or laptop more convenient. The malfunction lies in the difference in current strength, since the USB connector supplies 0.5A of electricity, while the battery is charged at 1A. Some models cannot be charged from a computer at all, since charge absorption occurs faster even in the background. If the USB port is faulty, the device will not charge at all.
- Damage to the cable in the form of rupture of the braid, abrasion of current-carrying conductors, creases. In addition, many people who are wondering why the iPhone 5S and newer generations do not charge using a non-original cable are faced with the fact that the device cannot recognize the cord. As a rule, older generation models can be successfully recharged using uncertified cables that cost less than the original.
- Failure of the power controller, cable or connector module due to mechanical damage or moisture.
- Severe wear and tear on the battery due to long-term use.
How to check the battery
The rechargeable battery breaks down over time and is a consumable item. Unfortunately, no battery has yet been created that can last a long time.
To check the battery status on iPhones with iOS 11.3 or a newer version of the operating system installed, go to the settings section. Next, we find the item where the battery information is indicated.
There are different programs in the App Store to determine the state of the iPhone battery. In addition, you can check the battery using special programs for computers with Windows or macOS operating systems.
To more accurately determine the battery condition, a USB tester is used. Its use will allow you to measure current and voltage parameters directly, bypassing the sensors installed in the iPhone.
In addition to current and voltage, the tester can measure charging power and battery capacity. However, to get the most accurate results, you need to choose a model, taking into account the option of supporting fast charging protocols.
More details about ways to check the battery condition of iPhones of the fifth, sixth and seventh series are written in this article.
Replacing the socket
If the Lightning port where you plug in the charging cable is faulty due to debris getting inside, you need to carefully clean it.
A thin and long object made of plastic or wood is suitable for this; Never use metal devices such as paper clips, as they can damage the contacts with static electricity.
After mechanical cleaning, you need to blow out the connector and check whether the cord can be detected. Often, after the procedure is completed, the iPhone charges normally.
If cleaning the socket does not help, the reason may be its mechanical damage: the case near the port will heat up, and when connected, the LED indicating the charging process may blink and turn off.
In case of burnout or mechanical damage to the contacts, the help of a technician is usually required, since the problem becomes the failure of the lower loop. This part cannot be repaired and must be replaced with a new one.
When making repairs, it is important that only the original is used for replacement, since cheaper Chinese analogues are rarely of decent quality, and when installing them, the repair will have to be done again after 2-3 months of operation.
What to do if the cable on the iPhone 5 is not certified and does not charge the smartphone?
The original iPhone cable has two significant drawbacks: it is very unreliable and very expensive.
And, of course, no one wants to pay 1,590 rubles (yes, that’s how much a charging cable made at Apple factories costs) for a cable that a priori will not last long, and therefore many decide to buy a non-original charger. And having saved a fair amount (prices for non-original cables start from 100 rubles!), the happy user returns home, but bad luck - when he connects his iPhone to a new cable, he realizes that the gadget is not charging and does not sync with iTunes, and a depressing message appears on his screen the inscription - “This cable or accessory is not certified...”. What to do in such a situation? Let's find out!
Battery Replacement
All iPhone models have a lithium-ion battery, the service life of which varies from 6-8 months to a year depending on operating conditions. After 400-800 full charge cycles, it drains much faster and takes longer to charge. In addition, battery damage can be caused by the following factors:
- Mechanical phenomena (fall, directed impact).
- Using low-quality adapters instead of the original charger.
- Liquid ingress, oxidation of battery contacts.
- Short circuit.
In any of these cases, it is better to replace the element: a new battery will hold a charge better and eliminate the hassle of long-term connection to an outlet. A replacement is most often ordered from a service center, since the iPhone’s design is monolithic, and you cannot simply remove the battery, as on most smartphones. To replace it, use a set in the form of a Phillips screwdriver and a special Pentalobe and a plastic spatula. Basic actions:
- The screws at the bottom of the device are unscrewed with a Pentalobe screwdriver.
- Using a spatula, the screen of the gadget is raised.
- The battery cable is held on by three screws; you need to unscrew them and disconnect the cable.
- The battery is removed and replaced with a new part, assembly is carried out in the reverse order.
Theory
A little theory in order to know how the process of filling the battery with energy goes. Lithium-ion drives are charged sequentially:
- First, the power controller passes current until the voltage reaches 4.2 to 4.4 V.
- After the capacity reaches 85%, the current gradually decreases from 2 to 0.5 amperes, although the voltage remains around 3.8 V.
What the process looks like
The familiar symbols % - with a picture of a battery in the upper right corner - are an approximate mathematical calculation, and not exact indicators. The driver just reads the voltage readings at the output and converts it into the familiar “percentage” format. When the voltage reaches a critical level of 3.5V, the controller sends a signal that the battery level is at zero and the iPhone begins to bombard us with messages about the need to recharge.
As with any smartphone, the accuracy of the readings gradually decreases and we observe sharp surges in charging. For example, at first it was 40%, and then it immediately becomes 10%. To improve accuracy, calibration must be performed periodically. Links to applications are above.
Main consumers of iPhone
A modern gadget consists of many nodes that consume different amounts of energy. Here are some of them:
- display when using maximum brightness mode – from 100 to 300 mAh;
- camera - approximately 600mA;
- flash on camera – from 150 to 200mA;
- processor – from 100 to 300mA;
- GPS module, when in search mode - from 200 to 300 mA.
If you count individually, this is not much, but when all these nodes work simultaneously, you get a very large consumption of capacity. And if you add games or active applications here, it becomes clear why the battery drains so quickly. And if you use the gadget as a video recorder or navigator, while simultaneously using other modules, then when the 1A charger is turned on, the phone will not only not charge, but, on the contrary, will intensively lose charge.
Software glitch
Often the cause of problems with charging a device is a failure in iOS: this may be a freeze of the operating system itself, which causes a delay in the response of the controller responsible for supplying current to the battery. To resolve the problem, you must perform the following steps:
- Press the Lock and Home buttons at the same time, hold them in this state for 15-25 seconds, without releasing: a white background with the Apple logo will appear on the display, then it will cease to be visible, and the keys can be released.
- Turn on your smartphone and connect the charging cable.
This procedure is known as a “hard reboot” and helps if the cause is an OS failure. As a rule, after this the power problem disappears.
Problematic firmware
Some users are faced with the fact that after they decided to change the firmware or install an update, the iPhone stopped “seeing” the cord. The problem may be that the update process fails, an application that is not certified is installed, or a virus is launched. You can solve the problem in the following ways:
- Roll back to the previous firmware version. This option is suitable for users who save a backup copy before updating: this will allow you to return the previous settings using iTunes. To do this, you need to go into the program and click on the restore button.
- Restore original settings. The method is used in other cases, however, this deletes all multimedia files and settings, so before using it you need to take care of resetting the data to the computer.
If after these steps there is still no reaction, most likely the reason is mechanical damage to the elements of the device.
What you can do with your own hands
First, let's figure out what to do if the iPhone won't charge. There is no need to panic and immediately run to the nearest service center. Of course, they will help, but it will take time and money. As a rule, Apple devices are reliable, which means there is a high probability that the problem can be solved on your own.
You can quickly determine the cause by following the clear sequence of actions presented below. This will save time and nerves.
Is the cable OK?
Damage to the power cord is the most common reason that the iPhone does not charge both from the network and when connected to a computer. Such problems can be observed after about a year of active use.
In order to check where the wire is damaged, it must be carefully inspected. It is possible that damage to the insulation is visible on it, and noticeable kinks or creases will be found near the plug. This indicates a violation of the integrity of the cable cores.
However, the damage may be hidden. The examination will not yield results. You can finally be sure that the problem is in the cable only after replacing it. A known working original wire will do. Having bought a cheap Chinese counterfeit, you may see a notification on the device screen that the accessory is not supported.
The fact is that original or certified cables are equipped with a special chip. Such measures have been taken by Apple to protect users from low-quality accessories.
There should also be markings on the original cable.
Checking the charger
Another reason that the iPhone sees charging and does not charge from the network is a faulty network adapter. It may also be due to the use of counterfeit chargers.
The desire to save money using such devices will lead to the need for serious iPhone repairs. Also, when using a fake but cheap network adapter, you cannot be sure that it will not catch fire at any moment.
As in the case of the power cable, you can check if there is a problem with it by connecting the iPhone to a working charger, for example, from another iPhone or from an iPad.
You should only choose original or Apple certified network adapters.
If the problem is fixed, that's good. We buy an original or certified charger from a reputable manufacturer. However, if this does not help, we continue to look for the reason further.
Clean and check charging ports
Dust, dirt or moisture that gets into the charging port means that the process may not start even though charging is connected. After all, any contamination of the contacts increases the contact resistance.
Damage to the port contacts leads to a similar result. This often happens when the connector is pulled out of it.
You should examine it carefully. If you can see that the contacts are bent or torn off, then you should contact a service center for repairs. You won’t be able to replace the connector yourself without experience and tools.
By the way, in this case, a message may appear on the iPhone screen, just like when using a fake cable.
To clean the connector, use a long object that does not conduct electric current, for example, a wooden or plastic toothpick.
The use of needles or metal clips is not recommended. They may damage or short out the contacts. Also, do not use cotton swabs. Use a toothpick to carefully remove any debris that has accumulated in the connector.
After this, you should connect the cable and network adapter. As a rule, this procedure restores the charging process and removes the message about problems with the cable.
However, the problem may appear in other cases, for example, after an unsuccessful software update.
Software malfunctions and how to force a restart
Software errors can result in the iPhone not recognizing the charger and not charging. They are caused by failures in the update process, malware, or infection of the iPhone with viruses.
You can solve the most common problems arising from software errors using special software, for example, using the Tenorshare ReiBoot program.
In some cases, the iPhone even shows that the process is in progress, but the battery is not charging. This happens when the battery is completely discharged.
In order to solve the problem, the iPhone should be restarted. Rebooting the first generation iPhone SE and earlier iPhone models is activated by pressing and holding the top button until the dedicated Power Off switch appears on the screen.
Switch the slider and wait thirty seconds. During this time, the iPhone should turn off. Then press the top button to turn it on.
For second-generation iPhone SE models and iPhone 6, 7, 8, the reboot process is similar to that described above, except that the power button is located on the side.
For newer models, such as iPhone X, 11, 12, 13, the reboot is activated by simultaneously pressing the side button and the volume down or up button. We hold them in this position until the “Turn off” switch appears. Move the slider and wait 30 seconds. Then press the side button to turn it on.
In serious cases, the iPhone will not respond to key presses. However, there is a solution for this problem - a forced reboot.
Forced reboot is activated differently for different models.
On the first generation iPhone SE or iPhone 6s, a force restart is triggered by simultaneously pressing and holding the Sleep and Home buttons. When the Apple logo appears on the screen, release the buttons.
To force restart iPhone 7 of all versions, you need to simultaneously press and hold the Volume Down button and the Sleep button. When the Apple logo appears, the keys are released.
You can activate restart for the second generation iPhone SE and for iPhone 8, X, Xs, Xr, 11, 12, 13 in the following way:
- Press and release the Volume Up button once.
- Press and release the Volume Down button.
- Press and hold the side button.
The button must be released only after the apple logo appears on the screen.
Water ingress
If moisture gets inside the iPhone, it not only leads to damage to the processor chips, but also to power problems. As a rule, in this case, the smartphone screen turns white or has stripes, the apple-shaped indicator blinks and turns off, and the iPhone cannot be charged.
The situation is complicated by the fact that it is difficult to disassemble the equipment yourself, and water can damage the most important contacts, and a short circuit will disable it completely. In some cases, if little water gets inside, only a few parts have to be replaced, including the battery itself; in others, important processor components burn out.
If water gets in, you should take the device to a service center as soon as possible, after wiping the outside of the case and screen to remove moisture.
It is not recommended to try to turn on the iPhone after “drowning”: this will increase the risk of a short circuit and significantly complicate repairs. In no case should you use “folk” methods such as soaking the device in rice, which will absorb water: the main damage is caused by microcrystals of salt dissolved in the liquid, which, after drying, remain on the surface and can penetrate deeper.
During the service, the smartphone is disassembled, each part is dried using special equipment, treated with cleaning compounds, after which the repairman inspects the elements. If there is damage, the failed parts are replaced.
Checking the memory
To begin with, if the iPhone charges only up to 4-20 percent when turned off, you should check the charger on another device. It is quite possible that:
- The wiring in the cable is interrupted - the current strength in this case is significantly reduced, preventing the battery from being charged to the required 100%.
- The electronics in the charger unit have burned out, again, the current strength will be significantly reduced. Repair is powerless here; it’s better to immediately buy a new charger for iPhone 6.
- The lightning plug is loose or the chip on the cable is damaged (yes, yes, there are chips in iPhone laces).
It’s quite simple to check whether the charger is working; we take a working charger from friends, neighbors, and lovers and connect it to our unfortunate device. The iPhone beeped joyfully, notifying that energy had entered the battery, then we run to get a new, preferably original, charger.
