Author of the article
Kristina Gorbunova
Higher education in the specialty “Information Systems”. In the field for more than 7 years, he develops websites on WordPress and Tilda.
By default, a Windows or MacOS laptop automatically connects to the wireless network when turned on. But sometimes the “no internet access” or “restricted network access” icon appears on the notification panel. When such errors occur and the laptop does not immediately connect to Wi-Fi, it is necessary to conduct software and hardware diagnostics of the devices.
Possible mistakes
I show identical errors, the solution of which lies in the same plane. Find your similar one among them, make sure that everything is the same, and then continue studying the material and ways to correct it.
In all options, we are talking about connecting to a Wi-Fi network. This error is not typical for a wired network.
Windows 10 – Can't connect to this network
Windows 7 – Windows could not connect to... (your network)
Linux - Could not connect to Wi-Fi network
Other variations may occur, but the reasons and solution for all will be the same as for the first point for Windows 10. I am typing this text from it, so I will show everything on it. For other systems, just look for a similar solution, and if there are suddenly a lot of requests, we will either write a separate article or add to this one. Write your problems in the comments, perhaps by doing this you will help thousands of other readers of our portal!
I can’t connect to the Internet: it’s the fault of the service provider
Often an unidentified network appears due to malfunctioning equipment on the provider’s side. In this case, users usually did not change anything in the settings or reinstall the system the day before. In such a situation, the subscriber has only one thing to do - wait. But you need to make sure that the failure was the fault of the service provider.
How to check it:
- Call the technical support number.
- Reconnect the cable to another computer. If the problem occurs on the provider's side, there will be no Internet on any device.
Sometimes users notice that there is a network, but there is no Internet. In this case, you should also contact technical support.
Main reasons
There may be a lot of them, but here are only the TOP problems. Why does the error occur:
- The password was changed - someone changed the Wi-Fi password and now the old saved one does not work.
- Other settings on the router changed - encryption type, channels and something else related to the wireless network.
- Same network names in different places, but with different passwords.
- It’s just a failure on the router or device – anything can happen, it’s technology.
- Other reasons are a solar storm, a coup d'état among penguins in Antarctica, etc. We won’t even consider this, but the reasons are sometimes really crazy. It’s better to write about this in the comments right away - you’ll help others and laugh together.
For the first, second and third points, the method mentioned above is suitable; for the other, a reboot usually saves anyone.
The laptop does not see the WiFi network only from my router or phone, but sees others
If Windows on a laptop sees other networks, but does not detect WiFi from your router or smartphone, then the reason is most likely in the signal distribution settings.
First, make sure that the device is within Wi-Fi coverage. Typically, in the 2.4 GHz range, the beam beam easily penetrates 2 interior ceilings. At 5 GHz it extends no further than the room next to the source.
You also need to go to the WiFi settings on the router and check the following parameters:
- Set the transmitter power (TX Power) to the maximum value
- Disable invisible network feature (hidden SSID)
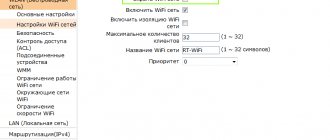
- Manually set the wireless signal channel. We have dedicated a separate instruction on how to choose the optimal channel that is not congested by neighboring routers.
These are the basic steps that need to be taken if your Windows laptop does not see the WiFi network from your smartphone or router. 99% of the reasons are corrected using the methods described. If you have any questions, ask them in the comments!
How to fix?
The first action for any problem is to restart your computer or laptop and router. It often helps if you have no idea about the reason.
If it doesn’t help, we start remembering. Maybe they changed the password? Let's try to enter it again. If the password has already been saved and does not allow you to enter it again, you can simply “forget” this network.
Windows 10
Follow the instructions for Windows 10:
- Go to “Network and Internet Settings”. To do this, left-click on our network and select this item:
- Wi-Fi – Manage Known Networks
- Select our network and click the “Forget” button
Now you can try to reconnect to the network and enter the current password!
Windows 7
On Windows 7 this is done in a similar way:
- Through the same network icon we get to the “Network and Sharing Center”
- Wireless Network Management
- Removing a known network
The above methods are also relevant for Windows 8.
Viruses block access
While surfing, users visit hundreds of resources. On many of them we download music, movies, images and other files. Viruses can get onto your computer along with downloaded files. Many of them know how to block access to the Internet. The user needs to download and install a reliable antivirus program on his computer.
The antivirus will automatically install updates. The user's task is to regularly scan the system.
You can restore access to the Internet in different ways. If none of the methods listed above helped you, you need to call a specialist to your home.
Once again about the password
This is the most common reason, so if you entered the Wi-Fi password and it still doesn’t work, there is an option to change it on the router. To do this, find your model on our website through the search - there will definitely be an article with the settings. Go to the configurator, and somewhere on the wireless network there will be a current password.
Maybe this will allow you to simply remember it, or maybe you’ll want to change it. Using your TP-Link as an example:
If something goes wrong, it makes sense to re-enter and save the old password - let it be updated in the router system. It happened that just such a rewrite helped on all devices.
Enabling the module directly
- Press the R and keys simultaneously.
- Enter the command “ncpa.cpl” and click “OK”.
- Now look very carefully at all the connections. By default, there should be a local wired connection and one via Wi-Fi. The second has a ladder icon. If it lights up in gray, then simply click on it and turn it on.
- If it is lit, then go to “Properties” .
- Now, in the fourth IP protocol property, set the IP and DNS detection to standalone. Then your laptop will pick up the settings from your router. You can also try setting the DNS manually: 8.8.8.8 and 8.8.4.4 - sometimes this also helps.
- If the device is not there, then most likely the drivers are not installed.
Other fixes
Here is another selection of possible ways to fix this error:
- We disable the antivirus - no matter how funny it may be, in rare cases it can completely block the connection to the network - it will be completely impossible to connect. Disabling methods are individual, look at your own.
- Update hardware configuration. A quick method can also help. The whole point is to go to Device Manager and click the button of the same name:
- Channel. Usually the Wi-Fi router itself selects a normal channel, to which at least you can freely connect. But in some cases it puts channel 13, but Windows cannot connect to it. So the recommendations are to go into the router settings, check the channel, and set it to something different from this one. But it’s easier - just reboot it several times - one day it will install the correct one.
- Drivers. Only in case nothing worked initially, and the system is very ancient, or there is simply suspicion about the driver. In practice this does not happen often. If you want, update it.
That's all! Don't forget to write your experience in the comments. And with this I say goodbye to you. I hope that the article was really useful and that you were able to connect to your network and the Internet. Your Nerd.
Laptop problem
When a computer does not connect to the network, you should highlight a range of possible reasons and eliminate each one in turn. Once the problem is resolved, Wi-Fi access will be restored.
Reasons why a laptop may not connect to the network:
- Wi-Fi is deactivated;
- incorrect security key;
- incorrectly configured power supply;
- driver problems;
- blocking wireless connection by antivirus;
- errors in the functioning of Windows;
- WLAN auto-configuration does not work;
- when sleep mode is activated, the module receiving the Wi-Fi signal is turned off;
- settings were lost due to an update;
- Wi-Fi module is broken;
- other problems.
Most problems and errors can be fixed using standard Windows tools. The only exception is a breakdown of the Wi-Fi module. Here you will need help from the service.
Wi-Fi is not activated
The wireless adapter should be enabled by default. But some manufacturers supply devices that have this option disabled by default. There are four ways to enable Wi-Fi on a laptop:
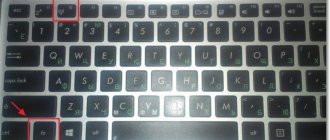
- Using a button on the case or on the keyboard. The Wi-Fi power key is easy to miss on a laptop. Some manufacturers place it on the back panel, where most users do not look. This button may be on your keyboard. It has a Wi-Fi sign on it.
- Key combination. Depends on the laptop model. For Acer it is Fn+F3, for Asus it is Fn+F2, and for HP it is Fn+F12. The instructions for the laptop usually indicate the required key combination.
- In Windows settings. Open the “Network Connections” section through the “Control Panel” (Network and Connections). Right-click on the “Wireless Network” icon and select “Enable” from the menu that appears.
- In Device Manager. To launch the utility, use the Win+R keys. In the window that opens, enter devmgmt.msc and click on the “Ok” button. Find the Wi-Fi adapter in the list of network devices. Right-click on it and select “Engage”.
Security key does not fit
When the laptop does not connect to Wi-Fi for a long time, a password entry error may appear. If the connection fails, you will be prompted to reenter your security key.
If the error does not disappear when you re-enter the password, you need to slightly change the procedure:
- Uncheck “hide characters” if it was checked there.
- Check if Num Lock and Caps Lock are activated.
- Make sure you are entering letters on the correct layout.
- View the password for the wireless connection in the router settings.
Let's look at the last point in more detail using TP-Link as an example.
- Connect to the router using a network cable.
- Open your browser and enter 192.168.1.1. You can also use any mobile device connected via Wi-Fi to the router for these purposes.
- After entering your username and password, go to the “Wireless Mode” section. Open the “Wireless Security” tab and remember the characters in the “wireless password” column.
- Enter your current password as the security key on your laptop.
Incorrect power setting
If your netbook or laptop does not want to connect to Wi-Fi, you should check if the saving mode is activated.
For this:
- Open Control Panel and change the view mode to large or small icons.
- Go to the "Power Options" section.
- Choose a balanced scheme. Click on "Power Plan Settings".
- Select "Change advanced settings."
- In the list that opens, find the settings for the wireless network adapter and set it to maximum performance.
- Click on the "Ok" button.
Driver problem
It’s faster and easier to reinstall the driver through Device Manager:
- Launch Device Manager through the properties of “My Computer”.
- Find the required network adapter in the list of devices and go to its properties.
- The General tab displays the status of the device. If there is an exclamation mark or a message indicating that it may not work properly, you should reinstall the driver.
- Go to the “Driver” tab and click on the “Update Driver” button.
- Click on “Find on this computer” and select the folder with the driver downloaded from the manufacturer’s website.
- Wait for the installation to complete and restart your laptop.
Considering that the laptop does not connect to the network, you should save the installer of the latest driver version on your hard drive in advance. You can download it from the PC manufacturer’s website using any mobile device and browser.
Antivirus is blocking the connection
Windows has its own firewall built in by default. It can only block outgoing connections, not the internet connection itself. To disable the firewall:
- Open Control Panel and switch the view to icons.
- Find the Firewall section.
- Go to the “Turn the firewall on or off” tab.
- Check the “Disable” checkbox for each option and click “Ok.”
When you can’t access the Internet from your laptop after installing a third-party antivirus, the problem is due to incorrect protection settings. Try temporarily disabling the software.
If access to the Internet is restored after this, then the problem is with the antivirus. You need to change the settings for outgoing and incoming connections.
Windows Error
In Windows 7 and Windows 10, the error “Cannot connect to the network” appears periodically. To fix it, you need to restart your computer. If after restarting the laptop does not want to connect to Wi-Fi, use the Windows troubleshooting tool. The software is able to detect a problem or device conflict.
WLAN auto-configuration
The computer will not be able to connect to the wireless network if the WLAN service is disabled. You should think about problems with this service if, when you click on the connection icon, other wireless networks are not displayed.
To enable the LAN AutoConfig service, press the Win+R key combination. In the window that opens, enter services.msc and click on the “Ok” button.
In the window that opens, find the WLAN auto-configuration service. Right-click on it and select “Run” from the menu that appears.
After launch, instead of the “No connection” notification, a list of available networks should appear.
Network disappears when resuming from sleep mode
If your laptop stops connecting to wireless mode after waking up from sleep or hibernation, you should change your power settings. For this:
- Open Device Manager through the properties of “My Computer”. In Windows 10, when you go to properties, PC settings open. The required function will be in the upper right part of the screen.
- In the Device Manager that opens, find the “Network Adapters” section.
- Right-click on the wireless network adapter and select “Properties”.
- In properties, go to the “Power Management” tab. Uncheck "Allow the computer to turn off this device."
- Click on the “OK” button. Restart your laptop.
No connection after update
If, after changing the encryption type or password, your computer stops connecting to Wi-Fi, it means that important connection settings have been affected.
There are two solutions to this problem:
- Return everything to the way it was before.
- Delete the connection and reconnect to the desired network.
The connection is deleted in the Network and Sharing Center. You need to select the desired connection, right-click on it and select “Delete”. After this, you can re-find a wireless network to connect to.
When downloading updates on Windows 10, sometimes there may also be a connection problem.
To fix it:
- Find the command line (Start menu, System tab). Right-click on it and select “Run as administrator.”
- Type the command netcfg -sn and press the Enter button.
- If the response message contains the DNI_DNE clause, execute 2 commands. First reg delete HKCR\CLSID\{988248f3-a1ad-49bf-9170-676cbbc36ba3} /va /f and then netcfg -v -u dni_dne.
- Restart your laptop. After this, the wireless adapter should work.
The laptop is connected to the network, but there is no Internet connection
If you were able to connect to Wi-Fi, but the sites do not load in the browser, you need to check your connection settings. For this:
- Open the "Network Connections" section.
- Right-click on the desired connection and go to properties.
- In the list that opens, find the IPv4 protocol, select it and go to properties again.
- Make sure that the checkboxes next to automatically obtaining addresses are checked.
- Click "Ok" and reboot your device.
If the laptop sees the network, but there is still no access to the Internet, it is worth considering other reasons:
- Payment was not made on time. Customer-oriented providers usually redirect such users to a page with a message about the need to top up their account. But some service providers automatically block Internet access until payment is made.
- Check your router settings. They may change as a result of a reboot or power surge.
- Contact your provider and make sure that the problem is not caused by maintenance or replacement of network equipment.
Breaking
If the auto-configuration service is working normally, the antivirus and other programs are also configured correctly, but the laptop cannot connect to the router, it is quite possible that the Wi-Fi module is broken.
You can identify the failure of this component in the following ways:
- Connect directly to the router using a network cable. If the Internet connection is established, then the problem is with the module.
- Checking in the task manager. If the module is broken, it will appear in the list as an unknown device or will not be visible at all.
- Press the Wi-Fi power button several times. If access to the wireless network does not appear, then the module has failed.
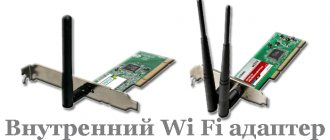
It is unlikely that you will be able to repair the built-in adapter yourself. But there is good news - many router manufacturers also produce stationary Wi-Fi modules (ASUS USB-N14, TP-Link ARCHER-T2U, D-Link DWA-131, etc.). To access the network, you need to connect this device to the USB port of your laptop.
Other reasons and solutions
Sometimes the laptop cannot connect to Wi-Fi because the selected channel is congested. In this case, you will need to change the router channel.
