Features of connecting a desktop computer to a Wi-Fi network
Selecting a Wi-Fi adapter
Frequently Asked Questions (FAQ)
After building a home Wi-Fi network that combines laptops, mobile phones and tablets, the owner of a stationary personal computer has a question: how to connect the computer to Wi-Fi. Most often, such a PC was previously connected directly to a network cable, and it does not have a built-in wireless module.
You can solve the problem in Moscow in the following ways:
- installing an additional router, followed by a wired connection to a PC. Advantages - the ability to significantly increase and improve the quality of wireless home Internet coverage. The main disadvantages are the high cost of the router; experience with configuring “bridge” type routers is required;
- Another option for connecting a PC to Wi-Fi is to connect the built-in Wi-Fi module. In this case, you create a stable wireless connection from the PC to the wireless network. The only drawback is the need to dismantle the cover of the system unit and the knowledge of installing devices into the PCI bus;
- The best option is to use an external Wi-Fi module, also known as a “Wi-Fi flash drive” or “whistle”. Its advantages are that it is a budget solution, does not require special skills, and provides stable computer access to the network.
Connecting a desktop computer to a WiFi network
Most desktop computers do not have a Wi-Fi module. Therefore, in order to connect to a wireless network, you will need to purchase an internal or external WiFi adapter. Now we will show you how to connect your computer to a wi-fi network using these adapters.
We use an internal Wi-Fi adapter
It looks like a small board into which you can screw an antenna. The cost of this board is not high, the price starts from 600 rubles, depending on the manufacturer and operating modes. There is also a negative point: you will have to climb into the computer system unit to insert the adapter. There is no need to be scared; in fact, this process is quick and easy. The instructions are shown below.
Installing an internal WiFi adapter
- Pull out the PC plug completely from the socket. Unscrew the bolts that hold the side cover.
- We remove one plug opposite the PCI connector into which we will later insert the Wi-Fi card.
- Insert the Wi-Fi adapter into the PCI slot. Check to see if it is tightly connected to the connector.
- Replace the side cover of the system unit and screw the antenna into the adapter.
Installing drivers and setting up a Wi-Fi network
Once the wireless internal module is installed on your computer, proceed with installing drivers. Usually the board comes with a disk containing the necessary utilities and drivers. If it’s not there, it’s okay, enter the name of the module into any search engine and download them from the manufacturer’s website.
- After installing the driver, a wireless Internet icon will appear on your desktop.
- Launch it by double clicking. A list of all wireless networks that you can connect to will appear, provided you know the password.
- Click on the network you need and enter the password.
Let's use an external Wi-Fi adapter
This option is simpler, unlike the one written above. Here you also need to buy an adapter, but only an external one. Now there is no need to disassemble the system unit, because this module is connected to the computer using a USB input. There is a large assortment of this type of modules on the market. We recommend purchasing with an external antenna, which can be replaced with a more powerful one.
Install drivers and set up Wi-Fi connection
- Plug the USB Wi-Fi adapter into your PC. Wait a couple of minutes.
- Install the driver on your computer using the disk.
- Click on the icon that should appear after installing the driver.
- Click on the Wi-Fi network you need and enter the access key.
Types of Wi-Fi modules for computers
There are dozens of different devices on the market. The most affordable in the price category is the USB Wi-Fi module. In appearance it resembles a regular flash drive. More expensive and advanced models may have a folding antenna. Most of these models provide transfer speeds of up to 300 Mbit per second.
The devices operate at frequencies of 5 GHz and 2.4 GHz. Cheap models may have poor Wi-Fi reception when far enough away, but for home use, indoor models are the best choice. A minor inconvenience is that such models occupy one USB port.
If you are looking for a really good adapter for your computer, the answer to the question of which one is better to choose is obvious - internal. It guarantees a better signal and higher data transfer rates. Models of this type can be equipped with two or even three antennas. The connection is made to a PCI or PCI-E slot on the motherboard. The cost of modules is much higher. There are models on the market from TP-LINK, ASUS and other brands.
Connecting to a router via Wi-fi is justified in cases where it is inconvenient or even impossible for you to pull the cable from the modem to the computer. When you move your system, you won't have to drag the Internet cable along with it. Also, the use of a wireless connection eliminates cables lying on the floor, which is especially important when creating an interior.
Now you know how to connect wireless Internet to a personal computer. Be sure to make sure that the device is software and hardware compatible with your computer when purchasing any type of adapter.
How to connect a laptop to a Wi-Fi network
To set up a Wi-Fi connection on your laptop, you don't need to buy anything. Since the wireless module in almost all models is installed by the manufacturer. Therefore, you can immediately proceed to familiarize yourself with how to easily connect to Wi-Fi from a laptop, on different operating systems Windows 10, 7. Regardless of the OS, the first step is to turn on Wi-Fi.
How to connect a laptop to Wi-Fi on Windows 10
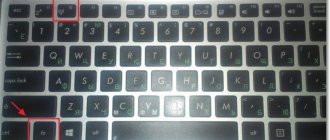
- Turn on Wi-Fi on the laptop. This can be done using: a button on the case, a keyboard shortcut, through the network control center or device manager. If you don’t succeed, then see the detailed instructions on our website in the “ WiFi ” section.
- After you activate the module, a dim wireless network icon with a small snowflake will appear in the clock area. This means that Wi-Fi is not connected to the network.
- Click LMB on the “ Network ” icon. You will see a list of networks (SSID) that the laptop sees. Click LMB on the one you want to connect to. Check the “ Connect automatically ” checkbox. So that in the future, when you turn on the laptop, an automatic connection to this network occurs. Next, click the “ Connect ” button and enter the security key, “ Next ”.
Checking the network card settings
If, after connecting to the WiFi network, the Internet does not work, then you need to check the network settings:
- Left-click on the “ Network ” icon, “ Network settings ”.
- Then we go to the very bottom and click “ Configure adapter settings ”.
- In the new window, right-click on the “ Wireless Network ”, “ Properties ” icon.
- Next, double-click to enter “ IP version 4…. " Check that the dots are opposite the line “ Obtain an IP address automatically ”; DNS should also be issued automatically.
That's all, you have successfully connected to wifi on your Windows 10 laptop. Perhaps
Possible problems and their solutions
There are a number of problems due to which you will not be able to connect to the Internet, in particular, on various versions of Windows: Windows 7 and higher. If your computer does not connect to Wi-Fi, make sure the board is securely connected. Try inserting other equipment into the USB or PCI ports. If it works properly, this means that the problem is in the modem itself. The board may be physically damaged.
In some situations, you will need to enable the adapter hardware on your computer. This can be done in a few simple steps:
- Right-click on the My (This) Computer shortcut and then click Properties.
- Go to the "Device Manager" section.
- Find your adapter. Go to its properties.
- Click the "Enable" button.
If you find an exclamation mark in a yellow triangle next to the device, the problem is with the drivers. Try reinstalling them or look for a different version. Make sure the driver is suitable for your operating system version.
Your computer may also receive error 651 miniport wan. Its reasons may be:
- the connection is blocked by an antivirus or firewall;
- you enter the password or login for your connection incorrectly;
- the conflict is caused by the network card;
- The problem is on the provider's side.
Try restarting your computer and then reconnecting the adapter. In the Device Manager window, disable the network card and check the operation of the computer's routers. Try running diagnostics in the adapter properties. In some cases, the troubleshooter corrects errors by setting the correct gateway.
How to easily forget (delete) the network and connect to the wifi network again on Windows 10, 7
Let's look at how to remove a previously saved Wi-Fi network on Windows 10 and Windows 7
How to forget the Wi-Fi network on Windows 10
- Click LMB on the “ Network ” icon, “ Network settings ”. Click on the line “ Manage known networks ”.
- You will see a list of Wi-Fi networks ever saved on the laptop. Click LMB on the network you want to forget, click “ Forget ”. Now, if necessary, you can reconnect.
How to remove a Wi-Fi network on Windows 7
- Click LMB on the “ Network ” icon, “ Network Control Center .....
”, “
Manage wireless networks ”.
- A window will appear in which all WiFi networks will be displayed. You need to right-click and delete the unnecessary network.
Connecting a Wi-Fi adapter to a PC
After installation, the adapter will not work correctly, or the Internet connection will be unstable. What to do? Set it up.
Installing drivers
The devices operate in Plug and Play mode. Once you have managed to connect the WiFi adapter to your PC, it is ready to work. In the OS, when connecting new equipment, the search for drivers occurs automatically. Automatic setup may not work on budget models. Then you will have to download the driver yourself from the official website and install it.
After installation, on your PC, click the network icon in the tray. Select the created network. The maximum Internet connection speed depends on the adapter and router. For example, a router with a specified speed of up to 1000 megabits per second transmits values close to the maximum over the wire. Wi-Fi software will not transmit the same stream width. Therefore, in order to achieve maximum performance, the technical characteristics of the router and adapter must match each other.
Equipment selection rules
To form your own virtual line, you will need the following elements:
- Modem and broadband internet connection.
There are the following high-speed connection options: cable and using DSL technology. To obtain such a service, you need to contact a service provider who will provide the end user with a broadband modem.
Some companies additionally offer wireless routers; in other cases, they will have to be purchased separately in specialized computer hardware and electronics stores.
- Wi-Fi router.
The router is responsible for sending data between the Internet and the home network. Using a router allows you to connect equipment without using cables. To complete the task, separate technologies are used: 802.11 a, 802.11 b, 802.11 g, 802.11 n, 802.11 ac, 802.11 ax.
Today, preference should be given to models with support for 802.11ac or 802.11ax
- Wireless network adapter.
It refers to a device responsible for creating a connection between a router and a personal computer. Not all units are initially equipped with it; in some cases, for stationary PCs, an additional purchase is required.
To determine whether it is present in the equipment, you need to carry out a simple check: go to the main menu -> find the device manager in the list -> expand the network adapters block -> find the desired unit in it.
The specified equipment is enough to connect all the equipment in the house to Wi-Fi.
USB network adapter TP-Link TL-wn822n
Quick Setup
Often router manufacturers provide quick setup options. In the web interface, you need to enter the “Quick Setup” section, and then click “Next”.
Next, the wizard will quickly guide the user through all stages of the connection. You just need to mark and enter the parameters specified in the agreement with the provider.
Location of the wireless router on the network
Your wireless router should be located where it can receive a strong signal with minimal interference.
For best results, use the following tips:
- Place your wireless router in the center. The router should be placed closer to the center of the house to provide a strong wireless signal throughout the house.
- Do not place the wireless router on the floor or near walls or metal objects such as metal filing cabinets. The fewer physical obstacles there are between your computer and the router, the stronger the router's signal will be.
- Reduce clutter. 802.11g networking equipment uses a radio frequency of 2.4 gigahertz (GHz). Microwave ovens and many cordless phones typically operate on this frequency. When you turn on the microwave oven or receive a call on your cordless phone, the wireless network signal may be temporarily interrupted. Most of these problems can be avoided by using a high-frequency cordless phone (such as 5.8 GHz).
File and Printer Sharing
Mostly, a wireless network is installed in order to have access to the Internet from any room in the house, but users also need wireless access to files and printers.
File sharing
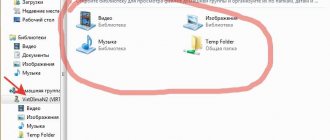
The easiest way to share files online is to set up HomeGroup Sharing . If you don't have a homegroup, you can share files by placing them in a folder in the Public Folders section. Network-connected users automatically share all files or folders in the shared folder.
To grant access to a shared folder, follow these steps:
- Open the advanced sharing settings window.
- Click the double arrow to expand your current network profile.
- In the Sharing of the General folder box, select one of the following options:
- enable sharing so that all users with network access can read and write files in shared folders;
- disable access to the shared folder (users connected to the computer still have access rights to these folders).
- Click the Save Changes button.
The above steps must be completed on all computers that host shared files.
To share your own files, save or copy the files to a folder on your computer. There is a shared folder for each type of library (Documents, Music, Pictures, and Videos). Each person who has an account on the computer has access to these folders.
For example, to open the Shared Documents folder, do the following:
- Open your document library.
- In the Navigation Pane, under Libraries, double-click Documents, then double-click Shared Documents.
Printer sharing
If you have a printer connected to one of the computers on your network, you can print to it from any computer connected to that wireless network. The easiest way to share a printer is to select the Printers checkbox when setting up your HomeGroup.
If you don't have a homegroup, you can follow these steps:
- Log in to the Windows system to which the printer is connected.
- Open the Advanced Sharing Options window.
- Click the double arrow to expand your current network profile.
- Under File and Printer Sharing, click Turn on File and Printer Sharing, and then click Save Changes.
Note: If password protected sharing is enabled, users can use an account with a password to access the printer.
To access the printer from any computer on the network, follow these steps:
- Open the Network folder.
- Double-click the icon of the computer to which the printer is connected.
- Double-click the printer icon. Windows will automatically add and install a printer driver to your computer.
