Hello. Using Bluetooth settings on Android, you can synchronize many gadgets with your smartphone: wireless headset (headphones), computer, mouse, keyboard, printer, camera, joystick, auto scanner, another smartphone or tablet, anything that supports Bluetooth communication.
On Android devices, Bluetooth settings have a special section, by going to which you can familiarize yourself with a few settings.
Information on settings is collected for Android OS 9. They differ slightly from older versions
Bluetooth technology capabilities on Android
Bluetooth technology appeared on the market in 1998 and immediately gained popularity among developers of multifunctional gadgets. This method of transmitting information has become a new alternative to the infrared ports that were used before. The reason for the popularity of Bluetooth technology is its transmission speed.
The first samples of Bluetooth modules transferred files at speeds of up to 721 Kb/s, modern ones - in large portions up to 24 Mb/s.
To pair devices via Bluetooth, Internet traffic is not used; you just need two devices with working modules.
With the advent and development of Wi-Fi, the popularity of Bluetooth technology has not decreased, because it uses an order of magnitude less energy resources. For this reason, wireless headphones, sports bracelets, smart watches and other Bluetooth devices are created.
Enable Bluetooth in 2 taps
Starting with Android 3.0, smartphones received a convenient drop-down menu at the top. It has a huge number of advantages and features, and most importantly, it allows you to enable everything you need in two clicks. Therefore, we unlock the smartphone and swipe from top to bottom, and then again to “pull out” the entire menu.
There will definitely be a Bluetooth sign throughout the menu. In my case it is at the very bottom. Just click on it and Bluetooth on your smartphone will be turned on.
This means that other devices can now find your smartphone, transfer files, or communicate with it via Bluetooth. Bluetooth itself consumes little energy and operates at a distance of up to 10-20 meters. It is advisable, but not at all necessary, to keep it turned off. This way you will save some battery power; Bluetooth itself is most useful only for owners of wireless headphones.
Setting up Bluetooth on Android devices
With proper configuration of the Bluetooth module, you can get the maximum level of comfort from use: quick pairing with other accessories, high data transfer speed. A user who knows how to set up Bluetooth on Android receives acceleration and stabilization of the process of transferring any files, from work documents to video footage.
Turning on the Bluetooth module
Setting up any equipment running the Android operating system begins directly with its activation, that is, you need to turn on Bluetooth on the Android tablet. To do this, open the settings menu, find the Bluetooth section and move the slider to the right.
Some module settings will only become available after you activate the transmitter.
Renaming a device
When you select the “Rename device” menu item, you can change the standard name of the gadget to a more recognizable one, which will be displayed on other devices during the pairing process or at the time of data transfer.
Manufacturers often use the name of the gadget model with nomenclature as a standard name. The user can use any characters in the name. If they decide to send you information, the opponent needs to know the name of your device.
Device visibility
For security reasons, all Android devices are initially in an invisible position. This setting is changed only long enough to find and pair the two devices. In earlier versions of the Android operating system, the user had to enable this feature manually.
Currently, you can simply go to the Bluetooth settings, the device will automatically switch to visible mode. Next, wait until your opponent’s gadget scans the network for available devices.
Setting up paired devices
When you connect to any device for the first time, the Android system prompts you to set up pairing. It’s worth agreeing, since later you will no longer have to scan the system and force your opponent to switch to visible mode to connect.
Paired devices can transfer data to each other even while in stealth mode. At the same time, for convenience, you can change the name of a particular gadget in the settings of paired devices.
Other pairing settings remain unavailable even for users with rooted devices (with full usage rights).
Viewing received data
A useful setting for the Bluetooth module is the “Received files” item. This setting takes the user to a folder where all files from other devices received via Bluetooth are saved.
This directory is created by default on the internal storage of the device. If desired, all files from this directory can be moved to other partitions, for example, to an external drive.
The convenience of this function is to gain access to data without wasting time searching for the file manager. When you select it, a complete list of previously received information opens.
How to set up Bluetooth
What users can do:
- change the device name;
- enable visibility mode;
- rename connected devices;
- break a previously created pairing.
The set of available functions may differ depending on the device firmware and OS version.
Activate and enable visibility
There are two ways to turn on/off BT. First:
- Expand the quick access curtain.
- Tap on the shortcut "Bluetooth».
Second option:
- Open "Settings" Go to " Bluetooth».
- Move the toggle switch to the active position opposite the function name.
Without leaving the settings, activate “ Visibility ”. This is necessary so that other devices in range can find and transmit information to the device. The option is hidden in an additional menu located in the upper right corner.
On older phone models, visibility is enabled when the user is in the BT settings.
Change name, cancel pairing, enable profiles
Without leaving the technology settings:
- Click on "Name Bluetooth».
- Use the keyboard to change the device name.
We recommend: VLC for Android
The names of previously connected devices are changed as follows:
- Go to interface settings. In the line with the name of the previously connected device, tap on the “ i" or hold your finger and select "Properties».
- Click on "Rename" and change the name.
Without leaving this menu, you can:
- «Cancel pairing»;
- activate the HSP/HFP and A2DP profiles - necessary for the operation of mono and stereo headsets.
In the “ For Developers ” menu there is a choice of audio codec, sampling frequency and audio channel mode, which are necessary to configure the sound in wireless headphones and speakers. Read more about these parameters in the article about connecting Bluetooth headphones.
Using the engineering menu to configure the Bluetooth module
The engineering menu is a tool that software developers use to make final adjustments before releasing a system. The Bluetooth setting in the Android engineering menu should remain unchanged unless you have the proper knowledge and experience.
To enter this menu item, when dialing a number on a phone or tablet, enter one of three digital-character combinations: *#*#3646633#*#*, *#*#4636#*#* or *#15963#*.
In the device information section, find the Bluetooth module settings. Run a rescan and change the search parameters. But it is better to refuse such rash steps, since any changes can lead to serious mistakes.
Update
One of the most frequently asked questions from our readers on the topic of this article:
Is it possible to update the Bluetooth version on Android and how to do it? Is it possible to install Bluetooth, and what program should I download for this?
The only correct answer:
It is forbidden. No way.
We are talking specifically about updating the Bluetooth version. Bluetooth itself is a hardware module. If you want to update the version, you will have to change the module itself. In general, this is not done on phones, so purchase a new phone for this task.
But why do you need this update at all? For primitive tasks, all versions of Bluetooth are backward compatible. Those. your 4.2-enabled device will easily connect to another 5.2-enabled device. And for most tasks this is enough.
If you meant updating not the version, but the list of devices, see below.
We have a good article on checking the current version
Computer or laptop
- Find the icon in the lower right corner of the screen in the tray. If you don’t see it, then click on the arrow that points up. Next, click on the icon we need.
- You should now see all devices available for pairing.
- To check that the device is connected, you can also go to “Start” - “Settings”.
- In the Bluetooth section you will see the name of the second device and the signature “Paired”.
On Windows
If there is no Bluetooth connection and the adapter icon is not in the notification center, go to Device Manager. Find Bluetooth. If the radio module icon has a down arrow, it means it is simply turned off. Right-click on it and select “Enable device”.
If the Bluetooth item is missing, look for unidentified hardware components. To do this, click on the “Update hardware configuration” button.
When unidentified devices appear in the list, run a driver search for them. To do this, right-click on the unknown component and select “Update drivers.”
It happens that Bluetooth is displayed normally in the manager, but it is impossible to connect a third-party device to it. In this case, you should try to update the driver for the module. Right-click on Bluetooth and select Update Driver. You can choose to automatically search and install, or you can tell the system the folder in which it will look for the required software.
If the system does not find a driver for the module, look for it by identifier on the Internet. To find out the identifier, open the module properties in Device Manager. Find the Details tab and select Hardware ID from the list.
The driver can be presented as a separate installation package or as an inf file. The installation package just needs to be launched. The inf file is installed by searching for the driver in the device manager. The user can specify the file location path or select the desired folder through the browse.
Disabling devices
- In the list of connected devices (Settings - Bluetooth) we look for the device you need to delete (sometimes this is necessary, for example, to repeat the connection during the first pairing failure). And opposite it, click on this arrow:
- Inside, click the “Disable” button.
On Macbook
If the module icon is gray and has a broken line at the top, it means the component has switched to offline mode. To resolve this issue, you need to restart your Macbook.
If after restarting the radio module is still unavailable, you must disconnect all USB devices and repeat the procedure again. Bluetooth can also be reset separately. To do this, hold Shift + Option and click on the radio module icon. An extended menu will appear. In it, select “Debug” and then “Reset module”. The component will be reloaded.
One of the drastic solutions to the problem is to update MacOS. To do this, go to system settings and click on “Software Update”. A list with all updates will appear. To start the installation, click on the “Update Now” button.
Deleting damaged settings files is another way to quickly restore Bluetooth functionality. Procedure:
- Launch the folder navigation window using the combination Shift + Command + G. Enter /Library/Preferences in the line.
- In the folder that opens, delete the file com.apple.Bluetooth.plist.
- Launch the Browse to Folder window again and enter /Library/Preferences/ByHost.
- Delete the file com.apple.Bluetooth.uuuuuuuuu, where uuuuuuuuu is any numbers and letters.
- Reboot your device.
After a reboot, the system will recreate the files again.
A complete reset of the system settings can also help restore the functionality of the Bluetooth module. To do this, you need to clear NVRAM.
Procedure:
- Turn off your device.
- Turn it on and immediately hold down Option, Command, P, R.
- Hold them for 20-30 seconds.
- The image on the device screen will go dark. Release the keys a few seconds after rebooting.
A full reset is only possible if there is no password on the firmware. If a password is set, the operation will be rejected. The system will start in recovery mode. To reset the settings, you first need to remove the password.
Inclusion
The most common case for all versions of Android.
- Go to Settings – Bluetooth
- Turn on the toggle switch.
That's it, Bluetooth is turned on. Another quick option to enable is to use the curtain on your phone:
Possible problems
Let's look at the main reasons why your module may refuse to work stably or completely stop functioning. If you have checked the presence of a radio module, activated it, updated the driver, one of the following solutions may be relevant for you.
- A hardware failure in which the adapter does not see the installed drivers. To get started, simply restart your computer. If this does not help, remove the current driver through Device Manager and download it again. Make sure there are no exclamation marks next to it.
- Some models, in addition to the wireless module driver, require a chipset and power supply update.
- Scan your laptop for viruses, as they can also interfere with the normal operation of this radio module.
- Also, many people forget to activate Bluetooth on the paired device they are trying to interact with.
- Find the Bluetooth icon in the system tray and right-click on it. From the list that appears, select Open Settings. Enable device detection by checking the appropriate box. Next, go to the “Sharing” tab and also use the checkbox to allow searching, transferring and receiving files.
- The Bluetooth adapter has failed. In this case, we recommend using the services of a service center.
Now you know how to connect Bluetooth on a laptop. In addition, we examined the installation of drivers for the wireless network adapter and its launch on different versions of Windows. Now you will no longer have problems connecting other devices to your laptop or transferring data. As you noticed, there is nothing complicated about this. Share your experience in the comments!
Client
To initiate a connection with a remote device (the device that holds the server socket open), you need to obtain a BluetoothDevice object containing information about it. This object is used to receive a BluetoothSocket and initialize the connection. Let us describe the connection procedure:
- Let's get a BluetoothSocket by calling the BluetoothDevice.createRfcommSocketToServiceRecord(UUID) method. The value of the UUID parameter must match the value specified when calling listenUsingRfcommWithServiceRecord to the server.
- We initialize the connection by calling the connect() method. After calling this method, the system will perform an SDP lookup on the remote device to match the UUID. If successful, subject to confirmation of the request from the server, the RFCOMM channel will be opened. This is a blocking call. If for some reason the connection fails or the timeout occurs (about 12 seconds), an exception will be generated.
As with accept, the connect() method should be executed in a separate thread, otherwise the interface may hang. Comment. Before calling connect(), make sure that no scanning is currently running to find available devices. If these operations are performed simultaneously, the connection will be established much slower, and you risk not meeting the timeout. Here is an example of a client application that initiates a connection
privateclass ConnectThreadextends Thread{ private final BluetoothSocket mmSocket; private final BluetoothDevice mmDevice; public ConnectThread(BluetoothDevice device){ // use an auxiliary variable, which we will later // associate with mmSocket, BluetoothSocket tmp=NULL; mmDevice= device; // get a BluetoothSocket to connect to a BluetoothDevice try{ // MY_UUID is the UUID that is also used in the server tmp= device.createRfcommSocketToServiceRecord(MY_UUID); } catch(IOException e){} mmSocket= tmp; } public void run(){ // Cancel scanning as it slows down the connection mBluetoothAdapter.cancelDiscovery(); try{ // Connect to the device via a socket. // The method blocks program execution until // a connection is established or an error occurs mmSocket.connect(); } catch(IOException connectException){ // Unable to connect. Close the socket and exit. try{ mmSocket.close(); } catch(IOException closeException){} return; } // manage the connection (in a separate thread) manageConnectedSocket(mmSocket); } /** cancel socket wait */ public void cancel(){ try{ mmSocket.close(); } catch(IOException e){} } }
To stop scanning the airwaves, the cancelDiscovery() method is called. Before calling this method, you can check whether scanning is in progress using isDiscovering(). Always call the close() method when you are done with the BluetoothSocket. This will help save phone resources.
Server
When connecting devices, one of them must behave as a server, that is, hold an open BluetoothServerSocket. The server's purpose is to wait for a request for an incoming connection, and when it is confirmed, create a BluetoothSocket. After this, BluetoothServerSocket can be closed. Let's consider the connection procedure step by step from the server's point of view:
- Get a BluetoothServerSocket by calling the listenUsingRfcommWithServiceRecord(String, UUID) method. The first parameter of the method is the identifying name of your service. The system will automatically add it to the Service Discovery Protocol (SDP) database. Typically, this parameter is simply specified as the name of the application. The second parameter also identifies the service. This parameter is used by the client when confirming the connection.
- We start listening for connection requests through the accept() method. This is a blocking method that returns a result either when the connection is confirmed or when an exception occurs. The connection is considered confirmed when the remote device sends a connection request to the UUID specified when registering the server socket. If successful, accept() returns the BluetoothSocket configured for the connection.
- If you want to accept an additional connection, call the close() method. This will release the socket and all its resources, but will not close the connected BluetoothSocket. Unlike TCP/IP, RFCOMM allows you to work with only one client on a channel, so in most cases it makes sense to call the close() method on the slice after setting the socket to accept.
Since the accept() method is blocking, it should not be called from the main activity thread, as this will cause the interface to freeze. Typically, all work with BluetoothServerSocket and BluetoothSocket is performed in a separate thread. To stop executing the accept() method, call the close() method on the BluetoothServerSocket (or BluetoothSocket) from any other thread in your application. Below is an example of a thread that implements the mechanism described above:
privateclass AcceptThreadextends Thread{ private final BluetoothServerSocket mmServerSocket; public AcceptThread(){ // use an auxiliary variable, which we will later // associate with mmServerSocket, BluetoothServerSocket tmp=NULL; try{ // MY_UUID is the UUID of our application, the same value // is used in the client application tmp= mBluetoothAdapter.listenUsingRfcommWithServiceRecord(NAME, MY_UUID); } catch(IOException e){} mmServerSocket= tmp; } public void run(){ BluetoothSocket socket=NULL; // wait until an error occurs or the socket // is returned while(true){ try{ socket= mmServerSocket.accept(); } catch(IOException e){ break; } // if the connection was confirmed if(socket!=NULL){ // manage the connection (in a separate thread) manageConnectedSocket(socket); mmServerSocket.close(); break; } } } /** cancel waiting for a socket */ public void cancel(){ try{ mmServerSocket.close(); } catch(IOException e){} } }
This example assumes that only one connection can be established, so after the connection is confirmed and a BluetoothSocket is received, the application sends it to a separate thread, closes the BluetoothServerSocket, and exits the loop. Note that when accept() returns a BluetoothSocket, the socket is already connected, so there is no need to call the connect() method. manageConnectedSocket() is a method within which you need to create a stream to transfer data. Its possible implementation will be discussed below. You should close the BluetoothServerSocket immediately after finishing listening for an incoming connection. In the example above, the close() method is called immediately after receiving the BluetoothSocket object. You may also need a public method to stop a private BluetoothSocket.
What devices have it and how to find it
Bluetooth is present in gadgets that require wireless transmission of information over short distances:
- smartphones;
- laptops;
- tablets;
- printers;
- digital cameras;
- wireless mice;
- keyboards and joysticks;
- headphones, headsets and speaker systems.
The list is constantly being updated, so don't be surprised if it turns out to be incomplete.
Bluetooth is installed in devices that can be called portable. It will definitely be on smartphones. It occurs often in laptops, but not in all. About a third of laptops may not have Bluetooth, so as not to increase the price. On computers it is not included in the standard assembly, but those who wish can always purchase a board or an external adapter.
All small devices labeled as “wireless” have it installed by default and are usually turned on immediately upon startup to make it easier to find and connect to.
Data transfer
After a successful connection, each of the connected devices has a BluetoothSocket object with which it is easy to transmit/receive data:
- Using the getInputStream() and getOutputStream() methods, get the InputStream and OutputStream objects that control transmission over the socket.
- Read and write data to a stream using the read(byte[]) and write(byte[]) methods.
You must use a separate thread to read and write data. This is important because the read(byte[]) and write(byte[]) methods are blocking and calling them on the main thread can paralyze your program. The main loop in this separate thread must read data from the InputStream. To write to OutputStream, it makes sense to create a separate public method.
privateclass ConnectedThreadextends Thread{ private final BluetoothSocket mmSocket; private final InputStream mmInStream; private final OutputStream mmOutStream; public ConnectedThread(BluetoothSocket socket){ mmSocket= socket; InputStream tmpIn=NULL; OutputStream tmpOut=NULL; // Get incoming and outgoing data streams try{ tmpIn= socket.getInputStream(); tmpOut= socket.getOutputStream(); } catch(IOException e){} mmInStream= tmpIn; mmOutStream= tmpOut; } public void run(){ byte[] buffer=new byte[1024];// buffer array int bytes;// bytes returned from read() // Listen to the InputStream until an exception occurs while(true){ try{ // read from InputStream bytes= mmInStream.read(buffer); // send the read bytes to the main activity mHandler.obtainMessage(MESSAGE_READ, bytes,-1, buffer) .sendToTarget(); } catch(IOException e){ break; } } } /* Call this method from the main activity to send data to the remote device */ public void write(byte[] bytes){ try{ mmOutStream.write(bytes); } catch(IOException e){} } /* Call this method from the main activity to close the connection */ public void cancel(){ try{ mmSocket.close(); } catch(IOException e){} }
The constructor creates objects to work with data streams, after which the stream animates the incoming data. After the next block of data is read from the incoming stream, it is sent to the main activity by calling the Handler method of the parent class. To send data from the main activity, simply call the write() method. Inside this public method, a call to write(byte[]) occurs. The close() method can also be called from the main activity. He breaks the connection.
Translation: Alexander Ledkov
Source: developer.android.com
Reset
Another item in the collection of useful actions. To reset Bluetooth settings on Android (sometimes necessary for the correct operation of devices or applications), you can do the following:
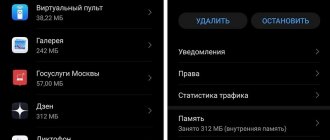
- Settings – Applications – All applications (the last item depends on your version of the system and shell, but we need to get exactly the complete list of installed applications).
- We are looking for the Bluetooth application (note that the application version should not be the same as the hardware version).
- We are looking for all possible cleaning methods: “Clear cache”, “Clear data”, “Clear all”. For me it's like this:
After resetting, it is always recommended to restart your phone.
Changing the device name
Why do you need to change your name? So that your phone can be easily found by other devices via Bluetooth (for example, you are looking for your phone on a laptop) or conveniently found in the list of already connected devices (for example, several Bluetooth devices are connected to your car, but you want to take sound only from your phone) .
You can change the name here:
Settings – Bluetooth – Device name


