Good day, dear friends! Fedor Lykov is in touch. Today I want to talk about how to set up a webcam on a computer and how to use it?
I think nowadays a lot of users use cameras for video calls, both personal and work related.
And they all use two types of cameras:
- Built-in - immediately present in the laptop, they can be found on the external top panel.
- External – they can be purchased separately and installed on your computer.
Checking the camera's functionality
There are several simple methods that will help you find out how to set up the camera on a Windows laptop and whether it is necessary at all.
First of all, we’ll find out whether the camera is in working condition; perhaps no action is required, and you just didn’t know how to start it. For this purpose, you can use the Live Webcam program - a very simple utility that works with the camera, you can also use online services. In the case of Live Webcam, the actions are elementary and boil down to downloading and launching the program. After starting the program, you will be taken to the main menu, where the image from the camera will be broadcast.
Another way is to use online sites. For example, go to https://webcamtest.ru or https://webcammictest.com/ru/ and click the corresponding button. After this, the browser will display a dialog box asking you to allow Flash Player to use your camera.
An alternative method for owners of Acer or Asus laptops. The application package contains standard programs, such as CrystalEye, ECap Camera or others. To launch them you need to use the hot keys Fn + V or find them using search. The interface is intuitive and even an insecure user can figure it out.
Often, any problems with the camera arise not so much due to physical wear and tear of the device, but rather due to a software failure or lack of drivers. Therefore, when analyzing how to set up a camera on a laptop Windows 7 and higher, one cannot help but mention a possible problem due to a disabled device.
To perform diagnostics you should:
- Click Start and RMB on “Computer”, where select “Properties”;
- Go to the "Device Manager" link;
- Find the “Image processing devices” section, perhaps such an item is missing or empty, then you need to move on to the next section;
- Right-click on the “Integrated Web Camera” item and select “Enable”.
This option allows you to enable camera support for applications if it is disabled at the system level. This is possible as a result of using an external camera and the built-in one turned off or due to intentional actions.
Installing drivers for a webcam
This section is a branch of the previous one and is relevant if you did not find your camera among the devices or it is reflected with a yellow exclamation mark. This indicates that there are no drivers installed or that they are faulty. Typically, such problems arise due to unqualified installation of Windows, when a large part of the system is not able to work normally due to drivers, or rather the lack of them.
You can improve the situation with:
- From the same manager panel you need to find the “Other devices” section, or among the “Image processing devices” there will be a camera with an exclamation mark;
- Right-click and select Update Drivers. If the system can find the original drivers, then select them. Afterwards, check the functionality of the camera, if it doesn’t help, then read on;
- Go to the laptop manufacturer’s website and in the “Support” section, find your model and download the drivers. After installation, the problem should disappear;
- You can also set up a camera on a laptop, built-in or external, if you use the device ID. This information is found: double click on the device and go to the “Information” tab, where select “Equipment ID”. By copying the string and entering it into the search on the site https://devid.info, you can find out the exact name of the device and download the driver from here or from another site.
Usually this method helps users, since the problem most often appears due to the laziness of the Windows installation wizard, and without a connecting link, in our case, a driver, the webcam will not work.
Install/update drivers
Manual method
- Right click on the webcam in Device Manager
and select "
Update driver
»; - In the window that opens, select the update method:
- Automatic search. Windows 10 will attempt to find a suitable driver on the Internet.
On this computer. It makes sense to use this option only if you have downloaded the driver to your hard drive in advance.
How to enable a webcam on Windows 7
To do this, you will need to do some things, such as.
- First of all, you need to check whether the device is even in our “Device Manager”. To do this, you need to write this query yourself in the search, and then open it.
- Among everything that is there, you need to find the item “Image processing device. We open it and look for our camera there.
- If this item is not there, then first you need to click on “Update configuration”. This button is located at the top.
- If even after this the required item is not there, it means that our PC simply does not see the device. Here you will have to search separately in a search engine. We enter the search for the name of the laptop model, then the model, and then the drivers for Windows. After the necessary drivers have been downloaded and installed, you should repeat the previous steps again. If everything is displayed as needed, then move on.
- If Device Manager sees the camera, it means it is simply turned off. It needs to be turned on. Right-click on it and click “Engage”.
- If after this the device does not start working, then you should click “Update drivers” in the same window where we clicked enable. This is possible when drivers have been downloaded for an outdated version, and they are not fully supported on Windows 7. You can enable automatic drivers. This way the system will be able to update itself and start working.
Checking the status of the webcam in the system
To check the operation of the webcam in Windows, use Device Manager. You need to do the following:
- Open "Control Panel".
- Go to the "Device Manager" section.
- Having found the name of your webcam, right-click on it and select “Properties”.
The window that opens will display the camera status. The inscription “The device is working normally” indicates its serviceability. Other messages in the status bar will indicate various errors, which are discussed below.
Enabling the video camera through Device Manager
If we are talking about the seven, then you can turn on the device using the device manager. To connect the camera this way, you need to follow a few simple steps:
- Open the Start menu and go to the Control Panel section.
- Find the subsection “All elements”.
- Next go to “Device Manager”.
- Then open “Imaging Devices”.
- Find the webcam in the list provided and open the context menu.
- Click on “Engage”.
- Complete the process by rebooting the computer.
Windows 7: how to check the camera on a laptop
Checking the Windows 7 webcam is not a complicated process, but it does require some understanding of the steps. Therefore, below is information on how to check the webcam on Windows 7.
Note! On computers with version 7 of the basic Windows software installed, the operation of the video camera cannot be checked using the operating system. Third-party applications are used for this.
Despite the fact that the seven does not contain functionality for checking the functionality of the camera, downloading additional applications is not required to test the image. One existing program that involves the use of a webcam will be quite enough. The most popular among them are Skype, Media Player Classic, PotPlayer, etc.
To test the performance of your webcam using Skype, follow these steps:
- Skype starts. To do this, click on the program shortcut.
- Next you need to open the main menu.
- Go to the "Tools" section.
- Then go to the “Settings” section.
- Select the “Video Settings” function.
- Check camera operation and adjust image parameters.
The Media Player Classic Home Cinema application will also help you configure the camera mode. And most likely, this video player is already installed on your computer, since it is included in the standard K-Lite package. To make sure the webcam is working using Media Player Classic, you need to launch the player. Next, go to the “File” section, which is located in the horizontal menu at the top. Select the “Open devices” function and get the desired image.
Note! In some versions of the program, you will also need to set basic camera settings, which are done through the “View” section of the application.
Media Player Classic Home Cinema
The popular player Daum PotPlayer has even more functionality than the previous application. It will allow you not only to check the operation of the camera, but also to write videos with the application of various filters.
Another way is to use specialized online services like WebcamToy. With their help, you can take photos from a webcam, process them, shoot videos and apply various effects.
Important! Images taken using such services are available only to the user.
Online service for checking the camera WebcamToy
Setting up the camera in Windows 7
Do not miss:
- All methods and programs to dock a window on top of all windows in Windows
- The best tablet manufacturers. Which tablet company should you buy?
- Google play services error: what are they and instructions on what to do
Since this version of the operating system does not have its own application for working with the camera, configuration is carried out using third-party utilities. One of the simplest options that works well with a system of any power is the AMCap application. It is designed for photography and video recording. It has many options that help solve the problem of how to set up a camera on a Windows 7 laptop. Most of them are concentrated in the Options tab. In it, you can make the picture on video and photo acceptable by dragging the sliders in the lines:
- white balance;
- brightness;
- shade;
- contrast;
- definition;
- gamma;
- saturation.
You will also find additional options such as shooting against the light and gain. You can find similar functionality in the Skype menu. This will help you use your camera for calls, while still showing the most normal picture possible.
Enabling and setting up the camera on a Windows 10 laptop
Now let's move on to the question of how to enable the camera on a Windows 10 laptop. Activating the camera on XP, 8 or 10 laptops is much easier - the creators of the operating systems have provided easy access to them. In XP, the camera can be found through the “My Computer” menu, and in versions 8 and 10 of the OS there is a special “Camera” application that can be used for taking photos and recording videos. This opportunity in modern operating systems has appeared due to the fact that they are installed not only on laptops and desktop PCs, but also on tablets. You only need to do the following:
- Open the Start menu. Go to the "All Applications" directory
- In the list that opens, go to the letter “K”.
- Select the Camera app and double-click to turn it on.
Now let's move on to how to set up the camera on a Windows 10 laptop. To do this, the application has a gear icon in which you can set the image parameters:
- release delay for photos;
- flicker reduction;
- video quality;
- Displays the framing grid.
But there are also additional settings that will help you limit the access of certain applications to the recording equipment, as well as forcefully enable or disable it. To do this, select the Settings tab from the Start menu and go to the Privacy section. Here you can block all or individual applications from using the camera. Just select the control item on the right side of the menu.
Troubleshooting
When checking the status of the webcam in the system through the device manager, you can see more than 50 error options. Most of them can be resolved by reinstalling or updating drivers, but there are a few more cases that are worth considering separately.
Privacy settings. After updating your operating system, default applications may be blocked from accessing your webcam. To allow programs to use the webcam, you need to:
- Open the Start menu and go to Settings.
- Open the “Privacy” subsection, select the “Camera” tab.
- Enable the Allow apps to access the camera option.
- Below, the system will also prompt you to select which programs will be able to use the device.
Webcam blocking by antivirus. Some antivirus software has the ability to block third-party applications from accessing the built-in camera. You need to disable this feature in your antivirus settings.
Lack of webcam in the computer device manager (for connected cameras). In this case, you should try connecting it to a different port. If the PC still cannot detect the camera, you should:
- Enter "Device Manager".
- Open the “Action” tab and click “Update hardware configuration”.
- Wait until the system finds and installs new drivers.
- To restart a computer.
Possible problems and their solutions
Even a new device may be faulty or unable to be configured. If the camera does not want to connect to the computer, then the device may have a manufacturing defect.
You can check the serviceability in the “Device Manager” - if the purchased device is not displayed in the “Other devices” section, then it is faulty. When a name with a yellow triangle is displayed, you need to disconnect and reinsert the cord into the USB port - most likely the camera is not connected correctly.
Problems with webcam operation can arise of various types, but most can be solved without changing the device.
- The camera has stopped working, although everything was fine before - you need to reinstall the webcam from scratch, the software may be damaged or the operating system on the computer has been reinstalled.
- Some functions do not turn on or the webcam stops recording during operation - such faults are usually caused by a damaged driver. Solution: download the latest version of drivers from the official website and install.
- The software does not start or the camera operates problematically - the operation of the device may be affected by the installation of new programs or the presence of a virus infection on the computer. Reinstalling the device from scratch helps.
- The camera constantly turns off and on, or is no longer detected by the system - you need to check the operation of the USB port, it may be damaged. You should also check the cord.
Almost all problems associated with the operation of a webcam can be solved by completely reinstalling the software for the device and updating the drivers. In some cases, connecting to a different USB port helps. It is important to update the software promptly and regularly; sometimes new versions of drivers correct factory and software errors.
Software installation and configuration
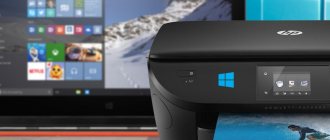
Step 1. Insert the CD that came with your webcam into your CD (DVD) drive, making sure that the manufacturer's logo is at the top of the disc.
Insert the CD that came with the webcam into the CD (DVD) drive
Since most modern MAC computers do not come with CD drives, you must use a separate CD drive connected via USB.
For MAC computers, a separate CD drive is used, connected via a USB connector.
Step 2: Once the CD is inserted into the CD/DVD drive, you need to wait for the software installation window to launch.
On a note! If the installation program does not start, launch the “Computer” icon on the desktop by double-clicking.
Double-click with the left mouse button to open “This PC” or “Computer”
Step 3. Click on the CD/DVD drive icon with the disc inserted, opening its folder.
Double-click on the CD-DVD drive icon with the disc inserted, opening its folder
Step 4. Run the software installation file Setup.exe by double-clicking on it.
Run the software installation file Setup.exe
Important! If the webcam CD is not supplied or a CD/DVD drive is not available, skip these steps.
Downloading software from the site
You can find and download the software for your specific webcam in the "Download" section of the webcam manufacturer's website.
You can download the webcam software in the “Download” section on its manufacturer’s website
Step 1. Before downloading the software, you must select the operating system in which the software will be installed and click “Download”.
Select the operating system and click “Download”
Step 2. After downloading the installation file, launch it with a mouse click. The software installation window will open.
Run the installation file
Software setup (example)
Step 1. Select a language and click “Forward”.
Select the language and click “Forward”
Step 2. If the webcam is connected, click “Forward”; if not, connect it to the computer and click “Forward”.
Click "Forward"
Step 3. Select the software to install and its installation location (it is recommended to leave it as “Default”). Click "Forward".
Selecting the software to install and where to install it
Step 4. After installing the necessary files, check the camera settings; its image should start in the central window. If necessary, adjust the webcam so that it looks at your face from your preferred angle.
Check the webcam sound. When speaking words into a webcam, you may notice a burst in the activity bar next to the “Audio” (or similar) section in the webcam window. Click "Forward".
Checking the settings
Reference! If you don't see any activity from your webcam microphone, it is likely not working and may need to be enabled through your webcam or operating system settings.
Step 5. To exit the installation process, click “Test my webcam”.
Click “Check my webcam”
Step 6: The camcorder software will launch. Its window usually has a settings section, often in the form of a gear icon. You can click the icon to view and change camera settings, including contrast, brightness, sound settings, and more.
Changing camera settings
Reference! If the webcam program does not open automatically after installation is complete, you need to find its icon on your computer and manually launch it by clicking the mouse.
Step 7. After making all the webcam settings, click “Save”.
Saving the settings
Some webcam settings can also be made when switching it to operating mode.
Webcam settings when switching it to operating mode
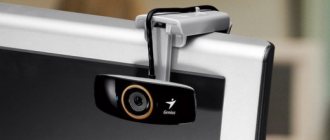
Installation
Installing the camera includes connecting it to a USB port and placing it on your desktop.
Accommodation
Cameras come with stands or clothespins. The first option involves installation on a table or shelf . The second allows you to attach the device to a monitor if it is thin enough. When installing a webcam, you need to make sure that you are clearly visible. To do this, it must be directed at you and stand at some distance.
Optimal placement if it has a stand:
- Under the monitor.
- To the side of the monitor.
- On the shelf on the side, at eye level.
If it has grips instead of a stand, then mount the camera on the monitor from the side that is convenient for you. Don't forget that placement depends on the length of the USB cable. For this reason, it will not be possible to place the device very high or far away. If desired, buy a USB extension cable and increase the distance from the computer to the webcam.
You can check whether you are clearly visible in the frame using Skype. Remember that the angle at which the lens is pointed at you determines how your interlocutor sees you. If he looks from below, then the chin seems more massive, if from above, then the forehead seems more massive.
Connection
If the kit comes with installation instructions, then find out from it what you need to do first: connect the device or install drivers, a disk with which may not be included in the kit. This happens when they are installed automatically.
The webcam is connected using a USB cable to the rear port of the computer . You shouldn't connect it to the port on the front of the case because it's used for devices that need to be unplugged frequently. The webcam is installed for a long time.
All wires that come from the webcam need to be connected. This could be a microphone wire, a second USB, or an electrical plug . The last two are used to power the device and without their connection it will not work.
Programs for working with a webcam
Let's look at the most popular options.
CyberLink YouCam
Cyberlink YouCam offers users advanced functionality to get the most out of their webcam. The program makes it possible to create clips, presentations, add dynamic effects, filters, colorful frames. Benefits of the application:
- screen capture function;
- use of special effects in real time;
- a large number of animated templates;
- built-in privacy protections;
- drawing tools.
The program is perfectly optimized for Windows 8 and 10. In addition, it has the function of remembering the user’s face.
ManyCam
ManyCam captures video from one or several cameras, has an online image editing function - the Skype interlocutor will immediately see the superimposed effects. Program features:
- setting resolution, number of frames per second;
- adding titles;
- combining filters;
- replacing the audio track;
- integration with all popular instant messengers.
"Camera" (standard application)
A standard program from Microsoft - for those who do not require complex functionality. “Camera” allows you to check whether the webcam is turned on, take a photo and shoot a video. The main advantage of the application is its intuitive controls. Additional functions here include:
- ability to set a timer for a photo;
- manual brightness adjustment;
- multi-shot;
- framing grid;
- flicker suppression.
ManyCam
Allows you to improve image quality. Adds funny effects.
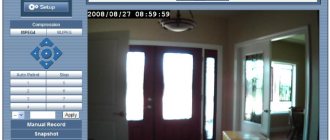
The application specializes in video surveillance and has the ability to constantly stream video over the global network. Supports simultaneous operation of several VKs. All captured videos are saved on the server. Allows you to remotely control whether the camera is turned on or off.
Setting up your webcam microphone
It is possible that the video from the webcam is transmitted, but the sound is not. In this case, you may need to configure the webcam microphone in your operating system.
Step 1: Right-click the Volume icon in the clock area and left-click Playback Devices.
Click on “Volume” and select “Playback devices” with the left mouse button
Step 2: Go to the Recording tab and right-click on the Microphone icon, selecting Properties.
Go to the “Recording” tab and right-click on the “Microphone” icon, selecting “Properties”
Step 3. In the “General” tab, in the “Controller” column, make sure that the required audio source (web camera) is selected. In the “Use of device” item, you also need to set the value “Use this device (on)”.
Set the value to “Use this device (on)”
Step 4. Go to the “Levels” tab, where you make sure that the microphone is not muted (the crossed out circle next to the speaker icon) and set the microphone volume in Desktop Microphone to 95-100%. You can also adjust the Microphone Boost level - it is usually set to 0 dB.
Setting microphone volume in Desktop Microphone
Step 5. To adjust the sound of the microphone after hearing your voice in the computer speakers, you need to go to the “Listen” tab and check the “Listen from this device” checkbox. After making all the settings, click “Apply”, then “OK”.
Step by step adjustment of microphone sound
For normal operation of the video camera, it is also necessary to monitor whether it is currently being used by other programs in the OS. In addition, when setting it up, you should read the “Operation Manual” to find out specific recommendations for working with the camera.
Video - How to connect a webcam to a computer without an installation disk
Camera disabled in BIOS
In rare cases, the built-in webcam may be disabled in the BIOS. Considering the fact that BIOS versions may be different, it is difficult to give specific advice in this case. Look for the webcam in the Advanced, I/O Port Access, Integrated Peripherals or Security sections. In the screenshot attached below, the camera is called “ Integrated camera”
“, your name may be different, but the line “camera” is most often present in the name.
Make sure that the setting responsible for the operation is set to “ Enabled
”.
How to check if the camera is working?
Many users check whether the camera works in the programs installed on the laptop. For example, they call friends and relatives on Skype. However, this method is not 100% reliable. The fact is that the webcam can be disabled in the settings of a particular application while it is in working condition.
Special online services allow you to find out whether the camera is really turned on. One of the simplest and most convenient is WebcamMic Test. To check the video camera, the user must:
- Go to webcammictest.com.
- Click on the “Check webcam” button.
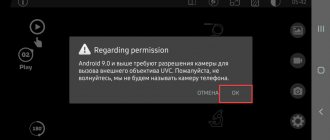
- When using the service for the first time, the browser may ask for consent to turn on the device. You need to confirm the action by selecting the “Allow” option.
If the camera is turned on and working properly, the user will see his image on the laptop or PC screen. Otherwise the following message will appear.
In addition, you can find out whether the webcam is turned on on the laptop even without access to the Internet. On computers with Windows 10, a standard application is installed that allows you to perform this check. You need to open the Start menu and find a program called “Camera” in it.
The webcam will automatically turn on when it starts, and an image from it will appear on the screen. A malfunction will be indicated by a corresponding notification.
What to do if the camera is not detected in Device Manager
To solve this problem, you need to provide the device with suitable drivers. On a computer running Windows 7, you can install the update automatically through Device Manager. To do this, in this section you need to expand the “Image processing devices” item. Next, find the required equipment and open the context menu by right-clicking on the name. Go to "Properties" and then to the "Driver" tab. Find the “Update” function and click on it, confirm the action and restart the computer. However, it is not always possible to install the update this way.
How to enable the camera on a laptop or computer with Windows 10
The second method for reinstalling drivers is to download the update from the Internet. To do this, you need to know the exact name of the webcam, as well as the make and model of the computer. Carry out the standard procedure - download and install the update.
Note! It is recommended to install driver updates from the official website of the laptop manufacturer.
Alternative causes of malfunction
Of course, we can’t help but mention those whose webcams really don’t work for technical reasons. Perhaps this is a defect in the camera itself (not common). Here you should already use the warranty or service center; manually achieving the goal can be difficult.
There is a likely situation when, due to a laptop fall or incorrect assembly, the camera is not connected to the board. It is possible that the cable is simply not connected or has fallen off; it is also possible that the wire has completely worn out.
Another option for setting up a camera in Skype on a laptop is to close another application that is using it. Two parallel connections will interrupt each other and, as a result, one program simply will not use the webcam. Also, applications like Skype require DirectX to be installed, which can also be the key to fixing problems.
By performing the proposed methods for solving the problem one by one, you will be able to watch how the camera comes into working condition and opens up new opportunities when communicating with your interlocutor.
Sources
- https://tvoykomputer.ru/kak-nastroit-veb-kameru/
- https://vacenko.ru/kak-vklyuchit-veb-kameru-na-vindovs-7/
- https://konekto.ru/kak-vkljuchit-kameru-na-noutbuke.html
- https://mirinfo.ru/pk-i-noutbuki/windows-7-kak-proverit-kameru.html
- https://SmartBobr.ru/poleznosti/vklyuchit-kameru-na-noutbuke/
- https://pc-consultant.ru/periferiya-i-oborudovanie/kak-podkljuchit-veb-kameru-k-kompjuteru/
[collapse]