Do I need to configure and optimize an SSD drive in Windows 10?
In Windows 7, XP and other outdated versions of the system, you could stumble upon processes that prevented the computer from using the SSD drive. For example, it was necessary to manually disable automatic disk defragmentation, since it was harmful to it. But with the advent of Windows 10, the situation has changed in the opposite direction: now the system independently determines that an SSD drive is connected to the computer, and not only does not conflict with it, but also automatically optimizes it.
From all of the above, we can conclude that you should not touch the settings of the SSD drive, as this will not help you eliminate errors and problems associated with it. The only thing you can do is change some of the parameters described in one of the following paragraphs of the article to extend the life of the disk and prevent it from breaking prematurely.
If you notice that your computer has become worse and are sure that the reason lies in the hard drive, then there can only be a few reasons for this:
- The disk is physically damaged. This option is only possible if the disk you just inserted does not work correctly. It may be defective, most likely it is covered by a warranty, take advantage of it.
- The computer is infected with viruses that prevent the disk from working properly.
- The disk is full or more than 80% full.
- The BIOS settings are set incorrectly. This will be discussed in more detail in the basic rules for using an SSD disk, described below in the article.
- Drivers for the disk were installed incorrectly or are out of date. In this case, they must be reinstalled or updated manually.
- When dividing the disk into sections and cells, a failure occurred, which led to the fact that the system could not fully contact the disk. To find out if this is the reason, you can use the free AS SSD Benchmark program (https://alex-is.de/PHP/fusion/downloads.php?download_id=9). After analyzing your disk, it will display the number of Gigabytes on it, and above this value there should be two lines with the “OK” parameter. Also, using this program you can find out at what speed information is read and written to your disk.
Checking the disk
What functions to disable for SSD and is it necessary?
Anyone who has wondered about setting up an SSD for Windows has come across advice related to disabling SuperFetch and Prefetch, disabling the page file or moving it to another drive, disabling system protection, hibernation and indexing of disk contents, moving folders, temporary files and other things to other drives , disabling disk write caching.
Some of these tips came from Windows XP and 7 and are not applicable to Windows 10 and Windows 8 and to new SSDs (disabling SuperFetch, write caching). Most of these tips can actually reduce the amount of data written to the disk (and SSDs have a limit on the total amount of data written over their entire service life), which in theory leads to an extension of its service life. But: through loss of productivity, convenience when working with the system, and in some cases, to failures.
Here I note that despite the fact that the service life of an SSD is considered shorter than that of an HDD, it is highly likely that an average-priced solid-state drive purchased today with normal use (games, work, Internet) in a modern OS and with reserve capacity (to avoid loss performance and service life extension, it is worth keeping 10-15 percent of the space on the SSD free, and this is one of the tips that is relevant and correct) will last longer than you need (that is, it will eventually be replaced with a more modern and capacious one). The screenshot below shows my SSD, with a year of use. Pay attention to the column “Total recorded”, the guarantee is 300 Tb.
And now, point by point, about various ways to optimize the operation of SSDs in Windows 10 and the advisability of using them. Let me note again: these settings may only slightly increase service life, but will not improve performance.
Note: I will not consider such an optimization method as installing programs on the HDD if there is an SSD, since then it is not clear why the solid-state drive was purchased in the first place - is it not for the quick launch and operation of these programs?
Disabling the page file
The most common advice is to disable the Windows page file (virtual memory) or move it to another drive. The second option will cause a drop in performance, since a slow HDD will be used instead of a fast SSD and RAM.
The first option (disabling the paging file) is very controversial. Indeed, computers with 8 or more GB of RAM can work with the page file disabled in many tasks (but some programs may not start or detect failures during operation, for example, from Adobe products), thereby preserving the reserve of the solid-state drive (fewer write operations occur ).
At the same time, you need to take into account that in Windows the page file is used in such a way that it is accessed as little as possible, depending on the size of the available RAM. According to official Microsoft information, the read-to-write ratio for the page file during normal use is 40:1, i.e. no significant number of writes occur.
It’s worth adding here that SSD manufacturers such as Intel and Samsung recommend leaving the page file enabled. And one more note: some tests (from two years ago, actually) show that disabling the page file for underperforming cheap SSDs can lead to improved performance. See How to disable the Windows page file if you decide to try it.
Disabling hibernation
The next possible setting is to disable hibernation, which is also used for the fast startup feature of Windows 10. The hiberfil.sys file, written to disk when the computer or laptop is turned off (or put into hibernation mode) and used for subsequent quick startup, takes up several gigabytes of storage space (approximately equal to the occupied amount of RAM on the computer).
For laptops, disabling hibernation, especially if it is used (for example, it automatically turns on some time after closing the laptop lid) may be impractical and lead to inconvenience (having to turn the laptop off and on) and reduced battery life (fast startup and hibernation save battery power). compared to normal inclusion).
For PCs, disabling hibernation may make sense if you want to reduce the amount of data written to the SSD, provided you don't need the fast boot feature. There is also a way to leave fast boot but disable hibernation by cutting the size of the hiberfil.sys file in half. Read more about this: Windows 10 Hibernation.
System protection
Restore points automatically created by Windows 10, as well as File History, are, of course, written to disk when the corresponding function is enabled. In the case of SSDs, some recommend disabling system protection.
Among some is Samsung, which recommends doing this both in its Samsung Magician utility and in the official SSD manual. It is stated that backup can cause a large number of background processes to run and reduce performance, although in fact, system protection only works when changes are made to the system and while the computer is idle.
Intel does not recommend this for its SSDs. Just like Microsoft does not recommend turning off system protection. And I wouldn't: a significant number of readers of this site could fix their computer problems many times faster if they had Windows 10 protection turned on.
For more information about enabling, disabling, and checking the status of system protection, see the article Windows 10 Restore Points.
Transferring files and folders to other HDDs
Another proposed option for optimizing the operation of an SSD is to transfer user folders and files, temporary files and other components to a regular hard drive. As in previous cases, this may reduce the amount of data written, while reducing performance (when moving temporary file and cache storage locations) or usability (for example, when creating photo thumbnails from user folders transferred to the HDD).
However, if you have a separate capacious HDD in the system, it may make sense to store really large media files (movies, music, some resources, archives) that do not require frequent access on it, thereby freeing up space on the SSD and extending the lifespan services.
Superfetch and Prefetch, disk content indexing, record caching and record cache buffer flushing
There are some ambiguities with these functions; different manufacturers give different recommendations, which I think should be read on the official websites.
According to Microsoft, Superfetch and Prefetch are also successfully used for SSDs, the functions themselves have changed and work differently in Windows 10 (and in Windows when using solid-state drives. But Samsung believes that this function is not used by SSD drives. See How to disable Superfetch.
Regarding the write cache buffer in general, the recommendations boil down to “leave it on,” but on clearing the cache buffer they vary. Even within the same manufacturer: in Samsung Magician it is recommended to disable the write cache buffer, and on their official website it is said about this that it is recommended to keep it enabled.
Well, as for indexing the contents of disks and the search service, I don’t even know what to write. Search in Windows is a very effective and useful thing to work with, however, even in Windows 10, where the search button is visible, almost no one uses it, out of habit, looking for the necessary items in the Start menu and multi-level folders. In the context of SSD optimization, disabling indexing of disk contents is not particularly effective - it is more of a read operation than a write operation.
Automatic optimization carried out by the system
It was said above in the article that Windows 10 automatically configures and optimizes the disk, so you don’t need to change anything manually. Here is a list of actions performed by the operating system to achieve maximum performance of the SSD drive:
- Changes the type of disk defragmentation from regular to special, based on the Retrim function. This defragmentation option does not harm the disk, but, on the contrary, helps sort the information redirected to it. Therefore, there is no need to disable automatic disk defragmentation in Windows 10 unless there are some reasons for doing so.
- Disables the ReadyBoot feature, which by default changes the way the page file works to speed up slow hard drives.
- Does not disable the Superfetch feature, as it did in previous versions of the operating system. With the release of Windows 10, this feature, which allows you to optimize the performance of applications and games by using the cache, can also work with an SSD drive.
- The system automatically adjusts the power supply parameters of the disk to provide it with the most comfortable recharge conditions.
This is where the optimization actions performed by Windows end, but there are still some functions that can either harm the disk or simply have no effect on it. Setting them up will be discussed in the paragraph below, but first you need to familiarize yourself with the rules that should be followed when using an SSD drive.
Swap file
Speaking, the correct setup of the Windows 10 system is for a solid-state ssd drive, often we are talking about disabling the page file, but is this true? Everyone forgets why this is needed, so if we are talking about optimizing services in the background, then of course this is not required, but there is software that can throw an error if the page file is disabled - often used Adobe Photoshop, for example, and others products of this family, and by the way, this is how we save the reserves of our SSD. Therefore, it would be correct to go into the settings and check the boxes we need.
- “Control_Panel” → “Advanced_System_Settings” → “Advanced” → “Settings” → “Advanced” tab → “Change” → the “Automatically_select_swap_file_size” checkbox should be checked → OK.
Rules for using the disk
So, if you are an SSD drive user, then you should adhere to the following rules so that your drive lasts as long as possible:
- Always leave 10-16% free space of the total disk space. This needs to be done due to some of the operating features of SSD drives. If your disk was produced by a large and famous company, then most likely you will be able to use a special program to work with it, in which you can find a special function that allows you to block these same 10-16%.
Samsung disk setup program - Open Device Manager and expand Controllers. In the “Standard controller” sub-item there should be a mention that your computer is running in ACHI mode, not IDE. This is necessary because some functions that allow you to optimize the disk do not work in IDE mode. You can change the computer's operating mode in the BIOS settings.
Checking the operating mode - Download a program to optimize it from the official website of your disk manufacturer. Use it, it will improve the speed of the disk and offer you all the necessary driver updates, which will also most likely bring positive changes.
Preparing for SSD Optimization
After installing Windows 10 on an SSD, you should make sure that the drive and its controller are optimally configured at the level of drivers and ATA interface functions. If these basic functions are not configured correctly, further optimization will not improve the performance of the SSD and may even cause harm.
Activating SATA ACHI mode
If the Windows 10 operating system was not installed from scratch, but was transferred from an old hard drive by cloning the system partition, you should make sure that the disk controller to which your SSD is connected to one of the channels operates in native AHCI mode and is not in compatibility mode. old disks, reducing reliability and performance. To do this, follow these steps:
- Use the WIN+Pause key combination to open the system information window, and from there, “Device Manager”.
Open the Device Manager option which is located on the left side of the screen - Find the “IDE/ATA Controllers” branch and expand it.
Expand the disk controllers section - If an AHCI controller is present in the list of controllers, then the mode of the same name is activated. If such a controller is not there, your system operates in compatibility mode with older disk devices. The presence of an AHCI controller indicates that the mode of the same name is enabled
Enabling AHCI mode using the operating system is fraught with a complete loss of its functionality: after a reboot, the OS will no longer be able to start.
Enabling the TRIM command
The recording mechanism in solid-state hard drives (SSDs) differs from that in classic hard drives: a memory cell is written to only after an erase operation. And when the SSD tries to write information to a cell that stores data from previously deleted files, it must first perform an erase operation and then a write operation. This halves the speed of writing files and reduces the resource of the disk itself, because the number of write cycles in an SSD is limited.
To prevent this from happening, the ATA command set (low-level disk device management commands) includes the TRIM command, which clears unused cells. In the Windows 10 operating system, the TRIM command is enabled in the Task Scheduler and is executed regularly without user interaction. But if the system partition was cloned to an SSD from an old hard drive, TRIM may be disabled.
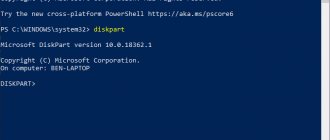
You can check the status of the command and activate it through the command line:
- Press the WIN+X key combination to open the user menu, from which select the “Command Prompt with Administrator Rights” option.
Bring up a shell window - In the shell window that opens, type fsutil behavior query DisableDeleteNotify and press Enter.
- If, as a result of executing the command, you receive the value DisableDeleteNotify = 1, then TRIM is disabled on your PC and must be activated.
- Type fsutil behavior set DisableDeleteNotify 0 and press Enter. After this, TRIM mode will be activated.
Use the fsutil behavior set DisableDeleteNotify 0 command to enable the TRIM feature on your computer
Each SSD manufacturer releases software for their drives that automatically activates TRIM mode, switches the SATA controller to ACHI mode, and displays the actual wear of the drive and its predicted service life. Installing such a program immediately after installing the OS on the SSD will be very useful.
The service utility for solid-state drives Transcend SSD Scope automatically activates TRIM mode on your PC
Several years ago, the author of the article bought a practically new SanDisk SSD, cloned the system from an old hard drive and began to work in normal mode, without making any optimizations or settings. TRIM was disabled. Having installed a service utility a little over a month later, the author was surprised to discover that during this time the disk had lost almost 4% of its resource. This is the price of operation without the TRIM function activated. After activation, the disk loses a percentage of its resource after about 2 months of operation (quite hard). Therefore, do not neglect the SSD optimization settings.
Update the SSD firmware
To make sure your SSD performs at its best, it's worth staying up to date with firmware updates for it. Unfortunately, they are not automated; the process is irreversible and a little more complicated than, say, updating software.
Each SSD manufacturer has their own firmware update method, so you need to go to the official websites of the SSD manufacturers and follow their instructions. However, a handy tool for you is CrystalDiskInfo, which displays detailed information about your drive, including the firmware version.
Default OS Setting for SSDs (Standard)
The standard Windows 10 settings assume the maximum level of performance for SSD drives.
All solid-state drives connected to the computer are detected automatically and then the system configures them.
SSD optimization using the OS occurs as follows:
- Defragmentation is disabled;
- The TRIM function is turned on;
- The system uses the Superfetch/Prefetch functionality;
- Next, for maximum optimization, the ReadyBoot function is disabled;
- The SSD's power supply is also optimized by the system.
Setting up storage for temporary OS files
Windows performs many service and system operations every minute. All of them are saved in a directory called TEMP.
Neither an ordinary user nor a PC administrator can disable the function of saving temporary files.
However, you can move the storage folder to your hard drive. If it is connected to a computer.
Moving the directory for storing temporary files will slightly slow down the operating system, but will extend the life of the solid-state drive by reducing data rewrite cycles.
Plus, if you're using a fairly powerful PC with 8 or 16 GB of RAM, the performance slowdown will be as unnoticeable as possible.
Follow the instructions to move the TEMP folder to your hard drive:
- Turn on the system properties window;
- Open the advanced options tab;
- Click on the "Environment Variables" button;
System properties window
- In the window that opens, select any of the two variables and click on the button to change it;
- In the Path window, specify the location where the system's temporary file storage will be located and click OK to save the change.
Changes to temporary file storage location
Change the location path of the second parameter in the same way.
Now all temporary system data will be saved on the hard drive and the capacity of the SSD will not be wasted.
What kills an SSD?
1. Defragmentation SSDs are limited in their write cycles, and defragmentation can seriously wear out the drive, reducing its lifespan. Therefore, forget about different defragmenters like IObit Smart Defrag or Defraggler.
Interesting materials:
Where should you put the powder in the washing machine? Where should I put the powder in the washing machine? Where to put the air conditioner in the washing machine? Where to put Calgon tablet in the washing machine? Where to put the dishwasher in a small kitchen? Where to put a washing machine in a small bathroom? Where to put the dishwasher? Where to pour powder in the Atlant washing machine? Where to pour powder in a BOSCH washing machine? Where do you put the powder in the washing machine?
Preparing a bootable flash drive
How to set up mail in Windows 10 - installing and configuring Outlook
How to install Windows 10 on an SSD using a regular flash drive? To do this, you need to take a USB drive with a capacity of at least 4 GB.
Step-by-step instruction:
- Insert the USB flash drive into the appropriate port and open the explorer.
- Format, selecting NTFS mode.
- Download the installation program from the official operating system support website and run it.
- After accepting the license agreement, click “Create installation media.”
- Sequentially set the language, OS version and bit depth parameters.
- Mark USB in the media selection window.
- Select the device and wait for the media creation to complete.
- Reboot.
- When the PC starts the system boot process again, press Del on the keyboard to enter the BIOS.
- Select the USB flash drive in boot order.
The boot disk is ready, installation begins. Now you need to figure out how to install Windows and what to do to optimize it on an SSD.
System Restore
In the early years of SSDs, when they were much less durable and more prone to failure than they are today, many people recommended disabling system recovery to improve the performance and longevity of the drive.
This advice is largely redundant these days, but certain SSD software (Samsung) will automatically disable the system restore feature.
System Restore is an extremely useful feature that's recommended to be left enabled, so it's worth heading to System Recovery settings to make sure your SSD hasn't disabled it.
Setting up write caching
On many SSDs, custom write-level caching can negatively impact drive performance. To understand this, you will have to disable this option in Windows and see how the drive performs afterwards. If your drive is performing worse, turn it back on.
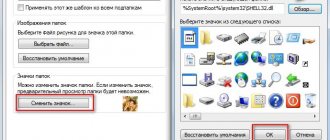
To open the configuration window, right-click “ This PC ” in the Start and select “ Properties ”. Click " Device Manager ", expand " Disk Drives ", right-click on your SSD and select " Properties ". Select the Policies . On this tab, you will see the option “ Allow recording caching for this device .”
Evaluate the speed of the SSD with and without this option and compare the results.
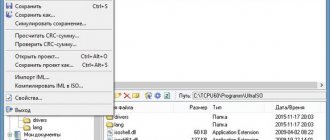
SSD Mini Tweaker utility
All of the above actions can be performed manually, but programmers have created programs called tweakers, the purpose of which is to customize the Windows OS, as well as its individual components, with a few clicks. One such program is SSD Mini Tweaker.
SSD Mini Tweaker
– a program, a type of tweaker, that allows you to optimize your SSD without much effort.
Advantages:
- Complete Russification.
- Works on all OS starting from Windows 7.
- Free.
- Clear interface.
- No installation required.
Hibernation
A mode that allows you to save the contents of RAM on the hard drive, so that the next time you turn it on, information and open applications from the previous session are saved.
When using an SSD, the meaning of this function is lost, since the drive starts up quickly anyway. And “Hibernation”, creating “write-overwrite” cycles, reduces the lifespan of an SSD disk.
Disabling hibernation:
- Launch cmd.exe again using the key combination win + R.
- Enter the command: “powercfg -h off”.
Prefetch and Superfetch
Prefetch
– a technology with which frequently used programs are loaded into memory in advance, thereby speeding up their subsequent launch. In this case, a file of the same name is created on disk space.
Superfetch
– a technology similar to Prefetch with the difference that the PC predicts which applications will be launched by loading them into memory in advance.
Both features are of no use when using an SSD. Therefore, it is best to turn them off. For this:
- Open the command line using the key combination win + R.
- Execute the command: “regedit” (go to the registry).
- Follow the path: HKEY_LOCAL_MACHINE → SYSTEM → CurrentControlSet → Control → Session Manager → Memory Management → PrefetchParameters.
- Find several parameters in the registry subkey: “EnablePrefetcher” and “EnableSuperfetch”, set their value to 0 (default 3).