Necessity. But first, let’s answer the question - why do you need a password on a PC and when can it come in handy? What can he protect us from?
If you install it on Windows 7, it can protect you from many troubles:
- will not allow someone else, without knowing the code for the operating system, to use your computer.
- needed for the security of your personal or business information located on hard drives when you are not around.
- will limit the time your children spend on the computer while you are not at home.
- serves as the first step in protecting your machine from viruses.
Installing it will undoubtedly be useful.
Setting a password on Windows 7
Even a simple combination of numbers is a guarantee that very young family members or work colleagues will not have access to information that is important to you. Creating a password is not difficult - the OS itself will help us with this.
First you need to turn on your computer and log into your account, which you need to protect with a password. To set a password, you need:
- Go to the “Start” → click on the user icon (the “User Accounts” );
Figure 1. Click on the user icon.
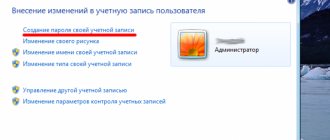
- In the window that appears, select the item “Create a password for your account” → set a password, re-enter it in the “Confirm Password” , come up with and write down a “Password Hint” → save the changes by clicking the “Create Password” ;
Figure 2. Enter a new password.
- Restart your computer to make sure the steps are correct.
Ready.
These two simple steps will help protect your files. If you want to change or remove your password, please read the next chapter. Be prepared that in order to reset your password, you may need to spend a lot of time at the computer, and you may also need special equipment.
Resetting the password is possible .
Therefore, if you are seriously concerned about the safety of your information, set a password on the BIOS. Instructions can be found in the “Bonus” chapter.
↑ Return
2.
Installation Methods
The main ways to set a password are:
- installation via control panel;
- installation using the local users and groups menu;
- use of third party software.
It is worth noting that there are a great many ways to set a password on a PC. To do this, you can use both the resources available in the device and use other features - third-party programs.
What to give preference to? More reliable and secure, of course, is to use your own PC software, which reduces to zero the risk of infecting your computer with viruses or spyware, which often accompany programs from unverified publishers.
Change or delete your account password (if you remember it)
These actions are no more complicated than those described in the previous chapter. We will consider two situations: when you remember the password (hereinafter in the text), and when you have forgotten it (see the chapter on removing a forgotten password). To remove or change the secret code, you need to:
- Go to “Start” → click on the icon (located in the upper right corner above the name of the current account);
- Now in the “User Accounts” , select the item you need: “Change...” or “Delete your password” ;
- Settings will open with fields that need to be filled out. You need to enter a new password, a confirmation hint for it (or the old one, if you are deleting it) → click on the “Change password” (or “Delete password”) .
Figure 3. Changing/removing the password. Ready.
Now it is advisable to write down the new password and save it in a safe place. After reading this chapter, questions might arise if:
- You have completely forgotten your password and want to view it or delete it;
- You are looking for a more reliable way to protect your data than standard means.
Then read the chapters that provide instructions on how to recover your password (even if you have forgotten it) and “Bonus” with steps to install protection on the BIOS.
↑ Return
2.1.
Complete password removal on Windows 7
This chapter contains information on completely resetting the password for absolutely any account.
To do this, you will need a flash drive and a working (with the ability to log into the OS) computer. Attention! All further actions must be agreed upon with the owner of the account/computer. Let's begin. Step 1. Preparing a flash drive.
First you need to clean the drive.
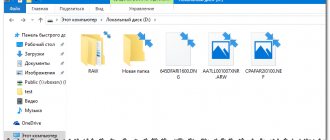
To do this, in the “My Computer” , you need to right-click on the flash drive and select “Format…” → file system: “ FAT 32” → “Start” .
Wait for the process to complete.
Figure 4. Formatting our flash drive.
Step 2. Download the required program to reset your password.
Everything is simple here: download the archive with the program (the archive is attached at the end of the article) → unpack it to any convenient place → copy the files to the root of the flash drive.
Step 3. Assign the drive status to boot.
This can be done using standard system tools - using the command line ( CMD ) .
To do this you need:
- Open “Start” → enter the following query into the search bar: “cmd” → open the corresponding item using the right mouse button (required!) → “Run as administrator” (a black command console will launch);
Figure 5. Open the command console with administrator rights.
- Next you need to enter the command: “G : syslinux . exe - ma G :"
(instead of "G" in both cases, use the letter of your flash drive, which can be found in the
"My Computer" ); - The operation should proceed without errors . You can now close the command prompt. If errors still occur, repeat the steps starting from Step 1.
Figure 6. We get a seemingly “zero result.” Step 4. Start the computer from a bootable USB flash drive. Executing this step depends in part on your motherboard/laptop model. We need to set our drive as a priority in the Setup Menu ( BIOS ) or Boot Menu → turn off the computer on which we plan to recover the password and:
- Enter BIOS by pressing the F1/F2/F12/Delete button (depending on the motherboard);
If you don't know how to enter the BIOS on your computer or laptop, then this article will help you.
- Go to the “ Boot ” (navigation is carried out using the arrows on the keyboard);
- Place the bootable USB flash drive as the very first one in the line “ Boot priority ( order )” / “ Boot device priority ”
- Save changes in the “ Exit ” tab (“ Save & Exit ”) by selecting “ Exit Saving Changes ” → confirm by clicking “ Yes ” .
The computer should automatically boot from the flash drive. Step 5. Remove the password.
First, you need to wait until the program is completely loaded (time 2 minutes if you are not sure). We enter the following commands sequentially without quotes (relevant for most users): The following actions are also suitable for resetting the administrator password.
- Press “ Enter ” ;
- “C:\Windows\System32\config” – access to the registry;
- “Password Reset ” – launching a script to completely remove the password;
- Enter the username whose password you want to reset;
- “ Clear User Password ” – clearing the password from the registry
- «!» – just an exclamation point;
- Press the “Y”
.
Now you need to restart your computer if this does not happen automatically.
The login password will be lost, and you will be able to continue using the OS. Don’t forget to write down the new combination on a piece of paper to avoid similar troubles in the future. The following is information about the most reliable (standard, of course) method of keeping data on a computer practically invulnerable to hacking - installing protection in the BIOS. ↑ Return
3.
Password protection of hard drives
Information stored on computer hard drives can be protected through encryption or archiving.
BitLocker
BitLocker technology is becoming increasingly popular as the number of mobile computing devices grows. A certain percentage of them are lost by their owners or stolen. If such devices contained confidential information, it could be read by attackers. If the drive was encrypted using BitLocker, then the data will remain confidential.
After encrypting a hard drive using BitLocker technology, all data stored on it is modified. Their true form will be visible only to the owner of the special key created during the encryption process.
At the same time, the hard drive is locked, and for normal operation you need to enter a password, also created during the encryption process. The password is the current decryption tool, and the key is the emergency one.
The password and unlock key are created during the disk encryption process.
- Click the “This PC” icon, then in the context menu of the drive you are encrypting, click “Enable BitLocker.”
- Select a method to unlock the drive at startup. An easier option is to enter a password.
- After entering and confirming the code, click “Next”.
- In the next window, select the option to save the emergency recovery key.
This completes the creation of the password and key. But preparations for the encryption process continue: in the following windows, the area and encryption mode are selected. After restarting the computer, a process begins that continues for a long time.
System requirements for implementing BitLocker encryption:
- professional or enterprise editions of Windows 7, 8 and 10;
- BitLocker technology support;
- the presence of two partitions on the computer’s hard drive with the NTFS file system.
BitLocker encryption is supported by all modern computers. The requirement for a specialized microprocessor TPM (Trusted Platform Module), indicated in a number of sources, is desirable, but not mandatory.
Archiver
Most Russian computers have the WinRAR archiver installed.
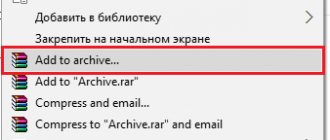
- Open “This PC” on the Desktop, then the context menu of the section to be archived, in which click “Add to archive”.
- In the “Archive name and parameters” window, select the archive name, the “No compression” method, click “Set password”, and then OK.
- In the next window, enter and confirm the code, then click OK.
Once the archive is created, the root directory of the archived disk will also contain the archive file. After this, the rest of the contents of the disk can even be deleted. Attempts by attackers to open the archive will be unsuccessful without entering the password.
We recommend that you read the article on the topic of how to put a password on a folder on a computer; from this article you will learn more about these methods.
Bonus. Setting a BIOS password
This password cannot be reset using a regular bootable USB flash drive.
To remove this type of protection, you need to “examine” the computer hardware. Only removing CMOS can restore the BIOS to factory settings (including clearing the password) if you forget the data from entering the Setup Menu of the computer. To install such protection, you need:
- Enter the BIOS (this is done by pressing the F1/F2/F12/Delete button);
- Find in the tabs (usually “ Security ” or “ Main ” ) the item “ Set User Password ” (or “ Bios Setting Password ” ) → select by pressing the “ Enter ” ;
- Enter a new password → “ Enter ” .
Figure 7. Create a new password.
- Now the protection is installed only at the BIOS entrance, and you need to make sure that the password is requested every time you start the computer. “ Password Check ” item in the menu → set its value to “Always”;
- Save the password by selecting “ Save and Exit Setup ” (can be located either in the general tab or in “ Exit ” ).
Ready. The most secure protection is installed. Without access to the BIOS, outsiders will be able to do literally nothing. Be sure to write down your password so you don't accidentally forget it, and put it in a safe place.
Setting up protection for Windows 8
The interface of the Windows 8 operating system is significantly different from its predecessors. How to set a password on a Windows 8 computer:
- Go to settings.
- Select the section “Changing computer settings” - PC Settings.
- Go to accounts - Login options - Password - Add.
If the Microsoft account is activated, the user's options for choosing an identification method are slightly expanded. In addition to the usual one, a graphic password is also available, which allows you to confirm entry using a picture, and a PIN code, like for a bank card.
Data encryption using BitLocker technology
BitLocker is a data encryption technology built into Windows OS. Before Windows 7, BitLocker could only be used to encrypt volumes of hard drives (HDD) and solid-state drives (SSD), but with the release of Windows 7, it became possible to protect removable drives and flash drives as well.
By default, BitLocker offers two ways to store and protect the encryption key:
- In a password protected system. The key is generated from the password and stored on disk as a file or record. If you forget or lose it, it will take a lot of effort to remove the encryption without losing the data on the media.
- On a smart card. The encryption key is recorded on a special medium - a smart card, which uses a PIN code to decrypt the data. This method is more reliable, as it establishes two-factor protection. And remembering a short PIN code is much easier.
Windows 10 Home Edition does not support BitLocker technology.
How to Set a Hard Drive Password Using BitLocker on Windows 10
- Open the “This PC” folder and right-click on the hard drive you want to encrypt. Then select "Enable BitLocker" from the list.
- In the window that appears, check the box next to “Use a password to unlock the disk.” Enter and confirm the passcode, then click Next.
- Options for storing the key will appear in a new window. Select the appropriate one (in my case “Save to file”).
- Next, another window will appear where you should select the storage location for the key file. Select a directory that is convenient for you and click “Save”.
- After saving the file, you will have access to the “Next” button in the previous window. Click it.
- Then select the appropriate encryption option and click Next.
- Depending on the OS version, another window may appear, where you again need to select the appropriate encryption mode and click “Next”.
- After this, a final window will open confirming your intention to encrypt the disk. Click "Start Encryption".
The encryption process can take from a few minutes to several hours. If progress is interrupted, you will have to start all over again.