08.08.2018 Category: OptimizationAuthor: Leonid Levin
Sooner or later, each of us thinks about a complete upgrade of our computer, or a partial upgrade by replacing its individual components. The main advantage of such a “point update” is that the user does not need to reinstall Windows OS after the upgrade (provided that the user does not change the system hard drive). However, when changing the motherboard, some difficulties may arise, since it is a fundamental link in the operation of the entire PC. Therefore, before upgrading the motherboard, it is necessary to carry out a kind of “preparatory stage”.
- How to keep Windows 10 working when upgrading your motherboard
“Preparatory stage” of the Windows registry
What problems does the user face after upgrading the motherboard?
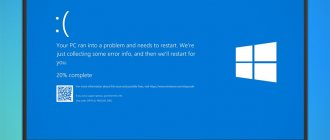
As already mentioned, the motherboard is a kind of “central link” of the entire computer, where data about all devices connected to the PC is concentrated. During the installation of the Windows 10 OS, the motherboard’s “database” receives information about the installed ATA/SATA drivers for hard drives (especially the system one), but during an upgrade this data is lost, which ultimately leads to problems starting the Windows OS . Such as a BSOD error or “blue screen of death”:
- with code "0x0000007B";
Error STOP: 0x0000007B appears after the start system boot screen of the PC (information window about the version of the motherboard and BIOS system) - or "INACCESSIBLE_BOOT_DEVICE".
Error STOP: INACCESSIBLE_BOOT_DEVICE appears after Windows boot screen
Indications for use:
There is only one reason for the appearance of BSOD in such cases against the background of working equipment - driver incompatibility. Pre-installed and those required for new equipment (the latter are just not enough). And it is precisely this behavior that is typical for situations when the user neglects basic preparations for moving, or when replacing the motherboard is associated with its breakdown, when there is no question of any preparation.
How to keep Windows 10 working when upgrading your motherboard
To protect your computer from BSOD errors and ensure Windows 10 starts correctly after upgrading the motherboard, you need to do a little preparatory work - make certain data adjustments in the system registry.
"Preparatory stage" of the Windows registry
To prepare your PC for component upgrades, follow several steps step by step:
- Open the task bar (WIN+R) and type regedit in it.
The “task bar” can also be launched through the “Task Manager” of Windows - Then in the root directory of the registry, find: HKEY_LOCAL_MACHINE\SYSTEM\CurrentControlSet\services\msahci.
The directory path is also displayed at the bottom of the registry window - In the work field (right column), highlight the “Start” line. Double-click on it with the mouse to open the parameters and set “0” in the “Value” field.
You can also open the Start parameter settings by right-clicking on it and selecting “Change” - Then navigate to the directory: HKEY_LOCAL_MACHINE\SYSTEM\CurrentControlSet\services\pciide.
It doesn't matter what order you change the registry settings in. - Find the “Start” line again, and similarly set the “Value” to “0”, saving the data.
Even if in the “Value” parameter settings is “0”, still write zero again and save the data - Done, you can now exit the system registry.
The “preparatory stage” is over. You can turn off your PC and upgrade the motherboard. The next time you start your computer, Windows 10 should boot without critical errors.
Based on my personal experience in upgrading the motherboard on a PC, I would like to note that even after completing the “preparatory stage” of changing the system registry settings, there is still a small probability of a “blue screen of death” appearing after the upgrade. This can usually happen due to differences in chipset versions on motherboards. A way out of the situation may be to “brute force” the PC startup settings in the BIOS. You just need to load the BIOS and in the Configure SATA As tab (Main category) set the available boot modes one by one. Go through them until the Windows OS boots.
The Configure SATA As setting category may also be called SATA Mode
Checking for the presence of a standard driver
To protect yourself from this rash step, you should first check which driver you have installed for your old motherboard. Press Win+R and enter the command devmgmt.msc , after which we go to the “ IDE ATA/ATAPI controllers ” section, which you need to find in the “ Device Manager ” that opens. If you see there that a standard dual-channel PCI IDE controller is installed, then in this case you can change the motherboard without “unnecessary movements,” since this means that you have standard Windows drivers and they fit almost all motherboards.
How to restore Windows 10 after replacing the motherboard
Do not forget that it is not always possible to complete the “preparatory stage” before upgrading your computer. What to do if the motherboard has already been replaced and it’s too late to edit the system registry settings? Don’t worry, you can still adjust the registry and “restore” Windows 10 functionality thanks to the “System Restore” mode. All you need is a bootable CD/USB drive with Windows 10 OS.
- Before starting the PC, insert a bootable CD/USB media into the drive/slot. After turning on the computer, enter the BIOS settings (which button you need to press is written in the information help of the start window).
The BIOS settings key depends on the PC motherboard model - Next, in the BIOS settings window, select the Boot tab.
Navigation through the BIOS settings menu is carried out using the arrow keys. - In the Hard Disk Drives category, highlight 1st Drive, press Enter and set the value to CD/USB device. Press F10 to accept the changes.
If the boot device is not a USB drive, but a CD or DVD, then you need to prioritize the corresponding drive - After restarting your computer, you will see a black screen with a notification: Press any key to boot from CD/USB. Press Enter.
- Next, the “installer” will autorun the “Windows Installation Wizard”. Go to the System Restore settings.
Through the "System Restore" function you can access the offline Windows registry - In the subsequent Diagnostics window, go to Advanced Options.
You don't need to restore Windows 10 itself - Click on the "Command Prompt" icon.
If you accidentally went to the wrong settings section, you can always go back a step by clicking on the “arrow” icon at the top of the window - After activating the “command line”, enter the value regedit. Press "Enter".
Command Prompt automatically runs as administrator - In the root directory of the registry, select the HKEY_LOCAL_MACHINE subdirectory, click on the "File" tab/"Load hive" option.
You need to select the entire folder, not individual files. - Specify the path to the installed Windows OS on your hard drive, namely: Drive\Windows\system32\config. Open the file system.
You need to open the system file (refer to the “file type” description), and not its text document - Give the new hive a name.
The name can be anything (in Latin) - After this, follow the root directory of the registry to the branch: HKEY_LOCAL_MACHINE\Name of the created “hive”\ControlSet001\services\msahci. In the properties of the “Start” parameter, set the value = 0.
To open the parameter settings, right-click on it and select “Properties” - Then similarly change the “Start” value in the pciide folder, which is located along the path: HKEY_LOCAL_MACHINE\Name of the created “hive”\ControlSet001\services.
The path taken through the registry root directory is displayed at the bottom of the window - Select the “hive” folder you downloaded, click on the “File” / “Unload hive” tab.
You only need to select the “hive” you created, and not the entire HKEY_LOCAL_MACHINE folder - Done, now you can close the registry and restart your PC. After this, your Windows 10 OS should boot.
Do I need to reinstall Windows when adding a hard drive?
No, you never need to reinstall
your OS if you are upgrading your hardware (in this case
HDD
and RAM) until you plan to remove the existing hard drive.
Interesting materials:
When was the VAT increase? When did the Chechens return to their homeland? When did the Black Sea become salty? When did Montenegro join NATO? When do they read the canon and when do they read the akathist? When are yellow roses given? When is Boris's angel day? When is day night? When is the day the same length as the night? When is it cheaper to go to Seychelles?
What will we need and in what direction will we work?
Before you start, please take note. Drivers must be contained in a separate folder, not in .exe and in unzipped form.
where X is the letter of the flash drive or card on which the drivers are located. I have the letter C assigned to the disk with Windows, which is not loading yet. We exit Diskpart with the exit command and make sure that our folder is on the flash drive by going through the letter assigned to it and using the dir command to display the contents:
Source
