Today, many computer users have learned to reinstall Windows OS on their own. Indeed, Microsoft has tried to make the Windows Installer interface as clear as possible, even for a novice user. However, this does not mean that after the installation of Windows is completed, no problems will arise on the user’s computer: very often users complain about the lack of sound.
No sound immediately after reinstalling Windows is the most common problem faced by users. As a rule, there are few reasons for such a problem; more precisely, there is only one - the lack of installed drivers for the sound card. Accordingly, all our subsequent recommendations will be aimed at solving this problem.
Solution 1: Set your default audio device.
1. Right click on the Sound
in the lower right corner of the taskbar.
2. Then click on “ Playback Devices”
».
3. Highlight your primary audio device, then click Set as Default
" You should see "Default Device" next to the speakers.
4. Click OK
».
Check the sound on your computer. If the sound still does not work, restart your computer. Still not working? Try the next solution.
BIOS
Oddly enough, sometimes the built-in sound card is disabled in the BIOS. For example, on my computer I almost immediately turned off the built-in sound card, since my sound is output through an external card. This way the two cards won't conflict. So if you don't see any devices at all in Device Manager, then it may also be disabled.
- Reboot the computer. The first window will give you a hint on how to start the BIOS. These could be buttons: Delete, F2, F12, etc. Just press this button.
- Now a very important point - BIOS versions can differ greatly, so here you will have to look for the section where the built-in sound card will be located. Just browse through the first menu items. It's small so you won't get lost.
- You will need to find any mention of “Audio” and turn it into “Auto” or “Enabled” mode.
- When you exit, save the changes, otherwise the card will remain turned off.
Solution 2: Change the audio format
1. Follow the first two steps from the previous solution.
2. Select your default sound device and click Properties
».
3. Click on the Advanced
».
4. In the Default Format
» Select a different bit depth and frequency to check if the sound works correctly.
5. Click on the “ Check”
" If the sound appears with the new format, then click "OK" and enjoy your computer.
If this solution did not help solve the problem with the sound not working after reinstalling Windows 7, then try another one.
Problem with Windows 7 sound service
If there is still no sound after updating the driver, then a possible reason for this is the disabled Windows Audio service. To find out its status, there is an easy way - click “Start”, then enter “Services” in the search bar and press “Enter”. A window will appear with a list of all OS services, in which you need to find the line “Windows Audio”. Double-clicking on this line will open a window with the current state of the service:
In this window, you need to set the startup type to “Automatic”, click the “Run” button, then “Apply” and “OK”.
By the way, sometimes for some reason the sound service does not start when the PC boots, even if everything worked before. This phenomenon is difficult to explain, but it can be easily treated by simply changing the volume control slider.
Views: 19993
Solution 3: Reinstall your sound card drivers
1. Press Windows logo key + R key
simultaneously to open the
Run
.
2. Enter devmgmt.msc
.
3. Then click OK
" to open "
Device Manager
".
4. Expand the Sound, Game and Video Devices dialog box.
5. Right-click on the name of your sound card and select Uninstall
».
6. Check the “ Remove drivers for this device”
».
7. Then click OK
" to confirm the removal of sound card drivers.
8. Restart your computer for the changes to take effect.
Once your computer turns on, Windows 7 will automatically install the latest drivers for your PC. Check if the sound is working on your computer.
One of these three solutions should help you when the sound does not work after reinstalling Windows 7.
Everyone who has a computer has had to reinstall the operating system at least once. This is an inevitable process, because in the process of web surfing you can easily infect your system with a virus, so sooner or later everyone faces this. Unfortunately, reinstalling fixes some problems, but at the same time may cause others. For example, users often complain that after reinstalling Windows 7, the sound does not work. Well, let's figure it out and solve this problem.
A method for the lazy
In recent years, there are many applications on the Internet that make life much easier for beginners. One of these is the Driver Pack - a special collection of drivers for all computer components, which allows you to install the entire set required after reinstalling Windows in a couple of mouse clicks. There are many different collections on the network: SamDrivers, SlimDrivers, Carambis Driver Updater, etc. The best, in my opinion, is DriversPack Solution. First of all, because it also has an online version, thanks to which you do not need to download an image of 12-15 gigabytes, but just have access to the Internet. If you have no sound after reinstalling Windows, just download the DriversPack online client here and run:
I immediately advise you to switch to Expert Mode so that you can deactivate the installation of additional software that will be offered along with the drivers. Be sure to go through all the sections, leaving only the necessary drivers checked - uncheck everything else. Click on the “Install” button and wait until the procedure is completed. The program will install the sound card driver if it was not there, or update the existing one, after which the sound will appear again.
There are several ways to install the required driver:
- Usually it comes with the PC on a special installation disk.
- The computer sound card model will help you determine which one you need.
- Finally, you can use programs designed to search for and automatically install drivers. For example, Driver Pack Solution, which is nothing more than an ISO image. After launch, this program completely scans the system, after which it suggests drivers that need to be installed or updated. Once this process is complete, you must restart your computer.
Using installation packages and driver updates
In such a situation (especially if the sound card with HD Audio support is not a Realtek model), you can try to install the original driver from the installation disk, which must be present when purchasing a computer or laptop.
If there is none, the best solution would be to use disk or desktop driver packages that allow you to install and update the software of any device. These include DriverPack Solution, Slim Drivers and Driver Booster packages. All user participation when using them is limited to agreeing to install the required software, after which it is mandatory to perform a complete restart of the system.
You can even remove the device, and perhaps after a restart its drivers will be installed automatically, not by the system, but by the update program.
Sound settings
However, the problem is not always in the “firewood”; perhaps you just need to adjust the sound settings. First, if you have not already done so, check the sound icon in the lower right corner of the screen, in the tray with the clock: it should not be crossed out. Now go to the Control Panel and select the Hardware and Sound section - Sound.
You should go to the "Playback" tab if it happens to be the wrong one. There will most likely be several playback devices, and there is a high chance that the system has selected the wrong device. If you don’t know what exactly you need to choose in your case, just turn on any song and select devices one by one.
I am sure that one of the problems described above is the reason why the sound disappeared on your computer after reinstalling Windows 7. But now you know how to fix it!
Reinstalling the operating system itself does not cause any difficulties for the user; it is intuitive and simple. To do this, just follow the instructions of the installation process. However, problems may arise later. This is often due to the fact that standard drivers do not fit your hardware and cause conflicts. It often happens that after reinstalling the Windows system there is no sound, or some of the USB devices do not work.
If the sound disappears after reinstalling Windows
In this, the most common option, the reason for the disappearance of sound is almost always related to the sound card drivers. Even if Windows “Self-installed all the drivers”, the volume icon appears in the notification area, and your Realtek or other sound card appears in Device Manager, this does not mean that you have the correct drivers installed.
So, in order for the sound to work after reinstalling the OS, it is possible and advisable to use the following methods:
Desktop computer
If you know what kind of motherboard you have, download sound drivers for your model from the official website of the motherboard manufacturer (not the sound chip - that is, not from the same Realtek website, but, for example, from Asus, if this is your manufacturer ). It is also possible that you have a disk with motherboard drivers, then the sound driver is there.
If you don’t know the motherboard model, and you also don’t know how to find it out, then you can use a driver pack - a set of drivers with an automatic installation system. This method works in most cases with regular PCs, but I do not recommend using it with laptops. The most popular and perfectly working driver pack is Driver Pack Solution, which can be downloaded from drp.su/ru/. In more detail: No sound works in Windows (only in relation to reinstallation).
Laptop
If the sound does not work after reinstalling the operating system on the laptop, then the only correct solution in this case is to visit the official website of its manufacturer and download the driver for your model from there. If you don’t know the address of the official website of your brand or how to download drivers there, then I described this in great detail in the article How to install drivers on a laptop, intended for novice users.
Main Causes of Hardware Conflicts
Most often, difficulties arise from drivers. However, this is not the only reason for hardware conflicts after reinstalling Windows. There can be several problems, and they can be divided into three categories:
- software;
- hardware;
- equipment incompatibility.
If, after reinstalling Windows, there is no sound on your computer, the first thing you need to do is check the devices for software errors. To do this, you need to perform the following sequence of actions:
- Go to the “Start menu”;
- Select the “Control Panel” section;
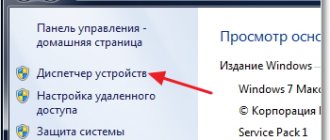
- Find the item “System”;
- Go to the “Equipment” tab;
- Click the "Device Manager" button.
Equipment that has problems after reinstalling Windows due to a missing driver will be marked with a yellow exclamation mark. If hardware errors occur or multiple devices are incompatible, it will be disabled. The figure below shows an example where the reason for no sound was the card being disconnected.
The problem that there is no sound after reinstalling Windows may be the presence of several similar devices or different versions of programs for managing the sound adapter. In the first case, you need to make sure that there is one device installed on your computer and that there is no sound card built into the motherboard. If there is one, you need to go to the sound settings and change the default device if it is not selected correctly. To do this you need to do the following:
Nothing helped
And so we need to once again stretch our brains and think about what could lead to such a coincidence of circumstances. You may have previously installed some program that is interfering with the sound card. Click on “Start”, type “Programs and Features” into the search bar and go there. Sort by date and remove suspicious software that was installed recently.
Check your computer for viruses and malware. Before doing this, be sure to update your anti-virus databases. You can download some free antivirus program or use the trial version.
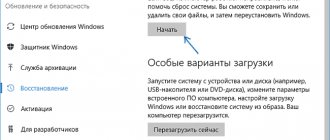
Try taking other headphones or speakers and connecting. The problem may not be with your PC, but with the playback device. If there is still a problem with the system, then you can try performing “System Restore”. Similarly, enter this name into the Windows search bar in Start. We start the service and select a restore point. After this, the computer will have to reboot - you will have to wait.
Installing audio card drivers in Windows 11 from Windows 10/8.1/8/7/Vista
The first thing you should try is to download the audio card driver from the website of the device, motherboard or laptop manufacturer. It is likely that there will not be software specifically for Windows 11. However, there will most likely be software for Windows 10 - you should try to download and install them. If not for 10, we use the software for 8. Installing a driver from previous versions of the OS should be done as a last resort, if nothing else helps. And, of course, you should first create a restore point. How to do this in Windows 11 - read here.
However, when installing a driver from previous versions of Windows, a natural problem may arise, and more than one. For example, the installer will immediately terminate its work, citing incompatibility with the Windows operating system installed on the computer. But more on that later. In the meantime, we need to figure out which audio card to look for the driver from. Device Manager will help us with this:
- Find the sound card in the “Device Manager” list according to the instructions above and double-click on it.
- In the window that opens, go to the “Details” tab, then select “Equipment ID” in the “Property” list, select and copy the line with the letters “VEN” and “DEV”.
- It is also possible that instead of "VEN" and "DEV" something like this will be specified:
- Whatever it says, copy and then paste the text into the search bar of any search engine to determine the name of the audio card or even find a site where you can download the driver.
We are trying to install the downloaded driver. If the installer gives an error about incompatibility with the operating system, follow these steps:
- If the downloaded driver is compressed into an archive, unpack it anywhere on the disk. If this is an executable EXE file, then you will need to find the folder on the disk where it unpacked the driver files. For example, when installing the Realtek driver, the third step specifies the path to unpack the driver:
- And at the very end of the unpacking, you are prompted to immediately begin installing the driver:
- In this case, you just need to uncheck the box and click “Finish” to close this window.
Now that we have the unpacked driver on disk, we reopen the “Device Manager” and the audio card properties window. Go to the “Driver” tab and click on the “Update Driver” button. But this time, instead of the “Automatically search for drivers” option, select “Find drivers on this computer” (we said earlier that we may have to return here):
Next, you will need to specify the folder into which the driver was unpacked. In our case, this is “C:\DRIVERS”. All you have to do is click the “Next” button and wait for the result - the driver will either be installed or not. And the failure is not necessarily due to the fact that software that was not suitable for the sound card was downloaded. It is possible that Windows could not find matching files in the specified folder. Just go back to the previous step to specify a different folder.
Driver rollback
- Click "Win+X" and select the section "device Manager».
- Select the section "Driver" and open the window "Properties».
- Here you should click on the button “Rollback».
Volga or Pobeda? Are you familiar with the Soviet automobile industry? Test yourself in a fun test!
Third party software
If the sound is gone in Windows 10, check to see if there is no sound in all programs. If it disappears in some individual applications or when working in a browser, most likely the problem lies with them. It is worth taking a close look at the settings of these programs.
If you cannot eliminate them, then reset all settings of this program/application or install it again. In addition, some program may be causing the error. After installing it, the sound disappeared throughout the entire system. You can check this while cleaning the system boot, leaving the audio service running.
Running the Audio Troubleshooter
Although all Windows troubleshooting tools have a reputation for being useless among users, they still, although not always, help. In general, this tool launches automatically when you click on the volume icon in the tray near the clock if the system has problems with sound. If this does not happen, then you can start it manually:
- Open the “Settings” window again, go to the “System” tab, then go to the “Troubleshooting” section:
- Go to the subsection “Other troubleshooting tools”:
- Click on the “Launch” button opposite the “Play sound” item:
- All you have to do is wait until the troubleshooter finishes its work: