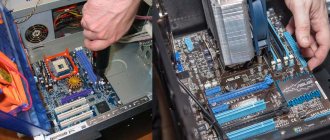
If you want to change the processor, but are afraid to do it yourself, and don’t trust the technician, then read this article. In fact, this process is very simple and easy. The main thing is to be careful, take your time and be attentive. So, in this review, we’ll look at how to install a processor on a computer.
This will also be interesting to you:
- How often to change thermal paste, and how to do it
- Which processor to buy: selection criteria
“Computer hearts” are divided into two types: Intel and AMD. Therefore, before installing a processor on your PC, you must choose one that matches the socket of your motherboard.
Installing an Intel processor generally differs little from AMD. There is a difference in the design features, but what and where to tweak will become clear when you pick up the processor itself, the cooler and see the motherboard in front of you. Therefore, I think it makes sense to combine the instructions for installing an AMD and Intel processor.
How to install the processor correctly
The processor is installed in a special board slot - a socket. Before installing the processor on the motherboard, remove the socket from its fasteners. Intel and AMD do this differently. But the point is that the processor socket was completely and easily accessible. These actions should be done carefully, without using excessive force.
On the processor itself and on its socket in the board there are special keys - designations and grooves. Thanks to them, you will never be able to install the processor incorrectly. Before installing the processor correctly, you need to orient it so that all the keys match the socket.
After this, you should carefully lower it onto the socket, and then, if you have oriented the processor correctly, it will fit into the socket itself. It is strictly forbidden to use force here, as you can bend the contact legs. This will lead to long and painstaking straightening.
After installing the processor on the computer, you need to secure it with the same fasteners from which we first freed the socket. Avoid applying strong pressure and ensure a firm hold.
How to find out which processor to buy
To purchase a processor, you will have to find out which motherboard is installed on a particular PC. Its modification, the type of “connector” (socket) for connecting the CPU.
There are two main manufacturers of boards and processors:
- Intel;
- AMD.
Important! These are old competitors, their components are not interchangeable. That is, an Intel processor will not fit an AMD board.
The main manufacturers of boards and processors are Intel and AMD
Motherboards are equipped with sockets - a kind of multi-pin connectors for installing processors. Each “leg” of the CPU corresponds to a hole with a contact.
There are several popular types for Intel and AMD:
- Intel: LGA 2011, 1155, 1156, 1366 and 775. The latter is obsolete, but is quite common;
- AMD: AM3, AM3+, AM2, AM2+, FM1, FM2.
For inexperienced users, the following method is recommended for determining the required CPU, so as not to go into the intricacies of processor design.
Step 1. You need to download the free CPU-Z program, there are Russified versions (also freely distributed).
On a note! If the system has more than 3 GB of RAM installed, it is recommended to use the 64-bit version; in other cases, the 32-bit version is suitable.
In the search engine of any browser, enter “CPU-Z download in Russian”, follow the first link
Select the appropriate version and click on the download link
Step 2. No installation is required, launch is carried out by double-clicking on the application icon from the folder where the download was made.
Click on the downloaded zipped file
Click on the “exe” file
Step 3. Information about the processor will be visible in the main window. In this case, the processor socket is called 1156 LGA. This is a common connector from Intel. Therefore, it is the CPU with this socket that should be purchased.
We recommend reading the article on how to choose a processor for a socket.
In the “CPU” tab, in the “Processor packaging” section we see the name of the processor socket
Important! But you need to remember that certain motherboards support specific processors.
Step 4. To find out which chips can be installed on a given MP, you will have to find out the list of CPUs it supports. To do this, you need to open the “Boards” tab, where the corresponding model in the system will be indicated. In our case it is H55M-S2.
Open the “Board” tab, find the necessary information in the “Motherboard Model” field
Step 4. Now you will need to enter this name in the browser search bar (for example, in Yandex search or Google) and find the official website of the board manufacturer.
In the search engine of any browser, enter the motherboard model and go to the official website of the manufacturer
Step 5. There, in the “Support” section for this product, there will be a list of chips that can be installed on the MP. An image of the board is also presented here, so you can verify that the model is correctly identified by appearance.
Go to the “Support” section, then open the “List of compatible processors” item
The figure shows a table with supported processors for our Gigabyte board.
In the table we find information about which processors are compatible with our motherboard
On a note! You can do it even simpler: write down the MP model and go to a computer hardware store, where sales consultants will help you make your choice.
Installing a cooling system on the processor
The processor cannot work without a cooler, otherwise it will burn out. On AMD and Intel, coolers are installed differently, as they have different designs. But everyone can figure out how this is done by looking at this radiator and fan. The idea is to use latches that allow the surface of the heatsink to be pressed tightly against the chip.
Don't forget about thermal paste. Before installing the cooling system on the processor, spread a thin layer of thermal paste, and only then install the cooler.
After the processor has been installed on the motherboard, and the fan and radiator have also been installed, you need to connect the power supply to the cooler. The motherboard has a special power connector for this. It will not be possible to make an incorrect connection due to the presence of keys. Move the excess power cord away so that it does not interfere with cooling and is not damaged by the fan blades.
This completes the installation of the processor; the video below will help you understand the procedure in more depth.
Setting in BIOS Setup
You usually do not need to make any settings in the BIOS after replacing the processor. Just reset all settings and the configuration will be redefined when you turn it on. You can do a reset in different ways:
- Move the special jumper on the connector to the “Clear CMOS” position for a few seconds. This jumper is usually located next to the battery. Then return it to its place.
- Sometimes, instead of a jumper, there are simply contacts on the board with the same designation - they can also be closed for a few seconds with a screwdriver.
- You can remove the battery and use a screwdriver to close its contacts. The BIOS memory where the settings are stored will also be cleared without power. Then return the battery to its place.
When you turn on your computer, the BIOS will load with default settings. You may need to go into them and set the time, date, and boot sequence from different devices.
Recommendations for installing a processor
And finally, I’ll give you a couple of recommendations.
Before installing the processor on your computer, you may have to remove the motherboard from the system unit. To avoid causing any damage to it, it should be placed on something soft - for example, foam rubber. Also avoid exposure to static electricity.
Some coolers and processors already have a layer of thermal paste. If the processor has thermal paste, then there is no need to apply it to the cooler. Do the same if the thermal paste is located on the cooler. That is, avoid double layering. In general, I would recommend that you erase the factory layer and apply your own, so that it is absolutely normal.
When installing the processor, try to avoid touching the socket, as this may cause the pin legs to become bent, which will be difficult to fix. The same thing will happen if you press hard.
A big mistake that technicians make is that they forget to turn on a computer with a cooler, the power of which is not connected. Therefore, check before starting whether the cooling system is connected.
Similar articles:
- How often to change thermal paste, and how to do it Let's talk about how often you need to change thermal paste. After all, untimely replacement can cause freezes...
- How often to change thermal paste, and how to do it Let's talk about how often you need to change thermal paste. After all, untimely replacement can cause freezes...
- Installing a hard drive on a computer - how to avoid mistakes Installing a hard drive on a computer is not a difficult task and there is nothing to be afraid of if you have to...
Setting up on Windows
There is usually no need to configure the system after replacing the processor - it will simply display a message about the detection of new hardware and install new drivers for it. After this, it is better to restart your computer. But sometimes, although in rare cases, a blue screen may appear instead of Windows loading normally. Then you can try to boot the system in safe mode - press F8 at the beginning of boot and select the appropriate item. Then, if the system boots, go to the list of devices, find the processor there and remove its drivers. After a reboot, Windows usually correctly detects the new processor and installs the appropriate drivers for it.
If all this does not help and the system does not boot, you should try booting from a flash drive or disk. If the computer works normally with them, then you will have to reinstall the old system again. This rarely happens, usually the source of the problem is drivers, and installing new ones rarely causes problems, since the system already has them for most processors.
Why does a blue screen appear after replacing the processor?
Windows crashing with a Blue Screen of Death (BSoD) most often indicates a problem. But not always.
A one-time BSoD after the first connection of a new device is a normal phenomenon, which may occur due to the system incorrectly recognizing it when installing the driver. To solve the problem, just restart your computer; reinstalling Windows is not necessary.
If crashes to a blue screen are repeated over and over again, the reason may be as follows:
- The processor is not fully supported by the motherboard.
- The BIOS settings are not set correctly.
- The cooler is installed incorrectly or its power does not meet the needs of the processor.
- Any of the devices is faulty (may have been damaged during an upgrade).
- The processor was not detected correctly in Windows.
- The CPU is individually incompatible with RAM.
Stages of installing a processor on a motherboard
Before starting the installation itself, you should definitely take into account some details when choosing components. The most important thing is the compatibility of the motherboard and CPU. Let's look at each aspect of the selection in order.
Stage 1: Selecting a processor for your computer
First you need to select a CPU. There are two popular competing companies in the market: Intel and AMD. Every year they release new generations of processors. Sometimes they have the same sockets as older versions but require a BIOS update, but often different CPU models and generations are only supported by certain motherboards with the corresponding socket.
Select your processor manufacturer and model based on your needs. Both companies provide the opportunity to select suitable components for gaming, working with complex programs or performing simple tasks. Accordingly, each model is in its own price category, from budget to the most expensive top-end stones. Read more about choosing the right processor in our article.
Step 2: Selecting the Motherboard
The next step is to select the motherboard, since it must be selected according to the selected CPU. Particular attention should be paid to the socket. The compatibility of the two components depends on this. It is worth noting that one motherboard cannot support both AMD and Intel, since these processors have completely different socket structures.
In addition, there are a number of additional parameters not related to processors, because motherboards differ in size, number of connectors, cooling system and integrated devices. You can find out about this and other details of choosing a motherboard in our article.
Step 3: Cooling Selection
Often the name of the processor on the box or in the online store contains the designation Box. This inscription means that the kit includes a standard Intel or AMD cooler, the power of which is quite sufficient to prevent the CPU from overheating. However, such cooling is not enough for top models, so it is recommended to select a cooler in advance.
There are a large number of them from popular and not so popular companies. Some models have thermal tubes, radiators, and fans can be of different sizes. All these characteristics are directly related to the power of the cooler. Particular attention should be paid to the mounts; they must match your motherboard. Motherboard manufacturers often make additional holes for large coolers, so mounting should not be a problem. Read more about choosing cooling in our article.
Step 4: Mounting the CPU
After selecting all the components, you should proceed to installing the necessary components. It is important to note that the socket on the processor and motherboard must match, otherwise you will not be able to complete the installation or damage the components. The installation process itself is as follows:
- Take the motherboard and place it on the special pad that comes with the kit. This is necessary so that the contacts at the bottom are not damaged. Find a place for the processor and open the cover by removing the hook from the groove.
The processor has a gold-colored triangular key in the corner. When installed, it must match the same key on the motherboard. In addition, there are special slots, so you cannot install the processor incorrectly. The main thing is not to apply too much load, otherwise the legs will bend and the component will not work. After installation, close the cover by placing the hook in the special groove. Don't be afraid to press a little harder if you can't get the lid all the way through.
Apply thermal paste only if the cooler was purchased separately, since in boxed versions it is already applied to the cooler and will be distributed throughout the processor during cooling installation.
Now it is better to place the motherboard in the case, then install all the other components, and last of all, attach the cooler so that the RAM or video card does not interfere. The motherboard has special connectors for the cooler. After this, do not forget to connect the appropriate power supply to the fan.
This completes the process of installing the processor on the motherboard. As you can see, there is nothing complicated about this, the main thing is to do everything carefully and carefully, then everything will be successful. Let us repeat once again that the components must be handled with the utmost care, especially with processors from Intel, since their legs are flimsy, and inexperienced users bend them during installation due to incorrect actions.
Thank the author and share the article on social networks.
Installing the processor
Having selected all the components, you can begin installation. It is important that the socket of the processor and motherboard match each other. Otherwise, one of the parts will be damaged.
The instructions on how to install the processor on the motherboard are as follows:
- First you need to put the motherboard on a special pad. This way, your contacts will remain completely safe;
- Having found a place for the processor, open the cover by removing the small hook from the groove.
- If it is not clear which side to install the processor, then on one of its corners there is a yellow triangular key, the same as on the motherboard. When installed, they must overlap each other. You should not apply significant effort, otherwise the legs of the fasteners will bend, which will lead to breakage.
- After inserting the processor into the socket, you need to close the cover and return the hook to its original state.
Now it’s unlikely that anyone will have a question about how to install an IntelCore i7 processor or any other.
Actions after installation
- If the computer is not new and any version of Windows was installed on it, it must be reinstalled. This is done to eliminate possible errors and problems. The operating system will adapt to the new processor, and it will work with greater performance.
- Depending on the processor, a cooler of a certain power will be required. It must be supported by both the motherboard and the processor itself.
How to change the processor to another one yourself
Yielding to an impulse, we immediately order a suitable “stone” from our favorite online store (or, not caring about self-isolation and the coronavirus pandemic, we go to an offline store). Don't forget to buy additional thermal paste - it is possible that you will need it.
Another such moment. Processors are available in two configurations:
- BOX - a box in which, along with the processor, a suitable cooler and the required portion of thermal paste are packed;
- OEM - the CPU itself, perhaps even without any packaging.
I recommend buying boxed solutions - in this case, the cooler’s power to cool the “stone” is guaranteed to be enough. If you buy an OEM part, its heat dissipation may be greater than that of the previously used CPU, and the fan may not be able to cope with such temperatures.
Disconnect all wires from the system unit and remove the side cover. Taking this opportunity, you can also clean all the dust inside the system unit. Next, remove the old processor and install the new one.
Radiator installation
Installing a radiator is an extremely important process. If a person changes the processor, there is no way for him to avoid this process.
Cooling is also selected depending on the motherboard socket. If a person bought a processor in a BOX kit, i.e. in the boxed version, the cooling already has thermal paste applied.
Intel Pentium processor in BOX configuration
All you need to do in this case is remove the protective film and install it on the installed processor.
If a person purchased cooling separately from the processor, he needs to make sure that the cooler is compatible with the socket and meets the heat dissipation requirements. To do this, you should make sure that the TDP parameter is greater than or the same size as the processor. TDP or power dissipation is a value in watts that indicates how much thermal power a CPU cooling system can handle. Typically, the TDP of processors for personal computers is 95 and 125 W. Accordingly, the TDP of the cooling system should be the same. You can find out the TDP of the processor and cooler on the manufacturer’s website or in the store where you plan to buy replacement components.
Replacing an Intel Processor
The process is almost the same. The only difference is in the way the fan cooler is attached to the motherboard. This brand uses 4 swivel clamps located at the corners. To remove the clamp, you need to slightly press the lever and turn it.
When installing the fan, after you have applied thermal paste, I recommend fixing the clamps diagonally, for example, upper left - lower right - lower left - upper right. The location is conditional, be guided by the position from you. There is no difference in the sequence, the main thing is the method of fixation, that is, diagonal.
Regarding reinstalling the operating system. In most cases this is not required. The OS does not have any drivers for the processor - this part itself makes all the drivers and other software work.
If you replaced the motherboard at the same time, then with a high probability you will need to replace Windows, since the old one simply will not start. If you decide to take this step, do not forget to copy the important data that is stored on the C: drive. Otherwise, you will have to use LiveCD and other shamanism to gain access to the system partition and save important files before full formatting.
That's all, actually. Replacing a processor is easier than it might seem, if you strictly follow the instructions, I guarantee. I also advise you to read what to do if the computer does not turn on after changing the processor (coming soon on the blog). You can read about the cooling system for a computer CPU here.
Follow me on social networks and don't forget to share this post. Good luck!
It's a pity that computers become obsolete faster than we would like. Just a three- to four-year-old device, according to the bigwigs of the computer gaming industry, is already “pre-retirement.” This means that to run the latest generation games you will have to fork out for new hardware.
Replacing all the components at once is expensive and not everyone can afford it, so many decide to upgrade their “pet” piece by piece. But admit it, which of you, when connecting another freshly purchased device, did not freeze with excitement: what if Windows won’t boot this time?
Upgrading a PC does not always go smoothly and, in order to avoid surprises, it is better to prepare for it in advance. Let's talk about whether you need to reinstall Windows after replacing the processor and what other surprises you may encounter during this manipulation.
