Relatively rare problems associated with the new operating system include the disappearance of the taskbar. Most often, this occurs at the request of the user (you can remove the panel using the parameters), and therefore does not cause much concern. However, if no one has changed the settings, then the problem inevitably requires human intervention. Therefore, below we will consider how to get the taskbar back in Windows 10.
How to enable the Taskbar?
The tool usually appears at the bottom of the screen. The appearance is standard, set by the operating system developer, but can be changed at the request of the user. Management is carried out through the context menu or the settings section of the personal computer. Main components of the console:
- Start button with access to PC folders and applications;
- quick launch system with links to necessary functions;
- search element;
- task presentation (display of currently running programs);
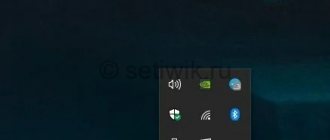
- additional tray (a set of icons, for example, clock and volume);
- Desktop launch key (usually displayed in the corner on the right).
A separate launch of the console is not required - Microsoft developers have provided for automatic launch after installing the Windows 10 operating system on the user’s personal computer.
Enable or disable system icons
These icons are quite often left as they are configured by Windows by default. The problem is that if you have a lot of active system icons, as well as several third-party applications that also put their icons in this section, they may lose their usefulness: quick access to certain system functions.
If the list of icons in this section is large, it's always difficult to find the one you need, and that's why disabling the ones you don't need (both third-party apps and system icons) can usually be a very good idea.
For third-party apps, you will need to access the settings and find the option to disable the icon. In almost all apps, this is in settings or preferences, so you just need to open the app and find this option.
Windows system icons can be turned on or off from one place . Microsoft has put everything in one place, making it very easy to manage.
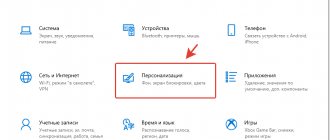
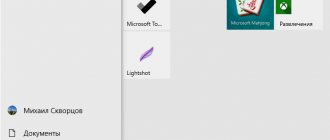
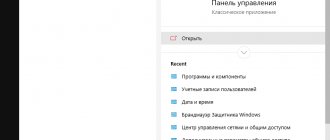
To access the icon options, you must display the Start menu and then click the gear icon to access Settings. Once inside, click “Personalization” and go to the taskbar from the menu on the left. Scroll and tap Turn system icons on or off.
In a new window you will see a list with all Windows 10 system icons . At this point, all you need to do is turn off or on the switch that you will find next to each icon. Select the configuration that best suits your needs, and as you change the switch, you'll see the icon disappear if you deactivate it or appear if you activate it.
How to change color
Often users are not satisfied with the external configuration of operating system elements that are installed by the developer. One way to change the color:
- open the “Settings” section (combination of the “Windows” and “I” hotkeys);
- go to the “Personalization” block;
- Select “Colors” from the list on the left;
- Check the box next to “In the Start menu, taskbar, and action center” (shown under “Display the color of items on the following surfaces”).
Attention! If the set presented by the program does not contain the desired shade, you need to go to the “Additional color” section. Here, by moving the cursor, you can select the most suitable option.
Quick desktop view
When many windows are open and you need to run some program from the desktop, it takes a long time to close each one individually. To do this, use a barely noticeable button on the taskbar on the right or the Win+D combination - click on it and everything will immediately collapse. We pressed the button again and the windows opened again.
How to return the shortcut to minimize all windows How to minimize all windows in Windows 7
But if you just need to look at the desktop, then in the settings, activate the “Show desktop when you hover over a button...” item. After that, just move the cursor to the end of the panel and the windows will disappear, and as soon as you remove the cursor they will appear again.
How to hide?
Hiding the block helps to customize the personal computer screen to the owner’s preferences. To remove the console, follow several steps:
- call the context menu of the element (right-click on an empty space);
- select “Automatically hide during desktop”;
- this function must be active.
If the situation has not changed, use the Task Manager. In the “User” block, find the “User” section, then go to “Explorer” (can be called exploer.exe). Click on the indicated item and select restart the operating system.
Restarting Explorer
The most often described problem with the missing Windows 10 taskbar is just a “bug” and can be solved very simply by restarting Explorer.
To restart Windows 10 File Explorer, follow these steps:
- Open the task manager (you can try through the Win+X menu, and if that doesn’t work, through Ctrl+Alt+Del). If Task Manager doesn't show much, click More Details at the bottom of the window.
- Find "Explorer" in the list of processes. Select it and click Restart.
Usually, these simple two steps will solve the problem. But it also happens that after each subsequent turn on of the computer it repeats again. In this case, sometimes disabling Windows 10 fast startup helps.
How to remove Search?
Reducing the number of pinned elements and icons helps make the console more spacious for working with current windows. For example, you can remove the Search button:
- activate the context menu;
- go to the Search line;
- Select “Hidden” from the options presented.
After completing the action, the icon will disappear, leaving more space for pinning more important icons.
How to reduce or increase?
The width of the block itself cannot be made smaller. However, you can customize the size of the icons displayed. Instructions:
- call the context menu;
- select the “Properties” section;
- Check the box next to “Use small buttons.”
After this, you must confirm the operation by pressing the “Confirm” button at the bottom of the current window.
Change location
There are four positions of the block relative to the desktop of a personal computer: top, bottom, left, right. To unpin an element from its current location (most often from the bottom), you need to follow several steps:
- open the console context menu with the right mouse button;
- select “Options”;
- then click on the “Taskbar” item;
- In the drop-down list of possible options, click on the desired line.
The method works for the tenth version of the operating system and earlier (eighth, seventh, others).
Adding a toolbar
Windows also allows you to add an additional toolbar. To add it, right-click in any empty space of the panel, where in the context menu select one or more options:
- Address - a simple address bar into which you can enter the URL of the website that will be opened in your default browser;
- Links - a list of favorites from the Edge browser;
- Desktop - a list of files and folders located on the desktop.
In addition to the standard options, you can also select “Create a toolbar”, then specify a folder on your computer. Files and folders located in it will be accessible using a small icon with a drop-down menu.
Pinning icons and folders
To pin an application or program icon to the console, you need to drag the shortcut from the desktop to the desired area. To fix a folder icon, do the following:
- launch Explorer, select the partition with the required folder;
- right-click on the selected element;
- in the context menu that pops up, click “Create shortcut”;
- Right-click on the new shortcut and go to “Properties”;
- select the “Object” field;
- In the line before the description of the path to the folder shortcut, write “explorer”.
In addition, in this section you can change the icon of the icon - change and click on the icon you like. Then click “Ok”.
Available panel settings, instructions
Each user can change the line at their own discretion. Settings such as reducing size, pinning, eliminating unnecessary icons, and narrowing are available. As you use your computer or laptop, you can periodically change its shape and appearance.
How to make the taskbar smaller
How to move the taskbar to the bottom of the screen in Windows 10
The line is enlarged for excessively large icons. To reduce them, respond with the following actions:
- Right-click on the strip and select the “Properties” section.
- In the menu that appears, select the “Taskbar” section, where you check the “Use small icons” function.
- To save the settings, click “Apply”, then “Ok”.
This is a set of simple actions that anyone with minimal PC skills can perform.
How to change the taskbar
For users who want to see the old XP main line in Windows 10, there is a way to give it a makeover. Perform the following actions:
- Right-click the mouse, the user should find the “Properties” function.
- A new window opens, where you check the box “Use small icons.”
- In the “Taskbar Buttons” section, select the “Do not group” function.
- Press the “Apply” key to save the selected settings, then select “Ok”.
In the Properties menu, it is not necessary to convert the string to Windows XP values. You can choose different formats according to your work preferences.
If the user needs to change the background color, the following settings need to be made:
- Right-click in the center of the main screen and select “Personalization.”
- In the window that appears, select the “Window Color” category.
- A new window appears where you select the menu color, enable the transparent function, and change the color intensity.
- If the above actions are not enough, use color settings, where you change the hue, saturation, and brightness.
- When everything is ready, click “Save changes”.
Attention ! If you don’t like the changes, do not save them, but click on the “Cancel” button.
Change of location
If you need to move a line, do the following:
- Right-click and select “Properties”.
- The Taskbar section of the screen is set to Bottom by default, but can be changed to Left, Right, Top.
- After selecting the required action, click on “Apply”, “Ok”.
If you need to add a new tool line, choose the following actions:
- Open the folder in the “Taskbar”, select the “Panels” section.
- Add links, address, desktop, input panel, language.
Important ! Any section, for example, language, is most often added by default. The user can add basic functions at his discretion.
Selecting address, desktop, input panel, language
How to pin at the bottom of the screen
Freezing a line is easier than performing other actions. Adhere to the following points:
- Clicking the right mouse button.
- Selecting the “Pin the taskbar” function.
The main thing is that there is a check mark in the pinning section. If it is already present, you do not need to do anything.
Freeze a row
How to remove unnecessary icons
The default row contains application icons. To remove them, right-click and select the “Unpin from taskbar” function. The application will remain on the computer, but the shortcut will be removed from the main line.
How to narrow the taskbar
If the user's main line has become too wide as a result of some action, point the cursor to its upper border. Press the double arrow that appears, narrowing the panel to its previous values. It will decrease as long as the icons allow.
Icon Location
The user can configure the location of shortcuts in the console area manually. The grouping of certain icons is as follows:
- open the element's context menu;
- select “Options”;
- then Select Icons.
Then you need to move the sliders to the “On” position. opposite the required programs. The setting allows you to avoid grouping applications that the owner does not use. The display order can be changed by selecting and dragging the cursor to the desired position.
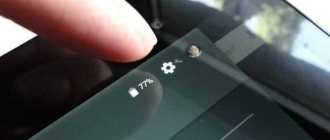
View battery status in the taskbar
When using a laptop, it is important to know how much charge is left on the device. To quickly obtain information, you need to configure the interface:
- go to the “Settings” section through the context menu;
- then to the block for selecting displayed elements;
- Opposite “Power”, activate the slider.
The corresponding icon will instantly appear on the console.
Auto-hide
In some cases, the user may not want the display of the retractable console to be visible. Setup steps:
- call the element's context list;
- go to the “Settings” section;
- Set the item “Automatically hide the taskbar in desktop mode” to the “On” position.
After this, the console will disappear if you remove the cursor from the corresponding field.
On Windows 7
Setting up the taskbar in Windows 7 or 8 and its elements are very similar to the top ten. Clicking on an empty space on a line opens a context menu. It contains all the points that we have already covered.
If you are interested in more settings, for example, you need to pin or remove the taskbar from the screen, then instead of the “Options” button, go to “Properties”.
How to hide the taskbar in Windows 7
A separate window will open, in which, in fact, all this can be done: select the type of buttons, the position of the panel itself on the screen, and so on. If the clock or volume icon disappears, use the “Configure” button.
Now, you know exactly where the taskbar is in Windows and how you can customize it. It should not be underestimated, since it not only allows you to switch between open utilities, but can also help you quickly access the desired folder. And thanks to the correct settings for displaying system icons, the necessary information will always be visible.
Watch the video on the topic:
Rate this article:
(ratings, average: 5.00 out of 5)
About the author: Anya Kaminskaya
- Related Posts
- Swapfile.sys in Windows 10. What is it and how to remove it?
- How to add a video to YouTube
- Numbers are printed on the keyboard instead of letters: how to fix
Disable the taskbar on additional monitors
You can disable the console on additional Windows monitors as follows:
- go to “Settings”, select the “Taskbar” section on the left;
- at the bottom you will find a display of several screens;
- switch the indicator to the desired position.
Attention! These settings will only take effect if the secondary display is in extended format.
Setting up specific tray icons
Tray is a separate area with icons on the taskbar. Customization is performed through the context menu and the Settings block. Configuration is performed in several options:
- hide icon;
- exit from the specified program;
- removing an application from the automatic download section.
For the first point, just drag the icon with the mouse cursor. You can exit by calling up the context list and the corresponding item.
The taskbar is an element of the operating system of a personal computer. The console displays icons for current operations, pinned icons, and a group of tray symbols. To configure the block, use the context menu and the “Options” section.
Additional reasons for disappearance
The number of reasons for a taskbar malfunction is actually much larger, but the most popular are:
- The presence on the computer of third-party programs that are capable of performing various manipulations with the interface without notifying the user. Most often these are tweakers, alternative skins, transformation packs, and in some cases even software that is not related to appearance at all. To make sure that the taskbar disappeared because of third-party utilities, you need to perform a clean boot of Windows.
- The integrity of system files has been compromised. This situation in most cases manifests itself immediately after installation. To solve the problem, you need to diagnose the OS and, if necessary, install a different version of Windows.
- The video card or related software is faulty. Some computer owners use obsolete components that do not support new display technologies. If your video card does not support one or another mode, it's time to think about buying a new one. It is also worth checking the relevance and presence of the necessary drivers in the system.
Don't forget about the tablet mode, which appeared in Windows 8. After switching to a special display mode, the Windows shell changes its appearance, and some elements become inaccessible. To fix the problem, you just need to return to the classic display mode. This is done by disabling tablet mode in the notification menu.