Notes – user notes that do not fit into the document, but are “attached” to the selected fragment. They are located in the margins (outside the sheet) and have their own structure and set of functions. They can be added in both single-user and multi-user modes.
How to remove notes in Word
How to Create a Note in Word 2010
To insert a note:
Step 1. Open a Word document, type or paste text.
Open a Word document, paste or type text
Step 2: Select a character, word, sentence, paragraph, chapter, or other text space.
Select the text for which you want to create a note
Step 3: Click on the “Create Note” icon in the “Review” menu.
Go to the “Review” menu, click on the “Create a note” icon
Step 4. In the comment field that opens, enter the text of the comment.
Enter the text of the comment in the notes field
Step 5: Click on any free text area to exit the comment field and continue working on the document. If you need to change the text of a saved note, just click on its text - you will immediately go into editing mode and can add or rewrite it.
Click on any free text area to exit the comment field
If you start making a note but change your mind, press Ctrl+Z on your keyboard to exit note-taking mode without saving.
Attention! If you erase text from a note in edit mode and return to work on the document, the note will not disappear. It will be “tied” to the text, but will not contain useful information.
Changing Notes
You can edit a comment by selecting Edit Comment from the More Thread Actions menu, which can be found in the top right corner when commenting.
Note: In Word for the web, the Edit Comment option is limited to only be available for comments that you have added. However, keep in mind that other people can still edit your comments by editing the Office file directly.
How to Hide a Note in Word 2010
Notes may interfere with document viewing. You can hide them so as not to be distracted from working on the text:
- Open a Word document with comments and go to the “Review” menu tab.
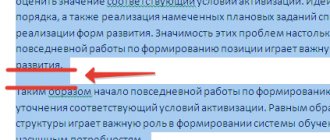
Go to the “Review” menu tab - Uncheck the Notes box in the Show Corrections drop-down menu.
Click on “Show corrections” and uncheck the “Notes” box.
Reference! To return notes removed in this way, it is enough to again about in the list of displayed corrections.
Word 2013
Disable change logging to prevent further changes from being added to the document. Existing recorded changes can be temporarily hidden by selecting No Changes in the Enter Review Mode box. This allows you to preview what the final version of the document will look like, but the changes will appear again when you open the document again. To prepare a document for sharing with others, you must finally accept or reject recorded changes and delete comments.
- To review changes one at a time, click Review, and then choose Accept or Reject. To complete the document immediately, select Apply all changes to the document or Reject all changes to the document.
- On the Review tab, in the Comments group, click the arrow next to the Delete button, and then click Delete All Comments in Document.
- You can find remaining recorded changes, comments, and other nonpublic information in a document by using the Document Inspector by clicking Find Issues, then clicking Document Inspector on the Review tab.
Content
The notes or annotation feature in Word is used to add small notes to a document, which appear as footnotes on the right side of the worksheet. Using comments, you can discuss the text with other users, make amendments to it, point out errors, etc. without changing the document itself. Notes that are no longer needed can be deleted or marked as completed.
How to Comment a Note in Word 2010
If you don't want to change an existing note, but want to add to it, you can create a note on the note:
Step 1. Open a Word document with a note and click on its text.
Open the Word document with the note and click on its text
Step 2: Click on the “Create Note” icon in the “Review” menu.
In the “Review” menu, click on the “Create a note” icon
Step 3: Enter additional note text.
Enter the text of the additional note
Step 4. Click anywhere in the document to exit note editing mode.
Click anywhere in the document to exit note editing mode
You can create multiple nested notes. They will be connected to the same section of text.
Adding or removing a note
By attaching comments to specific parts of the document, your feedback will be clearer. If someone else comments on a document, replying to their comments allows you to discuss it even if you are not in the document at the same time.
Select the content you want to comment on.
Go to > New Comment.
Enter a note. If you want to make changes to any of the comments, just go back and edit them.
To reply to a comment, go to the comment and select Reply.
Note: Please note that other users may change your comments. Comments in an Office document are stored in a file, so anyone with editing access to the file can edit your comment.
How to Delete a Note in Word 2010
When you're done with a note (or it was created by accident), you can easily delete the note:
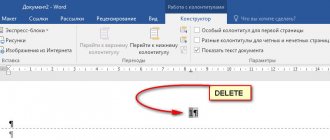
Step 1. Open a Word document, select the note to delete and right-click on it.
Select the note to delete and right-click on it
Step 2: Select "Delete Note" from the menu that appears.
Select “Delete note”
You can also select a note and click the Delete Note button in the Review section of the menu.
Select the note and click the “Delete note” button in the “Review” menu section
On a note! You can cancel deletion by pressing “Ctrl+Z”.
Overview panel
The purpose of the viewport is to make long comments easier to read, as well as to provide an overview of all comments in one place.
To display the panel in Word 2007 and 2010, you must enable it on the Review tab. It's in the tracking group. You can choose if you prefer a horizontal or vertical version.
In older versions of Word (2002 and 2003), you should find the Reviewing toolbar and click Reviewing Pane. The Review Toolbar should appear now, but if it doesn't, go to the View menu, find Toolbars there, and click Review.
How to Delete All Comments in Word 2010
Once you've finished working on a document, you can quickly clear it of all user notes:
Step 1. Open the Word document in which you want to delete all notes.
Open a Word document in which you need to delete all notes
Step 2: Click on any note in the document.
Click on any note in the document
Step 3: Click on “Delete All Comments” in the drop-down list of the “Delete Comment” button in the “Review” section of the menu.
In the “Review” menu section, click on the “Delete comment” button, then on “Delete all comments”
All user comments will be removed from the file.
Find out information with step-by-step instructions on how to work in Word for dummies from our new article.
How to comment
In versions of Word whose main menu looks like a ribbon, comments can be added to any content: picture, shape, table, chart, text, etc. Text and graphic information can be used as comment content.
There are two ways to add a note.
First:
- By pressing and holding the left mouse button, select the fragment in the document that you want to comment. Then open the “Review” tab in the Word menu.
- Click Create Note.
- Enter the note text.
The footnote will appear to the right of the page content.
Second:
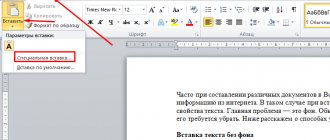
- Select the fragment of the document you want to comment on and go to the “Insert” section of the main menu.
- Click Note.
- Type or paste text.
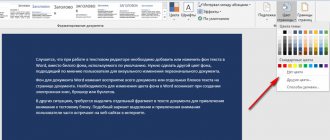
To hide (collapse) the contents of comments, click the “Show…” button in the “Review” tab. After this, they will take on a compact form: instead of being displayed in the sidebar, they will hide under characteristic icons.
To expand a comment, click on its icon.
How to Delete All One User's Comments in Word 2010
If multiple users worked on a document, you can delete all notes from each of them. For this:
Step 1. Open a Word document with notes from two or more users.
Open a Word document with notes from two or more users
Step 2: Open the Reviewers list in the Show Revisions section of the Review menu.
In the “Review” menu, in the “Show corrections” section, open the “Reviewers” list
Step 3. Leave those commenters whose notes you want to erase marked.
We leave marked those commentators whose notes need to be erased
Step 4: Select any remaining note.
Select any remaining note
Step 5: Click Remove Displayed Notes from the Remove Note button list in the Review menu section.
In the “Review” menu section, expand the list of “Delete comment” buttons and click “Delete displayed comments”
Step 6: To get your saved notes back, go to the Show Revisions section of the Review menu.
In the "Review" menu, in the "Show corrections" section about
On a note! You can also include notes from just one or a few selected users by checking the boxes next to their names.
Ways to remove the correction area in Word
Many users of the Word program know how to use the editing mode. This mode is quite popular in editorial circles, when the resulting work needs to be sent for revision, indicating all the shortcomings.
And if you are still an inexperienced user, then perhaps you do not know how to remove the correction area in Word, or the author himself does not know. In any case, in this article we will look in detail at how to do this.
Namely, how to accept changes and how to delete comments.
We accept changes
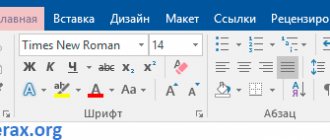
Before telling you how to remove the correction area in Word, you must first familiarize yourself with the toolbar. In the “Review” tab you are interested in only one group – “Changes”. It is here that you will find the tools that will help you say goodbye to the area of corrections in the document.
So, before you there is a document that has been edited using the “Corrections” tool. You understand that you need to correct the text and want to remove the reviewer’s comments. To do this, in the “Corrections” tool group, click the “Next” button. You will be taken to the first comment. There are two options: you can click on the “Accept” button or the “Reject” button.
note
After clicking on the “Accept” button, the changes made by the editor will be accepted and the text will be corrected. If you do not agree with the comments and want to leave the text the same, then click the “Reject” button so that the text correction (Word) does not occur.
So, methodically, one by one, delete the note, accepting it or, conversely, rejecting it.
We accept all changes immediately
So, we have already figured out how to remove the correction area in Word, using step-by-step acceptance or rejection of comments, but what if all the comments in the text are appropriate, and you want to accept them all instantly. Or reject them all at once. Fortunately, this can be done.
To immediately accept all changes, you need to click on the arrow in the “Changes” tool group, which is located under the “Accept” button, and select “Accept all changes” from the drop-down list.
If you want to immediately reject them, then you need to do all the same manipulations with the “Reject” button.
Deleting notes
Finally, we will tell you how to remove the correction area in Word if comments were made by other users. The point is that in this case the above methods do not work.
However, this is just as easy to do. All you need to do is select the note that you want to delete, and in the “Notes” tool group, click on the “Delete” button.
Source: https://pckryiz.ru/1989-sposoby-kak-ybrat-oblast-ispravlenii-v-vorde