Hello, dear visitors of my blog! Today we will consider the question of how to insert a Word document into Word. For example, you are preparing a document, and you need to insert any other file. It would be nice to have information on exactly how to carry out such an insertion. Let's figure it out.
In order to insert another document into a Word file, a special function “Insert Object” is provided, i.e. Word treats another document as an object.
Create a new file and insert it as an object
The first method is necessary when the finished document to be inserted has not yet been generated. This means that we will prepare it as we work.
- Place the cursor on the area where you plan to create an object.
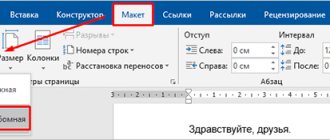
- On the ribbon, go to the tab called “Insert”, and in the “Text” section, click on the “Object” button. A new window will open.
- In the window that opens, in the “Creation” tab, select the file format that is required from the “Object type” list.
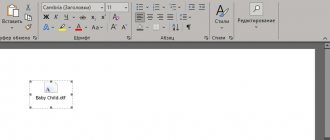
- Check the “As an icon” checkbox if you want the contents of the document to be reflected by double-clicking on the symbol.
- Click OK.
Word will create a symbol of the specified program in the area where the cursor is located, and the program will be launched to create a new file.
For example, if you select “MS Excel Sheet” as the object type, the Excel symbol will appear at the location where the cursor was placed, and then Word will launch Excel so that you can create a new document.
Formation of information blocks
Naturally, at the beginning of any presentation there should be a title page. The “main heading” in this case should directly reflect the topic that will be subsequently disclosed.
The next two slides are most often “loaded” with the introductory part. For example, the user is faced with the need to create slides whose purpose is to present the capabilities of a company that could provide its services to another organization, in particular, for the transportation of goods. An advertising campaign of this kind should primarily acquaint potential clients with the slogan, achievements and capabilities of the organization. It would not be superfluous to indicate the main direction of activity.
To make such a presentation, it is better to place a colorful company name on the first slide, and a slogan and opportunities, which can consist of several (3-6) smaller headings, on the second. The next couple of slides can reflect information about the company, for example, operating principles, accumulated experience, license information. The same section may mention the company's advantages over its competitors, as well as current promotions.
The last slides should reflect information that would familiarize potential consumers with the list of products and services offered. If the list of organization capabilities is too huge, it will be better if standard services are combined into groups.
The very last slide should contain only contact information. It is also acceptable to use conclusions or simple generalizations here.
How to insert a Word document into Word as an object
You can insert a finished document into a file using one of two methods: insert the file directly into the document or add a link to it. Place your cursor over the area where you would like to see the object.
- On the ribbon, in the “Insert” tab, in the “Text” section, click on the “Object” button. A new window will open.
- You must select the “Create from file” tab.
- By clicking on the “Browse” button, you will have to select the location where the file you need is located.
- Check the "As icon" checkbox if required. A document icon will appear at the cursor location. So, it is possible to add a file to a Word document.
- If the task is to add a link to a file, you simply need to check the “Link to file” checkbox.
How to link to an application
Applications must be placed in the same order in which they are mentioned in the text. If you need to make a link to the application from the main text, then you need to write: “See. application No.... "
For convenience, it is worth making a list of applications and their order as you work. This will save time and effort when drawing up the final version of the work.
Do you need to urgently order term paper? Place your order and our experts will respond within 10 minutes!
Added file and link - what's the difference?
If you decide to update the added file, you will have to click on the object several times to open and also edit it. Having edited the original document (outside of Word), the object within the document will remain unchanged. As for the link, the situation is the opposite. This will always display any changes made to the linked file.
Thank you for reading my article, and I wish you good luck mastering the secrets of the Word text editor. I will be glad to read in the comments that you were able to insert a document into the file you created.
Note: We strive to provide you with up-to-date reference materials in your language as quickly as possible. This page has been automatically translated and may contain inaccuracies and grammatical errors. It is important to us that this article is useful to you. Please take a few seconds and let us know if it helped you using the buttons at the bottom of the page. For convenience, we also provide a link to the original (in English).
Creating an Attractive Presentation in Word - Basics
Whatever the topic of the material being presented, it is necessary to make the presentation interesting, bright and memorable. It is this condition that affects the overall success of the plan. And taking the time to create an attractive design will achieve the primary goal of making your slides more impactful.
The user must first structure the text that will appear in the presentation. Another important aspect that should never be forgotten is time. As practice and research conducted by scientists show, the human brain is able to adequately perceive slides with information that are shown for no more than 20 minutes on a positive emotional level. It is advisable to take this parameter into account when creating a presentation and try to fit into this time period.
It is considered optimal to create an advertising display that does not exceed the content of 10–12 slides. On such a number of pages it is necessary to fit only basic information, presented exclusively in a concise and most accessible form.
Inserting a new object
To create a new file to insert into a Word document or email message, follow the steps below.
In the Object dialog box, click the New tab, and then select an option from the Object Type list.
The default program for this file type will start, in which you can enter any text or data. After you close the program, any content you added or changed appears in the Word document or email message.
If you want the file to display a clickable icon rather than the first page of the file, select the As icon check box. If this check box is selected, you can select a different icon by clicking Change Icon.
The information in the results section changes according to the selected object type and whether the icons are highlighted. With this information, you can determine what you want to insert and how you want it to appear.
To change the data in an inserted object, double-click it.
Editing function
The multifunctional text editor Microsoft Word will help anyone who wants to create slides for a presentation, which can later be edited.
When the main presentable advertising “backbone” has been created, you need to take care of editing the text. Immediately at this point you can begin to change the overall appearance, color and font size, as well as the entire style. You can accomplish this by highlighting the headings after the appropriate parameters have been set in the command ribbon.
If you managed to create a presentation in Word that has an attractive design, do not forget about the font size. According to experts, there is a certain text size for a specific group of listeners. It is best to choose a size that is half the age of the oldest person viewing the presentation. As practice shows, the text chosen in this way turns out to be easy to read for almost everyone.
Before creating slides, do not forget about the color scheme, which will become the main background, since the color of the words being typed will depend on it. The perception of a presentation directly depends on the color of the text. Therefore, it is best to choose a color scheme that will contrast with the main background. It is preferable to opt for a combination of white and black or red and blue.
The appearance of the main font should, first of all, be readable rather than beautiful. Before you apply this or that design, you should see how it looks on the big screen. The right font helps make a Word presentation more attractive and modern. That is why, instead of the usual Times New Roman, you need to use, for example, Lucida Console.
Linking or embedding an existing file
To link or embed an already created object, follow the steps below.
In the Object dialog box, click the Create from File tab and click Browse to find the object you want to insert.
To link an object to a source file without embedding it in a Word document or email message, select the Link to file check box.
If you want the file to appear as an icon rather than its first page, select the As Icon check box. If this check box is selected, you can select a different icon by clicking Change Icon.
Tip: The information in the results section changes depending on whether the file link and image icon are selected. With this information, you can determine what you want to insert and how you want it to appear.
Rules for designing an application in a coursework
There is no strict structure for application design, but there are common design rules that should be followed:
- applications are placed at the very end of the work, there should be no entries after them;
- When creating three or more appendix sections, you should separate them from the main work by a separate sheet with a heading indicating that it is followed by a section with additional information. The title is written in the font of the entire course work, in the center of the sheet, if desired – in bold font;
- make references to the appendices “(see Appendix 5)” in the course work. Applications are arranged only in the order they are mentioned in the main part of the work.
Applications are located separately on each sheet, regardless of the space they occupy. To prevent them from getting mixed up when formatting the entire work, they must be separated using the following keys: Insert - Page Break. If the application does not fit on the page, then when moving it to the next page, write “Application” at the top and put the serial number of the transferred application.
Important!
Application pages are not numbered. Only the applications themselves have a serial number. The application must also have a title. When referenced in the main work, it is not indicated. If there are several diagrams, tables, figures, etc. in one application, then in addition to the number, the letter value “(Formula B.2)” is also indicated.
If the application is large, it can be divided into several headings, subheadings and lists.
Embedded objects and related objects
Embedded objects become part of the Word file and are no longer part of the original file.
Linked objects can be updated when the source file changes. The associated data is stored in the source file. The resulting Word file or email message stores only the location of the source file and displays a view of the associated data. If file size matters, use linked objects.
Data exchange between applications can be implemented in one of two ways:
- object embedding creates an independent copy of the object in the client document. No communication with the server document is supported;
An embedded object (an Excel sheet or chart) stores information directly in the Word document. To edit an embedded object, double-click the object to launch Excel, make the necessary changes, and then return to Word. Because information is stored in a Word document, embedding should be used when you need to distribute a live version of a document to people who will not have access to separately made sheets and charts.
The linked object (Excel worksheet or chart) appears in the Word document, but the information is stored in the original Excel workbook. When you edit data in Excel, Word can automatically update the worksheet or chart in your document. Linking should be used when you need to include independently entered information in a document, such as data collected by different departments, or when you need to store information that is updated in Word. Because linked data is stored in a different location, linking can help minimize the file size of a Word document.
Introduction
Most users are accustomed to creating beautiful presentations exclusively in Power Point. And this is not surprising, because anyone, not even an IT professional, will be able to create a colorful, attractive design in a short time - a unique advertising presentation of a written term paper, graduation project, and maybe even a new product or service provided. Using the built-in tools, the user will be able to “breathe life” into his idea by clearly demonstrating it. The presentation is convenient because with its help you can present everything with a minimum of typing through visual illustrations, graphs and diagrams. When creating a presentation, do not forget about the capabilities of the multifunctional text editor Microsoft Word, which has excellent qualities that allow you to make the presentation as clear and accessible as possible.
Unlike the popular Power Point application, Word is perfectly adapted to working with any amount of text, because this is its purpose. Everyone is familiar with the problem of structuring an information block in slides. It is this aspect that determines the advice of experts to first present the text on a sheet of paper, and only then import it into Power Point.
Embedding objects
Object embedding creates a copy of the object in the generated document. Due to the fact that there is no direct connection between the source and the injected object, no changes to the injected object can affect the original object.
Embedding an Excel object in a Word document
Open an application, such as Excel, and select the table in the file Employee_Education.x1s as the object to embed.
- Select the object (data in the table), and then select Edit, Copy, a copy of the object is placed on the clipboard and is ready to be embedded in another application.
- Open the desired file in the client application (Word document) and place the cursor at the insertion position where the object to be embedded is to be inserted.
- Select Edit, Paste Special, the Paste Special dialog box appears (Fig. 119).
- Select an object from the As list, for example, a Microsoft Excel Sheet ( object).
- Click OK . The object is embedded.
Rice. 119. Embedding objects in the “Paste Special” mode
Only selecting the Object of the corresponding application in the As field and checking the Insert switch will allow you to create an embedded object. Any other selection will change the object's format.
Editing an embedded object
Embedded objects can be edited directly in the client application document. In Office 2000, when you edit an embedded object, it is activated, and the client application's menu and toolbar change to the menu and toolbar from the server application (Figure 120). Thus, editing an embedded object in the client window is carried out using the server application.
It is recommended that you always deploy an object if the following conditions are met:
- all information must be placed in a single document. For example, in the case when a document needs to be sent to the user by email;
- the server application will not be available on the same computer where the client application is running.
Rice. 120. Implementation of an object
It is not recommended to embed an object if the following conditions exist:
- the client application does not support embedding;
- The server object involved in the communication may change in the future and this change will affect the client document.
Linking Objects
Linking does not require that a copy of the object be inserted into the client application. Instead, a server object is inserted into the client application.
Linking is only possible for saved files.
Linking has its own specific advantages:
- the amount of data that needs to be stored in the client document is less than when the object is embedded;
- if the object is subsequently modified by the server application, the modification is automatically carried over to the client application.
Setting up an object link
Open a server application, such as Excel, and create an object to link (select the table in the file Employee_Education.x1s ). The file storing the object must be saved.
- Select the object, and then select Edit, Copy . A copy of the object has moved to the clipboard and is ready to be pasted into the client application.
- Open a client application, such as Word, and place the insertion position where you want the related object to be inserted.
- Select Edit, Paste Special.
- The Paste Special dialog box appears (Fig. 121).
- Select the required type of link insertion— Microsoft Excel Sheet (Object) from the As list .
- Check the Paste Link radio button and then click OK . The table is inserted into the Word document as a linked object, and changes to the table in Excel are automatically transferred to the Word document.
- Change any data in the table, then switch to Word and view the data in the document.
Rice. 121. Linking objects in Paste Special mode
Types of Link Insertion
Link paste types are available from the As in the Paste Special dialog box.
- Object (for example, Microsoft Excel Sheet Object). Inserts the associated object along with all the information contained in the object, as it would in a server application. An object can only be edited in a server document.
- Rich text (RTF). Inserts and links text and formatting from a server application. The text can be edited in the client application, but the changes may not be saved when the connection is updated.
- Unformatted text. Inserts and links only text from the server application. The text can also be edited in the client application, but the changes may not be saved when the connection is updated.
- Drawing. Inserts and links a drawing of an object from a server application. Such an object can be used for printing on high quality printers.
- Bitmap. Inserts and links a drawing of an object (such as a Paintbrush drawing) from a server application. An object can only be edited in a server document,
- HTML format. Inserts an object in HTML format for sending an email message.
- Unicode text . Inserts a Unicode object. (Microsoft Office is based on the Unicode text encoding standard, which allows Office programs to display documents correctly no matter what language they are written in, as long as the operating system supports the character set for that language.)
Design of large format applications
It is often necessary to attach attachments to coursework whose format is larger than A4. These can be attachments on sheets A3, A1, A4 *3, A4 *4. Large format is used for drawings. They are usually produced by hand or in special programs.
In order to create such an application, you need to look at the manual. Because there is no special standard. And the requirements are different for each faculty.
Exercise
Link and edit objects created in Excel in a Word document
- Switch to Excel and open the file Employee Education.x1s.
- Select the range A2:C5 that you want to copy.
- Select Edit, Copy, the range of cells is copied to the clipboard.
- Switch to Word and create a Report.doc file.
- Navigate to the page you want and place the insertion position in a blank paragraph.
- Select Edit, Paste Special. The Paste Special dialog box appears.
- Select Microsoft Excel Worksheet Object from the As list.
- Check the Paste Link radio button.
- Click OK , the worksheet is inserted and linked into the document.
- Exit Excel.
- Click No to avoid saving a large clipboard.