Making a zip archive without a program in Windows
The easiest and fastest way to make a zip archive is to make it in Windows OS without a special program.
Select any number of files/folders - press LMB and move either up or down until all files/folders are selected.
Can be opened in a separate window!
Making a zip archive without a program in Windows
Next, press RMB and look for the “Send” line in the window that appears.
Next - make a “compressed zip folder”
Can be opened in a separate window!
Making a zip archive without a program in Windows
A zip archive will be created in the folder where you selected the files/folders.
Copy link
It is impossible to compress a folder with zip files, what should I do?
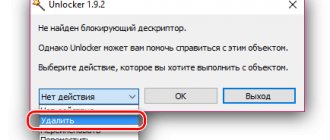
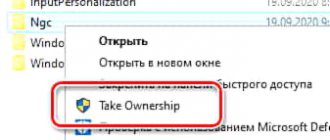
When compressing files into an archive, sometimes an error occurs - “The folder with files cannot be compressed” (screen 3).
What to do in this case? First, we need to identify the causes of this problem. For me it was the following - an extra character in the name of a file or document.
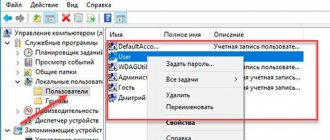
To remove this error, right-click on the file and select “Rename” from the menu (screen 4).
Next, remove characters that interfere with archiving, such as dashes, underscores, and so on. After this, just press “Enter” on the keyboard to rename the file. Next, send it to the archive again.
The process of creating a zip archive in winrar.
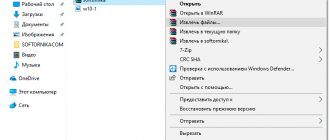
As in the paragraph described above, select the required files/folders and press RMB.
In the window that pops up, select the line with the recognizable archiver icon (it should appear after installing winrar)
Can be opened in a separate window!
The process of creating a zip archive in winrar.
In the new window, select the location (browse) to save your newly created zip archive .
Select the archive format “zip ”.
If you need to change the name of your zip archive, rename the default name of the new zip archive.
Click ok.
The process of creating a zip archive in winrar.
Copy link
Archiving files. Concept
Archiving is the process of changing the volume of files (increase/decrease), without affecting the quality of the file. The meaning of archiving is that files and folders are placed in a virtual archive, stored there in their original form.
The meaning of an archive in real life is similar to a virtual archive, storing information
A small example:
- there is a book on your desktop
- the book is stored in an information file of a certain size, for example 2 MB
- By archiving a book, you can reduce the file size to 150 KB while fully preserving the text and reading quality
Schematic representation of a file - a book after archiving:
The simplest scheme for archiving and compressing a file
However, not all files can be reduced. Video, music, photographic files are difficult to reduce. Such files are “compacted”, or rather archived into one large, packed file.
Option No. 1 creating a zip archive in the 7-zip program (fast)
We select the necessary files/folders that we want to place in the “zip archive”.
Click on the selected RMB in the window that appears and look for the line 7-zip.
Next, a new window opens, where we look for the line “folder name.zip” (on the screen “new folder2.zip”)
Can be opened in a separate window!
Option No. 1 creating a zip archive in the 7-zip program (fast)
The archive will be saved in the folder in which you selected the folders/files.
Our zip archive was created in the 7-zip program.
Popular archiver programs
The following options will help you create an archive in ZIP format.
Table of programs for creating and working with archives in ZIP format.
| The name of the program | Image | Description |
| WinRAR | Supports all formats with the implementation of data encryption and recovery of damaged fragments functions | |
| WinZip | Powerful and lightweight program with the possibility of individual archiving settings | |
| 7-Zip | Convenient utility with performance testing function | |
| PeaZip | A program with extensive data archiving capabilities | |
| ZipGenius | Easily archives and unarchives data, fully integrating into Microsoft Windows. Supports 25 formats and 5 compression levels |
option number 2 creating a zip archive in the 7-zip program
Again, select the necessary files/folders for the new zip archive.
Click on the selected RMB in the window that appears and look for the line 7-zip → add to archive.
option number 2 creating a zip archive in the 7-zip program
In the new window, select the location where you are going to save your new zip archive.
In the archive type selection line, select the zip archive type.
Click ok.
option number 2 creating a zip archive in the 7-zip program
Copy link
Automatism
In addition to zipping files for mailing, you can carry out this process almost completely automatically. If you have a program like Microsoft Outlook installed, you just need to associate it with the RAR archive. Then, when selecting options from the drop-down list when creating an archive, you need to click “Create an archive and send by email.” After making all the settings for the future archive, click “Ok”. The archive will automatically be added to a new email.
We hope our article helped you figure out how to archive files for sending by mail. Remember that the best way is the simplest. Therefore, do not try to complicate everything, create an email on any of the available services, quickly transfer the necessary files to the archive and send. Simplicity is the key to success.
Many users have encountered the problem of sending large files via email. This process takes a lot of time, and if there are several such files, the task often becomes impossible. You can make the process of sending to the addressee and downloading to the recipient easier by using various methods of reducing the weight of the content attached to the letter.
Option #1 to create a zip archive online.
Select drag and drop or open files (click on the button).
Can be opened in a separate window!
Option #1 to create a zip archive online.
After this, a window should open (automatically) for choosing to save the newly created zip archive online. Here you can change the location and name. Click “save”.
Option #1 to create a zip archive online.
If the download does not start automatically, then item No. 3 with a “save manually” button will appear at the bottom.
Can be opened in a separate window!
Option #1 to create a zip archive online.
Copy link
Archiving using Winrar
We have already mentioned that today this program is considered the gold standard in the archiver category. Strictly speaking, the compression quality here is not the highest, but high versatility did its job, and in terms of the number of copies sold, Winrar is the leader in its category (excluding pirated copies).
Let's look at how to properly archive files and folders in rar format using this program.
The algorithm is quite simple: select the folder or file to be compressed, right-click and select “Add to archive” in the context menu that appears. There will be 4 lines starting with this phrase; we are interested in the second, in which after “Add to archive” the name of the file/directory that needs to be compressed is indicated.
No confirmation is needed; immediately after selecting a menu item, the archiving process will start, the progress of which will be displayed in a separate window. After the procedure is completed, a file with the same name and rar extension will appear on the disk.
You can estimate how much the file or directory size has decreased. To do this, right-click on the folder that you archived and select “Properties”. Remember the value of the “Size” parameter and do the same operation with the archive. Let's say, for a doc file the compression ratio will be high (about five times), for large txt text files it will be even higher.
But for photos (jpg), video (avi) or music (mp3), compression will have virtually no effect, it will be zero or minimal. And all because files in this format are already compressed when they are created, but not by archivers, but by special software.
We have already noted that the archive format is unsuitable for reading by ordinary programs, so if you downloaded or were sent a rar archive, you need to unzip it.
By the way, if Winrar is already installed on your computer, then in principle it is not necessary to do this. By double-clicking on the archive, you can see its contents and even open some files by clicking on them. But it’s difficult to call this method convenient, so it’s better to unzip the archive file.
So, double-click on the archive again, we get the same result - a new window with the contents of the archive. But we are interested in the top menu of the program - click on the “Extract...” tab. A new window will open, suggesting the path where the contents of the compressed file will be unzipped. By default, this will be a directory with the same name, but you can change this path as you wish, even creating a new folder.
Of course, you can unzip not the entire archive, but individual files or subdirectories, and in exactly the same way - by placing the cursor on the desired element and clicking the "Extract..." button.
After unzipping, the rar file can be deleted from your computer.
Note that although Winrar is a paid program, new users are given the opportunity to try it out for 40 days after downloading. In this case, the functionality of the program will be the same, but each time you use it, a window will pop up warning you that you are using the trial version and asking you to purchase a license. If you do not do this, the archiver will stop working at the end of the trial period.
You can find out whether you have a licensed version or a trial version in another way - by clicking on any archive, selecting the “Help” tab in the top menu in the program window, and then the “About the program” sub-item. A new window will appear, at the bottom of which it will say “40-day trial” or “Copy owner”. In the latter case, you are the owner of a legal version of the archiver with an unlimited period of use.
Make a zip archive on mac
Depending on how many files you want to put in the zip archive on your Mac - if you need all the files in the folder - the key combination Command (⌘) + A. You can select a range of elements by holding the Shift key (⇧) and clicking on the first and last file or a folder in the list. We select randomly - Command (⌘) click on the desired files/folders (analogous to windows ctrl + LMB).
Next, click on the selected RMB.
In the new window, select “Compress objects (N)”, where N is the number of files/folders you have selected.
Make a zip archive on mac
The zip archive will be created in the same folder - Archive.zip
Make a zip archive on mac
Screenshots from the site https://yablyk.com/.
Copy link
How to zip a file or folder in 7zip
7zip is our favorite program for working with archives. Simple, free, functional, small and effective. You can download 7zip from the official website for free. The installation procedure takes place in one click and takes a few seconds.
After installation, open the files or folder in Explorer that you want to archive, right-click on them and select 7 zip - Add to archive .
A window will open where you can set archiving parameters. As you can see, there are many more settings for archiving here than in standard Windows Explorer. You already have access to the choice of archive format (7z is used by default), compression level, number of threads, the option of splitting the archive into parts, creating an SFX archive (it is also called a self-extracting archive, capable of extracting files without the need for archivers) and even setting a protected password encryption.
If you are a beginner, pay attention first to the Compression level . The higher the level, the more space you'll save, but the computer will spend more time compressing. You can also select one of the formats in the Archive format . Tip: the 7z format compresses files more efficiently than others when archiving.
To then unpack the file on a computer without archivers at all (very old PCs, for example, that don’t even have a built-in archiver), use SFX archiving, which will pack the files into an executable exe file.
Warning : Be very careful with SFX archives, since self-extracting archives from unknown sources often contain viruses. Make sure you trust the source of the file and always keep your antivirus enabled.
If you need to protect files inside the archive, set a password in the Encryption . In this case, to gain access to the contents of the archive, you will need to enter a password. By the way, this is one of the methods to put a password on a folder. You pack the files into a ZIP archive, after which you can open the archive like any folder, but the system will require a password to open or copy the files.
The disadvantages of the 7zip archiver include the inability to create rar archives, which are very popular among users of the WinRAR archiver. Although 7zip can work with RAR files (and a large number of other archive formats), it cannot create RAR archives. Otherwise, 7zip is an ideal application for working with archives, which will satisfy the needs of almost every user.
how to make a zip archive on android
Does your Android phone have a built-in program for creating a zip archive? I don’t know, but I know that mine doesn’t!
But I installed the “explorer” explorer (the explorer is like on a computer). The default Explorer installation sucks. Why they don’t install the default explorer on Android phones - like on a computer - I don’t understand!
how to make a zip archive on android
Not necessarily this conductor, for example “ES conductor”, or any other! They should have a built-in ability to create a zip archive by default.
Using the above guide to Android, we will create a zip archive
How to view the contents of a ZIP file and add files
If you want to check the contents of the ZIP file, double-click it in File Explorer. The ZIP file will open much like a regular folder, and you'll see the files inside.
You can also copy and paste or drag and drop files into this window to add them to the ZIP file. To remove individual files from a ZIP file, delete them from here. Any changes made to the folder will be applied to the ZIP file.
Once you're satisfied, close the zip file windows and you're done. You can copy the ZIP file anywhere.
You can also add additional files to an existing ZIP file by opening it in Explorer and then dragging the files you want to add into the window.
How to extract one file from a compressed folder (Zip file)
Using Explorer, locate the compressed folder (Zip file) from which you want to extract the file. Double click on it and it will open like a normal folder. You will see either a list of files or a group of icons representing compressed files.
Find the file you want to extract and drag it from the compressed folder window to another location, such as another folder or desktop.
The extracted file is copied to the new location and it also remains in the Zip file. You can repeat this process as many times as you like. When you're done, simply close the compressed folder window.


