The Android operating system was developed specifically for mobile devices and today is the most popular operating system for smartphones. Unfortunately, Android developers are not interested in supporting x86 x64 processors that are used on personal computers. But this does not mean that you won’t be able to use Android on a personal computer.
The easiest way to run Android on a computer is to use special emulators, but this option is not suitable for everyone. Most of these emulators work from the Windows operating system and are designed only for running mobile games on a computer. Therefore, the operating system in them is greatly reduced. If you need full-fledged Android on your PC, then it is better to use a special build of Android-x86, which is supported by a group of independent developers. You can download it here.
Android-x86 can be installed on a virtual machine (for example VirtualBox or VMware Warkstation) or directly on a computer disk. The developers claim that the assembly supports ext4, FAT32, NTFS file systems. NTFS support means you can install Android next to Windows and choose the operating system you want when you boot your PC.
Installing Android-x86 on PC is done in a few simple steps.
Is it possible to install Android on a laptop or desktop computer?
Rufus program for burning a disk image to a flash drive
The answer is yes. Indeed, it is possible to install an Android mobile system on a laptop or personal computer, and it is not very difficult. Of course, difficulties may arise due to various kinds of system failures and incompatibilities, but most often, if you strictly follow the step-by-step instructions, the installation can be completed quite simply.
Existing installation methods
At the moment, there is only one way to install Android on a laptop - creating a bootable USB flash drive, from which the installation will take place, just like for Windows. There are plenty of ready-made options, but Remix OS and Android x86 are popular, installing them on a PC is not particularly difficult.
For your information! You can also use the Android OS on a PC using an emulator, but this cannot be called an installation. Moreover, such systems are usually installed to improve the performance of old computers, and the emulator requires significant resources.
Appearance of a mobile operating system on a PC screen
Pros and cons of Android as an operating system
Such solutions have a number of advantages and disadvantages. Among the advantages:
- the ability to install an operating system on almost any computer, which, due to its weak hardware, cannot handle even the lightest builds of Windows;
- significant increase in performance on weak netbooks or PCs;
- convenient software testing that you don’t have to regularly download to your phone;
- a lot of OS settings, as well as programs and games - everything, as befits an android.
Advantages do not exclude disadvantages. The main ones are:
- if an emulator is used, a weak computer will start to work even more slowly and will regularly overheat;
- Not all Android PC builds are packaged perfectly. Sometimes the system cannot install due to various errors;
- porting. If you are using not an emulator, but a real OS, then it must be ported to the computer architecture;
- inconvenience of controlling a familiar touch interface for the user using a keyboard and mouse.
Note! To these pros and cons are also added the subjective and value judgments of various people, but they all overlap if a person urgently needs an Android OS on a PC.
The process of installing Android x86 on a personal computer
Creating bootable media
Once the ISO file is installed, it must be burned to bootable media, such as a disk or memory card.
Burning to a DVD or CD can be done using standard Windows tools that appeared after the release of version 7 of the OS. To burn to disk, you need to do the following steps:
- First you need to insert the disc into the drive;
- Open the folder with the image and double-click on its icon;
- Then select the disk on which the personal computer system should write the image and wait until the download completes.
If you want to install an image on a memory card, you should be warned that this cannot be done using standard Windows tools. This problem can be solved by installing special software. The Daemon Tools program is best suited for this, but it’s worth noting right away that it’s paid. You can also find a free version of the application on the Internet, however, it does not have the option of recording images to a memory card.
The paid version of the program has a trial period that lasts several days. At this time, you may well have time to create a boot image of Android.
To write an image to a card using the Daemon Tools program, you must perform the steps described below:
- First you need to open the main screen of the utility and select the memory card icon on it;
- Then connect the portable drive to your personal computer and select the disk, image, and recording type;
- After that, click on the “Start” button and wait for the image to finish recording.
Preparing for installation
How to pay by phone instead of a Sberbank card Android - NFC system
Before installing the operating system, you need to carefully prepare. To do this, create a bootable USB flash drive and configure the BIOS on the computer. In fact, the process of recording an image of this OS is no different from a similar operation with Windows. You will need:
- Android image. It is best to use Android-x86 as it is well ported and actively supported by developers;
- Rufus program. It is needed to write the OS distribution onto a formatted flash drive;
- flash drive. Preferably with a volume of at least 16 gigabytes;
- netbook, laptop or computer on which the installation will take place.
Installing Android on a laptop as the main system instead of Windows
Installing Windows on a laptop: what needs to be installed after reinstallation
Next, the system image is written to the USB flash drive. You can use two programs: Android-x86 Project or Remix OS. Both are quite convenient and have their own set-up and control advantages. Each one should be considered.
Android-x86 Project
In the case of Android-x86, first of all you need to:
- Download the OS image in ISO format and select the bit depth of your PC (available for x64 and x86).
- Install the Rufus program and log into it.
- Set the parameters as in the picture below.
- Click on “Start” and wait until everything is ready.
After this you can configure the BIOS:
- Reboot the device and enter its BIOS.
- Go to the “Boot” tab and select the “Boot Device Priority” option.
- Set your flash drive as the priority device.
- Save the settings and exit them.
To install as the main system, you should follow the following algorithm:
- Insert the drive into the USB port of the PC.
- Boot it with the accepted BIOS settings.
- Select “Install Android-x86”.
- Select the hard drive partition to boot (ext4).
- Click on “Skip” if you plan to use only this system.
- Wait until the installation is complete and click on the “Restart” button.
- Set up the OS and log into your Google account.
Even x32 bit versions are available on a laptop or computer
Remix OS
For this OS, 8 GB on a flash drive is enough, but you will definitely need a computer with x86 architecture. First of all, you need to download the system image and install it on a flash drive. You can use the standard program. Just specify the file and media and click “OK”. Everything will be done automatically.
Next, you should, by analogy, set the correct BIOS settings, specify the mode of operation with the operating system, install it and configure it for yourself. It is not recommended to make it the main one, since the project is not yet very stable and is not suitable as the main OS.
Note! Recently, support for x32-bit netbooks with weak system characteristics has appeared. Remix OS can turn them into portable music or video players.
BIOS setup
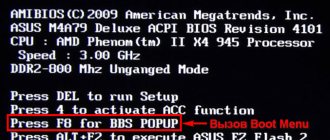
To enter the BIOS, you must press the “Delete” button on the keyboard while starting the personal computer. It is important to do this before the system boots. Then you need to specify the boot media priority by going to the menu called “Boot”.
This menu will list all media connected to the personal computer in the order in which they are used. As a rule, the hard drive on which the device OS is installed comes first. In its place, you need to set priority to the previously created bootable media.
How to install Android on a PC with a second system
If you want to keep your old system and install Android as a second one, then you can use the Minitool Partition Wizard Free program. The instructions are:
- Download and run the software.
- Select the disk to be partitioned.
- Right-click on it and select “Split”.
- Confirm your intentions.
- Turn off your laptop or computer.
- Insert a flash drive with the prepared system
- Select the same “Install” item.
How to pay with your phone instead of a card for Android - setting up NFC
The following points repeat the configuration of Android-x86 as the main OS, which were described above.
Note! As for Remix OS, you can also install it in parallel with another system. To do this, they most often use the YourDroid utility.
To install Android on a second system, you need to divide the disk into parts
How to run Android on a netbook or computer without installing the OS
There are a number of ways that allow you to avoid installing the system on your hard drive. This is the use of emulator programs and launching the OS directly from a flash drive. They have their own characteristics and advantages, but this does not exclude their disadvantages.
Emulators
Emulators are not only available in the Android application development environment. They are available completely free of charge to anyone whose PC can handle it. This is the main drawback. A weak PC that can barely run the program and load the system in it will not be able to run games and demanding applications on it.
For your information! A mobile OS is installed primarily for the convenience of using a low-power and old laptop, so this method is suitable only for developers with powerful computers who need to regularly test their programs and games, emulating different versions of Android.
The most popular emulators are:
- BlueStacks (https://www.bluestacks.com/ru/index.html);
- Tencent Gaming Buddy (https://gameloop.fun/ru);
- AMIDuOS (https://4pda.ru/forum/index.php?showtopic=649977);
- Droid4X (https://droid4x.ru/);
- Nox App Player (https://ru.bignox.com/).
Virtual operating systems put a lot of stress on the main platform
Run from a flash drive
Android-x86 Project or Remix OS, which were described above, can also work without installation. To do this, you just need to run them from a flash drive. To do this, in the first case, you need to go through the process of creating a bootable USB flash drive and change the BIOS settings, and then, when restarting, select the “Live CD - Run Android x86 without installation” option.
If Remix OS was used as the operating system, then you need to do the same thing as described in the corresponding subparagraph above, but specify “Guest mode” when starting. This will allow you to launch from the installation flash drive and test the necessary settings or applications.
Important! In any case, when you start the system once, no applications, games or programs will be saved, and in the next session the OS will appear in its original form. In addition, it works more slowly from flash drives.
Selecting guest mode to start the system without installation
Possible problems during and after installation
Not everything always goes the way the user wants. Sometimes even experienced people make mistakes and cannot install a mobile operating system on a computer or laptop. Even if the installation went well, it doesn't mean the launch will be perfect.
Note! Often errors are caused by system failures and hardware problems of the device. Sometimes a person tries to install a broken or crooked version of Android that is no longer supported.
Problems may also arise at the stage of formatting the flash drive and creating a system image. During this process, it is best to choose a file system like FAT32 or NTFS due to the fact that they have optimal compatibility with the APK format installation files that are copied by Windows. The problem is that due to different file systems, Windows simply will not see the flash drive, and a conflict will arise.
The flash drive with Android and Windows must have the same file system
Thus, installing Android on a PC or notebook of any model does not require the user to have any supernatural knowledge of system administration. It is necessary to clearly understand why this is being done and follow the informative step-by-step instructions provided in this material.
Download the distribution
Initially, Android did not have support for computers with x86 architecture, and older versions were intended exclusively for mobile devices. Now there are no restrictions. On the website of the developers of the Android-x86 project, you can download a distribution kit of the system, which can be installed on any computer without any problems. The latest version available for installation is Android 7.1.
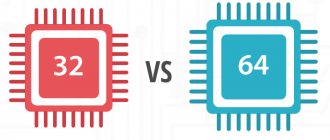
When choosing a distribution, pay attention to the bit depth. If your computer uses x86 architecture, you need to download the appropriate installation package. You can view the system type in the “Computer” properties.
