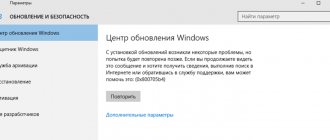
The Windows 10 operating system is currently updated regularly. In most cases, updates go smoothly and without any problems, but sometimes users have to deal with update errors and blue screens. Each error has its own individual code, which indicates a specific problem in the system. Accordingly, depending on the error code, you need to select a method for eliminating it.
0x80070652 Windows 10 update error, how to fix?
Classification of codes
There are several main mistakes:
- 80072F78 is a code that indicates that during the update, an error occurred in the database. That is, the files stored in the database have been damaged and in order to fix the error, you need to restore these files via the command line;
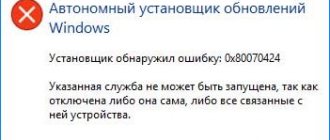
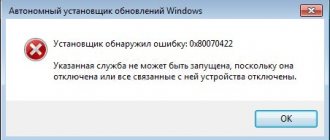
80072F78 error that occurs in the database when updating the system - 0x80070490 is a code indicating an error in the system update center. The problem here lies in the package manager. Because of this, the operating system simply cannot complete installing updates. This can also be solved via the command line. In particularly severe cases, you will have to reinstall Windows;
0x80070490 error that occurs in System Update when updating Windows - 0x80070057 is another error that occurs in the update center. This problem occurs at the stage of downloading updates. You can also solve it through the command line by entering certain commands;
0x80070057 error that occurs during the update download stage - 0x80248007 occurs when a specific file is missing from the update center, without which it is impossible to update the system. Also, such an error may occur if the system cannot find license rights to use the software. The problem can be resolved through the command line or by deleting temporary files that may prevent the necessary programs from being detected;
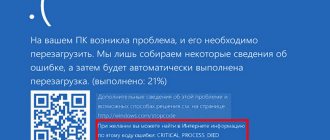
0x80248007 error that occurs when a specific file is missing, without which it is impossible to update - There are quite a few reasons for the occurrence of 0x8024401c: errors in registry entries, untimely installation of system drivers, incomplete removal of the previous version of Windows, damage to files important for the operation of the operating system. Depending on the cause of the occurrence, you need to select an appropriate solution to the problem: reinstalling drivers, the operating system itself, eliminating registry errors, and so on;
There are many reasons why error 0x8024401c may occur; to determine this, open the link “Get help with this error” - 0x80070070 – an error that occurs due to a simple lack of free space. It indicates that the operating system, or rather its updated version, weighs more than what is available on the system disk. The solution is quite simple - free up disk space before trying to install updates again;
Error 0x80070070 due to insufficient free space for the new operating system - 0x80073712 is another error associated with missing or damaged system files necessary for updating. Due to the fact that there are no files on the disk responsible for transferring information, the update simply cannot start. Solved by cleaning the disk or using special software;
Error 0x80073712 due to missing or damaged system files required for updating - 0x80070643 – occurs if the update was installed with errors. You can solve it via the command line;
Error 0x80070643 occurs if the update was installed with errors - 0x80246007 is an error that is issued when Windows has not been fully loaded. To solve it, just rename the desired system folder and try to download the updates again; Error 0x80246007 occurs when Windows has not been fully loaded
- 0x80070652 is an error that often occurs when installing different versions of Windows. In addition, it may occur when installing additional software. Has several solutions. Let's look at each of them in more detail.
Error 0x80070652 can occur when installing any Windows operating system
How to fix installation errors related to device drivers
Error codes
- 0xC1900101 - 0x20004
- 0xC1900101 - 0x2000c
- 0xC1900101 - 0x20017
- 0xC1900101 - 0x30018
- 0xC1900101 - 0x3000D
- 0xC1900101 - 0x4000D
- 0xC1900101 - 0x40017
Description
Most often, any errors whose codes begin with 0xC1900101 are associated with incompatibility of drivers or devices with the new version of the system. They may occur during the preparation of the update for installation or the installation itself. Sometimes they even cause BSOD (blue screen of death).
Solution
There are several solutions of varying levels of complexity.
Driver update
- Press Win + R to bring up the command window.
- Type the command devmgmt.msc and press Enter .
- Find the problematic components. They are usually indicated by a yellow exclamation point or question mark.
- Right-click on the device and select Update driver . You can click on Remove device to bypass the error when installing the update. In this case, after installing the new version of Windows 10, you should search for the necessary driver so that the device works correctly.
If you installed the drivers manually (for example, by downloading them from the computer manufacturer's website), then you should follow the steps recommended by the publisher of your drivers. Go to the PC manufacturer's website and check if updated drivers are available. It makes sense to contact the manufacturer's technical support and find out if your device is compatible with this update.
Disabling a device
A temporary solution is to disable the problematic device.
- Disconnect flash drives, speakers, headphones, printers and other devices from your computer.
- If the problem persists, disable the audio card, network card, or other components in the BIOS. Please note that they may not be compatible with the new version of Windows 10. In this case, after installing it and turning on these devices, the system may simply not boot or the device itself may not work.
Fixing Windows 10 errors
The problem may be a system that does not work correctly with devices. Fix problems in Windows 10.
Lack of space on the system disk
These error codes may also indicate that there is insufficient free space for the update. We suggested steps to get around this problem above (section “How to fix errors related to insufficient space on the system disk”).
First way. System Restore
The first way to fix the error is to restore the system. Or rather, with its rollback to the last saved point.
Important! Creating restore points is very important to ensure the safety of the operating system. It is recommended to create them as often as possible and at a time when the computer is at its peak performance. This will allow you to return to your best condition at any time.
If you have prudently created at least one such point, then if an error occurs, all that remains is to return the system to this point. Make sure that there are such points, and then proceed according to the following scheme:
- In the Windows menu, open the search engine and enter the sentence “create a restore point” there.
Open the search in Windows 10, enter the sentence “create a restore point” in the field, click on the result that appearsOn a note! You can also access this section through the “Control Panel”.
- Find the word "Restore" and click on it.
In the “System Protection” section, click the “Restore” button - You will receive detailed recovery instructions, at the end of which all available recovery points will be displayed. Select the one you need, click on the “Next” button.
Click “Next”
Check the box “Show other restore points”, left-click on the desired point, click “Next” - Check all the settings, click “Finish” and wait for the recovery process to complete. We check the data, click “Finish”
The note! It is best to choose the latest point, unless it was created when errors were already starting to occur in the system.
After the program restores the system, try updating it again. Or do another action that caused you to receive the error. If the system gives the same error again, it means that this method does not work in your case. Let's move on to the next one.
Second way. Windows 10 Update Troubleshooting Wizard
Another way is to use the troubleshooting wizard. Windows Update has its own error resolution tool.
- To download it, go to the official Microsoft technical support website. In the search field of any browser, enter the name “Windows Update Troubleshooter”, go to the official Microsoft website, Left-click on the link “Download Troubleshooter for Windows 10”
- Run the downloaded file. Left-click on the downloaded file
- Left-click on the line “Windows Update”. Click Next. Left-click on the line “Windows Update” and click “Next”
- The program will begin to determine what the problem is and try to solve it on its own. In most cases, this should help. We wait for the problem detection process to complete, during which the utility will identify the problem and automatically fix it. After the diagnostics are complete, read the information, click “Close”
How to fix errors when using a bootable USB flash drive
Description
Sometimes when using a bootable USB flash drive to update your system, you may encounter problems due to damaged files.
Solution
The easiest way to solve the problem is to overwrite the system image.
- Download the Windows 10 ISO from Microsoft or other sources.
- Make a bootable USB flash drive using this image.
Method three. Media Creation Tool
If the update center stubbornly refuses to work correctly, you can resort to other methods, or rather other programs. Media Creation Tool is special software whose main purpose is to create an operating system installer. But it can also be used to update Windows.
You can download the tool on the official Microsoft website. You don't even have to make any settings. For this:
- Just go to the website and click on the "Update Now" button. In the search engine of any browser, enter the name of the Media Creation Tool utility, follow the first link to the official Microsoft website, and click “Update now”
- The program file will download. Launch it. In the “Downloads” folder, double-click on the installation file with the left mouse button
- A window with a license agreement will open. Click "Accept". Read the license agreement and click “Accept”
- The program will ask what exactly you want to do with the update files. Choose the first one. ABOUT
- Wait until the updates are downloaded. We are waiting for the update process to complete
- The program will notify you that it is ready for installation. Click Install. Click “Install”
- Wait for the installation to complete.
The fact is that 0x80070652 is precisely an error from the update center, and not from the installation files themselves. So this method involves using an alternative program.
- How to disable and restore automatic Windows 10 updates
How to fix errors related to lack of space on the system disk
Error codes
- 0x80070070 – 0x50011
- 0x80070070 – 0x50012
- 0x80070070 – 0x60000
- 0x80070008
Description
Typically, these errors occur when there is too little free space left on the system disk. To install major updates like Windows 10 1703, you often need to free up about 8 GB.
Solution 1
You should free up space on your system disk. The article at the link provides many ways to do this by removing unnecessary files and programs, as well as fine-tuning the system.
Solution 2
On devices with a small amount of memory, such as tablets with a 16 GB drive, it is impossible to free up enough space. However, there is a way to reduce the system disk requirement from 8GB to around 3GB.
- Download the Windows 10 Creators Update ISO image from the official Microsoft website.
- Make a bootable USB flash drive using this image.
- Insert this flash drive into the device that needs to be updated.
- Insert another flash drive or SD card into your computer with at least 10 GB of free space. It is advisable that there are no files on it at all.
- Run setup.exe on the boot drive.
- In the Windows window, more space is needed , click on the inscription Select another drive or connect an external drive that has at least 10.0 GB of free space and specify the previously installed flash drive.
The program will begin updating. Its temporary files will be placed on the flash drive or SD card you specified.
Fourth way. Update Center Catalog
The vast majority of users are accustomed to the fact that Windows is regularly updated automatically, without requiring any outside intervention. But if you happen to encounter an error, you may have to find and install updates manually.
To do this, you need to follow the following steps.
How to view the update number
For this:
- Access the Settings screen from the Start menu. Open the Start menu and click on the gear icon to open Settings.
- Enter the word “center” in the “Search” field and select “Windows Update Options.” In the “Find” line, enter the word “center”, select “Windows Update Options”
- A single button “Check for updates” will immediately appear there. Click on it. Click on the “Check for updates” button
- You will see the available update, or rather its number.
How to download an update from the Update Center Catalog website and install it
To do this you need:
- Go to the Update Center Catalog website. Go to the official website of the Microsoft Update Catalog
- Find the update you need and download it. To do this, you need to enter the update number into the search bar on the website and find what you need among the list of results. Enter the update number in the search field, click the “Find” button, select the appropriate update from the proposed options, click “Download”
- Install the update manually. To do this, run the downloaded file, when you see this dialog box, click “Yes”. Click “Yes”
- After successful installation, you will see the following message. Read and click “Close”
Thus, you install a new version of the operating system, bypassing automatic updates, so you are not afraid of errors.
Causes of errors
Error code 0x80070652 may occur as a result of Windows 10 users attempting to download a different program when updating their operating system. This could also be caused by an issue with previous update installations. For example, in some cases, your previous Windows process installation may have been interrupted or simply not completed properly. This causes any other subsequent update process to result in error code 0x80070652.
Fifth way. Using a BAT file
In theory, to perform a complete reset of components, you need to use the command line and carry out many different operations in it. But instead, you can take an alternative route and create a special file called BAT. Essentially, this is just a file, initially a text file, into which all the commands that could be implemented through the command line were stuffed.
So how do you create a BAT file?
Create a special folder where you can conveniently store these types of files, or just use your desktop, no matter where you put the file. It will work equally well everywhere.
- First, create a text document. Right-click on an empty space on the desktop, hover the mouse over the “Create” item, then click on the “Text Document” item
- Open your text document and paste into it everything you copied here: script to reset Windows Update. Open a text document and paste the copied script
- After this, save the changes. Go to the “File” tab, click on “Save As”. Go to the “File” tab, click on “Save As”
- Now you need to change the file name. Or rather its format. Text files are initially in the "txt" format. Correct these three letters to "bat". The name itself can also be changed, but this is not necessary. In the “File name” line write “File.bat”, in “File type”, select “All files”, click “Save”
- The file is ready. All that remains is to open it to begin the reset process. Double-click with the left mouse button on “File.bat” After launching “File.bat”, a command line will open, which will automatically display commands from the file, press “Enter”
If you want to learn in more detail how to create a bat file, and also consider creating a file without much programming knowledge, you can read an article about this on our portal.
In fact, the command line will still open, but the necessary tasks will be written in it automatically. This is somewhat more convenient. When the program finishes its job, check if the Update Center gives an error. If you did everything correctly, it should return to working condition.
- Turn off or configure automatic Windows updates using the registry.
Error 0x80070652 in Windows Update
Solution #1 Run the troubleshooter
The very first and most obvious step when encountering any problem with Windows Update is to use a system tool designed to troubleshoot this element of the operating system. It is extremely easy to use and we will write below instructions on how to do this (an example is given on Windows 10).
- Press the key combination Windows + S to bring up the OS search bar in front of you.
- Enter the query “Troubleshooting” into the empty search bar.
- Select the found result by left-clicking on it.
- Find the section called "Run and Run."
- Left-click on “Windows Update,” then click on the “Run the troubleshooter” button.
Once you click on the above button, the Windows Update troubleshooter will be launched. You just need to follow the process and do everything the tool asks you to do. If the program detects a problem, it will offer you a fix. Follow the on-screen instructions from the tool and you should be able to get rid of your Update Center problems. This may help you resolve the issue that was causing the 0x80070652 error.
Solution #2 Uninstalling the latest updates
Error 0x80070652 may be a sign that the update you are currently installing conflicts with updates already installed on the operating system. This can happen from time to time, and this problem can be resolved by reinstalling updates previously installed on the system. So, to uninstall previous updates, you will need to follow the following series of steps:
- press the key combination Windows + S ;
- enter in the line “View update log”;
- select the found search query;
- click on the “Uninstall updates” link;
- Find previously installed updates in the list, right-click on them and select “Uninstall”;
- After deleting the updates, close the classic window, then return to the still open “View log of installed updates” window and click on the gear icon with the left mouse button in its upper left corner;
- click on the “Update and Security” section;
- Click on the “Windows Security Center” tab;
- Click on the “Check for updates” button.
After clicking on the above button, the search and installation of previously removed updates will begin, as well as the installation of an update that was previously interrupted by error 0x80070652.
- How to fix error 0x80070020 when updating Windows 10?
Solution #3 Update Windows OS using Media Creation Tool (Windows 10 only)
If you can't update your Windows 10 operating system with the usual tools, then why not try another method? So, apart from Update, users can also update their Windows 10 using the Media Creation Tool. The main task of this tool is to create installation media for Windows, but it also includes functionality for updating the system.
Follow the link below and download Media Creation Tool to your computer.
https://www.microsoft.com/ru-ru/software-download/windows10
So you've downloaded the tool. Now launch it to begin the process of updating your Windows 10. Once you launch the Media Creation Tool, you will be presented with a license agreement for its use - confirm that you agree to it. Next, you will be presented with a choice with two options - select the “Update this PC now” option, then click on the “Next” button and follow the instructions from the tool. In this way, you can bypass error 0x80070652 and calmly install new updates.
Solution #4: Using the Microsoft Update Catalog
Automatic updates are a wonderful feature of Windows, without which it is difficult to imagine the daily routine of an ordinary user. However, if you encounter error 0x80070652 when trying to update using the usual method, you can always try installing the new update yourself using the Microsoft Update Catalog.
Follow the link below to go to the specified resource.
https://www.catalog.update.microsoft.com/Home.aspx
All you need to do is enter the number of the desired update in the search bar on the right and click on the “Find” button. Then a list with search results will open in front of you, where you will need to find the required update and click on the “Download” button. After this, a small window will open in front of you, where you will again need to click on the “Download” button.
After downloading the required update to your computer, extract it from the archive (they are often packed) and manually install it on the system. Thus, you will not have to encounter error 0x80070652, since Windows Update will not be involved in the installation process.
Solution #5 Using a BAT file to reset the Update Center
Probably, error 0x80070652 arose due to some problems directly with Windows Update itself, as a result of which the released update cannot be installed. Any user can easily reset the Update Center components, i.e. will return them to their original form, thereby correcting the problems that have arisen with them, for example, error 0x80070652.
Essentially, resetting Windows Update components is done by entering a number of different commands into the Command Prompt. However, instead of a series of commands, you can use a special BAT file containing all the necessary commands. So, to create and use a BAT file that can reset Windows Update components, you will need to follow these steps:
- create a simple text file in any place convenient for you (RMB→Create→Text Document);
- Open the created text file and place the following commands inside it:
- placing the above lines in a text document, save the changes to the file;
- right-click on the file and select “Rename”;
- change the file format from TXT to BAT and save the file (you can also change the file name to something like "Windows Update Reset" or something similar;
- double-click on the file with the left mouse button to execute the commands embedded in it.
A Command Prompt will open in front of you, where you can monitor the process of resetting Windows Update components. The command line will automatically close after the commands in the BAT file have completed executing. After using the file you created, go to Windows Update and check if error 0x80070652 is shown.
Solution #6 Using a restore point
If nothing worked for you, and error 0x80070652 has not disappeared from your computer, then we recommend that you use a restore point. You may have previously installed some software, such as a driver for a specific device, that for some reason conflicts with the update you are installing.
Try restoring using a point prepared in advance. The system automatically saves a restore point if software has been installed into it, so there should be no problems with this. Press Windows + S , then type “Recovery” and select the classic item in the “Recovery” Control Panel.
Next, click on “Run System Restore”, select the restore point you need and run the specified process, during which, by the way, your computer may reboot, but this is quite normal, so no need to worry. Once the recovery process is complete and your system is back to its original state (at the time the point was created), try going to Windows Update to check for error 0x80070652.
Found a typo? Select the text and press Ctrl + EnterX
Error 0X80070652 may occur during the process of installing updates in Windows 7/8/8.1 or Windows 10. Some users may encounter this problem during installations of other programs, such as Visual studio.
Several other users have reported that they received this error while upgrading their operating system to Windows 10. Simply put, you can get this error while performing various tasks.
Update your drivers
Quite often, compatibility issues can also be caused by outdated or faulty drivers. As a result, this may prevent Windows from updating successfully. That is why it is recommended to scan all devices for drivers and update them if necessary. You can do this manually or use a special utility for a faster solution. Both options are shown below:
- Left-click on the Start Menu and select Device Manager .
- Ideally, you should update all available devices. If a device is marked with a yellow triangle, then it should be updated first.
- To do this, right-click on the driver, select Update and follow the instructions on the screen.
- Let Windows find new drivers and download them.
Drivers are the key to properly configuring your system. They provide a stable connection between the equipment and your operating machine. Manually updating a number of drivers can take a long time due to repetitive steps. Here you can download the best driver update utility that will handle this task itself - Driver Booster from IObit:
Driver Booster start screen
Driver Booster scan results
Driver Booster Tools Section
Fixes for error 0X80070652 in Windows 7/8/8.1/10
This error is found on all versions of Windows operating systems when performing various tasks. For example, downloading and installing updates postponed for later or installing certain programs that were described above. This article will contain three methods to solve this problem. Let's look at them.
Method #1 System Restore
Creating restore points from time to time can truly save the life of your system. It is recommended to do such points every month, or better if every week. This should be done at a time when your computer is in its best shape. Everything should work smoothly and without any errors.
If you already have a System Restore point, then you need to move your computer to this point and error 0X80070652 will definitely leave you alone. Check if you have any points and follow these steps:
- Enter the following sentence in the Start search bar - “Create a restore point.”
- Select the System Protection tab.
- Click on the "Restore" button.
- In the “System Restore” window that appears, click “Next”.
- You will see a list of all System Restore points available to you, with the date and time indicated. Select the point you need (preferably the latest one) and click “Next”.
- Next, click “Finish” and let the utility do its job, which may take some time.
After this process is completed, try to do the action that caused the error 0X80070652. If it is still present, then move on to the next method.
How to fix errors that cause you to roll back to a previous version
Error codes
The error code can be found later. Messages like:
- We were unable to install updates.
- Error installing updates. Rollback to previous version.
Description
The update installation process is interrupted. Some message is displayed on the screen, and the recovery mechanism returns the system to its previous state.
Solution
Find out the error code and try to find information about it in this article or in other sources.
- Go to Settings - Update & Security - Windows Update .
- Go to Update Log .
- Click on the inscription Failed to install under the entry about the unsuccessful update, go to the Additional information and use the information from there. If that doesn't help, try using the Media Creation Tool.
Method #2 Clean boot
Another good method for identifying and eliminating even a few errors. A clean boot will allow you to download only the Microsoft services that your system needs to run. Third-party programs will not be downloaded. It is between these third-party services that conflicts most often arise that interfere with the performance of various tasks on your computer.
To perform a Clean Boot, follow these steps:
- Press the Win+R and enter msconfig . Or you can find it using the start menu search engine. In any case, “System Configuration” will open in front of you.
- Select the Services tab.
- Check the box in the lower left corner that says “Do not display Microsoft services.”
- Click on "Disable All".
- Now open Task Manager. You can do this by right-clicking on “Start”, or by using the key combination Ctrl+Alt+Delete.
- In Task Manager, go to the Startup tab.
- Disable all programs that start with your system.
Now restart your computer and you will get a clean boot. If everything went smoothly, then you should not receive errors 0X80070652 and based on this you can determine the source of the problem. Gradually reconnect disabled programs and services to the system by rebooting. The process is long, but it will help you determine the culprit of this error.
Check the integrity of system files.
As we mentioned at the beginning, update problems can occur due to corrupted or missing files. These files are required for Windows services to function properly. If some of these files are located outside of their native environment, then this will most likely be the cause of the update errors. Below we'll use SFC (System File Checker) and DISM (Deployment Image Servicing and Management) to help detect and repair missing components. Here's how:
Using SFC
- Open Command Prompt by entering cmd in the search box next to the Start Menu button.
- Right-click on Command Prompt and then Run as administrator .
- Once the console opens, type sfc /scannow command and press Enter .
- When the recovery process is complete, restart your computer.
Using DISM
- Open Command Prompt as we did in the previous step.
- Copy and paste this command DISM.exe /Online /Cleanup-image /Restorehealth.
- Press Enter and wait for Windows to finish scanning and fixing.
- After that, restart your computer and install the update again.
After running both of these scans, try installing the problematic update again. If this does not help, proceed to the further steps mentioned below.