The phone is one of the most important accessories in a person's life. Most people feel uncomfortable if they don't check their smartphone screen at least once every 20 minutes. It's all about regularly displayed notifications, which also distract from work. To create a normal working atmosphere for yourself, you first need to understand how to disable push notifications on iPhone.
What are push notifications and why do iPhone users and developers need them?
Push notifications are messages that pop up even when your screen is locked. They may contain information about the status of the phone, messages from instant messengers, news and promotions from various sites.
Push messages are supposed to contain data that is important to the user, which is why they pass through all ad blockers and appear on top of all windows. They come only from installed applications and sites to whose newsletters the user has subscribed.
The technology first appeared in iOS 7 (iPhone 4), but gained popularity on later models: iPhone 6 and iPhone 7. Developers use push messages to warn about a ready application update and possible problems, and provide details of the technical condition of the phone. Push notifications are also used to stimulate app purchases through promotions and discounts.
So-called web-push, that is, messages from websites, are used to inform subscribers about the latest company news, reminders about an order that has not been completed, messages about upcoming promotions and other advertising purposes. In order to receive these notifications, the user must manually subscribe to them.
Instructions on how to disable pop-up messages on iPhone
Step-by-step guide on how to disable push notifications on iPhone:
- In the settings, select the “Notifications” section.
- In the list of applications, select those whose notifications you want to hide. You can separately prohibit appearance on the screen, sound, display in history and display of banners. If you need this application to be completely silent, then disable “Allow notifications” for it.
- If you don’t want to configure each application individually, you can disable the display of all messages on your smartphone at once. To do this, in the “Notification Center” you need to disable the “Notification Type” option. You can also get to the Notification Center by swiping the screen from top to bottom.
- If you need to turn off all incoming messages for a couple of hours, you can simply turn on the “Do not disturb” mode in the settings. But keep in mind that in this case, incoming calls from SMS will be blocked, too.
How to View Hidden Messages Without Unlocking iPhone
By default, iPhone helpfully shows thumbnails of all messages and notifications, including text and even photos. Comfortable? Undoubtedly. As long as you're not in a public place.
Therefore, many people disable the display of content in received iMessages. The required toggle switch is here: “Settings - Notifications - Messages - Show thumbnails.” The messages are now hidden.
But not everyone knows that to view such hidden messages you do not need to go to the menu and “swipe” the Notification Center every time. Unlocking via Touch ID is enough.
Here's how it works: 1. A message/notification arrives on the iPhone. Content hidden. 2. Place your finger “registered” in the system and wait for Touch ID to work. There is no need to press the Home button. 3. Now the content can be viewed.
There is one caveat. The method will not work if the iPhone is unlocked without pressing the Home button. This item “Settings - General - Universal access - Home - Open with finger” should be disabled.
⭐ Thanks to re:Store for the useful and interesting information.
Source
Why can't this be done?
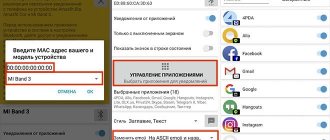
If, after all the operations, push messages continue to disturb you, then most likely this is an advertisement from the operator. MTS, Megafon and Beeline regularly send unnecessary spam, which is not disabled in the standard way.
To deal with this problem, you need to go to the SIM menu of the phone. It may be called “MTS services”, “SIM portal MegafonPRO”, etc. Turn off all notifications and unknown services. After this, advertising junk will no longer appear on the screen. Disabling is also possible using USSD commands. Since they change regularly, it is best to check with your operator for the current shutdown code.
Open on lock screen
To quickly view recent notifications on the lock screen, lift iPhone* or wake iPad. You can also do the following from the lock screen:
- Select one or several notifications from a particular program.
- Swipe notifications left to view or delete them.
- Manage alerts for specific programs.
To preview notifications on the lock screen, go to Settings > Notifications > Show Thumbnails and select Always.
*Rise to Activate is available on iPhone 6s and later models.
Manage notifications
To manage notifications from the lock screen or Action Center, follow these steps:
- Swipe left on an alert or group of alerts.
- Click Manage and choose one of these options.
- Deliver silently: Notifications appear in Notification Center but not on the lock screen, are delivered silently, and do not display banners or icons.
- Turn Off: This option allows you to turn off all notifications for a specific program. To turn them back on, go to Settings > Notifications, select an app, and click Allow Notifications.
In the Settings section, you can also change alert styles or settings for a specific program.
How to remove icons of social networks and instant messengers from the main screen into a folder
Sometimes disabling notifications from programs is not enough for the user. Apple iPhone owners want to hide not only notifications, but also the entire application so that an unauthorized person does not gain access to it after unlocking the smartphone.
Hermann
Expert in the field of digital technologies and the activities of mobile operators. I am engaged in constant monitoring of industry changes in Russia and abroad.
Ask a Question
Question to the expert
How to create a folder to hide applications?
On the main screen of the Apple iPhone, the folder is created without any problems. The user just needs to point the icon of one application over the icon of another. This creates a folder consisting of two programs. To add a few more utilities, you just need to point all the icons of interest to the folder. Instantly all the necessary applications will be in a single directory.
Is it possible to rename a folder?
Yes. To perform the operation, you will need to open the created directory and click on its name. A simple text editor will open, which will allow you to enter any characters at your own discretion.
Is it possible to detect an application if it is in a folder?
Yes. In miniature, the program icon will be visible through the folder. But its size is so small that it is very difficult to notice the logo with the naked eye.
How to completely hide an application icon?
This function is not provided by the iOS operating system. However, there is an alternative option. For example, you can add 2-3 applications to a folder. Then you need to hold your finger on the icon of the hidden program and move it to the right. This will automatically create another folder page. The application logo will become invisible from the main screen, as well as on the first page of the catalog. Finding such a program is almost impossible.
Changing settings for notification groups
You can combine notifications into groups or store them separately.
- Go to Settings > Notifications.
- Select a program and click Group.
- Select one of the following options.
- "Automatic": notifications from each program will be grouped according to the program's notifications.
- “By program”: all notifications from each program will be combined into single expandable alerts.
- Off: Notifications will be displayed in the order they were received and will not be grouped together.
In this section, you can also choose how you want to preview notifications for specific programs. For example, notification thumbnails may always or never appear, even if the device is locked.
How to view notifications in Notification Center in the order they arrive in iOS 9?
In addition to major innovations and redesigned standard applications, the developers have introduced many new features in iOS 9 for more flexible system configuration. One of these features allows you to display incoming alerts in the Notification Center not by groups, but as they arrive. In this instruction we will show where exactly the new parameter is activated.
Since its first appearance in iOS, Notification Center has organized incoming alerts into groups by app. In some cases, this was convenient, but more often than not, users only had to waste extra time navigating through a long list of outdated alerts.
Apple engineers decided to correct the situation in iOS 9, allowing users to decide for themselves what the notification feed should look like. Changing the settings turned out to be quite simple.
How to view notifications in Notification Center in the order they arrive in iOS 9?
Step 1: Launch the Settings from the home screen of your iOS device
Step 2: Go to
Notifications
Group by program ”
option
Step 4: Go to the Sort Order and select the Recent option
Immediately after applying these settings, you can check the Notification Center - the latest notifications will now be displayed at the very top of the list and you can access them much faster.
Source
Set up location-based alerts
Some programs use location data to send relevant alerts. For example, a notification to call someone might appear when you arrive at or leave a certain location.
If this type of warning is not needed, you can disable it. Go to Settings > Privacy > Location Services and select an app to turn it on or off to alert you based on your location. For more information about location services, see this article.
Enable location-based notifications
Some apps use your location to send notifications based on where you are. For example, you will see a call reminder when you arrive at or leave a certain location.
If you do not want to display such notifications, you can disable them.
Open Settings
> Privacy > Location Services.
Turn on location services.
Tap an app, then choose whether you want to share your location with the app when you use it.
If you don't receive notifications from a specific program
To receive notifications, connect to a Wi-Fi or cellular network. If you are not receiving notifications for a specific program, follow these steps:
- Make sure the program supports notifications. Go to Settings > Notifications, select an app, and make sure Allow Notifications is turned on.
- If you've enabled notifications for an app but aren't receiving alerts, the Banners option may not be selected. Go to Settings > Notifications, select an app, and then select the Banners option.
- Make sure you're signed in to your Apple ID.
- Make sure Do Not Disturb is turned off.
- If you recently installed an application or restored data from a backup, open the application to start receiving notifications.
Alerts from government agencies
In some countries and regions, users can enable notifications from government agencies to alert the public. For example, in the US, you can receive government alerts on your iPhone, and you can turn AMBER alerts, public safety alerts, and emergency alerts (which include severe and extreme imminent threat alerts) on or off; they are enabled by default. In Japan, you can receive earthquake alerts from the Japan Meteorological Agency on your iPhone.
Open Settings
> “Notifications”.
Scroll down to the Government Alerts section and turn on the alerts you want.
Government alerts vary by carrier and iPhone model and may not apply in all conditions. See the Apple Support article Learn about emergency alerts and government alerts on iPhone and Apple Watch.
Source
Additional Information
Notifications are sent over Wi-Fi only when cellular networks are unavailable. Firewalls and proxy servers may prevent you from receiving notifications. Get help using the Apple Push Notification Service (APNS).
Information about non-Apple products or independent websites not under the control or testing of Apple is not intended to be a recommendation or endorsed by Apple. Apple is not responsible for the selection, functionality, or use of third party websites or products. Apple is also not responsible for the accuracy or reliability of data contained on third party websites. Please be aware that there is a risk in using any information or products found on the Internet. Please contact your supplier for more information. Other company or product names may be trademarks of their respective owners.
reading time: 1 minute
Apple specialists were the first to use push notifications on device screens. The technology turned out to be in demand and popular and soon spread to other device platforms.
This function consists of instantly displaying important information from applications installed on the gadget. The advantage is that programs may be closed, but you will not miss messages or other important data.
Push notifications allow you to save traffic and also do not require the application to be constantly open. RAM is not loaded with currently unnecessary programs that are waiting for a response from their server.
There are three types of notifications built into iOS. These include an audio message, a pop-up banner with sound, and a symbolic one (an icon next to the application icon).
For Android owners
If you want the same notifications on the Android platform as on the iPhone, the developers have offered the SlideLock utility. With its help, you can exactly repeat the demonstration of apple product alerts. Any messages will appear on top of the lock screen. Swiping the line to the right will open the application, swiping to the left will hide it from the screen as unnecessary.
You also have access to a choice of programs from which you need a message first. The design and functions of the locked screen can be customized as desired. You can download the utility from the Play Market.