For the most part, Windows updates happen silently in the background and are installed only when prompted or after you turn off your computer.
However, there are times when the update system needs a helping hand. If you're experiencing an error updating Windows, you're not alone. This failure has become a widespread issue for the OS ever since Microsoft abandoned its QA team and relied on users through preview builds, reviews, etc.
Your Windows 10 may have downloaded half an update before deciding it doesn't want to stay connected to the server. In other cases, the OS tries to do its own thing for a while, slowing down your long-awaited update before scanning. Apart from these two situations, the OS may encounter an installation error or a data problem that stops it in its tracks.
If Windows Update freezes or freezes, there are a few steps you can try. Here's the process, in order of importance.
Run the Windows Update Troubleshooter
The first step is the safest way to resolve Windows 10 update problems. The process will automatically scan and detect problems on your system, which may take a few minutes.
- Open the Start menu and click Settings.
- Then click Update & Security.
- Then click "Troubleshoot" and then "Advanced troubleshooters."
- From there, select Windows Update and then Run the troubleshooter.
We hope the troubleshooter will resolve issues that cause Windows Update to freeze.
How to quickly abort an update
If you want to quickly abort a Windows 10 update, depending on its stage, the first thing you need to do is the following:
- if the update has just started downloading, disconnect from the Internet;
- if the update has downloaded and the system asks to restart to apply it, do not do this under any circumstances;
- If, when you turn on/off/restart the system, installation or application of updates begins, turn off the computer by holding down the power button on the case.
Regardless of the option you are faced with, all further steps will look almost the same. Now you need to start canceling the update that has started. For the last problem, start the system in safe mode.
Starting the system in safe mode
Starting the system in safe mode is guaranteed to help start the computer without installing downloaded updates.
If you skipped downloading updates and turned off your computer, canceling them will pose some difficulties: every time you try to log in, an attempt will be made to apply the updates. This problem has been fixed in later versions of Windows 10, but it's best to start your computer in Safe Mode just in case.
- Turn on your computer. After a couple of seconds, press the F8 key (to avoid missing a moment, do this every two seconds from the start).
- The system startup option selection screen appears. Select "Safe Mode with Command Line Support."
This window is called up by pressing the F8 key when you press it while turning on the computer.
Remove files from software distribution
If the troubleshooter doesn't resolve your update issue, it's time to change your computer's system settings. This should not harm your computer. You are only deleting temporary Windows Update files, but it is recommended that you set up a system restore point before proceeding.
- Open the Start menu, type "cmd" in the search box, then "Command Prompt" and select "Run as administrator."
- Then stop the Windows Update Service and the Background Intelligent Transfer Service. You will need to enter two commands in the command line: net stop wuauserv net stop bits After entering each one, press Enter. This will disable the Windows Update Service and the Background Intelligent Transfer Service.
- Then you need to delete the files in the C:WindowsSoftwareDistribution folder. Select all files, then click Delete. If the files cannot be deleted because they are in use, you will need to restart your computer. Turn off the two Windows Update services and try deleting the files again.
- After cleaning the folder, restart your computer or manually enable Windows Update services. To do this, open the command line (admin) and enter: net start wuauserv net start bits
- Now run Windows Update and you will find that there are a number of updates that need to be downloaded to your computer, which can take up to several hours depending on your system and connection.
Once all the updates have been installed, Windows will schedule a time to restart, although you can always restart it immediately.
How to delete the $Windows.~BT folder
The Update Center downloads Windows 10 installation files to the hidden folder $Windows.~BT on the system partition of the disk; these files take up about 4 gigabytes and there is no point in having them on the computer if you decide not to upgrade to Windows 10.
To delete the $Windows.~BT folder, press the Win+R keys and then type cleanmgr and press OK or Enter. After a while, the Disk Cleanup utility will launch. In it, click “Clean up system files” and wait.
In the next window about and click OK. After cleaning is completed, also restart your computer (the cleaning utility will remove what it could not remove on a running system).
Create a quick fix batch file
The following fix is a convenient way to run multiple commands in one fell swoop. The success rate of the script depends on changes to Windows resulting from previous updates and the current state of your OS. This may or may not work. Use it at your own risk!
The batch file (shown below) does the following in exact order:
- Change the attributes of the “system 32catroot” folder and the files in it.
- Stops the Windows Update Service (wuauserv), Cryptographic Services (CryptServ), and Background Intelligent Transfer Service (BITS).
- Rename the "system 32catroot" folder to "system32catroot.old"
- Rename the Windows Update temporary files folder "WindowsSoftwareDistribution" to "WindowsSoftwareDistribution.old".
- Rename the "All UsersApplication DataMicrosoftNetworkDownloader" folder to "All UsersApplication DataMicrosoftNetworkDownloader.old".
- Reboot BITS.
- Restart CryptSvc.
- Restart wuauserv.
To run the batch file, copy the following script into Notepad and save it to your desktop as "UpdateFix.bat" so it's easy to find and delete when finished. Right-click the batch file and select Run as Administrator. Restart Windows after the script completes successfully.
@ECHO OFF echo This script is intended to stop Windows Update being COMPLETELY and UTTERLY rubbish echo. PAUSE echo. attrib -h -r -s %windir%system32catroot2 attrib -h -r -s %windir%system32catroot2*.* net stop wuauserv net stop CryptSvc net stop BITS ren %windir%system32catroot2 catroot2.old ren %windir%SoftwareDistribution SoftwareDistribution.old ren "%ALLUSERSPROFILE%application dataMicrosoftNetworkdownloader" downloader.old net Start BITS net start CryptSvc net start wuauserv echo. echo Windows Update should now work properly. Thanks Microsoft. echo. PAUSE
The above script allows Windows to create fresh update folders and the data in them to prevent any file corruption or incompatibility.
Disabling automatic mode only
How to cancel Windows 7 updates that are downloaded automatically, but leave the option to install manually?
- Launch Control Panel.
- In the window that appears, click on the “Update Center” item.
- Click on the "Center Setting" button. It is located on the left side of the interface.
- Set the switch to the “Do not check” position.
- Click "OK" at the bottom right of the window to confirm the changes.
Identify Windows 10 update error codes and fix any problems found
If none of the above options fixed your Windows Update problem, it's time to decipher the codes to discover the cause of the failure. Most update problems return an error code that identifies why the update failed. The following table lists the most common Windows Update error codes and possible solutions to resolve them.
Error 0x80073712. A file that is required to update Windows 10 is damaged or missing. Type "DISM.exe /Online /Cleanup-image /Restorehealth" without quotes to restore system files, then try updating the OS again.
Error 0x800F0923. The driver or program is not compatible with upgrading (NOT upgrading) to Windows 10 from Windows 7, 8 or 8.1. Back up your drivers and programs to keep them safe, then uninstall your current graphics driver and let Windows switch to the default driver. If this doesn't work, try removing other drivers. Also make sure you have enough disk space for the update.
Error 0x80200056. The update process was interrupted due to a manual restart, accidental shutdown, or user logout. Just try updating again.
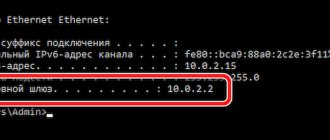
Error 0x800F0922. Scenario #1: The PC is unable to connect to the Windows Update servers. Disable VPN (if applicable) and try reinstalling. Otherwise, try updating again once your internet connection is stable and reliable. Scenario #2: There is not enough free space on the system-reserved partition. Increase the partition size and try updating Windows again.
Error: Updates failed to complete. Cancel changes. Don't turn off your computer. Error: Failed to configure Windows updates. Cancel changes.
The PC failed to update due to unclassified or unknown issues. Any causes not listed in the specific error categories will result in one of these general error messages. Review the update log to find the failed update and the specific error code that caused the problem. Fix the problem, then try the update again.
Error: The update is not applicable to your computer. Your Windows system does not have all the necessary updates installed to update the OS. Run Windows Update to make sure all applicable updates are installed, then try updating again.
Error 0xC1900208 - 0x4000C. An incompatible application has blocked or interfered with the update process. Uninstall the app or program and try updating Windows 10 again.
Error 0xC1900200 - 0x20008, 0xC1900202 - 0x20008. Your PC does not meet the minimum requirements to upgrade to Windows 10. Upgrade your PC hardware (if possible) or replace it.
Error 0x80070070 - 0x50011, 0x80070070 - 0x50012, 0x80070070 - 0x60000. There is not enough space on your PC to install the Windows 10 update. Free up some space in your OS partition and try again.
Error 0xc1900223. The update has an issue with the download or installation files. No action is required; the system will try again later.
Error 0xC1900107. The previous update is still in the process of being cleared, usually awaiting a restart. Try restarting Windows, and then try installing the new update again. If this fails, try using Disk Cleanup, restart, and then try updating.
Error 0x80300024. The specified disk operation is not supported by the current disk. Review the detailed Windows 10 requirements to ensure the drive (partition or volume) meets any applicable requirements. If not, replace the drive.
Error 0x80070002 0x20009. Windows 10 Update can't find a specific file due to permissions, conflicting apps, or other connected drives. Disable all firewalls and close running applications. If this doesn't work, try disconnecting all non-OS drives, rebooting your device, and trying the update again.
Error 0xC1900101 0x20017, 0xC1900101 0x30017. A driver issue caused a problem during the installation of the update. Disconnect all unnecessary devices such as USB drives, cameras, etc., and disable all anti-malware and virus protection services.
Error 0x8007042B 0x4000D. Windows Update quit unexpectedly due to an existing running process that was interfering with operation. Perform a clean boot to eliminate any questionable processes and try the update again.
Error 0x800700B7 0x2000a. A security service, application, or process has caused Windows Update to terminate unexpectedly. Disable all applications and security services, and then try the update again.
Error 0xC1900101 - 0x20004. When upgrading from Windows 7 or 8/8.1, there was an issue with the message "Installation failed during the safe_OS phase with an error during the INSTALL_RECOVERY_ENVIRONMENT operation." The error is usually caused by BIOS incompatibility or SATA configuration. Try updating your BIOS, removing all unnecessary SATA drives, disconnecting all external USB drives, and disabling network devices in Windows 10 Device Manager (NOT right-clicking elsewhere).
How to disable the update permanently
If you are sure that you do not want to update the system in the near future, then you can use one of the methods that allows you to disable auto-update forever, more precisely, until you manually enable it again. For example, you can use the Group Policy Editor, Registry Editor, Command Prompt, etc. But the easiest and fastest way is to disable the update center:
- Launch the Run window by holding down the Win+R combination on your keyboard. Run a services.msc query to open a list of all services available on the system.
Execute the request services.msc - In the window that opens, find the update center and double-click on it.
Double-click on the “Update Center” service - Stop the service, and then set the startup type to Disabled. Done, now the update center will not start, and accordingly, there will be no one to download and install updates.
Stop the service and set the startup type to “Stopped”
Video: Disabling Windows 10 Update
You can interrupt the installation of updates by forcefully shutting down the computer and entering safe mode. You can prohibit downloading new versions through the command line, enabling metered connections and Airplane mode. To completely disable auto-updates, quit the update center.
Windows 10 automatically installs updates in the background. Most of the time this is good, but sometimes you get an update that breaks everything. In this case, you need to uninstall that particular update.
Windows 10 is more aggressive about updating than previous versions. For the most part, this is a good thing, since too many people never bother installing updates—even critical security updates. However, there are many PCs and configurations that stop working correctly after an update. There are several ways to delay installing bad updates. You can prevent certain types of updates from downloading automatically. And, starting with the Spring 2017 update, you can easily pause or defer non-critical updates for a month or more.
Unfortunately, none of these strategies help if you've already downloaded and installed an update that broke something. This gets even more complicated if the update is a major new build of Windows, such as the Fall Creators Update released in September 2022. The good news is that Windows provides a way to remove major build updates and smaller, more typical Windows updates.
Use System Restore
If your computer is still unresponsive when installing updates, you can run System Restore. This will take your computer back to an earlier point in time.
- To access the System Restore feature, enter System Restore in the search bar and select Create a restore point.
In the "System Restore" section, you can select the appropriate point to return to.
After reverting to an earlier restore point, try installing updates normally again.
The main reasons for disabling the built-in update utility
- The main problem caused by updates is sudden crashes and critical errors after completing the installation procedure.
- The operating system stores all downloaded packages. Over time, there are a lot of them, and this reduces the free space on your hard drive. When the value of this parameter reaches a critically low level, the OS will simply refuse to boot.
- When the Windows 7 update program downloads the files it needs, surfing the Internet becomes uncomfortable. This problem occurs especially often among users connected to a “narrow channel”. If the provider limits the amount of traffic per unit of time, automatic updates can hit your pocket.
- If the patch installation process is running, the computer cannot be turned off until all operations are completed.
- If a pirated version of Windows is used on the computer, the scenario of limiting the functionality of the computer after installing the next package is real.
Use the Windows 10 Recovery Tool
If your Windows 10 device is still not updating or is still stuck on updating, you need to download Windows 10 Recovery Tool and repair the drive or go back to the previous restore point. If your device is not responding, you need to boot it using another one.
- If you haven't already, start by downloading Windows Media Creation Tool, it is also used to repair/fix your existing Windows OS.
- Then connect the USB drive with the recovery tool installed on it.
- Now reboot your device and press F8, F10, F12 or Del to enter BIOS/UEFI, it depends on the manufacturer.
- Then find Boot or Boot Order and click on it. Some BIOSes store it in the System section.
- Then change the boot order so that Windows Media Creation Tool boots first. Usually you can just use the arrow keys to change the boot order.
- When the tool downloads, select your language/settings and click Next.
- Now select Restore your computer from the options.
- Then start by trying to repair the drive using the sfc command, type “sfc /scannow” without the quotes and press Enter at the command prompt.
- If this doesn't work, you'll want to use a previous restore point and revert to it.
Windows creates them by default when you download new programs, so you should have several to choose from. Sometimes Windows 10 can run into problems when updating, luckily you now know what to do if this happens. Start with the least complex and persistent problem before resorting to previous recovery points and more drastic solutions.
Force completion of installation
The complete system update path takes place in several stages: downloading files, pre-installing them and, finally, rebooting the computer to finally install the updates. How to stop the process in the first two stages is described below in the paragraph “Forcing the download to complete.” If you are at the last step, that is, the computer has rebooted, displaying a notification on the screen that an update is in progress, and information about the completion of the process (what percentage of updates have already been installed), then the only way to prevent updates from installing completely is to deprive computer power supply.
To do this, you need to hold down the on/off button on the system unit for 5–10 seconds, without releasing it until the screen goes dark.
Press the power button for 5–10 seconds
When the computer turns off due to your actions, updates will no longer be installed. But, as soon as you start the system again, the update procedure will begin again and will reach the end, unless manually interrupted again. To prevent this from happening, you must start in safe mode.
Starting in Safe Mode
When safe mode is activated, all services that are not involved in ensuring the operation of the system are disabled, including the installation of updates. To tell the computer in which mode to start, you need to press the F8 key on the keyboard several times at the moment when the system just starts to turn on (that is, 1-2 seconds after pressing the “Enable” button). If you do this on time, a list of available launch modes will appear on the screen, select the “Safe Mode” line using the arrows on the keyboard and press the Enter key.
Select the line “Safe Mode”
The system will continue to boot, but updates will not be installed. But as soon as you switch to normal mode again, updates will continue. To prevent this from happening, without leaving safe mode, follow the steps described in the “Forcing the boot to complete” section.
Removing installed updates
We want to make a small digression from today’s topic for those users who did not have time to stop installing updates and are now encountering errors while working at the computer or simply want to use the previous version of the “seven”. You can do this in five different ways, each of which is applicable in certain situations. Another author on our website spoke about each of them in more detail. Check out this material by clicking on the link below.
Read more: Uninstalling updates in Windows 7
We talked about the available methods for uninstalling updates in the Windows 7 operating system. As you can see, there are different solutions for different situations. All you have to do is study each of them to decide which one is suitable.
We are glad that we were able to help you solve the problem. In addition to this article, there are 12,719 more instructions on the site. Add the Lumpics.ru website to your bookmarks (CTRL+D) and we will definitely be useful to you. Thank the author and share the article on social networks.
Describe what didn't work for you. Our specialists will try to answer as quickly as possible.
Causes of malfunctions
The message about canceling changes usually appears after the user has installed an update to the Windows 10 operating system.
It would seem that installing updates is a prerequisite for stable computer operation, but in this case the PC owner encountered one of the following problems:
- unofficial update installed;
- During the installation process the device was turned off;
- the update was not fully downloaded due to lack of free space;
- influence of malware;
- system failure.
The first 3 reasons are very easy to determine if the user monitors the state of the computer. And the problem seems to be easy to fix, but the device does not start. Therefore, you will have to use workarounds to resolve the startup error.