The Windows software upgrade must be used for absolutely all types of devices. Many users try to disable this service to reduce the CPU load on their device.
However, many users are wondering: how to enable Windows 10 Update on a device? This article provides various ways to resolve this issue.
Figure 1. Dialog box informing us that there are no updates
Service
First, let's see if the Center works on the computer. The service of the same name is responsible for its operation. In earlier builds of the “tens”, the service was displayed in the general list as wuaserv. This is the real name of this service.
Go to the services editor - key combination Win + R, enter the command services.msc. We find the desired service under one of the above names.
Double-click on it with the left mouse button and select the startup type – “Automatic”. Click “OK” and restart the computer.
Frankly, the startup type was set to “Manual” on our computer. But the Center still worked and downloaded updates. But it’s better to play it safe and make sure that the Center starts automatically.
Inclusion options
{banner_banner_top}
The Windows 10 Update Center is located in the Settings directory under Updates and Security.
Launch via control panel
Automatic updating of Windows 10 is usually performed independently, but there are cases when automatic updating does not occur, then you need to configure it manually.
Microsoft developers have moved the update center from its usual place to the Settings application. To do this, go to the Start Menu. Then select “Options”. In the window, go to the “Update and Security” tab, then find the “Windows Update” item.
Enable in Local Group Policy
If Windows 10 Update is not working, you need to follow these steps:
- By holding down the Win+R keys, open the “Run” command.
- We write in the line “Open:” services.msc
- Click on the OK button (Figure 2).
Thus, we will call the “Services” window. In the list on the right is “Windows Update”. We hover the cursor and right-click, after which a list with the “Properties” item will appear. In the new window, on the “General” tab, select the “Startup type” line and set the “Automatic” option. Don't forget to click on the OK button.
The final step is to reboot the device.
Figure 2. Entering the service.msc command in the service window
Launch via task manager
How to enable Windows 10 update service? To do this, you need to launch the “Task Manager”; you can quickly do this by simultaneously holding down the CTRL+SHIFT+ESC keys. We move to the “Services” directory and find the “wuauserv” service. This service automatically updates the device in the background (Figure 3).
Figure 3. The wuauserv service running in the task manager for auto-updating the OS
Via command line
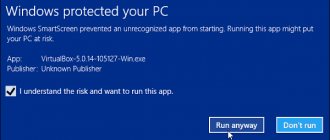
It happens that receiving an update is prohibited through the system settings. In this case, updating your machine using the above methods will not work - this can be done forcibly using the command line. How to forcefully enable Windows 10 update? Right-click on the Start menu and find “Command Prompt” or Windows PowerShell from the list. In the window that appears, you need to write the following command: wuaclt.exe/updatenow and hit the Enter key (not too hard) (Figure 4).
Figure 4. Windows Update window showing available updates
Correct the value of a parameter in the registry
To check for an update for your computer, you need to click on the “Check for updates” button. It may also not work unless you correct the setting in the registry. To correct this misunderstanding you will have to perform the following steps:
- Open the “Run” window, hold down the Win+R keys and then enter the “regedit” command.
- In the “Registry Editor” window, in the search bar, paste this path: HKEY_LOCAL_MACHINE\System\CurrentControlSet\Services\wuauserv.
- In the list we find the “Start” parameter we are interested in and right-click on it to select the “Change” item.
- Surely you will see the value of parameter 4. To start the service we need and start loading, change the value to 1 (Figure 5).
Figure 5. Correcting the values of parameters in the registry to activate the update
WSUS Offline Update Program
The WSUS Offline Update utility is a life hack for users who don’t want to keep up with the latest updates for Windows and Office. After all, it is through this utility that you can install various add-ons for devices, and this is convenient because you can install the update offline - no Internet connection is required. To the list for downloading components, you can add and remove service packs, various libraries and other “chips” (Figure 6).
Note : WSUS Offline Update provides the ability to verify downloaded updates.
It is also possible to collect data into ISO images, which can be useful for their further use. Also on our website you can find a huge number of useful programs for Windows.
Figure 6. Appearance of the WSUS Offline Update application interface
Command line
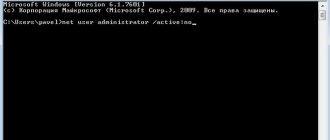
You can start the Update Center service through the command line. To do this, run it as administrator (read here how to do this). Moreover, it is better to use the classic CMD interface rather than PowerShell.
We write the command in the line: net start wuauserv. After which we see a message that the service has started successfully.
How to enable auto-update in Windows 10
How to enable hibernation in Windows 10 - step-by-step instructions
The system installs automatic updates independently. To activate them, you need to go to Windows Update, for example, through the Start menu and set the appropriate value.
Disabling auto updates on Windows 10
There is no particular need for automatic updates, since notifications about them arrive almost every day, thereby annoying the user. In addition, auto-updates will be installed after exiting the operating system and the PC will not be able to be turned off until the procedure is completed. This recommendation especially concerns selective auto-updating of drivers.
Local Group Policy Editor
Update Center is enabled in the Policy Editor. We wrote about it in detail here. Let's go to the editor. In the “Computer Configuration” section, go to the “Administrative Templates” folder, and then to “Windows Components”. There we find the “Update Center...” folder with dozens of parameters.
We are interested in “Setting up automatic updates”.
Double-click on the parameter and in the window that opens set the value to “Enabled”. Please note that such settings are not possible in the home version of Windows 10 (Windows 10 Home). There is no local policy editor.
Windows 10 Update not working
Installation of the update in Windows 10 is performed at an independent system level. However, sometimes for some reason Windows cannot download and install the update due to errors in the system. The question arises: how to enable the Windows 10 update service?
The system has a special tool for identifying and eliminating system errors, which is called “Troubleshooting”. To launch it, go to the search bar and enter the name of this tool. When you run the Troubleshooter, it will scan your system for errors and then restart services.
Registry Editor
Automatic updates are triggered by changes in the registry. We launch the editor (read here how to do it on the “ten”) and follow the path indicated in the screenshot. Find the Start parameter in the wuaserv folder, double-click on it with the left mouse button and change the value to 1. Click OK, close the editor and restart the computer.
What you need to enable the latest Windows 10 updates
Firstly, the operating system itself is needed, i.e., a person must be able to go to the desktop and fully use Ten. Otherwise, for activation, you can use standard system tools or download specialized software from the Internet, install it on your desktop computer or laptop and subsequently activate the service.
How to enable SMB1 on Windows 10 - step-by-step instructions
Programs that allow you to start or disable the update service on Windows 10 do a good job of the task. However, their use does not make much sense. After all, it’s easier and safer to enable the function on the operating system itself.
Note! By downloading software from unverified sites on the global network, you can run into a virus. Therefore, you should be vigilant and careful.
Third party programs
What to do if you can’t set up automatic downloading? Starting the service doesn't help, but you don't have the time or knowledge to find workarounds? Then try updating the operating system using the WSUS Offline Update utility. Download it from the official developer website using the link. On the main page, click on the button marked in the screenshot. The creators guarantee complete security for users and their personal data on their PC. After downloading, follow the following procedure:
- In the program folder, open the UpdateGenerator.exe file.
- Select your OS version: Windows 10 x32 or x64. To start downloading files, click “Start”.
- Once the download is complete, you will see a log on the screen with a list of all downloaded files. The download and installation time depends on how long it has been since you updated Windows. Now you need to go to the “client” folder and open the UpdateInstaller.exe file.
- In the program window, click “Start” to begin installation.
If WSUS Offline Update starts to freeze or stops searching for files, try using an earlier, more stable version of the program.
You only need to update the operating system in this way once, since after installing the patch, troubleshooting will be carried out and the default central processing center will be launched.
Uninstalling updates
There are two types of updates: downloaded and installed. They can be removed from your computer.
- The downloaded files are located in the Windows\SoftwareDistribution\Download folder, which is located on the main system drive. Delete the contents of the destination folder to get rid of updates. You can find what you need by subfolder name and creation date.
Delete the contents of C:\Windows\SoftwareDistribution\Download - To roll back the system and erase installed updates, go to the update log and click on the “Remove updates” button.
Click the “Uninstall updates” button to remove installed updates - You will be redirected to the “Control Panel”. In the general list, find the required update and use the “Uninstall” button to erase it, and then restart the computer to complete the procedure.
Select and remove the installed update
There are also other folders on the computer that store a cache of updates and previous versions needed for system rollback and recovery. They can also be cleaned, but this is not recommended.
Wu10Man
Free program
And the last program in our review is Wu10Man, which in terms of functionality competes with the previous utility. More precisely, it also has a function to pause updates. As in previous cases, this program is also easy to use, although only key functions are translated into Russian:
To pause updates (separately for basic and cumulative), you need to go to the “Pause Updates” tab, and then:
- Or select the end date of the ban on updates (1).
- Or, in the field under the date, manually enter the number of days during which the ban will be in effect, starting from the current day.
Let's finish here.
Method 5: Enable or disable automatic updates over network connections
Windows automatically downloads and installs updates, except for metered connections. In this case, Windows will automatically download only those updates that are necessary for Windows to function properly.
This option will work on all editions of Windows 10.
- Open Settings (Win + I).
- Go to the "Network and Internet" section.
- Click "Ethernet" and select your connection.
- Switch "Set as metered connection" to "On".