Windows operating systems
03/29/201960373 1 comment
A printer is a popular peripheral device that is widely used in offices, enterprises, government agencies and at home due to its ability to instantly print any documents. It is quite easy to use and does not require any special skills from the owner. However, sometimes owners of office equipment have problems setting it up.
How to connect a printer to a laptop?
Let's consider all the actions in more detail.
Connecting a printer
Installing a wired printer begins by connecting it to a power source, as well as to a laptop or computer. For these purposes, the device is equipped with two corresponding cables. Having established a connection with a computer via a USB port, turn on the printer by pressing the power button on the body.
In most cases, Windows automatically detects a new device in the system and installs the necessary software to work with it. However, if this does not happen, the owner of the laptop or PC needs to follow these steps:
On Windows 10 :
- Open the Start menu, go to Settings and select the Devices section.
- Click on the line “Printers and scanners” and click the “Add a printer or scanner” button.
- Wait until the computer completes the search and select the appropriate option from the list provided. If the laptop cannot detect the printing device, you must click “Update” or “The required printer is not in the list” and follow further instructions from the system.
On Windows 7 and 8 :
- Find the "Devices and Printers" section in the Start menu.
- Click the “Add a printer” button. Click on the “Add a local printer” option in the manager that opens.
- On the “Select a printer port” page, click “Use existing and recommended.”
Tip: Check out the list of the best all-in-one printers for home use if you haven't made your choice yet.
Installing drivers
Drivers are required for the printing device to work correctly. They are usually contained on a disk that is included with the printer upon purchase along with the cables. To install the drivers, you need to place the media in the disk drive of your laptop and wait for it to start automatically. If the disk does not open on its own, you should do it manually through “My Computer” by double-clicking on the name of the disk drive with the driver.
The installation program is launched through the file “Setup.exe”, “Install.exe” or “Autorun.exe”. Its interface differs among different printer manufacturers, but the general structure in most cases remains unchanged - the computer owner must carefully follow the system instructions to install drivers. The program will ask you to agree to the terms of use, select a printer connection method, and specify the folder to install the files.
Important: if you do not have a disk with drivers for your device, you can download them through Windows Update and on the manufacturer’s website. These methods are described in more detail below.
Printing settings
After successfully connecting the printer to the laptop, all that remains is to configure the printing. This procedure is carried out through the computer control panel. The user is required to:
- Enter the “Control Panel” and select the “Devices and Printers” category.
- Find the name of your office equipment in the list, right-click on it and click “Printing Settings”.
- In the window that opens, set the appropriate parameters: paper size, page orientation, number of copies, image quality, paper source, etc. Click the “Apply” button for the changes to take effect. The specified settings will be used when printing documents from a laptop.
Checking the connection
Before proceeding directly to setting up printing from a computer, you need to check whether the router detects the device itself. Essentially, at this point, no matter how the printer is physically connected to the router, via USB, Wi-Fi or LAN, the switch should show its presence on the network. To check, you need to go through the procedure of logging into the router settings, which is traditionally done through a regular browser. Let's look at this process step by step:
- The browser will open.
- Enter the information provided in your router documentation or on the router label. Of course, this is relevant if the settings have not been changed much by the user compared to the factory settings. In the specified locations, you can find the device's network address, default username and password. For example, most routers use the path https://192.168.0.1. The standard username and password are “admin” and “admin”, entered without quotes and in lowercase letters when prompted after entering the address in the browser. For example, entering the settings of a TP-Link router will occur as follows, as shown in the following figure.
- After logging in, you will be interested in the “Network Map” item in the router menu. The user enters it immediately after logging in or the link is on the first screen. On the page that opens, the connected printer will be displayed among other devices. However, there is a nuance here: with a USB connection, it may be called “Unknown device”. Don't let this fact bother you. Connection to clients will still be carried out using the control programs of the printer itself, and here it is enough to determine the fact of its presence on the network. The figure below shows the “Network Map” of an ASUS router with a Samsung ML-1250 printer connected via USB
- In cases where it is not displayed on the “network map”, you should focus on the address of the issued device and the presence of a close physical connection to the router when using a USB cable.
- Another option is when the printer itself is connected via LAN (RJ-45) or Wi-Fi, but is not visible from the router, then you should look for it simply through the “My Network Neighborhood” of the computer. It may appear there even without specifying the “network map” in the list.”
How to install a printer without an installation disk?
Printer owners often lose driver disks. In addition, not all modern laptops are equipped with CD drives, so even if you have the media, installation will not be possible. In this case, you must resort to alternative methods of installing drivers.
Using Windows Update:
- Enter the “Control Panel” and open the “Device Manager”.
- Expand the “Printers” section and find your model in the drop-down list. Right-click on the device name and click “Update Drivers”. Select the “Automatic search” option and follow further instructions.
Tip: If the main menu of your operating system does not work, find out what to do when Start does not open on Windows 10.
Manually via the printing device manufacturer’s website:
- If Windows Update cannot detect the driver you are looking for, you should download it yourself.
- Current files are most often posted on the support page of the official website of the printer manufacturer. There, the user is provided with detailed installation and configuration instructions.
- Links to download drivers for printers from popular manufacturers: HP - support.hp.com;
- Canon - canon.ru/support;
- Epson - epson.ru/suppor;
- Samsung - samsung.com/ru/support.
Interacting with the Printer
If you first purchased a printer and connected it to your computer, you may have difficulty performing some common tasks. Our other materials, which are intended for beginner users, will help you figure this out.
In the near future, you will need to perform maintenance on the device: refill it, clean the print heads or cartridge.
Almost all of this can be done yourself or using software, so pay additional attention to these topical guides. We are glad that we were able to help you solve the problem.
In addition to this article, there are 12,047 more instructions on the site. Add the Lumpics.ru website to your bookmarks (CTRL+D) and we will definitely be useful to you.
Thank the author and share the article on social networks.
Describe what didn't work for you. Our specialists will try to answer as quickly as possible.
How to connect a printer to a laptop via Wi-Fi?
Many modern printers can be connected to a computer via a Wi-Fi network. Before installing such a device, you need to make sure that the wireless connection function is turned on and available . The button with the corresponding icon allows you to find out. On most models of office equipment, it is highlighted in blue if the connection is functioning correctly. Also, to use a wireless printer, you must have access to the Internet. After checking the connection, the user should add the printer to the system for further configuration:
- In Windows 10 (the algorithm is the same as with a wired printing device) : If the system does not automatically identify office equipment, open “Start”, go to “Settings”, in the “Devices” section select “Printers and scanners”.
- Click on the “Add” button.
- If the device is not found, click “The printer you need is not in the list” to proceed to manual setup.
- Go to the Start menu and open Devices and Printers.
Tip: If you have difficulty using your scanner, learn how to scan a document to your computer.
Preparation
Before you start connecting, you need to do a little preparation. It consists of the following steps:
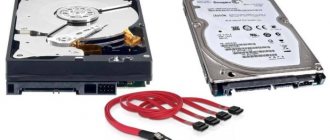
- Make sure your laptop has working USB ports. You need them because the printer connects to your laptop via a USB cable. It is quite simple to check the functionality of the ports - just connect some USB device to them in series (a regular mouse will do). Ideally, there should be at least three working ports - for a printer, for a mouse, which will provide you with convenient navigation, and for a flash drive, since you may need it to transfer scanned copies to it. If there are not enough free working ports, then buying a USB splitter will help you. If your printer has Wi-Fi support, then all this is not needed, but we will talk about it a little later.
Checking all USB ports for functionality
- Choose a suitable location where you will place the printer. You can carry it everywhere, but this is strongly not recommended, as it is very easy to damage its parts. The location for the printer must meet two criteria. Firstly, it should be close to the place where you plan to place the laptop while working with the printer. Otherwise, the printer’s USB cable simply will not reach the port. Secondly, there must be free space for paper output. If paper with a printout falls on the floor, it may get lost (which is especially true in cases where you print large amounts of information on several pages), and if the paper touches foreign objects during output, it will become wrinkled.
Choosing a suitable place where the printer will be located
When you have prepared everything, you can proceed to the next steps - connection and configuration.
How to connect a Canon printer to a laptop?
- Connection methods
- Installing drivers
- Settings
- Possible problems
A printer is a device necessary for working in any office. At home, such equipment can also be useful. However, in order to print any documents without problems, you should configure the equipment correctly. Let's figure out how to connect a Canon printer to a laptop.
Let's sum it up
Manually installing a printer on a laptop is carried out in three steps. It is necessary to connect office equipment to a power source and to a PC. Then install the latest version of drivers on your computer from a disk or from the Internet. The final stage is setting up printing parameters for future documents. On Windows 10, connecting wired and wireless printers follows a single algorithm. Minor differences are present in earlier versions of the operating system.
Thank the author and share the article on social networks.
Many owners of portable equipment are often interested in how to connect a printer to a laptop via WiHi connection or USB cable. Some inexperienced users don’t even really know whether this can be done at all. If you are using one of the current versions of Windows 7, 8 or 10, then you can connect according to the instructions in this article.
First, let's connect the printer and laptop together physically, wirelessly, or over the network. Let's take a closer look at technology such as WPS (Wi-Hi Protected Setup), consider manual setup, installing drivers with and without an installation disk. We will give recommendations on how to set up printing from a laptop to any model of printer or MFP from HP, Canon, Epson, Samsung and others.
Installing drivers
With disk
For the device to work correctly, it is necessary to install certain drivers. As a rule, a disk with them is included with the equipment upon purchase. In this case, you just need to insert it into the laptop drive. It should start automatically.
If this does not happen, you can switch to manual control of the process. To do this, you need to go to the “My Computer” section. There you need to double-click on the disk name.
Installation is done using the Install files. exe, Setup. exe, Autorun. exe.
The interface can be anything, but the principle is the same in all cases. You just need to follow the system instructions, and the installation will be successful. The user is asked to agree to the terms of use of the drivers and choose a method for connecting the device. You also need to specify the path to the folder where the files will be installed.
Without disk
If for some reason there is no driver disk, you can go another way. You need to go online and find drivers suitable for your specific device model. They are usually posted on the manufacturer's website. Then the files should be downloaded and installed according to the attached instructions. By the way, this method can also be used if the laptop does not have a disk drive (such models are not uncommon today).
Another option for searching and installing drivers is to use System Update. In this case you need:
- in the “Control Panel” find “Device Manager”;
- open the “Printers” section;
- find the name of a specific model in the list;
- right-click on the found device name and select “Update drivers”;
- click “Automatic search”;
- follow all instructions that appear on the screen.
Settings
To print any document, you need to configure the equipment. The process is quite simple - the user must:
- in the “Control Panel” find the “Devices and Printers” section;
- in the list that appears, find your model and right-click on its name;
- select “Printing settings”;
- set the required parameters (size of sheets, their orientation, number of copies, etc.);
- Click "Apply".
Possible problems
If you are about to print something, but the laptop does not see the printer, do not panic. You should calmly figure out the cause of the problem. The vehicle name may be set incorrectly. If another printing device was previously connected to the laptop, data related to it may remain in the settings. In order to print documents through a new device, you only need to specify its name in the operating system and make the appropriate settings.
If the printer refuses to work, check whether there is paper in it and whether there is enough ink and toner. However, the device itself should inform you if any components are missing. For example, this could be a notification on the display or a flashing light.
In the next video you can take a closer look at the Canon PIXMA MG2440 printer and learn about all the intricacies of connecting the printer to a laptop.
Task: launch a modern printer
To understand and launch a modern PU, you need to have a fairly clear understanding of the process itself and know its principles. They are as follows. Before you connect your Epson printer via WIFI you may have to understand the principles of connecting external devices. This is necessary not only for external development, but also to quickly understand the problem.
First, a short excursion into history. The invention of the computer is an achievement of the last century, but they suffered from one significant drawback: all parts and functional units were unique for each model. The computers themselves were supercomputers. The appearance of devices for automatic printing was predetermined by the release of the IBM System/360. This mainframe is the first universal computer. Its device was distinguished by the presence of software and hardware interfaces that ensured the connection of different elements using a single integration interface.
IBM System/360
How to install driver on Windows 10
Canon i-SENSYS MF4410 is an excellent MFP option that is suitable for both small offices and home use. The device includes printing, copying and scanning functions. Laser printing is a guarantee of good quality results and high speed. If for some reason you do not have access to the driver disk, you can download a special installer from the link at the top of the page.
After downloading the file, open the directory with all downloads made through the browser and run the program called Canon i-SENSYS MF4410. The utility will create a new folder with all the necessary files in the same directory. Go into it and find the “Russian” folder. There are two directories here - for 32 and 64-bit Windows operating systems. Select the folder that corresponds to the bit level of your OS and launch “Setup” from it.
The installation wizard will immediately prompt you to read the license agreement. To speed up the procedure, you can not read the text of the document and click on the “Yes” button.
Now select “USB connection” and click on the “Next” button.
The program will begin installing the driver. You need to wait 1-2 minutes until the final window appears. Click on the “Exit” button to close the installation wizard.
After this, the printer will be ready for use!
Canon i-SENSYS MF4410
Windows XP/Vista/7/8/8.1/10
Size: 22.1 MB (x32) 24.4 MB (x64) Bit depth: 32/64 Links:
In order to find out the bitness of your operating system, you need to read our article “How to find out the bitness of the system in different versions of Windows.”
Connection without using WPS
In rare cases, the router does not support the security protocol. Then you need to immediately launch the software to download and install the necessary drivers and follow these steps to connect Canon via Wi-Fi:
- Insert the CD that came with your Pixma MG3640, or open the installation file from the manufacturer's official website.
- This window will appear on the screen. We don't reward anything. Let's wait.
- In the next window, click "Printer Settings".
- The application checks for the latest updates. We can't wait to find out more.
- The program should automatically detect the country. If not, select the region manually.
- We accept the terms of the license agreement.
- We agree with the next window. The application requests permission to send additional information about the device's operation to Canon.
- Click further until the connection method selection window appears.
- Let's select the first element.
- The computer will search the network for the Canon MG3640 to connect via Wi-Fi. The process may take up to five minutes. Be patient.
- If this is the first time the printer is connected, the computer's network connection will be disconnected for a short time.
- The User's Guide will appear on the screen with detailed instructions for setting up your Canon. Prepare the printer for connection. Make sure the indicators and buttons appear correctly.
- During installation, a message may appear on the screen: “The installer is asking for access to your passwords.” Click Allow."
- software, drivers and tools are installed. Let's wait.
- The “Add Printer” button will appear on the screen. Click Add.
- The found printer is displayed in the Add window.
- Bonjour is displayed first, then Canon IJ Network."
- We select the second option, the printer is configured.
- If this is the first time you are installing Canon, the software will ask you to adjust the print heads. Agree.
- Start a print trial.
- Complete the installation.
Attention! During final setup, the printer offers the installation of additional programs that allow you to correct images and change the number and size of documents. You should not install these utilities. They simply load the system by offering the tools of the Microsoft Office suite.
Pixma MG3640 is configured and ready to use. In addition, the equipment can be connected directly to the computer, without resorting to the “intermediation” of a router.
Installing the driver on Windows 10
So, you have become the proud owner of a Canon i-SENSYS MF4410 MFP, and the last thing you need to do before starting work is to install the drivers. To install drivers for this printer on your computer or laptop, you need to follow a simple sequence of simple steps, namely:
Before starting the installation, make sure that you have not yet connected the printer to your computer. Now download the driver itself, double-click on the downloaded file and after that, a folder with the same name as the driver will appear in the same folder where the source file is located.
Next, go to the unpacked folder, find the “32bit” or “x64” folder - it depends on you, namely, if you downloaded the driver for x32/x86, then you will have a “32bit” folder, if x64 - the x64 folder.
In it, find the “Setup” file and run it by double-clicking on it.
The installer start window will open, which will kindly offer to install the drivers on your computer. Click the “Next” button.
The next window will prompt us to accept the “License Agreement”. This is easy to do, you just need to click on the “Yes” button.
Next, select the connection type. Here you need to o and click “Next”.
The Installation Wizard will copy all the necessary files to your PC and then notify you that the installation procedure is complete. All you have to do is connect your MFP to your computer and press the “Exit” button.
Congratulations, you have completed installing the drivers and can now safely start working with the Canon i-SENSYS MF4410 MFP.
One of the most difficult situations is when we get our hands on a Canon printer, without the necessary installation disk. This can happen if we bought a printer inexpensively from our friend, or at some kind of sale of things, or somehow we got our hands on someone’s old printer, or it is possible that we received a gift to our office because they bought a newer model there.
The disk can also be lost after formatting the computer if we have been using this computer for a long time and this disk has never been useful before.
But in any case, such a problem can be solved; it is only recommended to follow all the instructions that we will now discuss in this article.
For the printer to work properly in any operating system, it is very important that we have drivers, and also have knowledge of how to install drivers on a Canon printer. Drivers are an intermediary for the connection between the printer and the computer, or between our other devices. Without them, nothing will work, the same thing will happen if the drivers are broken or outdated - full-fledged work will not be possible. The question is how to install a printer on a computer without a disk that you didn’t have at hand. There is a way out of this situation and today we will tell you about it. When many users do not have an installation disk for a Canon printer, it confuses them because they have no idea what can be done about it. In fact, the situation is not hopeless, there are other sources for obtaining essential drivers and how to install a printer without a Canon installation disk.
How to connect a Canon printer to a laptop without a disk Step 1. Connect the printer to the computer via a USB cable. Through this cable, the printer receives data for the printing process. It looks something like the image below:
If you do not have this wire, there is no reason to worry, since its cost is not high and you can purchase it at any computer store. » Step No. 2 First of all, turn on the computer and after it completes the boot process, turn on the printer. This must be done in such a way that the computer is already in normal functioning when the new hardware is connected, so that the PC can detect the new device. Step #3 Now on your computer, click on the “Start” button, then select “Settings”. Step #4 Then select “Printers and Faxes” or “Printing Devices”. Step #5 Now after clicking on the button as shown in the previous image, all that remains is to click on the “Add Printer” option. Note: Add Printer in Windows7 is located in the top left corner as shown in the image below. In WindowsXP, this option is also in the upper left corner, but in the "
Step #6 The Add Printer Wizard will begin. Click Next to allow your computer to discover your new printer through Plug and Play Note: Plug and Play in Windows 7 is automated. Once we click on the “Add Printer” option, it will detect the printer automatically. Below we leave you with an image of how the printer will appear when you try to install it on Windows 7. This system will automatically detect printers that are connected and available for installation. In this case, the computer will automatically begin installing the printer. If this does not happen, you will have to select a printer from the list. You can use the Help or Help app in Windows if your device is not recognized. Step No. 7 If the printer is not recognized by the computer, you will have to select the port through which the printer is connected. As mentioned earlier, the printer is connected to the computer via a USB cable. We select the same type of connection. All that remains is to choose a printer. If the printer is not new, then this will most likely happen when installing it on Windows7 or WindowsXP. First, in the window that appears, select the printer brand, then the model with the corresponding series. Step No. 8 If the procedure carried out in step 7 does not work, then you should download the driver from the manufacturer’s website. Once the driver is downloaded, install by unpacking the driver file. How to install drivers for my printer normally if I have installation problems » Please be aware that even if you use this information, the driver installation process without the installation CD or without the driver present may not proceed as expected. Therefore, we are always ready to help. Just leave a comment on this article and we will respond as quickly as possible."
Features of installing different brands of printers
It’s worth briefly going over the main installation features of popular brands of printing devices that can most often be found in homes and offices.
- Samsung. Hardware is usually easily adaptable to operating systems. But older models of their printing devices will not automatically install on Vista and Windows XP. Even if all the drivers are available, you will have to specify the path to the driver manually.
- Epson. Another very popular manufacturer. In most cases, Windows operating systems easily recognize these devices. But Windows XP users encounter problems if they previously installed drivers for another printer on their PC or laptop. Then, during installation, the system will automatically update old drivers, and will not search for software for new equipment. Therefore, before installing and connecting, it is recommended to remove old drivers, as well as the old printer itself from the list of equipment. A similar situation may repeat with more recent versions of the operating system.
- Canon. To begin, strictly follow the assembly instructions that came with your printing device. Most often, the operating system recognizes new hardware without problems, finds all the drivers and automatically installs them. But after installation, Canon brand printers usually require a print head alignment procedure. To do this, you will need to insert the supplied paper into the tray and print a test page. Only after this the setup will be completely completed.
- HP. As for HP, these printers have an important distinctive feature in comparison with the listed brands. The thing is that the installation must be performed when the device itself is turned off. That is, in this case, you should connect the printer to the PC without turning on the printing device, install the driver and only then turn it on. When the driver is installed, it will ask for connections to the printer. The user turns on the printer's power and the setup wizard completes.
Take this into account. Largely due to non-compliance with the instructions for a specific brand and brand of printer, certain difficulties may arise when connecting and connecting to a computer or laptop.
How to connect a canon printer to a laptop
Many people have problems and questions when, after purchasing, they bring an MFP home, namely, how to connect a canon printer to a laptop. There are several connection methods, choose which one to use, each has certain advantages and disadvantages. In general, how to connect a Canon printer to a laptop is a fairly common problem, because users believe that there is a significant difference between a PC and a laptop. But in fact, there is practically none; now we cover all the most popular methods, as well as the features of working with an operating system such as MacOS.
The essence of the first method is to use a connection using a USB cable. The answer to the question: how to connect a canon printer to a laptop using USB is the following instructions:
- Install the MFP next to your laptop; it is important that the cable easily reaches the corresponding port.
- Connect the power cable to the printer, then press the power button. Most models from this manufacturer are detected automatically; just wait a certain period of time for the operating system to deal with the peripheral device.
- After that, click on the logo to go to the start menu. Select the Options tab.
- In the window that opens, there will be a “Devices” item; when you click on it, a list of connected devices will appear, among which will be “Printers and Scanners.”
- Click on the “Add Printer” button next to the appropriate device. Next, simply agree with all the questions that the system asks you, so that ultimately you can complete the procedure of how to connect a canon printer to a laptop .
How to connect a canon printer to a laptop running Mac OS
First of all, you need to have the latest and most current version of the system, so check for updates, as well as search for new versions of drivers. Once the system is in optimal condition, you can begin making connections: Connect to your laptop using a USB type C cable. Next, turn on your printer and wait for notifications to appear on the laptop. After a certain period of time, a notification will appear in front of you: “Install”.
Pairing with the power grid
Obviously, the printer requires a separate power supply to operate, since USB does not provide the device with the required voltage. The kit must include a cable, one end of which is inserted into the printer (the connector is located at the back), and the other end into the socket. It is better to use a surge protector or stabilizer to protect equipment from damage during a thunderstorm or voltage surges.
New models may have an external power supply and a more compact connector. But this does not change the essence.
I am sure that the first step does not cause you any difficulties. The only point that many people encounter is the presence of an additional power button hidden somewhere in the back.
Therefore, if immediately after connecting to the power source the indicators do not light up, the device shows no signs of life - look at the front panel, look for a key with a similar designation:
Or use the switch at the back:
How to connect a canon printer to a laptop
It is worth noting that not all portable devices that are based on the Apple operating system can be connected in this way. If the notification does not appear, then most likely the device is simply not compatible. After downloading the updates, you will be completely ready to go.
How to connect a canon printer to a laptop without using wires? Many modern models of multifunctional devices can be connected without using wires, using an Internet connection via Wi-Fi. You can often find out about the presence of such a module by the markings on the box, or by reading the technical characteristics of the device.
It is worth noting that for laptops, this connection method is the most practical, since you do not lose mobility and ease of use. The only limitation is the coverage area of your router, but in general this is not a significant problem. To know: how to connect a canon printer to a laptop , you just need to follow the steps below:
Install the printer and laptop in the signal coverage area. Turn on the device for printing using the special button on the case. To connect your device to a wireless Internet network, you will have to open the manual that came with it, because each model has its own connection algorithm. If you have lost the instructions, then go to the manufacturer’s official website, where there are tips and digital copies of such manuals. After the printer connects to your access point, you need to perform the same manipulations as with a wired connection. Now you can use the device without being limited by wires.
How to connect a canon printer to a laptop that is based on the MACOS operating system? The only difference is that with a wireless connection, you will have to go to system settings to change some connection settings: In the menu that opens, select Printers and Scanners, then click on the plus icon to detect and connect a new device.
Click on your MFP name when the system finds it. The process may take a certain amount of time, but if your printer was not found, check whether you are connected to the same access point, and then try connecting to the Wifi network again.
Connect directly to PC
For visual assistance when connecting a printer without a router, watch the following video:
Your router isn't working and you need a printer? We follow these instructions:
- Press and hold the Wi-Fi button until the power light starts flashing.
- Then press the "Color" button, then the "Wi-Fi" button. The light next to her began to blink.
- We launch the driver previously downloaded from the official website.
- Disconnect from the wireless network if it is connected to your PC.
- Under "Choose how you want to connect to your wireless network," select "Direct Connection."
- The printer is connected to the PC, all sensors stop blinking.
- Canon will appear as a separate Wi-Fi network in the Current Connections section of your computer.
Advantage: Canon Pixma MG3640 does not depend on the router signal quality. Disadvantage: the PC does not have Internet access via Wi-Fi, which may interfere with comfortable work.
How to connect a canon printer to a laptop using Bluetooth.
This method is gradually losing its relevance, as the number of printers and laptops that have this kind of module is significantly decreasing. Manufacturers are gradually abandoning this type of connection, giving preference to Wifi and other technologies, but still a small percentage of devices are still actively functioning. So, you will need to perform the same actions as for WIFI, only with one but, at the device selection stage, you need to select not “Printer or scanner”, but “Add Bluetooth or other device”. Thus, similar manipulations will have to be done every time you break the connection. That is why this method of connecting a printer to a laptop is gradually being abandoned in favor of faster and more convenient ones.
Which of the above options should I use? Choose for yourself, let us remind you that devices with Wi-Fi or Bluetooth modules are much more expensive, and among representatives of the budget segment there are practically no such devices.