Standard utility
The operating system provides a tool for getting rid of garbage, which has not gained much popularity, despite the fact that it is always at hand. To operate it, follow the following steps.
2. Specify the system volume as the object to be scanned.
After evaluating and scanning the partition, the application will display all objects that can be erased from the disk without damaging Windows and programs, including files remaining after updating the operating system, sketches, reports and archives.
3. Mark the items to be deleted and click “OK”.
4. Confirm the operation. Afterwards the program will automatically shut down without any notifications.
Significant disadvantages of this method: you cannot specify which files should be deleted, the application erases only data that is stored on the disk for more than 7 days, and does not require confirmation of the operation.
Storage
1. Open “Options” using the Win + I key combination.
2. Go to the “System” section.
3. Click on the vertical menu item “Device memory”.
4. To analyze the contents of the system volume, click on it.
Afterwards, the window will display information about the allocation of memory on the partition, where there will be an item “Temporary files” with the amount of unnecessary objects.
6. Check the required boxes and click on the first button to delete temporary files from the system volume.
Cleaning on the command line
Now let's learn another method. To do this, launch the command line (or, as it is also called, the console). The Command Prompt can be accessed through the Start menu or by typing cmd in the Run window. Next, enter the following command on the command line:
Lines with the names of the files to be deleted flash on the screen. This process will take some time, and when it is finished, you will find that the temp directory is empty. The example above deletes the Temp folder located inside the Windows folder. At the beginning of our conversation, we mentioned several other possible locations.
Manually
You can also get rid of temp files in Windows manually. The bulk of them are located in two directories: with the current account data %userprofile%AppDataLocalTemp and system %windir%Temp .
Using Explorer or a file manager, visit these folders and delete their contents as usual. Some objects may be busy with worker processes and should be skipped. After finishing the programs that use these files, or rebooting the PC, you can try again, if they were not deleted automatically.
The temp folder and its contents in Windows systems
Hello readers. Do you know what the temp folder is? Maybe you were not at all aware of its existence on your computer? You should definitely fill these knowledge gaps. This article will help with this. After reading it, you will be able to increase the performance of your computer and get a certain amount of free memory in it.
What is the temp folder for?
During each session of your work on a PC, many processes are running on the system that are hidden from your eyes. In particular, each program creates temporary files necessary for retrieving and archiving data.
To prevent them from being scattered everywhere, the operating system puts them in one folder - temp.
In theory, they should be removed on their own, but this does not always happen. For example, when the computer is unplugged or due to a power failure, temporary files are still stored in the folder.
Also, Windows does not provide for automatic cleaning.
Thus, over time there are more and more files and as a result the folder weighs a lot. Its volume can even be calculated in gigabytes. But you could use this space for more useful purposes. Still wondering if you should delete its contents? The answer is obvious.
Where is temp?
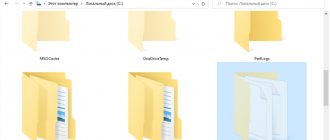
Before you start emptying the folder, you should find it. It is located on drive C, in the Windows folder. It is there in all releases of the system.
There is another folder with the same name and purpose. You can find it at C:UsersUsernameAppDataLocal. Also similar folders are located in “All Users” and in “Default”. The files from them will not be useful to you either. By the way, to see them, you need to open the visibility of hidden files and folders. If you have Windows 10, then this is configured in the “View” tab. This tab is in all folders.
Did you know that the busier your system disk is, the lower its performance? So let's move on to freeing up space on it.
How to clean?
There are several ways to get rid of the contents of temp folders. The simplest one is to select all files (hot keys Ctrl+A) and delete them.
You can also perform a deeper cleanup of the local disk:
- Right-click on it.
- From the drop-down list, select “Properties”.
The following window will open:
- Click the Disk Cleanup button.
- In a new window you will be offered a list of files that you want to get rid of. I advise you to tick all the boxes.
- Click OK.
- A warning will appear asking if you are sure of your decision. Confirm the action.
Second way
Using a similar principle, you can do the same through the CCleaner program, which is designed specifically to clean the system of this kind of garbage.
By the way, I wrote in more detail about cleaning the system here. But in principle there is nothing complicated there. Anyone can figure it out without any problems. This is what they call software for people.
Now you can take a walk and see how this folder has changed in weight. By the way, the folders themselves may remain in this folder, but they will be empty. And yes, these two methods described above are not dogma; you can also clean them manually. Here, see for yourself what is more convenient for you. It’s just that I personally find it convenient to delete all the garbage in one fell swoop, rather than going to each folder separately.
In principle, we can end this post. The temp folder is not some kind of secret; there is a lot of material on it already on the Internet.
I hope you will visit my site again.
I will be glad if you bring your friends. How? Just share this or any other article you like on your social media account.
CCleaner
The most popular tool for getting rid of junk on disks and in the system registry. You can download the program from the official website - https://www.ccleaner.com/ru-ru/ccleaner.
1. Run the utility, check the boxes of all the items that you need to get rid of (in this case, these are “Temporary files” in the “System” subsection).
You can also clean up all other garbage in Windows and accumulated by programs, for example, Internet browsers.
2. Click “Analysis”, and after it is completed, click “Cleanup”.
3. Confirm the operation.
You can also refuse to display confirmation.
Step One: Search for Temp Folders
There may be several similar file storages on a PC, but most often we have only two Temp folders. One is located in the Windows folder, namely in the system partition of the PC, while the second can be easily found in the user profile by enabling hidden folder displays. So, in Windows 7, you need to follow the path: Drive C: Users Folder - Username - AppData - Local
If for some reason you do not find the Temp folder here, seek help from your trusty friend “Search” and the “Run” command. In the window that appears, simply enter the command %TEMP%, and it will automatically open before your eyes.
The process of deleting temporary files in Windows 10
Next, we will look step by step at how you can clear the system cache and get rid of temporary data using standard Windows 10 OS tools and third-party utilities.
Method 1: CCleaner
CCleaner is a popular utility that allows you to easily and safely get rid of temporary and unused items. To remove such objects using this program, you must follow these steps:
- Install CCleaner by first downloading it from the official website. Launch the program.
- In the “Cleaning” section on the “Windows” tab, check the box next to “Temporary files”.
How to delete temporary files in Windows 10?
Temporary files are commonly referred to as those files that applications store on your computer to temporarily store information. However, there are many other temporary file types in Windows 10, including those left over after installing a new version, update logs, error reports, temporary Windows installation files, and more.
Typically, these files do not cause any problems, but they can grow quickly, using up valuable hard drive space, which may be the reason preventing you from installing a new version of Windows 10, or the reason why you are running out of space.
Luckily, Windows 10 offers several ways to safely delete temporary files on your PC using the Settings app and the Disk Cleanup tool.
This guide will teach you how to quickly delete temporary files in Windows 10 to free up space, or free up space after installing a feature update such as Windows 10 version 1903.
Windows Update folder
The files in the C:\Windows\SoftwareDistribution are recreated with every update, even after deletion. The only way to solve this problem is to disable the Windows Update service on your computer.
1. In the search bar, enter Services .
2. Open the Services window and scroll down.
3. Now right-click on Windows Update and select Stop as shown in the image below.
4. Now navigate to your local drive (C:) in File Explorer .
5. Here, double click Windows and delete the SoftwareDistribution folder .
Services
window again and right-click Windows Update .
7. This time select Run as shown in the image below.
Note. This procedure can also be used to reset Windows Update if files have become corrupted. Be careful when deleting folders because some of them are in protected/hidden places.
How to delete temporary files using settings
In Windows 10, you can use the Settings app to delete temporary files manually or automatically, but the steps will be slightly different depending on the version you're using.
Delete temporary files in Windows 10 version 1903 or later
Use these steps to delete temporary files using the Settings app in Windows 10 version 1903, May 2019 Update, or later editions:
- Open Settings .
- Click on System .
- Click on Storage .
- Under Local Disk, select the Temporary Files option
- Select temporary files to delete.
- Click the button Delete files.
After completing these steps, unnecessary files will be removed from your computer, freeing up space for more important files.
Delete temporary files in Windows 10 version 1809 or earlier
Follow these steps to manually delete temporary files using the Settings app in Windows 10 version 1809, October 2022 Update, or earlier releases:
- Open Settings .
- Click on System .
- Click on Storage .
- Click on the link Free up space now.
- Select the files you want to delete, including: Windows update log files.
- The system has generated Windows error reporting files.
- Windows Defender Antivirus.
- Cleaning Windows Update.
- Sketches.
- Temporary files.
- Basket.
- Temporary Internet files.
- Delivery optimization files.
- DirectX Shader Cache.
- Previous Windows installation.
- Click the Remove files button.
After completing these steps, the files you selected will be permanently deleted from your computer, freeing up space for more valuable files.
If you're uninstalling a previous version of Windows 10, be aware that you won't be able to downgrade to an earlier version without these files. However, after installing a feature update on your computer, the operating system automatically deletes these files after 10 days anyway.
Cleaning problems
It happens that deleting files from this folder is not always successful. That is, an error may occur when clearing and deleting some information. Don’t worry right away that you have some kind of problem with your computer. In fact, the system may be using these files at a given time. If you know which program is using documents, you can close it using the task manager from the registry and then try again to clean the Temp directory.
Automatically delete temporary files in Windows 10 version 1903 or later
Additionally, you can use "Storage sense" to automatically free up space by deleting those temporary files and contents from the Recycle Bin.
Use these steps to automatically delete space-wasting files using Storage Sense in Windows 10 version 1903 or later:
- Open Settings .
- Click on System .
- Click on Storage .
- In the “Storage” section, turn on the toggle switch.
After you complete these steps, Storage sense will delete most temporary files, as well as those files that have been in the trash for more than 30 days.
Additionally, you can always click the Configure Storage Sense button or run it now to configure cleanup settings or run Storage Sense on demand.
How to clean your Windows 10 computer from junk using an application
A bad feature of the Temp folder is that only those files that the system has assessed as temporary are stored in it. But Windows 10 is not omnipotent and it does not consider a large amount of system garbage as such and leaves it lying in place. You can, of course, remove all this junk manually, carefully searching through the dark corners of your system, but it will be much easier and more practical to download a special application that can clean everything in just a couple of clicks.
We will look at cleaning the system using a third-party application using the example of the CCleaner program, which is the simplest and most powerful among all its analogues.
Run a problem search
Click "Fix Selected"
When finished, restart your computer and delete your backups
Automatically delete temporary files in Windows 10 version 1809 or earlier
Use these steps to automatically delete space-wasting files using Storage Sense in Windows 10 version 1809 or earlier editions:
- Open Settings .
- Click on System .
- Click on Storage .
- Turn on the storage switch.
After completing these steps, Windows 10 will automatically delete temporary files and those files that have been in the Recycle Bin for more than 30 days.
You can also click the Change how you free up space link to schedule automatic cleanup or run On-Demand Storage to free up space in Windows 10.
How to Delete Temporary Files Using Disk Cleanup
If you receive a message that your device is low on space, you can also use the Disk Cleanup tool to delete temporary files to free up space on your computer.
To remove temporary files from Windows 10 using Disk Cleanup, follow these steps:
- Open File Explorer .
- Click on This PC .
- Right-click the drive where you installed Windows 10 and select Properties.
- Click the button Disk Cleanup.
- Click the Clean up system files .
- Check the items you want to remove. For example, temporary Windows installation files, Windows update log files, Recycle Bin, temporary files, and Windows error reporting system.
- Click OK .
- Click Remove files to complete the task.
Once you complete these steps, the files will be permanently deleted from your computer, freeing up space for new files.
Third party programs
Although there are quite a few third-party junk cleaning software programs, I would like to pay special attention to the CCleaner program. And, although this is my subjective opinion, I consider this program to be one of the best free programs in this category for “care” for your computer.
In most cases, it is enough to clean folders once every six months or once a year. The frequency criterion is how quickly the free space on the system disk of your computer or laptop decreases.
That's all for today. I told you what the TEMP folder is and whether its contents can be deleted.
Where are temporary files stored?
In Windows 10, as well as all modern versions of the Windows operating system, there are two main folders for storing temporary folders. One folder for storing system temporary files and one folder for storing user files.
In order to find out the exact location of these folders on your computer, you need to open the “System Properties” window. This can be done by pressing the Win-R key combination and running the command “sysdm.cpl”.
After the “System Properties” window appears, you need to go to the “Advanced” tab and click on the “Environment Variables” button there.
This will open the Environment Variables window with a list of user and system variables. User variables will be displayed at the top, and operating system variables at the bottom.
In each of the lists you need to find the variables “TEMP” and “TMP”. These are the folders with temporary files. However, it is not recommended to delete temporary files from these folders yourself. To do this, it is better to use the standard tools built into Windows 10. We will talk about this in more detail below.
What does "TEMP" mean and what is this folder for?
I want to start with the fact that folders and files on a computer have some separation. Conventionally, this division can be called “system” and “user”.
System folders and files are those that are used exclusively by the operating system itself for its work. User intervention, for example, deleting a system folder or system file, can lead to the crash of the entire operating system, after which you can simply enjoy the “blue screen of death.”
Well, if you accidentally or intentionally delete a user file or folder that should not be deleted, then some program will simply stop running or you will constantly “pop up” on the screen and get annoying error messages in programs. In this case, the operating system itself will not be affected. But you will ruin your nerves thoroughly.
So, one of the system folders of the operating system is the Temp folder.
This is an abbreviation for the word “temporary”, which means “temporary” in English. Hence the main purpose of this folder is to store temporary data (temporary folders and temporary files).
What does "temporary" mean? What is stored in the temp folder? There are a couple of “subtle” points here.
One of them is that when installing programs, the operating system uses this folder to store intermediate data. Those. “drops” various software components into this folder, from which it then forms software modules for, in fact, direct installation of the program itself or programs on the computer. After the programs are completely installed, these most useless components remain in the Temp folder.
Why they remain there and why they are not automatically deleted is another question that is not related to this topic. But the fact remains a fact. “Garbage” accumulates over time. And, if this garbage is not removed, the consequences can be quite sad.
The second point is that the operating system itself, during its operation, “dumps” some data into this folder, which it accesses periodically. Moreover, the system strictly protects this current data from any user intervention.
In computer language, the system closes access to its data.
Uninstall via Options
As already mentioned, to delete temporary files in Windows 10, it is advisable to use the built-in tools. This way you don’t risk deleting something important and disrupting the operating system.
The first thing you can do is delete temporary files through the Options menu. To do this, open the Start menu and click on the gear button or use the Win-i key combination. After entering the “Options” menu, go to the “System – Device Memory” (or “System – Storage”) section.
In this section you will see a list of disks that are installed on your system. Here you need to click on the drive on which you want to delete temporary files.
After this, you need to wait until Windows 10 analyzes the disk and go to the “Temporary Files” subsection.
In this section, you need to mark those objects that you would like to delete and click on the “Delete” button.
In addition, Windows 10 can be configured to automatically delete temporary files. To do this, return to the “System – Device Memory” section in the “Options” menu and scroll down the settings to the “Memory Control” function, which is responsible for cleaning unnecessary files. To configure this feature, click on the “Change method” link.
After this, a window with settings will appear. Here you can specify when to automatically delete temporary files, and also set up the removal of items from the Recycle Bin and Downloads folder.
For temporary files, you can specify daily, weekly, or monthly cleaning here, and files from the Recycle Bin and Downloads folder can be deleted after 1, 14, 30, or 60 days.
How to move the Temp folder to another drive
For convenient monitoring and cleaning, the Temp directory can be moved to another partition or disk. A number of transitions and data entries will be required:
- Open Control Panel – “System and Security” – “System”.
- Select additional options (lower in the list on the left).
- In the new properties window, click on “Advanced” from the list at the top and select “Environment Variables” at the bottom.
- The change module requires TEMP and TMP values in the top list. Select one of them and go to “Change...”.
- In the line below, indicate a convenient drive, path and folder, and confirm.
- Do the same with the second variable.
Temporary files will be collected in the designated location. The same action is available for the system storage (listed below in the changes module), but it is undesirable - the OS will slow down for a while, but later will work as before.
The process of changing location
Important ! Transferring will not solve the problem of clearing memory. The speed of programs may suffer - all service and ordinary applications will have to make changes and move temp data there.
Getting rid of unnecessary data is a solvable task that does not depend on the level of computer literacy. There are many ways to do it - from simple deletion to drawing up a system order. Just be careful when working with directories.
Temporary files in Temp should be deleted automatically, but this does not always happen. The user has a chance to correct the defect; all tools from the command line to the Task Scheduler are available. The folder is not an “invulnerable pillar” of the OS - it can be viewed and its contents cleaned, moved for convenience and control. Those who like simplicity just need to install the utility - this way Temp will be emptied without changing system settings.
Source: https://mirinfo.ru/pk-i-noutbuki/papka-temp-v-windows-10.html
Uninstall using Disk Cleanup
Also available in Windows 10 is the Disk Cleanup utility, which was used to delete temporary files in older versions of Windows. To use this option, you need to press the Win-R key combination and run the command “cleanmgr.exe”.
After this, the Disk Cleanup menu will appear. Here you need to select the drive you want to clean.
Next, you need to click on the “Clean up system files” button and select the disk again. This will allow you to delete documents left behind after updating Windows 10.
Next you need to set the marks and click on the “OK” button.
After confirmation, the system will delete all selected files.
Trying to remove it manually
The simplest and first method that comes to mind is to delete the contents of directories manually. Visually, the temp folder in Windows 7 is no different from others, but some features of its files do not allow the operation to be completed cleanly and completely.
- Open the directory in the usual way.
- We select all the files and subdirectories in it by clicking the key combination “Ctrl” + “A” (equivalent to the “Edit” => “Select All” menu option).
- We press “Shift” + “Del” and we get... not exactly what we wanted. The process is terminated by a message indicating that the system does not want to delete a particular file. Here's what it looks like:


