Error code 0x80004005 can occur when updating Windows 10 or even when connecting/creating a virtual machine, as well as in any other situations. We tried to consider solutions for almost all possible cases.
What causes error code 0x80004005 in Windows?
Error code 0x80004005 generally occurs due to one of the following reasons:
- when working with virtual machines;
- Dpcdll.dll file is missing;
- corruption of system files;
- problems with Windows Update;
- when extracting archived/compressed files or folders;
- when renaming files or folders;
- when the user tries to access shared files and folders.
Content
- Run the Windows Update Troubleshooter
- Perform SFC and DISM check
- Replace the Dpcdll.dll file
- Update your PC with the latest patches and SSUs
- Edit the registry key AppCompatFlags\Layers
- Enable guest access to network shares
- Enable SMB 1.0/CIFS client support to access legacy servers
- Perform a clean install
Method 1
The E-FAIL error code 0x80004005 can be resolved by simply renaming the files in the virtual machine folder. If a failure occurs, the session is still saved, but the prefix –prev, sometimes –tmp, is added to the vbox extension. In this case, the source file that is being searched is missing, but the information can be retrieved.
The reason 0x80004005 appears in VirtualBox Windows 10 is located in the user folders of the system drive. Open a directory such as C:/Users/[Current NAME]/VirtualBox VMs.
Go to the directory with the machine name. Here you will see not only the “native” file with a normal extension, but also one that was saved with problems.
Save the original file with the .vbox extension to another location just in case. And rename the one with an unwanted prefix.
We proceed in the same way with the .VirtualBox folder. After this, restart the application, error 0x80004005 should disappear.
Run the Windows Update Troubleshooter
In most cases, a failed Windows update can cause a number of other problems related to system performance. Error code 0x80004005 is one such case and you can fix this problem using the troubleshooter.
- Press the Win + R on your keyboard to open the Run . Then type control and press Enter on your keyboard.
- When the window opens, select from the drop-down menu View: Small Icons. After that, go to the section Troubleshooting.
- Now on the right side of the window, select System and Security .
- Right click Windows Update and select Run as administrator.
- On the next screen, click Additionally. After that, check the box Automatically apply fixes and click next.
- Click Next to start the recovery process.
- After the inspection, you will be provided with information about the identified problems. Also click View More Details to see detailed information.
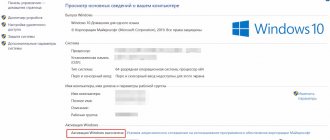
Checking Windows activation status
I'll list the steps first, and then you can view a series of screenshots that will help you understand the instructions.
- Open Windows 10 settings through the Start menu;
- Go to the “Update...” section;
- Select the “Activation” tab. If there is an error message, then below we find a link to “troubleshooting” and wait until the analysis is completed. After making automatic corrections, reboot the PC:
Perform SFC and DISM check
System core files play a vital role in running all the basic operations smoothly in Windows 10. If any of these files are corrupted, then it can cause error code 0x80004005. To fix this, you must follow the steps given below.
- Press the Win + R keys together to open the Run .
- Type cmd into the text box and press Ctrl + Shift + Enter .
- If the User Account Control window appears, click Yes to allow Command Prompt to be opened as an administrator.
- Next to the blinking cursor, enter the code below and click Enter. sfc /scannow
- After starting the program, wait a couple of minutes until the search and correction of damaged files is completed.
- Type exit and press Enter to exit the command prompt. Then restart your computer for the changes to take effect.
System files corrupted by malware can also cause this error on your Windows 10 PC. You can check and repair the system image by DISM scanning. Here's how to find and fix damaged files on your computer:
- Press Win + S to open the Windows 10 search box.
- Type the CMD into the text box and right-click the top result.
- From the context menu, select Run as administrator .
- If a UAC window appears, click Yes to allow access.
- In the command prompt window, enter the command below and press the key Enter. DISM.exe /Online /Cleanup-image /Restorehealth
- Since this is a time-consuming process, it may take 10 to 15 minutes to complete the entire process. Once the scan/repair process is complete, restart your computer.
Reasons for the error
A variety of factors can cause the problem, which is why even the official Microsoft reference lists it as an unidentified error. The following situations may be triggers:
- Your computer is missing important system drivers or they are outdated.
- The updates failed, resulting in damaged files remaining on the hard drive, or installed packages conflicting with each other.
- The system license key was not authenticated, causing Windows activation to fail.
- There are incorrect entries in the registry.
- A 32-bit OS is installed on a virtual machine running Windows 10 with a 64-bit version.
- A virus attack was carried out on the computer, which damaged its performance.
Since it is impossible to say definitively what caused the situation, it is very difficult to prevent secondary cases in the future. In general, experienced users advise adhering to standard measures: checking your PC for viruses, installing security updates, and using a licensed version of Windows.
One of the most common reasons that interferes with the performance of a PC is the accumulation of garbage; it is recommended to clean and defragment the hard drive. The Computer Accelerator program will help keep your system clean and protect it from failures.
The application will help solve a number of problems:
- Delete temporary installation files, browser and system cache;
- Detect and fix empty or erroneous registry entries;
- Run automatic cleaning and optimization of the system on a schedule;
- Restore the system after crashes and virus attacks.
Additionally, you can delete large unused files, configure network security and check which programs run with the system, and much more.
Replace the Dpcdll.dll file
If some important DLL files are missing from your computer, this can also result in error code 0x80004005. According to some users, they fix it by simply downloading and installing the Dpcdll.dll file on their computers. Use this solution only if you receive any indication of missing DLL files in the error message. How to add this dll file to your computer is described below.
- First of all, open the DLL file download site.
- Go to the search bar and type Dpcdll.dll .
- Click Enter, and select the line with the DLL file in the search results.
- After going to the DLL file page, select the desired version, if you do not know which version of the file to select, select the latest one as shown in the image below.
- The file available there is in Zip format. So be sure to unzip it when the download is complete.
- Run dialog box Win + R keys on your keyboard .
- Copy/paste the text below and click OK . %SystemRoot%\System32\
- You will follow the path - C:\Windows\System32 . Copy the DLL file that you extracted from the archive and paste it here.
Check to see if this error no longer occurs.
Attention! If you are using a 64-bit operating system, copy the Dpcdll.dll and paste it into this folder: C:\Windows\sysWOW64
Ways to fix the error
Method No. 1
If a failure occurred while downloading updates for your operating system, then to restore correct operation, follow the following procedure:
Method No. 2
Often the error occurs when there is a corrupted update file. To solve this, you should delete the contents of the folder where operating system updates are downloaded. For this:
Method No. 3
The error is very often associated with a malfunction of the virtual machine (virtualbox program). In this case, do the following:
Additional ways to resolve virtualbox crashes:
Method No. 4
If an error occurs when trying to connect to RDP, do the following:
Method No. 5
A common cause of error 0x80004005 is damaged DLL files and registry malfunctions. To solve, do the following:
Method No. 6
Method No. 7
If the error appears labeled "DllregisterServer", then you should do the following:
Method No. 8
If you have an error marked “system componentmodel win32exception” and “dllregisterserver”, changing your account type to “administrator” will help you. To do this: go to the “Start” menu, type “User Accounts” in the search bar and click on the result found.
In the window that appears on the screen, click on the item “Change your account type”, in which check the “administrator” box.
Method No. 9
If your case is out of the ordinary, and all methods and techniques have not helped, then the only way to get rid of the error is to completely reinstall the operating system. Although this solution is radical, it provides one hundred percent elimination of any error.
Update your PC with the latest patches and SSUs
Error code 0x80004005 may occur during the update process or as a result of incorrect installation of updates on the computer. After such situations, installing the latest correct updates or maintenance stack can help.
- In the Windows 10 search box, type View update history .
- Now click on the drop down list Component updates and copy the latest version number of Windows 10 updates by right-clicking on it as shown in the image below.
- Next, visit the Microsoft Update Catalog and paste the update number from the previous step into the search box, then press Enter .
- After you see a list of updates for the version you need on the screen, go to the window again View update history and click on the dropdown list Corrections. After that, compare the update numbers installed on your system with the list of released updates on the Microsoft catalog site as shown in the images below.
Attention! It is necessary to compare the updates that are indicated in the column Classification update directory as Security Updates - Therefore, determine which Security Updates are not yet installed on your operating system and then select the update that matches your system architecture, i.e. x86, x64 or ARM64. Once you have decided which update to choose, click the Download next to it.
- In the window that opens, click on the link with the number of the required update to start downloading the file.
- When the system prompts you to save this file, navigate to the folder and save the installation file.
- Once the download is complete, double-click the installation file to begin updating your device and then follow the further on-screen instructions.
Method 3
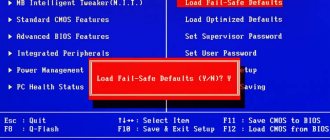
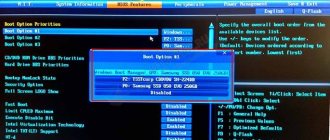
The error “E-FAIL 0x80004005” in VirtualBox Windows 10 may appear when virtualization is disabled in the BIOS. You need to go into basic settings upon boot. For many PCs, this is done using the F2 button, which is pressed immediately after turning on the computer. Laptops may have a special button. For example, on Lenovo it is located next to the power key.
If this does not work for you, then a new version is installed - UEFI. In this case, you need to press [WIN]+[I] at the same time and go to the updates and security section.
Here in the recovery area, click the reboot button.
During the startup process, different menus will appear on a blue background. Continue through: Troubleshooting – Advanced Settings – UEFI Firmware Settings.
To get rid of error 0x80004005 in VirtualBox, look for the Intel Virtualization section and enable it (the “Enabled” value).
Edit the registry key AppCompatFlags\Layers
If the problem is due to the fact that error 0x80004005 occurs when working with the VirtualBox program, then to fix this error you need to remove a specific key from your computer. To do this, follow the steps below.
- In the Windows 10 search box, type Registry Editor and press the key Enterto open the Registry Editor on your computer.
- In Registry Editor, go here: HKEY_LOCAL_MACHINE\SOFTWARE\Microsoft\Windows NT\CurrentVersion\AppCompatFlags\Layers
- Now on the right side of the window, right-click on the string option C:\Program Files\Oracle\VirtualBox\VirtualBox.exe and select Delete , and then click Yes on the warning to delete.
- Close the Registry Editor window. Try connecting to the virtual machine from your computer again.
Comments (7)
It helped - “Go sequentially ComputerHKEY_LOCAL_MACHINESYSTEMCurrentControlSetServicesLanmanWorkstationParameters. Change the value of the AllowInsecureGuestAuth parameter to 1."
Ps I haven’t tried anything before!
Wow, the register feature helped
Thanks for the advice, the problem was in the registry in the parameter: ComputerHKEY_LOCAL_MACHINESYSTEMCurrentControlSetServicesLanmanWorkstationParameters: AllowInsecureGuestAuth “1”
There was an error while working with the network. Your solution helped. Thanks a lot.
Thank you very much, the item “Unable to connect to a remote PC via local network” also helped. I enabled all the necessary services, disabled SMB, nothing helped. I changed the AllowInsecureGuestAuth value to 1 in the registry and everything worked, I had access to computers on the network.
Server 2022 - helped, thank you!
Go sequentially ComputerHKEY_LOCAL_MACHINESYSTEMCurrentControlSetServicesLanmanWorkstationParameters. Change the value of the AllowInsecureGuestAuth parameter to 1.
Fire article, the item “It is impossible to connect to a remote PC via a local network” helped, I connected through Radmin, I suffered for 4 hours.
Enable guest access to network shares
Starting with Windows 10 version 1709, Windows prevents you from accessing network shares when guest access is enabled. Guest access means connecting to network shares without authentication using the built-in “guest” account.
Attention! Guest access is often used to access data stored on network storage. Every user from any device has access to these resources. As a general rule, it is never recommended to use guest access as it poses a serious security risk. In times of ransomware, encrypting entire drives is definitely not a good idea. If you are creating a storage server, it is highly recommended to use LDAP support for authentication on your NAS server.
To enable guest access, follow the steps below.
- Press the Start , then in the list of programs, select Windows Administrative Tool in the menu that opens Registry Editor .
- After the Registry Editor
, go to the registry branch: HKEY_LOCAL_MACHINE\SYSTEM\CurrentControlSet\Services\LanmanWorkstation\Parameters - On the right side of the editor window, find the option AllowInsecureGuestAuth and left click on it to open it.
- After the window opens Changing a DWORD (32-bit) Value change the value to 1, as in the image below. AllowInsecureGuestAuth and left click on it to open it.
- After changing the value, click OK and close the Registry Editor window. After that, check if the error occurs or if it is resolved.
Attention! If the AllowInsecureGuestAuth is not in the required registry branch, then create it. To do this, make sure you are in the correct registry branch, then on the right side of the window, right-click and select New -> DWORD (32-bit) Value . Then call it AllowInsecureGuestAuth .
Now go back to Step 3 and complete all the necessary steps.
Error when deleting a file or folder? The solution has been found!
Sometimes there are times when some files simply refuse to be deleted! When you try to delete, a window pops up with titles like this: “ Cannot delete [filename]. The object is being used by another user or program ." or “ Cannot delete [filename]. No access .". Now I will show you how you can easily solve this problem...
So let's get down to business. To remove undeletable files, such a cool utility as Unlocker was invented. It helps you quickly delete a stubborn file or folder, for example, when you see one of the error options shown in the screenshot:
The error in Fig. 1 usually occurs if the file is currently open in some program and is blocked from any attempts to change or delete it. In an easy case, it is enough to simply close the program, but in more complex cases it is generally not clear what to do, since there is not a single open program on the desktop, and the file, however, is not deleted! Fig. 2 usually indicates problems with file access rights, that is, a file was created by one user, and another user is trying to delete it. Well, in the third picture the problem arises as a result of some incorrect actions, freezes or program glitches.
Let's move on to downloading and installing Unlocker.
Scroll to the download location and click on the correct link, which I have highlighted in green, as indicated in the picture:
Unlocker should start downloading. In this case, another advertising page may automatically open, close it.
There is nothing complicated in the installation itself, the only thing I would draw your attention to is uncheck the installation of Babylon Toolbar, because it is absolutely not needed. To make it look like in the picture:
The easiest and most convenient way to use Unlocker is to launch it through the Explorer menu:
1. We have an undeletable file 103.xls. Right-click on Unlocker
2. Select the desired action. I chose Delete
3. Great, the file has been deleted!
Write in the comments if the program helped you? Have you ever had such cases when even Unlocker could not cope? For me personally, Unlocker has long been a useful tool.
Enable SMB 1.0/CIFS client support to access legacy servers
Enabling this client is sometimes necessary to connect to legacy data stores; we do not recommend using it for a long time. To enable it, follow the steps below.
- In the Windows 10 search bar, type Turn Windows features on or off .
- After the window opens, scroll down and expand the item SMB 1.0/CIFS file sharing support.
- Check the box SMB 1.0/CIFS client. Click OKto apply the changes.
- Check if error 0x80004005 has been resolved when connecting.
Why does the error occur?
This problem occurs due to various reasons. These include situations such as:
- driver conflicts for some programs;
- having problems with the antivirus ;
- the firewall is not configured correctly;
- attempt to make changes without administrator rights.
There are also other reasons why error code 0x80004005 bothers the user.
The consequence may be an unexpected termination of the program, an inability to share, or an error when burning the disc.
Perform a clean install
If none of the above fixes resolve error code 0x80004005, it is better to perform a clean installation of Windows 10. To do this, follow the steps given below.
- First visit the official Microsoft website.
- Click on the button - Download the tool now.
- After this, the download of Media Creation Tool , indicate where to save it on your computer or laptop.
- When the installation file downloads, right-click on it and select Run as administrator .
- After the Windows 10 installer launches, accept the Microsoft software terms of use by clicking the Accept . Next, you will be given two options: Upgrade this PC now and Create installation media (USB flash drive, DVD, or ISO image) , choose the one that suits you best.
- In our case, we chose the option Upgrade this PC now and press Further.
- The Applicable Notices and License Terms window opens , click Accept to continue with the installation.
- On the next screen, be sure to check whether the option Save personal files and applications ; if not, then enable it using the item Change components selected for saving .
- After that, click the Install and follow the on-screen instructions until the entire process is completed.
Warning! If you prefer a clean installation of Windows 10, be sure to create a complete backup of all important files and folders.
How to fix
Windows is positioned as an enterprise operating system with various features to support workgroups and sharing files and physical resources. Despite this emphasis, however, this flagship operating system seems to go out of its way to generate encrypted and user-hostile error messages for common problems.
These error messages always make solving problems more difficult than they need to be. They also tend to add a layer of confusion and frustration for intelligent but not immersive human users who could probably solve the problem if they knew something about the cause.
One of the most egregious offenders is Windows error code 0x80004005. This error usually appears during an unsuccessful attempt to use a shared resource over a network, such as a shared network hard drive. The usual syntax for this error is usually something like “Windows cannot access \\Computer1, check your spelling... error code 0x80004005 unspecified error.”
Of course, that super helpful message popping up on someone's screen basically doesn't tell them anything. As a result, it can be very difficult to resolve this error.
But don't worry. There are several methods that can be used to solve this problem. In this article, I will explain how to diagnose and fix the main problems this error code may present.
FIX ERROR "WINDOWS CANNOT ACCESS YOUR COMPUTER"
There are a few “quick fixes” to try to resolve this error. These solutions are often effective in solving this problem.
While this is not a comprehensive list of all possible solutions, there is a good chance that one of these fixes will work for you.
QUICK FIX 1: DISABLE IPV6
One fix is to disable your computer's IPv6 protocol. You don't need IPv6 right now anyway unless you are using an IPv6 network.
Just follow these four steps to try this fix:
- Right-click the Windows Start button and select Network Connections.
- Click the “Change adapter settings” button.
- Right-click your network adapter and select Properties.
- Find Internet Protocol Version 6 (TCP/IPv6) in the center area and uncheck the box.
Most network configurations still use IPv4 and will for the foreseeable future, so you won't need IPv6 for a while unless you're on a corporate network that already uses IPv6. (In that case, this quick fix won't work for you anyway.)
Click the “OK” button and restart your computer. If this does not resolve the error, move on to the next suggested solution.
The next step is to ensure that the NetBIOS Service is running. NetBIOS allows networked computers to share resources. If this does not work or is not enabled, this may be causing the error.
Follow these steps to check if the NetBIOS service is enabled:
- In the same window as above, highlight IPv4 and click the Properties button at the bottom.
- Click the Advanced button and select the WINS tab.
- Make sure the NetBIOS setting is set to default.
If NetBIOS works as it should, then move on to the next possible solution.
QUICK FIX 3: CHECK YOUR SHARING SETTINGS
If NetBIOS settings weren't the problem, let's look at the advanced sharing settings.
- Go to Control Panel, Network and Internet, Network and Sharing Center, and Advanced sharing settings.
- Click Private Network and make sure Network Discovery is enabled and the Automatic installation checkbox is checked. Make sure file and printer sharing is also turned on.
- Click All Networks and make sure the Turn off password-protected network sharing option is turned on.
If you made changes to any of these settings, retest your share to see if the error is corrected.
QUICK FIX 4: CHECK PERMISSIONS
If this doesn't fix it, we should next check your permissions.
- Right-click on the folder or drive you want to share.
- Select Sharing and then Advanced Sharing.
- Select the Sharing tab and then Advanced Sharing.
- You need to check the box next to Share this folder. Check it if it is not. Then click the permission button.
- Select the Everyone group, which should be in the top panel, and allow full control. If the "Everyone" group is missing, click the Add button and type "All" in the bottom area, and then select it.
If this solution doesn't work for you, it's time to move on to quick fix number five.
QUICK FIX 5: RE-DOWNLOAD WINDOWS 10 UPDATE
If you receive this error message when trying to update Windows 10, the problem may be caused by a corrupted setup file.
To fix this, try re-downloading the Windows 10 installer and starting over. As frustrating as this may be, it's worth a try if this is the source of the problem.
QUICK FIX 6: ENABLE SMB 1.0/CIFS FILE SHARING SUPPORT
Suggested by TechJunkie reader TFI, several users reported that this does the trick.
- In the search box, type “Control Panel” and select “Programs and Features”.
- In the left task pane, click the “Turn Windows features on or off” button.
- In the dialog box that appears, scroll down and find “SMB 1.0/CIFS File Sharing Support.”
- Make sure the checkbox next to this option is selected.
- click OK.”
Thank you, TFI!
FINAL THOUGHT
It can be frustrating and difficult to troubleshoot Windows 10 errors, and the error messages rarely provide any useful information.
Hope one of these options helps you get your Windows 10 machine working properly again. Are there any other suggestions to solve this problem? Share them with us in the comments section below!
This isn't the only opaque Windows error message, and TechJunkie has many tutorials on fixing some of the others that pop up.
Source: https://zen.yandex.ru/media/windows10/kak-ispravit-windows-ne-mojet-poluchit-dostup-k-kompiuteru-kod-oshibki-0x80004005-5e143001bb892c00af8e35f0
When extracting an archive
Another archiver
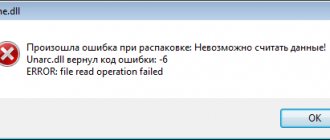
When you try to unzip any particular file, it throws error 80004005 Unidentified error and this makes the file inaccessible. Here you need to install 7Zip or WinRAR program on your computer. First visit 7zip or WinRAR website and select x32 or x64 bit architecture according to your PC configuration. After installing the utility, try to open or extract the same problematic file that generated the error.
Re-register jscript.dll and vbscript.dll
If using another program does not solve the problem, try this solution. re-registering the jscript.dll and vbscript.dll files on the command line was successful jscript.dll is a library that is used when running JScript, while vbscript.dll is basically a module that supports API functions for VBScript.
Disable your antivirus
A third-party antivirus could be a possible cause for this particular error. It happens that some antivirus programs block the extraction of zip files for security purposes. Try disabling the software's real-time protection and see if you get error 80004005. If you did not receive an error and were able to extract the zip file, then you should think about this antivirus. Try using a different one or use the built-in Windows 10 antivirus.
Manual update installation
If the patch and manipulations with the firewall did not help you, follow the procedure described below.
First step
- Go to the path “%systemroot%SoftwareDistributionDownload”;
- Uninstall absolutely all content;
- Restart your computer.
Already at this stage the problem can be solved. Is error 0x80004005 still appearing? Then proceed to the second step
Second step
- Go to the Microsoft website;
- Find the update you need;
- Remember his number;
- Type this number into Google;
- Download the update.
Note
- Double-check that the firewall on your computer is working properly;
- Disable antivirus software during installation;
- Often the error problem occurs on unlicensed Windows.
In this case, you should not rely on support from Microsoft. First you should activate the OS and only then carry out the above steps.
There is also a completely radical way to solve the problem: reinstalling Windows. This action will probably help, but the reinstallation process is quite labor-intensive, which is why not every user will want to perform such a manipulation.
