Good day! Few users of the Android operating system know that their devices have the ability to reboot and then enter the “Bootloader” menu. This is a very useful functionality that is not available on all devices, but it’s worth learning about. Reboot to Bootloader – what Android is, how to use it – you will learn from this publication.
Purpose Bootloader
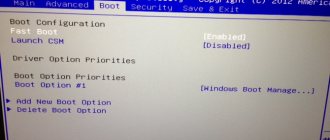
To describe the functionality briefly, it is a kind of BIOS on a computer. That is. This is a kind of intermediate state, a shell before launching a full version of the system. Designed to gain access to the recovery mode with subsequent loading of the normal operating mode of the OS. This can be useful when Android was blocked for some reason or the firmware crashed. By executing the “Reboot to Bootloader” (RtB) command, you can get to a menu where actions to update the software and remove the lock will be available.
It is worth noting that mobile device manufacturers are making every effort to prevent users from installing third-party (unofficial) firmware. But with the use of Bootloader it is possible to bypass all the prohibitions. This is a kind of boot record from which information is taken about the startup order of the smartphone - which services and hardware components should be loaded and put into operation first, and which should come later.
With this functionality, gadget owners can not only change the version of the operating system, but also remove any pre-installed applications, activate root access, reset settings to factory settings, and more.
It is worth noting that the “Reboot to Bootloader” option is not available for every model, and the appearance of the menu may vary significantly.
By the way, if Root access is open on the device, then there is no need to enter Recovery mode for RtB. All you need to do is use the free Holo Reboot utility.
Another advantage of Bootloader is the ability to eliminate software failures. This is useful when you rarely restart the system (and it is advisable to do this at least once a week). Also, the option will help eliminate viruses in the form of uninstallable software or Android pop-up ads.
You are probably already confused in the theory and would like to move on to the practical part. Everything will be now!
The author recommends:
Basics of using Reboot to bootloader
What this means – I explained above. And now - important recommendations:
- Everything you do in the Bootloader (the main Android bootloader) is done at your own peril and risk. I do not bear any responsibility for problems that arise during the manipulation process. The probability of device failure is quite high if incorrect operations are performed;
- The risk of data loss is also considerable. It is advisable to create backup copies on third-party media in advance. Otherwise, you may lose important information when trying to unlock your phone using RtB.
The shell should be launched when the smartphone is turned off. Next, simultaneously press and hold two keys – Power (Power, On/Off) and Volume down . For Samsung, the sound control button can be replaced with Home .
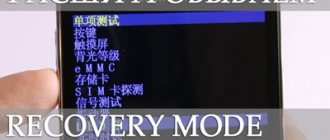
Thus, we find ourselves in the Recovery menu, from where we go to RtB:
This method works on almost any model, regardless of the manufacturer (only the appearance may differ. The screenshot above is an example on HTC).
There is a second option . If you have Developer Mode unlocked, then with the device turned on, open “Advanced settings” - “For developers” and activate “Factory unlocking” (relevant for Android 5 and higher):
Then hold down the power button, select “Reboot” and modes should appear, including Bootloader.
Please note that in this article I did not delve into the specifics of the firmware and advanced application of the described functionality. The fact is that each situation is individual, and advising one thing is the wrong approach. I told Reboot to Bootloader what Android is, and if you want to find out specifically about your smartphone (how, what is done), I recommend visiting the most authoritative forum w3bsit3-dns.com.
Sincerely, Victor!
12/15/201710:019033Victor FelkInformation portal IT Technician
Reboot to Bootloader what is it ? Good day! Few users of the Android operating system know that their devices have the ability to reboot and then enter the “Bootloader” menu. This is a very useful functionality that is not available on all devices, but it’s worth learning about. Reboot to Bootloader – what Android is, how to use it – you will learn from this publication.
Purpose Bootloader
To describe the functionality briefly, it is a kind of BIOS on a computer. That is. This is a kind of intermediate state, a shell before launching a full version of the system. Designed to gain access to the recovery mode with subsequent loading of the normal operating mode of the OS. This can be useful when Android was blocked for some reason or the firmware crashed. By executing the command “ Reboot to Bootloader ” (RtB), you can get to the menu where actions to update the software and remove the lock will be available.
It is worth noting that mobile device manufacturers are making every effort to prevent users from installing third-party (unofficial) firmware. But with the use of Bootloader it is possible to bypass all the prohibitions. This is a kind of boot record from which information is taken about the startup order of the smartphone - which services and hardware components should be loaded and put into operation first, and which should come later.
With this functionality, gadget owners can not only change the version of the operating system, but also remove any pre-installed applications, activate root access, reset settings to factory settings, and more.
It is worth noting that the “ Reboot to Bootloader ” option is not available for every model, and the appearance of the menu may vary significantly.
By the way, if Root access is open on the device, then there is no need to enter Recovery mode for RtB. All you need to do is use the free Holo Reboot utility.
Another advantage of Bootloader is the ability to eliminate software failures. This is useful when you rarely restart the system (and it is advisable to do this at least once a week). Also, the option will help eliminate viruses in the form of uninstallable software or Android pop-up ads.
You are probably already confused in the theory and would like to move on to the practical part. Everything will be now!
Basics of using Reboot to bootloader
What this means – I explained above. And now - important recommendations:
- Everything you do in the Bootloader (the main Android bootloader) is done at your own peril and risk. I do not bear any responsibility for problems that arise during the manipulation process. The probability of device failure is quite high if incorrect operations are performed;
- The risk of data loss is also considerable. It is advisable to create backup copies on third-party media in advance. Otherwise, you may lose important information when trying to unlock your phone using RtB.
The shell should be launched when the smartphone is turned off. Next, simultaneously press and hold two keys – Power (Power, On/Off) and Volume down . For Samsung, the sound control button can be replaced with Home .
Thus, we find ourselves in the Recovery menu, from where we go to RtB:
This method works on almost any model, regardless of the manufacturer (only the appearance may differ. The screenshot above is an example on HTC).
There is a second option. If you have Developer Mode unlocked, then with the device turned on, you can open “ Advanced Settings ” - “ For Developers ” and activate “ Factory Unlock ” (relevant for Android 5 and higher):
Then hold down the power button, select “ Reboot ” and modes should appear, including Bootloader.
Please note that in this article I did not delve into the specifics of the firmware and advanced application of the described functionality. The fact is that each situation is individual, and advising one thing is the wrong approach. I told Reboot to Bootloader what Android is, and if you want to find out specifically about your smartphone (how, what is done), I recommend visiting the most authoritative forum w3bsit3-dns.com.
Almost every Android device has such a useful function as “Reboot to Bootloader” . Today we will tell you what this option is, as well as what capabilities the Bootloader function itself provides.
“Reboot to Bootloader” is an important option that is responsible for direct rebooting into Recovery and subsequent loading of the mobile OS. It works similar to the BIOS menu on your PC. Just like BIOS, the main purpose of the option is to boot the OS. In addition, the mode also allows you to flash your Android, removing the preset lock. Let's take a closer look at what the main Bootloader option does.
Reboot to Bootloader mode
This option without launching Recovery on rooted devices can be performed using the Holo Reboot – ROOT program.
MicroTechnics
I welcome everyone to our website and today, after a short break, we will return to the topic of microcontrollers. To be completely precise, we are beginning to discuss one very interesting and important topic, namely the use of a bootloader when programming controllers. Today we will look at the theoretical part - why a bootloader is needed, how it works and what it even is. The next article will be devoted entirely to practice. Looking ahead, I’ll say that we will write our own bootloader for our favorite STM32 !
So, in simple words, bootloader is a special program that is located in the memory of the microcontroller and can independently reprogram it. For a better understanding of the process, let's look at how the program stitched into the microcontroller is generally executed and where it is located.
As you remember from the article on the flash memory of STM32 microcontrollers, the main user program starts from the first page of memory, or more precisely from address 0x08000000. That is, when power is applied, the controller immediately runs to this address.
When using the bootloader, everything looks a little different. The main program is written to different addresses and is located, for example, from address 0x0800A000. And the memory area (0x08000000 – 0x0800A000) is completely given to the bootloader. As a result, we have two full-fledged programs in the controller’s flash memory. When the device is turned on, the bootloader receives control (since it is located in the area starting from the “starting” address 0x08000000), and during further operation, the bootloader, having completed all its tasks, transfers control to our main program, which is located at address 0x0800A000 (we took this address as an example ). Here is a small diagram to demonstrate how the bootloader works:
It seems clear how it works, but the question arises: why is all this necessary? Let's find out!
The bootloader's primary task is to program the microcontroller. It doesn’t just perform some actions and then transfer control to the main program (goes to the address that corresponds to the beginning of the main program), it, first of all, independently writes this main program into flash memory at the required addresses.
Let's look at a small example for better understanding. Let us create a bootloader (a bootloader is exactly the same ordinary project as any other program for a microcontroller), which interacts with an external memory card, searches for a program file on the card and, if found, writes the program to the desired memory area.
A small digression from the main topic... Let me explain what I mean here by “program file”.
When we create a project (Keil, IAR - it doesn’t matter), then at the output (after assembling the project) we receive a compiled file for flashing the firmware into the microcontroller. Most often we used the .hex file of the program. So this is the file we need in this case.
But the hex file is not entirely suitable for our purposes, since in addition to the code of our program, it contains additional service information. In order not to process it and not pull out the code we need from the hex file, which the bootloader should write to flash, in the compiler settings in the Output tab we will ask it to generate a bin file for us instead of a hex file.
A binary, unlike a hex, contains only sequential program code and nothing more. That is, the bootloader can only read bytes from the bin file and write them to flash memory. That is, in our example, the bootloader’s task is to read bytes from a file on the memory card and write them to addresses starting from 0x0800A000. Here's the pseudocode for clarity:
void main() { // Initialize the SDIO interface for communicating with the memory card SDIO_Init(); while(1) { // Looking for the firmware file if (f_open(file.bin) == FR_OK) { ProgramFlash(); JumpToMainProgram(); } } }
Of course, this is a greatly simplified version of the bootloader. Here we are in an eternal loop trying to open a file with a program, and as soon as we succeed (the user has written the long-awaited file to the card), the bootloader programs the flash memory and jumps to the address of the program it recorded. The controller then starts executing the user program. Once again, this is just pseudocode for an example; we will definitely write a full-fledged bootloader for STM32 in the next article!
All this, of course, is very interesting, but it is still unclear why all these difficulties are needed...
With this, everything is actually simple - for example, the first situation - there is a huge number of devices, at the factory workers flashed a bootloader into each controller (for example, using ST-Link) on each board, which, when connected to a flash drive (in advance) provided connector) searches for the firmware file on it and performs programming. The main program, of course, can also be flashed together with the bootloader via ST-Link. But the subtlety here is that the bootloader project always remains unchanged and there is no need to reflash it, but the version of the main program can be updated a bunch of times during the process of testing devices.
And here it’s much easier to connect ST-Link once and flash the bootloader, and then simply dump the new version of the main program onto a flash drive and stick it into the finished device, where the bootloader will do the flashing, than to run from one board to another a hundred times, plugging ST -Link, while carrying a laptop with ST-Link Utility? As you can see, the benefits of the bootloader are obvious!
The second situation demonstrates this even better. The device has already been released and a bunch of copies have been sold to users. No matter how good the final version of the program is, no one is immune from the unexpected appearance of errors during operation. And here the person who bought the device will definitely not be able to disassemble it in order to flash it through the programmer. That is, updating the program is simply unrealistic. It's a completely different matter if the manufacturers provide a built-in bootloader. The user can easily transfer the downloaded binary to a memory card or flash drive and connect the card/flash drive to the device. The manufacturer can only post new firmware versions on their website!
There are actually a lot of possibilities here - a device manufacturer can easily release a device to the market with basic firmware that implements all the necessary functions, but does not contain any nice graphical things or the ability to connect to a PC (depending on what kind of device it is). The manufacturer does not need to rack his brains to release the perfect firmware the first time, in which absolutely everything possible will be implemented, because he knows that the built-in bootloader will easily help the user update the program in the future.
In general, we can talk about the benefits and applications of the bootloader for a very, very long time? In addition to the mentioned options for updating the firmware using a flash drive or memory card, the bootloader can use any of the data transfer interfaces, such as SPI, I2C or USART.
In general, it seems that we have dealt with the theoretical part dedicated to using the bootloader, but let's discuss one more point in this article - namely the hardware bootloader of STM32 microcontrollers.
The STM32 already has a bootloader, which ST engineers placed in a specially designated memory area of the microcontroller (System Memory). It’s impossible to remove it from there, and there’s no reason to? In order to enter the controller into bootloader mode, you need to apply certain signals to the BOOT0 and BOOT1 pins. After this, the microcontroller is ready to accept new firmware via USART. To do this, you need to connect the board to a PC, download a special software from ST - Flash Loader Demonstrator and load your firmware file into it.
- Kingo HTC Bootloader Unlock 0.2.0.1819
To be honest, I prefer not to use a hardware bootloader for several reasons.
Firstly, the firmware is not encrypted in any way, which is often unacceptable for commercial devices. If I use my own bootloader, then I can do whatever I want to the bin file, such as swapping certain bytes. If such a file falls into the hands of competitors, it will do nothing, since only my bootloader knows how to decrypt the binary. This is not possible when using a hardware botloader - Flash Loader Demonstrator accepts the bin file in its original form, that is, all the bytes in it are not encrypted.
Secondly, the user will need to connect his board to the PC and download additional software to flash the device, and this is not very good. The easier the device is to use, the better! But there are also advantages of a hardware bootloader - it does not take up flash memory. When using your own bootloader, you need to keep in mind that both the bootloader and the main program must fit in memory. There is no such problem with a hardware bootloader - it is located in a special area that the programmer cannot use.
Let's finish this for today, don't miss the article on the practical implementation of the bootloader!
Share!
© 2013-2021 MicroTechnics.ru
1 19.01.2017
Understanding how your smartphone works and what important components help it do so definitely won't hurt. In this post we will get acquainted with what is called Bootloader, or “bootloader”. Why is it open or closed and what is it for? The average user will not have to work with the bootloader, but it is useful to know about its existence.
Start over. Bootloader, or bootloader, is a program that runs every time you turn on your smartphone. It is responsible for launching the required operating system. In other words, Bootloader starts before the Android operating system is even loaded. It is this program that allows you to launch Android or activate recovery mode, for example.
Manufacturers block access to the bootloader on their devices. Thus, they prohibit users from running any other operating system on the device other than the one provided by the manufacturer. Those who want to install custom firmware resort to unlocking the bootloader, although there are manufacturers that produce devices with an unlocked bootloader.
The bootloader is installed by the smartphone manufacturer. If it is blocked, it will allow only the authorized version of the operating system with the appropriate electronic signature to run. Methods for bypassing this check vary depending on the smartphone manufacturer and usually require root access.
It is worth noting that careless actions of users sometimes lead to damage to the bootloader program. This is one of the reasons why you should not disconnect the cable from the smartphone during the firmware or turn off the electricity. Restoring Bootloader is a very complicated procedure that has nothing to do with restoring the smartphone firmware or updating the Android version.
Bootloader functionality?
In addition to launching the Android OS or any other system, the bootloader is responsible for updating , but third-party firmware is initially blocked. The user can unlock them using the RtB option. Manufacturers, therefore, exclude the installation of any third-party OS on your device. That is, updates will be exclusively for official additions.
If the user needs to make more radical changes, for example, changing the operating system, then the bootloader will need to be unlocked. After this step, you can reflash the smartphone, roll back to factory settings, remove any software, open root rights and much more. Each device is unique in this regard, so the functionality differs from each other and some actions may or may not be present.
Separately, you can display RtB's cache clearing . Useful if your smartphone experiences frequent crashes or glitches. Relevant for all devices that work for a long time without reboots. In part, this opens up the prospect of removing various viruses that have entered the system under the guise of uninstallable applications or home screen screensavers. After all, sometimes you can’t just log into the desktop, but RtB is always activated.
By the way, read this article too: Sberbank in Android Pay - how to set up and use
Features of use
- The user must be aware that all actions in the bootloader are done at your discretion. No one is responsible for various bugs that arise during manipulation. You should weigh the pros and cons, as there is a risk of completely destroying your phone.
- There is also a moment with deleting all data. When unlocking, there is a possibility of erasing information stored on the media, so first copy important documents.
- The bootloader starts from a disabled state. To do this, hold Volume Down and Power. If you need to perform this action from a PC, then use the ADB, Bootloader Unlock or Odin . Download them from the Internet, because they are all distributed for free.
- The warranty issued on a smartphone is voided under many circumstances, but this does not happen when unlocked.
How to unlock bootloader
In order to do this, you can use a universal method. Remove the battery from the smartphone, then insert it back and hold the volume control to the “-” position along with the power. After a few seconds, the device will reboot to the desired state. If RELOCKED is visible in the first line, enter the fastbootoemlock command using the special adb utility, Odin or Bootloader Unlock .
For all known models, special applications are posted on the network that perform the function of unlocking the bootloader. If difficulties arise during the work, watch the video with several alternative methods:
Do not forget that during changes to the BIOS, the system will be rolled back to factory settings.
Important: Normal Boot what is it on Android
Conclusion
I hope you understand what this “Reboot to Bootloader” function is on Android, and how useful it is for performing factory settings or changing the OS. It should be noted that only a person with in-depth knowledge of devices should work with it.
Similar articles
Unable to sign in to device due to a recent password change 24 hours Tap Parental Control application - what is it, how to remove it from Android A custom OS can cause critical problems in phone and installed applications - what to do Sberbank in Android Pay - how to set up and use SMS_S application - how remove this virus Error when receiving data from the server [DF-DFERH-01] fix APD News pops up on the phone - how to remove ads Blurbcheckout what is this program YGPS - what is this program MTKLogger in Android - what is it?
After turning on the smartphone, a special Bootloader is activated - it launches the kernel of the Android operating system and important software that ensures stable operation of the gadget. Android devices have a special “Reboot to bootloader” function. It allows users to go to an intermediate stage between system startup and the bootloader. The principle of operation of the function is similar to the BIOS, which is found on any computer.
Why do we need the “Reboot to bootloader” function?
Controlling the “Reboot to bootloader” functions and switching between available tools is done via the volume keys. You can navigate the menu in two directions: up and down. In the section you can view detailed information about the phone, as well as test the operating system. Available features include:
- Unlocking the bootloader to obtain Root rights to the smartphone.
- Installing a third-party program on your gadget—you don’t need to use the official Google Play app store for this.
- A tool for debugging applications and removing programs that cannot be removed using standard operating system tools (so-called “built-in” software from the manufacturer).
- Clearing the smartphone cache (there are simpler methods) from the accumulation of “junk” files that reduce the performance of the smartphone.
- Reset your smartphone to factory settings (there is also an easier way). When performing this action, you need to remember that all data and settings of the phone will be deleted.
Warning.
Before unlocking the bootloader of your HTC smartphone, first back up the data you need. During unlocking (unlocking), all data is deleted - contacts, SMS, games, applications and other data! For information on how to make a backup, read the article - backup on Android .
If you have problems with the device not being visible or being unable to install the driver, visit the article - USB device is not recognized.


