It is impossible to imagine a modern computer without such a device as a mouse. Since its invention, it has become an indispensable computer control device. They come in different shapes, with two or more buttons, with a ball drive and optical laser. But each of them needs to adjust the speed of cursor movement, depending on the user's requirement. Therefore, in this article we will look at instructions for setting mouse sensitivity in Windows 7, 8 and the popular game Counter-Strike.
Adjusting mouse sensitivity in Windows 7 and Windows 8
Windows 7
In order to change mouse sensitivity in the Windows 7 operating system (see detailed description for Windows 8 below), you need to make a couple of simple changes.
- Go to the “Control Panel” window, to do this, click the “Start” button and select this item.
- In the Control Panel menu, click on the Hardware and Sound category. This category of settings helps you manage all available computer hardware.
- In the window that opens, in the “Devices and Printers” section, find the “Mouse” item and select it.
- In the mouse properties window that opens, go to the “Pointer Options” tab. In the "Move" section, drag the slider to set the cursor speed to suit your needs. To optimize and improve performance, check the box next to “Enable increased pointer accuracy.” Click "Ok" and try moving the mouse pointer; if the sensitivity does not suit you, then move the cursor speed control a little more.
To reduce sensitivity, you need to drag the pointer to the left (1-2 divisions are enough to get a noticeable reduction in speed). Conversely, to increase speed, drag the control to the right. From our experience, the most comfortable work is with settings slightly above the middle (but if you feel more comfortable working at a higher speed, you can set it higher).
Windows 8
The setup process in Windows 8 is similar. Go to the control panel, find the “mouse” item and click on it.
In the window that opens, go to the pointer parameters tab and set the desired level of cursor movement speed.
The best programs for setting up a mouse
- X-MOUSE BUTTON CONTROL…
- AUTOMATIC MOUSE AND KEYBOARD…
- MOUSE CLICKER…
- GMOTE…
- WIZMOUSE…
Please note that not all mice come with dedicated software. So this solution doesn't work for every computer mouse...
How to Change Mouse Sensitivity Using Registry Editor
Press the Win + R hotkey and type regedit. Next, press “Enter” or “OK”...
Changing the registry can cause certain problems with your computer. Therefore, I strongly recommend creating a backup copy. To do this, just click "File"...
Then “Export”...
In the Export area, select Entire Registry and enter the desired file name...
Select a safe location and click the "Save" button. If something goes wrong after the change, you can always restore the registry from a backup by running this file...
And so, let's move on to this branch in the registry...
HKEY_CURRENT_USER_ControlPanel_Mouse
In the right pane, double-click "MouseSpeed" and set these values to 2...
Now change the given values for MouseThreshold1 and MouseThreshold2 to 0...
After this, the mouse sensitivity will be set to maximum. If your mouse is too sensitive, you can set different values for MouseThreshold1 and MouseThreshold2. This solution is most likely intended for advanced users. If you are not familiar with the registry editor or are afraid to change or edit something in it, you can use another solution, for example the programs that I described above...
Changing mouse sensitivity using driver snap-ins
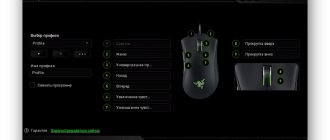
A4tech drivers
In order to change the sensitivity of the A4tec mouse using a snap-in, launch “properties” by right-clicking on the operating system tray icon.
In the settings window that opens, go to the “Movement” tab and in the “Cursor movement speed” section, drag the slider to determine the maximum comfortable sensitivity. To save, click “Ok”.
Logitech drivers
Changing the Logitech mouse sensitivity settings is done in the driver menu, on the “Mouse Moving” tab. In order to change the settings, select its model in the “Select a mouse” field and in the “Pointer movement speed” item, change the sensitivity as you wish.
Setting up mouse buttons
Mouse settings in Windows 7 and 10 are no different from those in older versions of the operating system. There is only a slight difference in the display of the main parameters.
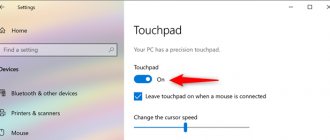
To get to the settings menu, you need to go to “Start/Control Panel/Hardware and Sound/Mouse” (for Windows 7) or “Start/Settings/Devices/Mouse” (for Windows 10).
The settings menu appears in front of us and its first tab is “Mouse Buttons”.
The first parameter, “Change button assignments,” is necessary for people who use the mouse with their left hand. It is indispensable for left-handed people and people with limited mobility.
Double Click Speed allows you to set the amount of time between the first and second click of the left button. To adjust the mouse, use the speed slider, and to check, use the folder control icon.
Sticky Mouse Button makes it easier to drag and select multiple objects on the desktop and in Explorer. This option was originally created to simplify work with outdated mechanical mice equipped with a rubberized metal ball. However, some users still use it now.
Setting the mouse speed in games
Mouse sensitivity in online games is one of the most important parameters for avid gamers, because a second of delay can result in the death of his character for the player. There are separate menus for adjusting mouse sensitivity in games; consider one of these games – Counter Strike. To do this, go to the game settings by selecting the “Options” menu item.
In this menu, go to the “Mouse” tab and in the “Mouse sensitivity” section, select the desired parameter that will allow you to control the character with maximum convenience. Changing mouse parameters exists in almost every game, and you can find them in the settings.
We adjust the wheel (SCM)
All modern optical mice are equipped with a special control element - a wheel. It is used for scrolling web pages, documents in a text editor, for quick navigation in a file manager and other tasks. It also combines the function of the third (middle) button when you press it.
Let's look at the second tab of the mouse properties “Wheel”.
“Vertical scrolling” allows you to set the number of lines that will be scrolled through in one step of rotating the wheel. A too small value will force the user to scroll harder through the SCM, and a large value (or a “per screen” value) will reduce the accuracy of searching for an object. You need to find a “golden mean” for yourself, which by default is 3 lines.
The “Horizontal scrolling” option is relevant for devices with joystick-type wheels, which allow you to move through text and pages horizontally. The setup principle is similar to the previous point.
Setting pointer parameters
All actions and mouse movements we perform are displayed on the screen in the form of a graphic symbol - a cursor. It appears on the screen immediately after connecting the device to the computer and remains active in the Windows environment.
To configure the mouse cursor, go to the “Pointer Options” tab.
The “Move” item is a slider for adjusting the speed at which the pointer moves across the screen. Too much speed can make mouse control inaccurate, and too little speed can make mouse control inconvenient. You can also set the accuracy of the mouse sensitivity settings on Windows 7,8 and 10 by checking the appropriate box.
“Home position in the dialog box” allows you to bind the cursor to the window control buttons at the moment it opens. This rather outdated option was useful for mechanical mice. It reduces the number of movements of the device on the surface and, accordingly, the rotation of its ball.
“Visibility” includes three parameters:


