While you can start using a wired, wireless, or Bluetooth mouse as soon as you connect it to your computer, it's always a good idea to set it up so it works the way you want it to. Windows 10 has many mouse settings that can help you with this.
For example, you can change the cursor speed, swap the left and right mouse buttons, or customize the appearance of the pointer. This complete mouse settings guide will walk you through all the mouse-related features in Windows 10.
Basic mouse settings in the Settings app
The Settings app provides quick access to several of the most common mouse settings in Windows 10.
Open the Start menu and select Settings > Devices. Then select "Mouse" from the sidebar.
Select the main button. Switch the primary mouse button to left (default) or right. If you prefer to use your mouse with your left hand, this is the first option you can change.
Cursor Speed: Drag the slider left or right to determine the cursor speed. If you find it difficult to move it from one end of the screen to the other, increase the speed. But if it seems too fast, try turning it down a notch.
Roll your mouse wheel to scroll: Set your mouse wheel to scroll multiple lines or the entire screen at once. The latter is fast, but you may find it a bit annoying.
Choose how many rows to scroll each time: If you choose to scroll multiple rows, drag the slider to determine the exact number.
Scroll inactive windows when hovering over them: Determine whether you want to scroll the contents of any window when you hover over them. If you tend to multitask with a lot of windows, you can leave this option active. Conversely, disable it if you want to avoid erroneously scrolling inactive windows.
Using Explorer
Explorer in the Windows 10 operating system is a special block located on the left side of an open folder. Here is a list of system files that you can quickly access. To correct the shortcomings of the device, you must use the following instructions:
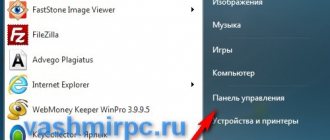
- on the control panel, find the folder icon, open it (you can use any already open system, the explorer is always located on the left, the general view of the window is always the same);
- In the upper right part, in the small search bar, enter the word “mouse” by clicking the “Enter” key;
- the program will display a list of results containing the query characters.
Attention! Any search engine in the Windows 10 operating system works only based on the entered data. For example, if you type the word “mouse”, the program will not give the desired result because in the root system of the computer the word is written with a different ending.
In the list that appears, find the “Mouse Options” section. Next, the settings are performed as usual. You can move the slider several times - set the value and check the device's response to make sure that the control device is working correctly.
Accessibility options in the Settings app
Windows 10 has several mouse-related Ease of Access settings. Open the Settings app and select "Ease of Access" to access them.
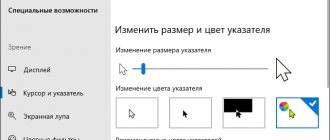
You'll find the first set of settings under the Mouse Pointer section in the sidebar.
Change pointer size: Drag the slider to increase or decrease the size of the pointer.
Change pointer color: Change the color by choosing a color scheme. For example, you can change the default white pointer to black, switch colors depending on the background, or choose a custom color.
The second set of settings is listed in the Text Cursor section of the sidebar.
Enable Text Cursor Indicator: Enables the text cursor indicator to improve the visibility of your input. Then select a color and use the slider to increase or decrease the color of the indicator.
Change the thickness of the text cursor. Drag the slider to increase or decrease the thickness of the text cursor.
Application of specialized software
Along with standard Windows tools, as well as additional software features offered by pointing device manufacturers, there is universal software. It also allows you to reassign the keys on the mouse, regardless of what model you are using. Among such programs it is worth highlighting the following applications:
- X-Mouse Button Control;
- Mouse Wheel Control;
- Logitech SetPoint.
Let's look at the setup algorithm using the first program as an example:
- Connect the peripheral device to the PC.
- Launch X-Mouse Button Control.
- Check the box next to the gadget you are using.
- In the right window of the program, select “Layer 1”.
- In the tabs named “Side Button”, set the required actions.
You can create several layers at once to optimize the gadget’s operation for different scenarios. For example, in games, buttons will perform one action, but in standard use cases, they will perform another. Just remember to switch from one layer to another in a timely manner. Otherwise, the one that was selected last time will always be used.
Accessing the Mouse Properties Panel
The Mouse Properties panel in Windows 10 contains the lion's share of mouse settings in Windows 10. You can access it by selecting Advanced Mouse Options under Settings > Devices > Mouse > Related Settings.
Mouse Properties is an old-school dialog box consisting of five tabs: Buttons, Pointers, Pointer Options, Wheel, and Hardware. Some of them contain settings similar to those found in the Settings app. Below we will look at each tab in detail.
Mouse Properties: Buttons Tab
As the name suggests, the Buttons tab in the Mouse Properties panel focuses on how your mouse's buttons work.
Button Configuration: Swap the default left and right buttons.
Double-click speed: Use the slider to determine how fast double-click is on your computer. If you're having trouble opening files and folders, try reducing your speed.
ClickLock: Activate this option if you want to drag and drop files and folders without clicking or holding them. Instead, briefly hold the button to begin selecting an item (select Settings to determine the duration). Then move the cursor and select the primary button again to release the item.
Using Registry Editor
The operating system registry is a database of information that contains complete information about installed files and programs on the device (personal computer, laptop). During the period of performing any operations on the PC, there is a constant reference to the register items.
The Registry Editor is a special application that allows you to edit entries, change data, and configure settings. The open editor window looks like a standard folder, which is opened by clicking on the corresponding control panel icon.
Attention! Editing information in the registry can lead to various consequences. Even small errors can cause various programs, software, and utilities to malfunction.
You can open the editor using the “Start” button (type regedit in the search bar). The found file is opened by double-clicking the left mouse button (answer “yes” to the request). And also through the hot keys “Win + R” - the “Run” line will open, then follow the same steps.
After opening the window:
- go to HKEY_CURRENT_USER;
- find the line Control Panel;
- in the list that opens, click “MOUSE”;
- a panel with mouse settings data will open on the right;
- To change the parameters, you need to right-click on the desired line and select “Change”.
A small window will open where you can enter the required data and then save. To prevent the click from triggering twice when clicked, the following numbers should be displayed: DoubleClickHeight – 4, DoubleClickSpeed – 500-550.
If there was no additional setting, double-clicking after pressing the left mouse button means the device is malfunctioning. The reasons are different - technical wear and tear, software failure, accidental change of internal registry data. Before contacting a specialist, you can try to solve the problem yourself (purchase new batteries or a device, fix software errors).
Mouse Properties: Pointers Tab
The Pointers tab is used to change the appearance of the mouse cursor. You can add a little personalization and also improve visibility.
Scheme: Change the default Windows mouse pointer by choosing an alternative such as Windows Black, Windows Inverted, Windows Standard, etc. Use the preview pane to choose the scheme that suits you best before applying it.
Configure: Configure context cursors for each schema. Double-click an action (Work in background, Busy, Select text, etc.) and select another .ANI or .CUR file from the built-in library or a third-party icon pack. You can always select "Default" to undo any changes, so feel free to experiment.
Enable Pointer Shadow: Adds a shadow to the mouse pointer. This makes it easier to track the cursor as it moves.
Bluetooth mouse
Another connection option is without using additional elements, via Bluetooth. Instructions for users:
- Find the Bluetooth icon on the taskbar, right-click on the icon to open the context menu of the object;
- in the list presented, select the line “Adding a device”;
- an additional working window will appear on the monitor, where you need to click on the “Add Bluetooth or other device” item;
- then select the required connection string.
A list of objects available for connection will appear on the screen. The user needs to select the mouse and click twice. For now, you can use the touch control panel on your laptop.
After completing these steps, a separate notification will appear on the screen of your personal device (stationary or portable) indicating that the element is installed correctly and is completely ready for use. You need to click the “Finish” button in the open window and begin interaction between the mouse and the PC.
Mouse Properties: Pointer Options Tab
The Pointer Options tab in the Mouse Properties panel provides additional options for customizing the mouse pointer.
Motion - Select pointer speed: Drag the slider to determine the pointer speed.
Motion - Improve pointer accuracy: Enable this option if you wish. Mouse Acceleration in Windows 10. Contrary to its name, the functionality will make your cursor less accurate!
Snap To: Automatically moves the pointer to the default button in the dialog box. Leave it disabled if you prefer full mouse control.
Visibility - Display Pointer Trails: Add a trail to the cursor and define its length by dragging the cursor from Short to Long or vice versa. This option is ideal if you have problems with cursor tracking.
Visibility - Hide the cursor while typing: If the cursor continues to interfere with your typing, try activating this option.
Visibility - Show the location of the pointer when I press the CTRL key: If you are having trouble identifying the cursor, activating this option will help you find it by pressing Control.
Mouse Properties: Wheel Tab
The Wheel tab allows you to define how the mouse scroll wheel works.
Vertical scrolling: Select the radio button next to Next number of rows at a time to scroll a specific number of rows. Or select One Screen at a Time if you want to scroll through the entire screen at a time.
Horizontal Scroll: If your mouse's scroll wheel supports tilt, enter a number to determine the number of lines you want to scroll horizontally.
Mouse Properties: Hardware Tab
The Hardware tab provides a list of all the mice and other pointing devices connected to your computer. Select a device and select Properties to view general and driver information about the device.
If you are having problems using your mouse, you can visit this panel to update the driver, rollback the driver, disable and re-enable the device, etc. Also, you can fix your mouse through Device Manager.
Connect a wireless radio mouse via a USB adapter
In most cases, the connection requires an additional element - an adapter, which comes complete with the main object (located in the box or case).
To get started you need to follow a few simple steps:
- unpack the set of elements;
- insert the adapter into the USB port on the personal computer;
- check for working batteries;
- on the case, switch the slider to the “On” position.
If the device involves a laser type of connection, a reddish glow will appear. You need to click a couple of times with any mouse button on an empty space on the desktop.
Attention! If the connection is not established, you must first check the functionality of the connected port - insert another device and a flash drive, for example.
Additional accessibility settings in Control Panel
In addition to the options above, Windows 10 also includes a set of additional accessibility-focused controls. You can access them by opening Control Panel and selecting Ease of Access > Change the way your mouse works.
Mouse pointers: Change the color and size of the mouse pointer (this matches the color schemes in the Pointers tab of the Mouse Properties panel and in the Accessibility panel of the Settings app).
Controlling the mouse using the keyboard. Select the Enable mouse keys checkbox to control the cursor using the keyboard. This is useful for interacting with the cursor when troubleshooting pointing device problems.
Make window management easier: It contains several options that let you activate windows by hovering over them and stop Windows from automatically sorting when you move them to the edge of the screen.
System tool
The built-in tools are not as functional, but they are quite enough to optimize the operation of simple manipulators with two buttons and a wheel. You can get to the settings through Windows Settings. This section can be opened from the Start menu or by pressing the Win+I key combination.
Next you need to go to the “Devices” block.
Here, on the “Mouse” tab, are the options we need.
Main settings
By “basic” we mean those parameters that are available in the main settings window. In it you can select the main working button (the one with which we click on elements to select or open).
Next are the scrolling options - the number of lines passing simultaneously in one movement and enabling scrolling in inactive windows. The last function works like this: for example, you write a note in a notepad while looking at the browser. Now there is no need to switch to its window, you can simply hover the cursor and scroll the page with the wheel. The working document will remain visible.