The most useful and common combinations
It is difficult to say which combinations are more popular, in demand and useful, since each of them in itself contains enormous potential.
But still, from the entire list of possible combinations, we can single out that “basis” that even a novice user should be familiar with. We study the most common hotkey combinations to speed up your PC work
“Copy”, “Cut” “Paste” - basics for beginners
Copying text information, a file, or an entire folder to the clipboard and then moving it - these are functions that are difficult to do without. Carrying out such actions using a pointing device (mouse), the user will have to spend an impressive amount of time on this. However, using hotkey combinations can save a lot of time. To learn how to use such a combination on the keyboard, you need to:
- In order to copy almost any element, you need to select it and press “Ctrl” + “C” at the same time.
The key combination “Ctrl” + “C” copies an element that must first be selected - To “cut” use the combination “Ctrl” + “X”.
To cut an element, press the key combination “Ctrl” + “X” - To place a copied or cut document, text or folder in the desired location, use the “Ctrl” + “V” buttons.
Use the keyboard shortcut “Ctrl” + “V” to paste the cut or copied element in the required place
Select all contents and cancel actions with a few keys
To take advantage of these features:
- instant selection function - the user needs to simultaneously hold down “Ctrl” + “A”;
Simultaneously pressing the “Ctrl” + “A” keys selects all content on the page - To undo an action just taken, you will need to press “Ctrl” + “Z” at once.
This function is one of the most useful, since with its help you can avoid wasting precious time on the lengthy return of previous parameters; To cancel the action you just performed, press the “Ctrl” + “Z” keys at once - to “neutralize” the action that is performed by the PC when pressing such a combination, you can use the following: “Ctrl” + “Y”.
Key combination “Ctrl” + “Y” to neutralize the completed action
Combinations for working with files that are open in applications
For those who spend a lot of time working in Word, it will be useful to learn about those combinations that will reduce the time spent using this program:
- “Ctrl”+“N” will allow the user to instantly create a new sample document in the program.
In addition to Word, this combination is also used in other text or graphic editors. The keyboard shortcut “Ctrl” + “N” creates a new sample document in a text editor - “Ctrl” + “S” is a useful combination that will save the document you are currently working on in a split second.
To save a text document, press the key combination “Ctrl” + “S”
Buttons for quickly working with dialog boxes
To quickly “move” between open programs and applications, instantly close them and scroll through them in one second, you need to know special combinations
- To “jump” between running programs, the user must simultaneously press “Alt” + “Tab”.
To move between programs you need to press “Alt” + “Tab” at the same time - To scroll backwards, press Alt+Shift+Tab.
To scroll through programs “back to front” press “Alt” + “Shift” + “Tab” - The “Ctrl” + “Tab” combination will allow you to instantly move from one document to another in one application.
This is also useful when changing tabs in some programs. To move from one document to another in one application, press the combination “Ctrl” + “Tab” - To quickly close a running application, use the simultaneous pressing of “Alt” + “F4”.
You can close a running application by simultaneously pressing the “Alt” + “F4” keys - “Ctrl” + “F4” pressed together will not close the entire application, but only one document or tab.
Pressing "Ctrl"+"F4" will close one tab or one application - To quickly “hide” displayed windows, you can combine “Win” + “D”.
To quickly minimize all open windows, press “Win” + “D”
Keyboard combinations while surfing the Internet through Internet Explorer
Like other existing web browsers, Internet Explorer can use a variety of hotkeys that allow you to instantly save, add and copy entire sites. The main hotkeys for this application are:
- “Ctrl” + “D”, which allow you to instantly add a site to your “favorites” list.
To add a site to the list of favorites, press the keys “Ctrl” + “D”
- To quickly close one tab, press Ctrl+W.
Close one tab by pressing “Ctrl” + “W”
- “Ctrl” + “T” makes it possible to open another additional tab.
“Ctrl” + “T” is used to open an additional tab in the browser
- Pressing "F5" will refresh the web page.
To refresh the page, press the “F5” key
- Using “Ctrl” + “Tab” you can quickly switch between all available tabs.
To move from one document to another in one application, press the combination “Ctrl” + “Tab”
- And the combined press “Ctrl” + “J” will display a list of available downloads.
Pressing "Ctrl"+"J" will display a list of available downloads
Selecting a region to edit.
How to undo an action in Photoshop
After installation, we can start the server to try out WorldEdit. First of all, you need to understand how the territory is edited - the plugin allows you to select a rectangle - “cuboid”, marking 2 points on the terrain:
This is done in several ways:
- Getting up first at the first point, type //pos1 into the chat, go to the second and write //pos2. The method is long and labor-intensive.
- The second method is suitable for working from a long distance - select points for the cuboid with a sight and alternately type in the chat: //hpos1 and //hpos2.
Well, the third, most common way is to simply pick up the necessary tool - a wooden ax. You can get it from the creative menu, or using one useful command, which is the most basic for this plugin, namely //wand. Using this tool, we can select the territory we need. With the right mouse button you select one point, with the right mouse button you select another. A cuboid is formed by drawing a diagonal from one point to another. (By the way, this tool is inseparable from another plugin - WorldGuard, which was developed by the same developers as World Edit.) So, we can manipulate the selected territory. Let's master the most basic commands.
Hotkeys: text document editor
Keyboard checkbox alt. how to put a checkmark on the keyboard? we show all the ways
Hotkeys when editing text in text areas and documents can significantly speed up and simplify the process.
Table 9
Hotkeys for the text document editor
| Action | Keyboard shortcuts | How the program works |
| Toggle insert/replace mode | Ins | Allows you to either add new characters to the old ones when entering, or overwrite the old ones with new ones |
| Go to the beginning of the line | Home | Moves the cursor to the beginning of the current line |
| Go to end of line | End | Moves the cursor to the end of the current line |
| Select to start of line | Shift + Home | Selects text to the beginning of the line |
| Select to end of line | Shift + End | Selects text to the end of the line |
| Go to the beginning of the text | Ctrl + Home | Moves the cursor to the beginning of the text |
| Go to end of text | Ctrl+End | Moves the cursor to the end of the text |
| Select to start of text | Ctrl + Shift + Home | Selects from the cursor to the beginning of the text |
| Select to end of text | Ctrl + Shift + End | Selects from the cursor to the end of the text |
| Scroll up one line | Ctrl+Up | Flipping through a text document |
| Scroll down one line | Ctrl+Down | |
| Go to the beginning of the previous word | Ctrl+Left | |
| Go to the beginning of the next word | Ctrl + Right | |
| Select previous word | Ctrl + Shift + Left | Quickly highlight a word (characters separated by spaces) |
| Select next word | Ctrl + Shift + Right | |
| Scroll up page | Page Up | Flipping through a text document |
| Scroll down page | Page Down | |
| Select previous page of text | Shift + Page Up | Highlights text page by page |
| Select next page of text | Shift + Page Down | |
| Remove selection | Esc | Removes selection |
| Go to line | Ctrl+G | Moves the cursor to line number |
| Delete the character to the left of the cursor | BackSpace | Deletes the character to the left of the cursor |
| Delete the character to the right of the cursor | Del | Deletes the character to the right of the cursor |
| Delete the word to the left of the cursor | Ctrl + BackSpace | Deletes the word to the left of the cursor |
| Delete the word to the right of the cursor | Ctrl+Del | Deletes the word to the right of the cursor |
| Set/remove bookmark | Alt+F2 | Marks the line you need |
| Next bookmark | F2 | Moves the cursor between bookmarked lines |
| Previous bookmark | Shift + F2 | |
| Delete current line | Ctrl+L | Deletes the current line |
| Move block to the right | Tab | Moves the selected block of text to the right |
| Move block to the left | Shift + Tab | Moves the selected block of text to the left |
Option 1: Disable keyboard shortcuts with Windows
How to cancel printing on a printer
Disabling Windows key combinations means prohibiting the use of combinations such as Win + R, Win + X, which call various system functions and applications. At the same time, “Start” itself will continue to open. The method is suitable for users who do not need such key combinations and/or who occasionally accidentally press them. To disable exactly the action that occurs when you press the Windows key, use one of the methods described in Option 2.
Method 1: "Local Group Policy Editor"
The Local Group Policy Editor system application is only available in Windows 10 Professional and Enterprise, and in Windows 7 also Ultimate. If your edition is Home (Windows 10/7 Home), Basic (Windows 7 Basic), proceed to the next method, which is an alternative to this, since such editions of the OS do not have this editor.
- Launch Local Group Policy Editor by searching for it in Start.
This can be done through the “Run” window by entering the name.
Sequentially expand the following sections: “User Configuration” > “Administrative Templates” > “Windows Components”.
Select the "Explorer" subfolder and on the right side, look for an option called "Disable keyboard shortcuts that use the Windows key." Open it by double-clicking the left mouse button.
Set the value to "Enabled" (since the option is called "Disable...", the value "Enabled" will enable this disabling policy) and save the changes with the "OK" button.
Log out or restart your computer to make changes.
Method 2: "Registry Editor"
If the application discussed above is not available, the same action will have to be performed through the “Registry Editor”. However, the steps will naturally be different.
- Through a search in “Start”, find and launch “Registry Editor”.
If you're using the Run app instead, enter the command there.
Follow the path. Windows 10 users can paste this address directly into the address bar and press Enter to quickly navigate. If the transition does not occur, remove the last word from the address.
Some users will not have an Explorer subfolder, so they will have to create one themselves. To do this, right-click on “Policies” in the left column and select “Create Section”, and then rename it “Explorer”.
While in the created section, in the central part of the window, right-click on an empty space and create a “DWORD Value (32-bit)” regardless of the bitness of Windows.
Rename the created parameter to “NoWinKeys”.
Open it by double-clicking LMB and change the value to “1”.
All windows can be closed and the computer can be restarted. In the future, to disable this feature, either change the value back to “0” or simply delete the parameter you created.
We are looking for programs that were launched in your absence
In the latest versions of the Windows operating system (if I’m not mistaken, starting from 7 or even Vista), among the file attributes there is a “Date of Opening” field. Accordingly, it means when the user double-clicked on it and launched it.
To do this we need to find all the programs. Launch Explorer and go to the “C:\Program Files\” folder, in the upper right corner in the search field, enter the search query “*.exe” and press Enter.
Executable files located in this folder will begin to appear in the list.
We need to switch to the “Table” mode on the “View” tab. Then right-click on the header of any column and select “More details...” in the menu that appears.
In the small window that appears, look for the “Access Date” item, check the box next to it and click OK.
All you have to do is click on the “Access Date” column header and find the time period of interest when the supposed unknown person did something on the computer.
If you are using a 64-bit version of Windows, then you will have another folder - “C:\Program Files (x86)\”. You need to do the same with her.
Also, don't forget about the games folder if they are installed in a different location (for example, on a different drive). So it’s worth doing the same steps. And, of course, if you have other programs installed somewhere, then it’s worth looking there too.
Note! If you have launched any applications since turning on the computer, the data about the previous launch will be deleted. If an unknown person previously launched the same applications that you launched after him, then the file properties of these applications will contain the date of your launch. It will no longer be possible to find out the date of the previous launch in this case.
In this case, it will no longer be possible to find out the date of the previous launch.
Browser history
The first step is to check the history of your Internet browser, where the addresses of sites to which you have navigated from the browser are always stored.
The browser history should be checked first, since it can be used to obtain login data for social networks, bank accounts, accounts of online digital distribution services (for example, Steam, Origin, Epic Games Store, etc.) and other services , from where attackers can obtain payment card data and other material benefits.
To view the history of the Google Chrome browser, just open the Internet browser and press the key combination Ctrl+H , or enter the path “ chrome://history/ ” in the search bar or click on the three dots icon in the upper right corner and select the item in the menu that opens "Story" .
In the window that opens, you can view the date, time and resources visited, which can be used to determine what third parties were looking for during unauthorized access to the PC.
If you find that your browser history has been cleared even though you did not do so, it means that someone was trying to hide traces of your computer activity during unauthorized access.
In this case, you should use our guide “How to restore browser history after clearing”, where you can learn about restoring and viewing history in all popular browsers.
In addition to history, the Google browser saves many actions performed on the network from a computer in a special section “My actions” , where you can view in more detail the search queries , videos watched on YouTube and other information.
To go to the “My actions” , just copy and paste the link https://myaccount.google.com/activitycontrols , and then select the required item (for example, select the “Application and web search history” , but here you can also view your location history, YouTube viewing and search history, data from synchronized devices, etc.) and click on the “Manage history” .
In the window that opens, you can familiarize yourself in detail with all the actions, views, and entered search queries that were completed in the near future.
How to undo deletion when pressing Ctrl+Z
"Such situation. I cut out photos from a folder on my phone and pasted them into a folder on my computer, and then I accidentally pressed ctrl-z in that folder and the photos disappeared. Tell me how to restore photos?”
Keyboard shortcuts in Windows are a very useful tool, and in particular, “Ctrl+C”, “Ctrl+X”, “Ctrl+V” and “Ctrl+Z”. The first three of these are the “copy/cut and paste” options that we used most often, and the last option is “undo”. By simultaneously pressing the Ctrl+Z keys, we can undo the last actions performed in a Word document or in many other programs.
It seems that the Ctrl and Z keyboard shortcut is very useful as it allows us to undo actions to avoid mistakes. However, many people ask about ways to recover deleted files when pressing Ctrl+Z.
see also
Copyright (c) 2022 HTFI. Copying information is permitted, provided that active links to sources are indicated.
Very often a situation arises when a computer or laptop begins to work unstably after installing a particular program, or after being infected with a virus. In this case, a function that will return the computer’s state to a few days ago will be very useful, thereby undoing unwanted changes to the system. This Windows OS feature is called System Restore. We will tell you how it works and how to use it in this article.
How to use hotkeys
Let me give you an example of hot keys: Alt+F4. This entry means that you should first press the first key (Alt) and then, without releasing it, press the second key F4. After this, you can release both keys at the same time.
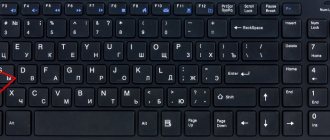
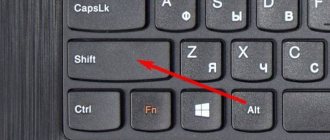
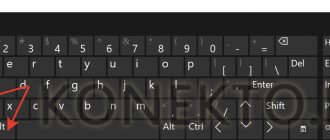
Rice. 1. Shows where the Alt, F4, Del (or Delete), Fn keys can be located on the keyboard
The Alt+F4 combination means closing the active window. That is, after pressing these keys, the window that the user is currently using will be closed. This is an analogue of the button in the form of a cross X (close) in the right corner of the window. Instead of using the mouse and using it to click on the cross, you can press two Alt+F4 buttons on the keyboard.
A keyboard shortcut can consist of three keys. For example, CTRL+SHIFT+ESC (Fig. 2) opens the Task Manager window. First, you should press and do not release the first Ctrl key (marked with number 1 in Fig. 2). Then, without releasing Ctrl, simultaneously press and hold the second Shift key (2 in Fig. 2). When Ctrl and Shift are held down, you need to briefly press the third Esc key (3 in Fig. 2). When Task Manager opens, you can release all three keys at once.
Rice. 2. CTRL, SHIFT, ESC keys
The key sequence rule should be remembered for those cases when you, without thinking, automatically pressed a key combination, but it did not work. Then you can remember the order of pressing the keys. If there are two hot keys, then first press the first key and, without releasing it, press the second key. Then both keys can be released.
Modifier keys
The Ctrl, Alt, Shift, Fn, Win keys are often used in keyboard shortcuts. These are called modifier keys. By themselves, as a rule, they do not produce any action. But they are used in combination with other keys.
The Fn key is also an auxiliary one. On 101-key keyboards, the small numeric keypad is located to the right of the main part of the keyboard. On laptops, the small numeric keypad usually works using the Fn key (Fig. 1). Such a keyboard is used, for example, to enter various codes.
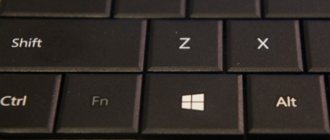
The Windows logo key (Figure 3) is sometimes called the Win key. If you click on it once, it will open the Start menu. Pressing again will close this menu. There are also many other shortcuts using the Win key.
Rice. 3. Windows logo key.
Entering "special characters"
To put the so-called “hiding” or simply “special characters” into practice, you need to use the following combinations: hold down the useful “Alt” key and use any of the “Numpad” numbers.
To enter a special character, hold down the “Alt” key and any of the “Numpad” numbers
The user can find the combinations themselves in this table in the screenshot.
Keyboard shortcut table for entering special characters
A small digression designed to help a beginner get comfortable with working in Adobe Premiere Pro
Sometimes some misunderstanding of the basic actions and application of certain functions is due to the fact that a person is simply lost in the interface. And it’s good if he has previously worked in programs from Adobe, and if all he is familiar with is a text editor. What to do in this case? In this case, I don’t see a big problem, since you can draw an analogy, albeit a very simplified one, between Adobe Premiere Pro and a text editor.
Imagine that you have a sentence typed in a text editor, and so a clip you have collected from various videos is the same sentence, only instead of words or letters there are frames - a video, or even a montage phrase, which is a group of frames that are designed to display the moment of action or the state of an object, and like an ordinary sentence consisting of text, it must reflect a complete thought.
Thus, each word in a sentence is a fragment of a video. In a text editor you can customize – format – each word or letter, and in a video editor similar operations include color correction, increasing the scale or duration of a fragment, and so on.
And it should become much easier for a beginner to perceive his actions in Adobe Premiere Pro if he does not get lost, but simply remembers his work in typing text and then bringing it into proper form.
And since working in Adobe Premiere Pro is similar to working in a text editor, it is quite logical that the same hotkeys work both here and there, and in fact they are standard shortcuts for most programs on your computer.
Undo last action in Microsoft Word
If you are an inexperienced computer user, and for one reason or another you often have to work in MS Word, you will probably be interested in knowing how you can undo the last action in this program. The task is actually quite simple, and its solution is applicable to most programs, not just Word.
Lesson: How to create a new page in Word
There are at least two methods by which you can undo the last action in Word, and we will discuss each of them below.
Undo an action using a keyboard shortcut
If you make a mistake while working with a Microsoft Word document or perform an action that needs to be undone, just press the following key combination on your keyboard:
This will undo the last action you performed. The program remembers not only the last action, but also those that preceded it. Thus, by pressing “CTRL+Z” several times, you can undo the last few actions in the reverse order of their execution.
Lesson: Using hotkeys in Word
You can also use the “F2” key to cancel the last action.
Note: You may need to press the F-Lock key before pressing “F2”.
Undo your last action using a button on the Quick Action toolbar
If keyboard shortcuts are not for you, and you are more accustomed to using the mouse when you need to perform (undo) this or that action in Word, then you will clearly be interested in the method described below.
To undo the last action in Word, click the curly arrow turned to the left. It is located on the quick access panel, right next to the save button.
In addition, by clicking on the small triangle located to the right of this arrow, you can see a list of the last few actions and, if necessary, select the one you want to cancel.
Return last actions
If for some reason you undo the wrong action, don't worry, Word allows you to undo, if you can call it that.
To redo an action you undid, press the following key combination:
This will return the undone action. For similar purposes, you can use the “F3” key.
The rounded arrow, located on the quick access panel to the right of the “Cancel” button, performs a similar function - returning the last action.
That's all, from this short article you learned how to undo the last action in Word, which means you can always correct your mistake in time.
We are glad that we were able to help you solve the problem.
Run tool
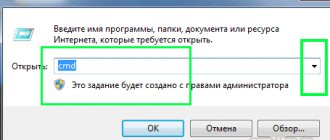
This is not a very popular tool among ordinary users, but it is quite in demand among advanced users. In the “Run” line, you can quickly enter the task/application that you want to open and immediately access it. For example, you can open the command line through this tool.
“Run” can be opened using the mouse, reaching the tool in a couple of clicks through the “Start” menu.
But why go to Start and perform unnecessary actions if there is a key combination Win + R.
Removal methods
The easiest way to end a task is to complete it manually. In the situation under consideration, we will assume by default that the frozen program is not closed by clicking on “Exit”, but continues to hang. In such a situation, you will need to remove the task or “kill the process”. These are 2 different tasks, especially in Windows 7 and XP:
- removing a task. Tries to terminate the program in a normal manner. The moment is waited until the program enters a stable state and then it ends. When canceling a task, the user will not lose any changed documents and settings;
- removal process. Instantly cancels the task. The program closes with the loss of all data. This method works faster than canceling the task, because the system itself terminates the application.
Both methods are located in the “Task Manager” and are located next to each other in the windows. And in Windows 10 there is no “kill process” option. Instead, a modified version of “End Task” is used, which checks the application’s response and then selects a tool.
Alternative methods include withdrawal using the “command line” or using the “Process Explorer” application from Microsoft. Each method will be considered separately with all the nuances and subtleties.
Manual mode
Perhaps the most obvious way for the user is to cancel the task in the device manager. Alternative methods require special software or some command line knowledge.
To remove a task on your computer, you need:
- Launch "Task Manager". The easiest way to do this is using the keyboard shortcut “Ctrl+Alt+Del”. Note: There is a joke among advanced users “send to 3 buttons”. It involves opening the Dispatcher and killing the process through it.
- Now select the desired program (which you are going to close) and click on it.
- At the bottom of the window there is a “Cancel task” button. The same line can be seen if you right-click on the process.
- By clicking the “Switch” button, you can go to the list of processes, where the program process will immediately be highlighted.
- Now you can click “End Process”.
The application will terminate immediately. The difference between removing a process and a task can be found above in the text.
Process Explorer
An alternative method for closing programs. It only indirectly relates to “task removal”, since it is focused on killing processes. To use the program effectively, you will need to find process names. And the program itself can be found on the official Microsoft website.
What you will need:
- We start downloading the file.
- Unpack the archive and run the program “as Administrator”. Without this, the system will not provide access to processes.
- We accept the terms of use.
- In Process Explorer, you can close any task that is running on your computer. Even systemic.
- Right-clicking on a process opens a context menu.
There are 2 important lines in this window: “kill process” and “kill process tree”. They differ in that the first closes only the selected task, and the second completely closes the program. This question is especially relevant in relation to browsers. The kill process closes individual tabs. And killing the tree will close the browser completely.
You need to be careful when using Process Explorer. This program is able to close processes necessary for the operation of the system
Therefore, carelessly closing everything can cause a “blue screen of death”, interrupting the operation of the system.
How to quickly show or return to the desktop in Windows [7, 8, 10]
Greetings!
Surely, while working at a computer, you have a situation when you need to instantly display the desktop or switch to it. Some users resort to tedious minimizing windows to the point of obstructing it, not knowing that there are ways to display the desktop in no time. We will tell you about them today.
Returning to the desktop using a keyboard shortcut
The first method is to use a keyboard shortcut. In Windows, this combination is Win + D - press it and folder windows and applications will instantly be minimized, and you will be able to see the desktop and carry out the desired actions.
Returning to the desktop using the taskbar (tray)
The second way to display and quickly go to the desktop is to use a button specially created for this in the taskbar.
By moving the mouse cursor to the lower right corner (over this button), all open windows will become translucent, and you will be able to see the desktop, and by removing the cursor from it, the windows will return to their original position. If you click on this button, all open windows will be instantly minimized, and you will be able to freely use the Windows desktop.
Return using the tray context menu
And finally, the last method is to use the taskbar context menu. To do this, move the mouse over the taskbar, and over an area free from icons of open applications and folders, and right-click.
A context menu will appear in which you must select “Show desktop”. By clicking on it, you will immediately see the desktop, which is not blocked by any windows due to the fact that they are all minimized to the tray (taskbar).
This is all. I am confident that you will be able to choose the most optimal way to quickly display and switch to the desktop in Windows from the options proposed and described in detail.
How to change combinations of an existing keyboard layout
In order to do this, you will need:
- Right-click on the language icon in the taskbar.
Right-click on the language icon
- Go to "Options".
Open "Options"
- In the window that appears, go to “Switch keyboard” and click “Change combination...”.
Go to “Switch keyboard” and click “Change combination...”
- Select the required value and save the changes made.
Select the required value and click “OK”
Useful Windows Keyboard Shortcuts
And now the most useful Windows key combinations that I recommend remembering. All of these shortcuts use “modifier keys” ( Ctrl, Alt, Shift
and
Windows
):
Every computer user should know this!
All PC users should know these Windows key combinations; they work both with folders and files, and with text.
“Copy”, “Cut”, “Paste” keys:
- Ctrl + C
– copy to clipboard (the file, folder or text will remain in the current location). - Ctrl + X
– cut to clipboard (the file, folder or text will be deleted from the current location). - Ctrl + V
– paste from the clipboard (copied or cut files, folders or text will appear in the current location).
“Select All” and “Undo”:
To select all the contents of the current folder or all the contents of an open document:
Ctrl + A – select all.
I hope you already know about these hotkeys, but it wouldn’t hurt to repeat them.
But not everyone knows these combinations:
- Ctrl + Z
– undo the previous action (including copying/moving files). - Ctrl + Y
– repeat the undone action (i.e. the opposite of the previous key combination).
Working with documents opened in the program
Hotkeys that will save you both time and nerves. Why drag the mouse to the File
", after clicking, look for the item "
Create
" or "
New Document
" (in most programs the location and name of the items are different), when you can hold down two keys:
Ctrl + N – creating a new document in the program.
When you type text in Word, you need to save the document often so as not to lose it in case of various failures. But sometimes you are too lazy to pick up the mouse again, look for an icon on the taskbar, or an item in the menu; there is a simple replacement:
Ctrl + S – save the open document.
These key combinations work in office programs, browsers, and graphic editors; both in Windows and Linux.
Hotkeys for working with program windows
When you have many programs open, and each program also contains more than one document, it’s not difficult to get confused. But these hotkeys will help you quickly switch between programs.
- Alt + Tab
- switch between windows of running programs. Hold Alt and keep pressing Tab to move to other programs (see ). - Alt + Shift + Tab
- scrolling through open programs in reverse order (the same Alt + Tab, but backwards) with a large list of open programs can be very convenient. - Ctrl + Tab
– switch between bookmarks of an open window, switch between documents open in the program (for example, you can quickly switch between two open files in Word). - Win + 1, Win + 2 ... Win + 0
– switch between open programs by number on the taskbar. Launching programs pinned to the taskbar (we have already discussed in more detail).
These keyboard shortcuts will help you quickly close unnecessary documents.
- Alt + F4
– closes the active program. - Ctrl + F4
– closing one document or tab in the program (the program itself continues to work).
Have a lot of programs open, but need to quickly see your desktop? Please:
Win + D – minimize all windows and show the desktop (pressing again returns all windows back to their place!).
Let's start with the keys that do not need a combination, pressing which individually performs some operation.
- F1
– in most programs, calls up
the help system
(“Help” or “Help”) - Backspace
-
goes back
in the Explorer window and in browsers (the previous open folder or the previous page of the site). - Tab
– each press
activates a different element
of the program window for keyboard control (open a new browser window and press the Tab key several times, watching where the blinking cursor or highlight moves).
In text editors, pressing TAB indents the text
at a standard distance - very convenient, but more on this in one of the future IT lessons. - Esc
–
closes dialog boxes
, various menus and some programs.
Also, cancels completed actions
(if you get lost in open program windows and are afraid to accidentally change settings, then press ESC until you return to the main window). - Win
– opens and closes
the “ ” menu
.
I have already mentioned some of the listed combinations in previous IT lessons, so as not to overwhelm you today with a huge list of new combinations.

