Adobe Photoshop positions itself as a leader in the field of graphic editors. This is due to the fact that the application has almost all conversions with image and photo. Another advantage can be considered the fact that there is a really light and unloaded interface, which attracts more and more newcomers to the field of design. The application is capable of working in both vector and raster modes, but the latter option is more focused. Despite the simple structure of the program, Adobe Photoshop has a very serious base of various functions and elements. Speaking about images, it is impossible not to mention correction by working on pixels; an example is color inversion.
Types of inversion
There are two types of inversion in Photoshop. The first type is associated with image selection. The second refers to the distortion of color brightness. They have one common principle - inversion (reverse effect). For experienced users this may not be new, but for beginners it will clearly be useful to know the capabilities of this program. Color inversion will allow you to apply a specific filter for image processing. And inverting the layer selection will add more options for creating objects and working on them.
How to remove black and white screen on Honor?
You can turn this mode off. Go to Settings and then find Color Correction mode. If this mode is enabled, disable it to resolve the issue. Go to Settings and then find the Simulate Anomaly feature.
Interesting materials:
What is a pie chart and when is it used? What is torque in a car? What are catch words and expressions in Russian? What are winged words in Russian? What are xylem and phloem? What is a blend in coffee? What is a merchant of the first guild? What is Kurban Bayram among Muslims? What is the fat tail of a ram? What is turmeric and where does it grow?
How to invert colors in Photoshop
A great opportunity to test this feature is to put it into practice. Images that have a vibrant color palette work best for this, so keep in mind that black and white graphics are not ideal for this operation. Let's assume that the user already has an image open in the program, now let's figure out how to invert the colors.
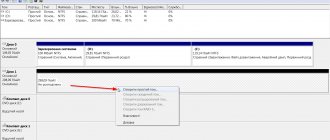
- Let's imagine that the user needs to invert an image; to do this, they need to combine all the layers into one common one. This can be done in the layers panel by clicking on the “Merge Visible” item.
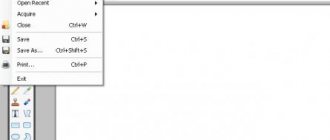
- Now the user has to go to the “Image” section at the top of the program. Select the “Correction” section and find the “Invert” item in it.
Color inversion is carried out through brightness values (256 units). For example, the area where the brightness is 206 will change after applying the operation to a value of 50. This action occurs with each area of the image, resulting in a picture that seems to have been changed to reverse colors.
Install a color calibration app
The application is one of the best solutions to be able to edit the color temperature of our phone's screen. And this is because they are applications that allow us to adapt the screen color to our tastes more precisely . While the system usually gives us several default settings to change the screen color, in the case of these applications the calibration controls are much more thorough.
One of the most interesting applications is the Color Calibrator , which, as its name suggests, will allow us to calibrate the color of the panel. Here we can independently select the intensity of each of the RGB channels on the screen , so setting everything up. We can also change the brightness and, very importantly, create different color profiles. This allows us, for example, to activate a certain color at a certain time and change it to another at another time, so that the screen and its color adapt to environmental conditions. We can also select one of the existing color modes to instantly change the color.
Inverted layer
You can select an area in an image in different ways. To do this, there are quite a lot of different tools that differ in their functionality. You can choose the selection method conditionally, from a rectangular area to a very complex geometric structure. In any of the cases, you can apply inversion to highlight. This function is located in the “Selection” section, “Inversion” item.
It is based on mutual redirection of the selected object and the layer as a whole. The selected object and the layer are swapped - now the layer becomes selected, and the previously selected object becomes unselected. Now the layer without an object can be edited: deleted, copied; and the object itself will remain unchanged.
It’s also worth noting that you can invert colors in a separate area of the image. To do this, you need to create a separate layer into which you should transfer the desired part of the image using mutual selection and copying the layers into one common one. It will be interesting to observe how clearly the inverted part of the image and its original look.
POST SCRIPTUM
Dear friends. I have a small announcement for you. I think you remember how I talked about how I was going to go to training on social projects from Dmitry Sidash and Alexander Borisov? So, if you are still thinking, then hurry up, because from 07/11/2016, i.e. the day after tomorrow the price for both trainings increases.
If now it costs 16,990 rubles before the result, then the day after tomorrow the cost rises to 33,980 rubles! "also rises from 12,990 rubles to 25,980 rubles. So we think. In addition, if you decide, I have small bonuses , including a discount on training.
Well, I say goodbye to you for today. Don't forget to subscribe to my blog updates and share this article with your friends on social networks. Good luck, see you in other articles. Bye bye.
Best regards, Dmitry Kostin.
Hotkeys
In Adobe Photoshop, a special place is occupied by functions that can be reproduced using keyboard shortcuts. For example, in order not to have to worry about opening all tabs, you can use the Ctrl + I key set. After using the hot keys, the image will appear inverted in brightness.
A method was described above where the user could invert a separate part of the image by transferring all layers to one. This method takes quite a long time to implement, so you can simply select an area in the image using tools that are directly intended for selection. Then press Ctrl + I, and the selected area will transform into an inverted layer.
If you remember about inverting the selection, then this function can also be activated. But first you need to set the initial selection with any of the possible tools, and then use the key combination Shift + Ctrl + I to invert the selected areas.
Why calibrate your Android screen?
Since smartphones are one of the most commonly used tools for consuming and creating multimedia content nowadays, having a well-calibrated screen is almost essential. If you don't believe me, imagine editing a photo on your mobile phone and when you view it on another device, be it a computer, TV or another smartphone, you notice that the colors have absolutely nothing in common with what you saw while editing on yours. smartphone.
This is why there are several standardized profiles or color spaces to ensure that the viewing experience is as similar as possible, regardless of the hardware used. Among the most well-known are sRGB, Adobe RGB or DCI-P3.
So, calibrating a screen is essentially adjusting its basic parameters—brightness, contrast, and color saturation—until it meets one of these standards.
Customizing the Android screen without third-party programs
You can customize the screen on Android without resorting to third-party software. This makes it easy to adjust simple characteristics such as brightness, contrast, and more.
To do this, go to:
- "Settings"
- “Screen/Display” (on some devices this section may be located in the additional sub-item “Phone Settings”)
This section contains the following items:
- Scenario
- Inversion
- Gamma
- Increased brightness and others
By opening each item, you can adjust the settings the way you like.
If the display's response to touches is not satisfactory, you can try adjusting it. To customize the Android screen, go to the gadget settings and select the “Screen/Display” section.
In this section, select “Calibration”.
The process of customizing the Android screen without third-party programs takes little time. You only need to click on the circles or crosses. Try to click exactly on the circles/crosses. Android will remember your presses and adapt to them.
How to change the notification shade on Samsung?
For this it is enough:
- Lower the curtain twice so that it opens to full screen
- On Samsung smartphones, you need to click the ellipsis icon and select the Icon Order menu. On other smartphones, for example, Xiaomi or Huawei, you need to click the pencil icon in the curtain and then start setting up.
26 Mar
2022 Interesting materials:
Which continents does the Antarctic Circle cross? What metals dissolve in nitric acid? What departments can there be? What suggestions could there be for the purpose of the statement? What could be the reasons for dismissal? What seas are there in Kuban? What seas wash the United Arab Emirates? What seas wash Egypt? What musical instruments are included in the orchestra? What muscles contract during breathing?
Customizing the Android screen using programs
Some gadgets lack built-in customization capabilities. For such devices, we have developed special software that will help you set up the screen on Android.
The Play Market offers many programs for customizing the screen. Enter the phrase Display calibration into the Google Play search bar. Select one application from the suggested options and install it.
We advise you to read reviews and comments about the application before installing it. This will help prevent your smartphone from becoming infected with malware.
If setting up the Android screen was not easy for you, and you have any questions, then feel free to ask them in the comments below.
Owners of smartphones based on the Android and iOS operating systems have been waiting for a long time for Google and Apple to deign to add a dark theme to the operating system, which would allow them to comfortably use their mobile device in the evening and at night. In fact, all Android smartphones already have a setting hidden from prying eyes that allows you to enable a dark theme, but many people just don’t even know about it.
A dark design theme is good because it significantly reduces eye strain at night and in the evening, when there are no light sources indoors or outdoors. If you read black text on a bright white screen for a long time, your eyes will begin to experience greater strain, which can subsequently lead to vision problems. To avoid this, you need to use a dark theme, which makes the background black and the font white.
Enabling dark theme on all Android smartphones is very easy and requires just a few simple steps. You can use this color scheme on absolutely all mobile devices and tablets running the Android 5.0 Lollipop operating system and later. Google notes that this can lead to a large reduction in performance (up to 5%).
The main disadvantage is that all icons and images will also be displayed with inverted colors, that is, they will look extremely unusual to the human eye. However, the dark theme on Android can be enabled whenever you plan to use mobile devices for a long time in the evening and at night. I would like to believe that in the future Google will add a full-fledged and native night mode to the Android operating system, which will allow you to use smartphones and tablets with greater comfort.
Don't miss your chance! Until April 21 inclusive, everyone has a unique opportunity to use Xiaomi Mi Band 3, spending only 2 minutes of their personal time on it.
Join us on
I think there is no need to once again describe the advantages of the Android operating system - everyone knows them, and one of the most significant of them, of course, is the ability to customize its appearance using various applications, widgets and themes.
Moreover, if you have always dreamed of being able to change the appearance of any application, by adding, for example, the logo of your mobile operator to the dialer, changing the color of the clock numbers to pink, or switching your favorite application to “Padonkaf izig”, then now you don’t need master the basics of creating Android applications: you can do all this using one single module of the Xposed framework, called Resflux.