Local Group Policy Editor is a Windows tool used by IT administrators. This is not always known to casual computer users. The Local Group Policy Editor allows you to manage the logon and shutdown processes, settings, and applications that users can change or use in Windows. This can be useful if you want to manage rules for other users of your computer. Read on to learn what Local Group Policy is and how you can work with the Local Group Policy Editor.
What is Local Group Policy?
By definition, Group Policy is a feature of Windows that offers you a centralized way to manage and configure the Windows operating system, programs, and user settings from computers joined to the same domain. Group policies are most useful if you are a network administrator and need to enforce certain rules or settings on computers or users on a network that you manage.
Local Group Policy is a variant of Group Policy that also allows you to manage individual computers, as opposed to all computers registered in a domain. A good example is your home computer running Windows 10, Windows 8.1 or Windows. This means that this tool can be useful for both home users and network administrators. Simply put, you should think of Local Group Policy as a set of rules that control how Windows runs on your computer or device.
Copying from the GPBAK catalog
This method is best suited if the editor files have been damaged or deleted. The advantage of this option is that the risk of rendering the system inoperable is minimal. It is worth noting that this method does not guarantee
positive result.
- you need to open Explorer, enter the command “%WinDir%\System32\GPBAK
” (for a 32-bit system) and
“%WinDir%\SysWOW64\GPBAK
” (for 64-bit systems); - In the directory, select all the files, click on them “RMB” and “ Copy
”; - in the address bar of the browser, in the directory path, click “ Windows
”, in the section we look for the “
System32
” folder, copy the files with replacement; - Next you should restart your computer.
A few examples of what you can do with the Local Group Policy Editor
Let's list a few examples of what you can do using the Local Group Policy Editor. You can configure Windows settings and enforce them so that users on your computer cannot change them later. Here are some examples:
- Allow users to access only certain applications found on your computer.
- Prevent users from using removable devices (such as USB drives) on the computer.
- Block user access to Control Panel and the Settings app.
- Hide certain items from the Control Panel.
- Specify the wallpaper used on the desktop and prevent users from changing it.
- Prevent users from enabling/disabling local network connections or preventing them from changing the properties of computer (local network) connections.
- Prevent users from reading and/or writing data from CDs, DVDs, removable drives, etc.
- Disable all keyboard shortcuts that begin with the Windows key. For example, Windows + R (which opens the Run windows) and Windows + X (which opens the Power User menu) stop working.
These are just a few examples. The Local Group Policy Editor in Windows allows you to configure many other settings.
Enabling gpedit.msc
Before installing the utility, it should be noted that it is not a Microsoft product, so the user installs it at his own peril and risk; the company is not responsible for unforeseen problems and failures in the system, therefore, if something happens, support will not be able to help.
So, if you still decide to install the program, then follow the link https://drudger.deviantart.com/art/Add-GPEDIT-msc-215792914 and download the archive.
Next, extract it to any folder using 7-ZIP or WinRAR. After which you should have an installation file called setup.exe. Double click the mouse to launch it.
The program interface, although in English, will not be too difficult to understand. Click “Next” and that’s it, the installation process takes place almost without your intervention. When installation is complete, click Finish.
Next, if you have a 64-bit system, open the Windows folder on your local drive C, then select “SysWOW64” and copy the “GroupPolicy”, “GroupPolicyUsers” folders and the gpedit.msc file from it. Go back to the Windows folder and find System32 in it. You need to paste the copied files into it.
Important! If you have 32-bit Windows, you don’t need to copy anything.
After making all the changes, restart your computer for them to take effect and try launching the Group Policy Editor. This can be done through the command line by pressing +R and entering gpedit.msc in the field.
How to Open Local Group Policy Editor in Windows
On Windows, an easy way to open the Local Group Policy Editor is to use Search. Enter "gpedit.msc" as the search text, and then click the "gpedit" search result.
NOTE. The Local Group Policy Editor looks and offers the same options, settings, and features whether you're using Windows 7, Windows 8.1, or Windows 10. So for the sake of simplicity, from now on we're only using screenshots taken on Windows 10.
Possible problems
When you launch the Group Policy Editor, you may receive a message that “Management Console cannot create the snap-in.” Basically, the error may appear due to the fact that the Windows username contains several words.
To fix this, you need to re-run the application installation file and before clicking on Finish, open the local drive C, go to the Windows folder, then open Temp, and then gpedit.
Now you need to edit the batch file. Select it depending on the bit size of your system. If you have 32-bit Windows, then right-click on the file named x86 and select “Edit”. With the 64-bit version, the steps are the same, only you need to select a file called x64.
Next you need to find the lines that contain the username and put them in quotes. For example, if before modification the line was icacls %WinDir%\SysWOW64\gpedit.dll /grant:r username:f , then as a result of modification it should look like icacls %WinDir%\SysWOW64\gpedit.dll /grant:r “ username":f .
Now you can run gpedit.msc.
If, as a result of all the completed operations, an error about the impossibility of creating a snap-in still occurs, then you can try to solve this problem by creating a new account with administrator rights, only the name must consist of a single word.
Log in to the system using the newly created account and run the installation of the utility again. After installation is complete, restart your computer and log in using your regular account. After this, you need to delete the new user’s account and you can use the group policy editor gpedit.msc.
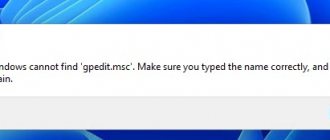
Sometimes when trying to start, users are met with an unpleasant surprise in the form of an error message: “gpedit.msc not found.” Let's figure out what ways you can fix this problem in Windows 7, and also find out what exactly is causing it.
The error “gpedit.msc not found” indicates that the gpedit.msc file is missing on your computer or access to it is not configured correctly. The consequence of the problem is that you simply cannot activate .
The immediate problems of this error are quite different:
- Deletion or damage to the gpedit.msc object due to virus activity or user intervention;
- Incorrect OS settings;
- Using an edition of Windows 7 that does not have gpedit.msc installed by default.
The last point should be discussed in more detail. The fact is that not all editions of Windows 7 have this component installed. So it is present on Professional, Enterprise and Ultimate, but you will not find it in Home Basic, Home Premium and Starter.
Specific methods for eliminating the “gpedit.msc not found” error depend on the root cause of its occurrence, the edition of Windows 7, and the system bit size (32 or 64 bit). Various ways to solve this problem will be described in detail below.
Method 1: Installing the gpedit.msc component
First of all, let's find out how to install the gpedit.msc component if it is missing or damaged. A patch that restores the work of the “Group Policy Editor”
, is English-speaking. In this regard, if you are using the Professional, Enterprise or Ultimate edition, then perhaps before applying the current version, it is better for you to try to solve the problem using other methods, which are described below.
Let's start the story about the patch installation procedure with a description of the algorithm of actions on computers with 32-bit Windows 7 OS
.
The process of eliminating errors on 64-bit OS
slightly different from the above option. In this case, you will have to perform a number of additional steps.
- Complete all the above steps up to and including the fifth point. Then open "Conductor"
. Type the following path into its address bar:C:\Windows\SysWOW64
Press Enter
or click the cursor on the arrow to the right of the field.
- The transition is made to the “SysWOW64”
.
Ctrl
button , successively click with the left mouse button (
LMB
) on the names of the directories
“GPBAK”
,
“GroupPolicyUsers”
and
“GroupPolicy”
, as well as on the name of the object
“gpedit.msc”
.
Then right-click ( RMB
) on the selection.
Select "Copy"
. - After that, in the address bar of Explorer,
click on the name
“Windows”
. - Going to the “Windows”
, go to the
“System32”
. - Once in the above folder, right-click on
any empty space in it.
From the menu, select the “Insert”
. - Most likely, a dialog box will open in which you will need to confirm your actions by clicking on the inscription “Copy with replacement”
. - After performing the above action, or even instead, if the objects to be copied are missing in the “System32”
, another dialog box will open.
Here you also need to confirm your intentions by clicking “Continue”
. - Next, enter in the address bar "Conductor"
expression:Click the arrow to the right of the address bar or just press Enter
.
- Going to the directory where temporary objects are stored, look for elements with the following names: “gpedit.dll”
,
“appmgr.dll”
,
“fde.dll”
,
“fdeploy.dll”
,
“gptext.dll”
.
Ctrl
key and left-click
on
each of the above files to select them.
Then right-click on the selection
.
Select "Copy"
. - Now at the top of the “Explorer”
to the left of the address bar, click on the
“Back”
. It has the shape of an arrow pointing to the left. - If you have completed all the listed manipulations in the specified sequence, you will return to the “System32”
.
Now all that remains is to right-click on
an empty area in this directory and select the
“Insert”
. - Confirm your actions in the dialog box again.
- Then restart your computer. After reboot you can run "Group Policy Editor"
. To do this, dial the combination
Win+R
. The tool will open
"Run"
. Enter this command:Click "OK"
.
- In most cases, the desired tool should launch. But if an error still appears, then again follow all the steps listed for installing the patch up to point 4 inclusive. But in the shutdown window "Installation Wizard"
button
"Finish"
don't click, just open
"Conductor"
. Enter the following expression in the address bar:%WinDir%/Temp/gpedit
Click the navigation arrow to the right of the address bar.
- Once in the desired directory, depending on the bit size of the operating system, double-click
on the
“ x86.bat”
(for 32-bit) or
“x64.bat”
(for 64-bit) object.
Group Policy Editor
again .
If the profile name you are using on your PC contains spaces
, then even if all of the above conditions are met, when you try to launch
the “Group Policy Editor”,
an error will occur, regardless of what bit size your system is. In this case, in order to be able to launch the tool, a number of actions are required.
- Complete all operations to install the patch up to step 4 inclusive. Go to the "Gpedit"
in the same way as above.
Once in this directory, right-click on
“x86.bat”
or
“x64.bat”
object , depending on the bit size of the OS.
Select “Change”
. - The text content of the selected object opens in Notepad. The problem is that Command Line
, which processes the patch, does not understand that the second word in the account is a continuation of its name, but considers it the beginning of a new command.
To “explain” to the Command Line
how to correctly read the contents of an object, we will have to make small changes to the patch code. - Click on the Notepad menu "Edit"
and select the option
"Replace..."
. - A window opens "Replace"
. In field
"What"
enter:In the "What"
enter this expression:
“%username%”:f
Click "Replace All"
.
- Close the Replace
by clicking the standard close button in the corner. - Click on the Notepad menu "File"
and select
"Save"
. - Close Notepad and return to the "Gpedit"
where the object being modified is located.
Right-
click on it and select. - After the batch file is executed, you can click “Finish”
in the
“Setup Wizard”
and try activating
the “Group Policy Editor”
.
Method 2: Copying files from the GPBAK directory
The following method of restoring the operation of a deleted or damaged gpedit.msc object, as well as elements associated with it, is suitable exclusively for Windows 7 Professional, Enterprise and Ultimate editions. For these editions, this option is even more preferable than correcting the error using the first method, since it is associated with fewer risks, but a positive result is still not guaranteed. This recovery method is done by copying the contents of the "GPBAK"
, where the backup original
“Editor”
in the
“System32”
.
- Open "Conductor"
. If you have a 32-bit OS, then enter the following expression into the address bar:%WinDir%\System32\GPBAK
If you are using the 64-bit version, then enter the following code:
%WinDir%\SysWOW64\GPBAK
Click the arrow to the right of the field.
- Select all the contents of the directory you are in. Click on the RMB
.
Select "Copy"
. - “Windows”
in the address bar . - Next, find the “System32”
and go into it. - In the directory that opens, right-click on
any empty space.
Select "Insert"
. - If necessary, confirm the insertion and replace all files.
- In another type of dialog box, click Continue
. - Then restart your PC and try to launch the desired tool.
Method 3: Checking the integrity of OS files
Considering that gpedit.msc and all objects associated with it belong to system components, it is possible to restore the functionality of the “Group Policy Editor”
by running the
SFC
, designed to check the integrity of OS files and restore them. But this option, like the previous one, only works in the Professional, Enterprise and Ultimate editions.
- Click "Start"
.
Go to "All Programs"
. - Go to "Standard"
. - In the list, find the “Command Line”
right
-click on it .
Select "Run as administrator"
. - Will start "Command line"
with administrator rights. Enter in it:Press Enter
.
- The procedure for checking OS files, including gpedit.msc, with the “SFC”
. The dynamics of its implementation are displayed as a percentage in the same window. - Once the scan is complete, a message should appear in the window stating that corrupted files were found and restored. But at the end of the scan, a message may also appear that the utility has found damaged files, but is not able to fix some of them.
- In the latter case, you need to scan with the SFC
via
the Command Line
on a computer running in
Safe Mode
. It is also possible that copies of the necessary files are not stored on the hard drive. Then, before scanning, you need to insert the Windows 7 installation disk from which the OS was installed into the drive.
Method 4: System Restore
If you use the Professional, Enterprise and Ultimate editions and you have an OS restore point on your computer that was created before the error began to appear, then it makes sense to use it to restore the OS to full functionality.
Method 5: Eliminate viruses
One of the reasons for the error “gpedit.msc not found” may be viral activity. If we assume that malicious code has already entered the system, there is little point in scanning it with standard antivirus software. For this procedure you need to use special utilities, for example, . But even when using third-party programs that do not require installation, it is better to do it from another computer or by booting from LiveCD or LiveUSB. If the utility detects a virus, you must follow its recommendations.
But even detecting and eliminating the virus that led to the error we are studying does not guarantee that the Group Policy Editor will return to work.
, since system files could be damaged by it. In this case, after neutralization, you will need to perform the recovery procedure using one of the algorithms from the methods presented above.
Method 6: Reinstalling the operating system
If none of the above methods helped you, then the only option to correct the situation is to reinstall the operating system. This method is also suitable for those users who do not want to tinker with various settings and recovery utilities, but prefer to solve the problem in one fell swoop. Moreover, this method is relevant if the “gpedit.msc not found” error is not the only problem on the computer.
In order to no longer encounter the problem described in this article, when installing, use a disk with the Windows 7 distribution kit of the Professional, Enterprise or Ultimate edition, but not the Home Basic, Home Premium or Starter edition. Insert the OS media into the drive and restart the computer. Next, follow the recommendations that will be displayed on the monitor. After installing the required OS edition, the problem with gpedit.msc should disappear.
As you can see, choosing a more convenient and relevant way to solve the problem with the “gpedit.msc not found” error on Windows 7 depends on many factors. These include the edition of the operating system and its bitness, as well as the immediate causes that caused the problem. Some of the options presented in this article can be used in almost all cases, while others are applicable only for a certain set of conditions.
The Local Group Policy Editor tool is useful for various OS modifications - we can use it to quickly and easily enable or disable specific features. Many of the tutorials are based on this editor - unfortunately gpedit is not available on the Home OS. But it can be installed. This is a file designed for Windows OS. If it can't load it correctly or it's infected with a virus or malware, you'll receive an error message. In particular, in Windows 10, messages may appear that gpedit.msc was not found. Errors most often occur when you start your computer, when you start a program, or when you try to use a certain function in your program (such as printing).
Solving problems with gpedit.msc on Windows.
Microsoft intentionally distributes the Local Group Policy Editor tool only for Windows Professional or higher. Therefore, the editor does not work in standard versions of the OS. This feature will also be useful on home versions of the OS, as it allows you to quickly switch between different settings. We can quickly enable or disable individual services, such as Defender, Gadgets in the Windows 7 cloud or OneDrive in Windows 8/10, block the computer from connecting to a homegroup, deny access to certain system settings (for example, the task scheduler) etc. Of course, all this can be done in the home version, but manual modification of the registry is implied. Our tool is much simpler - it will do everything for us. Fortunately, there is a way to install the Local Group Policy Editor for the home version of the OS. The most common errors that may appear on a Windows computer are:
- gpedit.msc error;
- file is missing;
- failed to register file;
- runtime error;
- loading error.
IMPORTANT. Troubleshooting errors when the gpedit.msc file is not on the system requires a superficial knowledge of how the registry works.
These error messages may appear during installation of a program, during startup or shutdown of the OS, or even during installation of the OS. Keeping track of when and where the gpedit.msc error appears is an important piece of information when troubleshooting.
How to use the Local Group Policy Editor
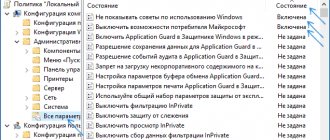
The Local Group Policy editor is divided into two panes: the left pane contains the Local Group Policy settings that appear in categories, and the right pane contains the contents of the active category. Local group policies are divided into two large sections:
- Computer Configuration—Contains Local Group Policy settings that control policies that apply to the entire computer, regardless of whether users are logged on or not.
- User Configuration—Contains Local Group Policy settings that control user policies. These policies apply to users, not the entire computer. While it's beyond the scope of this guide, you should be aware that user policies apply to users regardless of which computer on your network they log in from.
The Computer Configuration and User Configuration categories are divided into three sections:
- Software Settings - Contains software policies and should be empty by default.
- Windows Settings - Contains Windows security settings. This is also the place where you can find or add scripts that should run when Windows starts or shuts down.
- Administrative Templates - has many settings that control many aspects of your computer. This is a place where you can see, change and even apply all sorts of settings and rules. To give you a few examples, you can control how Control Panel, Network, Start Menu, and Taskbar work, and what users can change when using them.
Installing the editor on Windows 10 Home
Now let's look at the home version of the "ten". It does not have local default policies, that is, there is no editor with an accessible graphical interface. All changes that are available in the editor must be made through the registry. And this is less visual and inconvenient.
But let's try to install the editor on the Home version. To do this, launch the command line as administrator. Here's how to do it in detail.
We need to write two commands in turn:
- FOR %F IN ("%SystemRoot%\servicing\Packages\Microsoft-Windows-GroupPolicy-ClientTools-Package~*.mum") DO (DISM /Online /NoRestart /Add-Package:"%F")
- FOR %F IN ("%SystemRoot%\servicing\Packages\Microsoft-Windows-GroupPolicy-ClientExtensions-Package~*.mum") DO (DISM /Online /NoRestart /Add-Package:"%F")
It will be easier for someone to create a text file, copy both commands and save it under any name with a .bat extension. Then run this file as administrator and wait for the commands to complete.
After installing the editor packages, try opening it. Use any of the above methods.
Note! Many parameters, even if the editor is successfully installed, will not be available in the Home version.
Run window
You need to open the “Run” window. To do this, you can, for example, press Win + R on your keyboard.
The Run window will appear. Specify the gpedit.msc and click OK.
Console
Probably one of the most inconvenient methods, but since it works, we cannot help but talk about it.
Click on the search button and enter the mmc . Next, select the application of the same name.
The console is running. Click “File”, then in the menu - “Add or remove snap-in”.
Next, select “Group Policy Object Editor”, click “Add” and then OK.
Additional setup for 64-bit system
If you have a 32-bit system, you don't need to do any additional steps, but if you have a 64-bit system (which is more likely), do the following.
You need to copy several files from the SysWOW64 folder to the System32 folder. To do this, go to the directory in Explorer:
where you need to find the following: GroupPolicy (directory) ; GroupPolicyUsers (directory) ; gpedit.msc (file) .
Mark these files and folders, right-click and select "Copy".
Then go to the following path:
Right-click anywhere and select “Paste.”


