When overclocking a video card, it is very important to know whether the adapter works stably with such parameters, what is the temperature of the chip at maximum load, and whether overclocking brought the desired results.
Since most overclocking programs do not have their own benchmark, you have to use additional software. In this article we will look at several programs for testing the performance of video cards.
Video Memory Stress Test
Video Memory Stress Test is a small portable program for identifying errors and failures in video memory. It stands out because it includes a bootable distribution kit for testing without the need to start the operating system.
GPU-Z
GPU-Z is a program that allows you to check the performance of video cards from manufacturers NVIDIA or ATI. The software will help you determine the exact characteristics of the video adapter:
- memory;
- tire type;
- Memory;
- what GPU;
- BIOS and its versions;
- DirectX;
- chip number;
- frequency of operation in various modes (2D and 3D);
- sensor indicators.
Installing GPU-Z
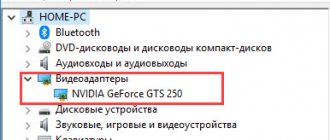
To test a video card in the GPU-Z program, you need to download and install the program on your computer. After launch, the characteristics of the video adapter will be displayed in the “Graphics Card” column.
Characteristics of the video adapter in the GPU-Z program.
The “Sensors” tab displays readings from sensors installed on the graphics card.
Graphic card sensor readings.
Watch a video about the operation of the GPU-Z program in this review.
Passmark Performance Test
This software is fundamentally different from everything described above. Passmark Performance Test is a collection of tests for the processor, graphics adapter, RAM and hard drive. The program allows you to conduct both a full system check and test one of the nodes. All basic scenarios are also divided into smaller, more focused ones.
Gpuboss.com – comparison of video cards online
The gpuboss.com service is a fairly professional network tool that allows you to compare two graphics cards online.
It works quite simply:
- You are going to this site.
- In the “Graphics card One” field enter the name of the first video card (in English), in the “Graphics card Two” field - the name of the second.
- Then click on the “Compare” button.
Enter the names of your video cards for comparison, and click on “Compare”.
Below, the characteristics of the specified two cards will be displayed sequentially, their performance parameters in games (Gaming), computing (Computing), noise and power (Noise and Power), graphics (Graphics), Performance per Watt.
A little lower on the service a description will be displayed demonstrating how this or that video card is better than its competitor. Very informative.
SiSoftware Sandra
SiSoftware Sandra is another combined software consisting of many utilities for testing and obtaining information about hardware and software. For the video card there are tests for rendering speed, media transcoding and video memory performance.
USERBENCHMARK
USERBENCHMARK is another powerful program for checking a video card and other components with the ability to compare these characteristics with other users from different countries.
This is not just a program, but an entire online service. In two clicks you can get all the data about your computer in real time for free.
USERBENCHMARK allows you to analyze all the main components, including the video card.
To analyze the operation of the video adapter and other elements of your computer, click on the white button on the main page of the site.
In order to test the service, we will test the computer on which this article was written.
As you can see in the screenshot below, this computer is suitable for most demanding tasks, but is not ideal for the maximum settings of most new games.
The USERBENCHMARK test provides characteristics and descriptions of the following indicators.
- PC status. A general description in percentage terms and even characterizes the owner himself. The owner of our computer was described as a “Technician.” This is partly true.
- CPU. Description of the processor and its capabilities.
- Graphic arts. This is the result of the service checking the video card as a percentage when working and supporting 3D games.
- Boot disk. Describes the speed and responsiveness of applications.
- Memory size. This item provides information about the sufficient or limited amount of memory to solve certain problems.
- OS version. Provides an assessment of the currently installed operating system.
When you click on the buttons Games, Desktop, Workstation. They are located at the top of the screen (see screenshot above) and you can get estimates of the main technical elements of the computer.
We recommend determining the quality of PC components in Game and Desktop modes
In the screenshot below, see a selected test conducted on the computer on which we wrote and published this article.
For more information on how to test a video card in the USERBENCHMARK program, watch this video.
The USERBENCHMARK program and service is great for testing a video card and other parts of a computer. This is a kind of social network that allows you to share your characteristics with other Internet users.
EVEREST Ultimate Edition
Everest is a program designed to display information about a computer - motherboard and processor, video card, drivers and devices, as well as readings from various sensors - temperature, main voltages, fan speeds.
EVEREST, among other things, includes several tests to check the stability of the main PC components - processor, video card, RAM and power supply.
Checking video cards using DirectX
The functionality of the modern Windows OS already has built-in capabilities for testing your video card. This is a built-in DirectX diagnostic tool that allows you to view the main characteristics of your video card and make sure it is working.
- To work with this tool, click on the “Start” button, enter dxdiag in the search bar and press enter.
- After a few seconds, the DirectX Diagnostic Tool window will open.
- Click on the “Display” tab and you can view the main characteristics of your video adapter, as well as make sure there are no problems with your GPU.
Use DirectX functionality to evaluate your video card's capabilities
Video Tester
This little program is at the end of our list due to the obsolescence of the method by which testing is carried out. Video Tester uses the DirectX 8 API in its work, which does not allow you to fully evaluate the performance of new video cards. However, the program is quite suitable for older graphics accelerators.
We looked at 10 programs that are capable of checking video cards. Conventionally, they can be divided into three groups - benchmarks that evaluate performance, software for stress loads and stability testing, as well as complex programs that include many modules and utilities.
When choosing a tester, you need to be guided primarily by the tasks at hand. If you need to identify errors and find out whether the system is stable with current parameters, then pay attention to OCCT, FurMark, PhysX FluidMark and Video Memory Stress Test, and if you want to compete with other community members in the number of “parrots” scored in tests, then use 3DMark , Unigine Heaven or Passmark Performance Test.
We are glad that we were able to help you solve the problem. In addition to this article, there are 12,719 more instructions on the site. Add the Lumpics.ru website to your bookmarks (CTRL+D) and we will definitely be useful to you. Thank the author and share the article on social networks.
Describe what didn't work for you. Our specialists will try to answer as quickly as possible.
FurMark
The FurMark program is a comprehensive set of tools for testing various load levels for video cards that support a special 3D API interface OpenGL (Open Graphics Language). A special scene depicting the so-called “hairy donut” allows you to load the video card to the maximum, measure its performance and check the stability of operation under load.System requirements: Windows XP/Vista/7/8/10, video card supporting OpenGL 2.0
Developer: oZone3D.Net
Licensing type: freeware
- (size 8.93 MB)
- (size 8.19 MB)
- (size 8.17 MB)
- (size 4.55 MB)
- (size 3.75 MB)
- (size 2.19 MB)
List of changes
1.20.2.0
(release 12/31/2018)
- Added support for NVIDIA GeForce RTX (2080, 2080 Ti, 2070) and Titan RTX;
- Added support for Radeon RX 590;
- In the GPU monitoring log file, GPU-Z values are used when GPU temperature, GPU core frequency, and memory clock speed are 0;
- GPU status polling is set to "1" (in previous versions it was equal to 10). GPU data is now logged every second when the Log GPU data checkbox is selected in the Settings window. This value can be changed in the configuration file (log_gpu_data_polling_factor attribute);
- Update: GPU Shark 0.12.2.0 and GPU-Z 2.16.0;
- Update: ZoomGPU 1.22.2 (GPU monitoring library).
1.20.1.0
(release 05/15/2018)
- Added minimal support for high-DPI screen modes. FurMark now scales without blurry effect on high-DPI devices;
- Update: GPU Shark 0.11.2.0 and GPU-Z 2.9.0;
- Update: ZoomGPU 1.21.7 (GPU monitoring library).
1.20.0.1
(release 01/23/2018)
- Added support for 21:9 aspect ratio format in resolutions: 2560×1080, 3440×1440 and 5120×2160;
- Added support for NVIDIA GeForce GTX 1060 5GB and NVS 810;
- Added support for NVIDIA Quadro P1000, P2000, P3000 and P4000;
- Added support for NVIDIA TITAN V, NVIDIA GeForce MX130 and GeForce MX110;
- Update: GPU Shark 0.11.1.0 and GPU-Z 2.7.0;
- Update: ZoomGPU 1.21.5 (GPU monitoring library).
1.10.3
(release 10/29/2012)
- Improved support for GeForce GTX 650;
- Added new versions of GPU-Z 0.6.6 and GPU Shark 0.6.7;
- Added new version of ZoomGPU 1.8.10 (GPU monitoring library);
- Added GPU/memory clock adjustments for GTX 600 to the database;
- Fixed issues where the average FPS could be below the minimum.
1.10.2
(release 09/10/2012)
- Added support for NVIDIA GeForce GTX 660 and GeForce GTX 650;
- Added new version of ZoomGPU 1.8.7 (GPU monitoring library);
- Added new versions of GPU-Z 0.6.4 and GPU Shark 0.6.6.
1.10.1
(release 05/10/2012)
- The monitoring module has been updated: it is possible to display memory load on some video cards;
- Added new versions of GPU-Z 0.6.2 and GPU Shark 0.6.3;
- Added support for GeForce GTX 690 and GTX 670 (ZoomGPU 1.8.3);
- Fixed a bug with not saving maximum monitoring values on GeForce GTX 6xx;
- Fixed minor errors when sending results;
- Fixed an error that occurred when the utility was launched unsuccessfully; the monitoring process was not unloaded from memory;
- Fixed the formation of monitoring in the XML report; the closing tag was missing.
1.9.2
(release 12/16/2011)
- Added support for the latest NVIDIA GeForce and AMD Radeon HD video cards (ZoomGPU 1.6.1);
- Updated benchmark for 1920x1080 resolution with a duration of 15 minutes;
- Now the user can submit the result after registration;
- Added new versions of GPU-Z 0.5.6 and GPU Shark 0.5.4;
- Removed option /gtx500ocp;
- Fixed a bug that caused the game to freeze at the end of tests.
1.9.1
(release 06/28/2011)
- Added support for the latest AMD Radeon HD and NVIDIA GeForce video cards;
- Added new versions of GPU-Z 0.5.1 and GPU Shark 0.5.1;
- Fixed an issue related to a bug in the AMD Catalyst GLSL compiler that caused the hairy donut to be illuminated incorrectly.
1.8.5
(release 06/28/2011)
- Improved presentation of current indicators;
- The number of available window resolutions has been expanded;
- Added support for the latest AMD Radeon HD and NVIDIA GeForce video cards;
- Sharp spikes in temperature graphs are now filtered;
- Reducing the window is no longer possible in windowed testing mode;
- Removed version 1.7.0 mode.
Creating a bootable Mats flash drive for testing a video card
Download and unpack the archive - .
Archive with password. To find out the password, follow the link above and follow the instructions. In response, you will receive a message with a password.
Unpack the archive and launch Rufus. Insert the flash drive and select the mats.img from the unpacked archive. Click Start.
Create a bootable Mats USB flash drive in Rufus
In order for mats to support 10 series video cards, you need to copy and replace the mats and mods version 404.184 into a bootable USB flash drive in the folder 367.38.1
Copy the mats and mods files to a bootable USB flash drive
Now the flash drive with mats is ready for use.
3DMark
A famous program for diagnosing video adapters, which is used not only by gamers, but also by device manufacturers themselves. Its results are considered the standard and are assessed when compiling ratings. The application is paid, but there is also a free version with a limited number of tests, which is quite enough for personal use.
3D Mark can diagnose both devices on a Windows 10 computer and other versions, laptops, as well as the graphic capabilities of smartphones and tablets on Android and iOS. Version 3D Mark 11 is designed to test video cards with DirectX 11.