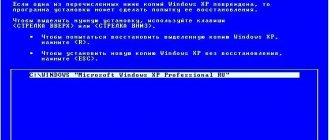
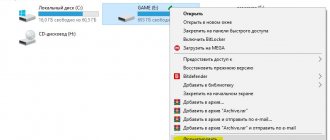
In some cases, you may need to start or boot your computer using a Windows 7 installation disc or USB flash drive if you want to do the following:
- Install or reinstall Windows 7. For more information about installing Windows 7, see Installing or reinstalling Windows 7.
- Recovering Windows 7 after a serious error. If Windows won't start on your computer at all, you can use the recovery tool and other tools in the System Recovery Options menu on your Windows 7 installation disk or USB flash drive. These tools can help you get Windows 7 back up and running. For more information, see Recovery FAQs and What is Windows Computer Operating System Recovery?
Note: If you are using a tablet or other touch-screen computer, you may need to connect a keyboard and mouse to launch the recovery tool and other tools in the System Recovery Options menu.
BIOS settings
You can determine the BIOS settings for a specific motherboard by looking at them in the motherboard data sheet. Important! Incorrect BIOS settings can damage your computer or reduce its power rating.
Information for management.
How to install Windows via BIOS , booting from DVD, USB, HDD depends on several Boot Menu keys:
Booting the device from BIOS
You need to get into the BIOS system: restart the PC and enter “Setup” - the software that is responsible for the initial boot of the computer.
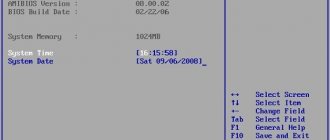
During the reboot, carefully monitor the inscriptions on the monitor screen; you must not miss the line that appears at the bottom with the following text: “Press ____ to enter SETUP.”
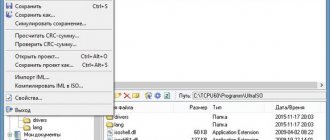
The program tells you how to get into the BIOS, you need to press the key that is written on the screen, it can be:
F1, F2, F3, F10, Del, Esc - they differ on different computers, depending on the BIOS version. Hold down the key until the system redirects to Basic Input-Output System. A list of tabs will appear on the screen; you need to select the one that talks about loading devices - “Boot devices” or “Advanced BIOS Features”.
If you fail to complete the prescribed steps the first time, do not despair; you need to repeat all the steps a couple of times.
We select a tab; in order to enter, you need to press the “ENTER” button. After that, find the “Boot Sequence” tab in the drop-down list and check the correctness of your choice with the information that appears on the right side of the monitor screen. It should say that the selected tab is responsible for the device boot priority.
After the boot tab has been determined, using the enter keys, you need to set the priority so that the first one in the list is “CD-ROM” or that boot device.
With the help of which the whole process will be carried out. To do this, you need to select “First Boot Device” in the list and then the hard drive.
You need to confirm that your choice is correct and click OK.
Thus, all BIOS system settings for loading and reinstalling Windows are ready. This was all done so that the next time the PC is rebooted, the OS itself will redirect Windows boot from the previously selected drive.
If you are experiencing difficulties or you have a special BIOS version, then you can call a computer technician who will do everything for you:
In order to start the download, you must restart your computer.
How to run a disk with Windows via AMI BIOS
- Using the right/left keys, open the “Boot” tab.
- Press the "Enter" button on the first item "Boot Device Priority".
- In the first position you need to put the optical drive drive - while at the first point, use the “Enter” key to bring up the menu for selecting boot devices.
- Set to "CD-ROM".
Loading Windows via USB flash drive.
To install Windows via the Basic Input-Output System from a flash drive, in fact, the entire procedure is similar to that described above, but you need to select Secure Boot from the list of proposed tabs in the BB BIOS system, or in the OS, with the simple option of “overlaying” versions, select the appropriate menu item.
The Windows installation process from a flash drive does not start and a black screen is shown on the monitor:
- UEFI mode is enabled;
- The flash drive is formatted in NTFS;
- BIOS BB supports only NTFS, UEFI - FAT 32 partitions.
With a new version of the system to boot from a flash drive, it asks for permission to use automatic mode. It is best to refuse such an offer, otherwise the OS may be installed on the wrong partition or some of your personal files may be deleted.
Before setting the BIOS settings, you must select using “+” or “-” and click on the “Boot” tab. When selecting settings, you must save them. To do this, you will need to press the “F10” - “Save and Exit” key. This action can also be performed by pressing the “->” key – “Exit Saving Changes”, i.e. “exit and save changes.”
After the approved and selected option and device boot priority, you need to select the F10 option, and then restart the computer.
How to start a laptop from disk via BIOS
In order to start a laptop from a disk via BasicInput-OutputSystem, you will need to change the parameters of the boss. To begin, insert the installation disk into the drive, while the laptop must be turned on. Reboot the OS and immediately press F8 (in different models this may be other keys or a combination of them). Next, you should execute the following commands: InternalDVD-Rom → Enter → Press any key to boot from CD → any key (this algorithm of actions is suitable if you start Windows from an installation disk). You can also enter the BIOS using another method. Turn on the laptop, press F2, then Start BIOS and Enter.
Tips and tricks.
For novice users who need to reinstall Windows via BIOS, experts have developed some tips for a competent and quick process.
For a successfully configured BIOS system, you should pay special attention to these recommendations:
- PC requirements (subject to Windows 7):
- Memory – at least 1 GB;
- Processor – minimum 1 Hz;
- Video card – minimum DirectX 9.
- Time to work in the BIOS.
How long does it take to set up and configure a new version of Windows? It all depends on the technical parameters of the PC:
- Performance “Clock Speed”;
- Number of cores “Cores”;
- Trunk frequency “800/1066/1333/1600 MHz”.
On average, it will take one hour to install Windows via BIOS .
Clean and simple Windows installation processes
A clean installation involves launching a disk with the system in manual mode while the computer is starting. After this, start, press any button, after the inscription “Press any key” appears on the tap.
If you are unable to install Windows yourself via BIOS, then use the service of a computer technician visiting your home:
The BIOS indicates the location of the new OS, for example, on a CD/DVD or hard drive, so that the old version is not used at all or is deleted. The clean version is used for any OS: Unix, DOS, Windows XP, as well as Linux, Windows 8 and Windows 7.
Simple is rarely used and is not recommended. This is due to the fact that the new version is launched from a CD/DVD disk with the old OS already installed. So a simple installation is more like an “overlay” process, since the new version is overlaid on the old version.
How to run a disk with Windows through BIOS and install the OS
At some point, the operating system has to be changed. Perhaps some of you, dear readers, have finally decided to switch to the faster Windows 8, or perhaps the OS has unexpectedly crashed. In any case, if you don’t know how to start a disk with Windows through BIOS, then this article will be an invaluable help in solving this kind of problem.
Saving personal information.
Personal data and information is a very important component that cannot always be restored if deleted or damaged, so before reinstalling anything, you need to take care of their safety.
To save information and personal data when reinstalling Windows, you need to copy and transfer all the necessary files to portable media (disk, flash drive, etc.). It is also very important to save passwords; for this it is recommended to use the Backup program or do it the old-fashioned way, manually.
By strictly following the rules and advice, you can understand how to install Windows via BIOS on a computer, even for a person without special skills and experience, in such situations.
The main requirement for proper installation is to accurately follow the step-by-step guide offered in the article above. Detailed photographs accompanying the installation steps will help you navigate the BB BIOS system.
How to enter BIOS or UEFI, change the priority of boot devices, operating modes of the SATA controller (AHCI and IDE), boot using the Boot Menu to install Windows.
In the last article we talked about how to make a boot disk or flash drive. And now I’ll tell you how to configure your computer’s BIOS to install Windows from a disk or flash drive.
Content
Content
Scheduled automatic computer startup - activate
Today there is a sufficient amount of software with which we can control the automatic turning on of the computer according to a schedule. But I want to note that automatically turning on the PC using programs is only possible when it is in “sleep” mode.
That is, a computer that is in “sleep mode,” as it would be easier to say, is already turned on. It just “wakes up” and doesn’t turn on.
It turns out (I was ashamed not to know this :)), you can configure the computer to automatically turn on according to a schedule and even when it is COMPLETELY OFF! Modern BIOSes that come with PC motherboards have settings to automatically turn on a switched off computer according to a schedule.
At the beginning of my acquaintance with computers (since 1995), such a setting in the BIOS could only be dreamed of. For what purposes you can use turning on the computer automatically is up to you to decide.
For example, from the most banal - using a PC as an alarm clock, turning it on to distribute or download torrents while you are away, maintaining your computer or checking it for viruses even when you are at work or on a business trip, etc.
You just have to remember to set up auto-shutdown if necessary, and this is much easier to do. I successfully tested the computer auto-on feature on three computers with different BIOS versions, the settings of which I want to share with you today.
What is BIOS and UEFI
Each motherboard has a special program for booting the computer and configuring the parameters of various devices. This program is flashed (programmed) into a special chip on the motherboard and is therefore called firmware.
Previously, all motherboards had firmware called BIOS, which had a simple graphical interface with white letters on a blue background and was limited in functionality. For example, in the BIOS it was impossible to use the mouse, select a language, and there were no graphic elements (pictures) due to the limited capacity of the BIOS memory chip. Also, motherboards with BIOS did not support disks larger than 2 TB due to limitations of the old disk partitioning system (MBR).
Nowadays, many motherboards have a new type of firmware called UEFI, which features an improved graphical interface using a beautiful background, hand-drawn buttons, the ability to select a language (including Russian) and some improvements. For example, support for a new type of disk partition (GPT), allowing the use of hard drives with a capacity of more than 2 TB.
What type of firmware your motherboard has can be found in its manual, on the website of the motherboard or laptop manufacturer, and also visually when entering the Setup configuration program. The Setup program is also flashed into the motherboard and is used to change BIOS or UEFI settings.
All ways to enter BIOS on a desktop computer or laptop
Most PC users know about the existence of BIOS, some even have an idea of its functions and purpose. At the same time, the average user does not need to directly access the BIOS. Working with a computer every day for many years, people do not know how to enter the BIOS and what may be needed in it.
Meanwhile, some operations, for example, reinstalling the operating system from a flash drive or enabling/disabling hardware elements are impossible without changing the BIOS settings. Understanding what it is will be useful for everyone.
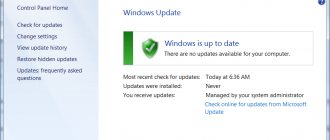
How to enter BIOS Setup
To enter the Setup program, immediately after turning on the computer, press the “Delete” button on the keyboard. On some motherboards and laptops, the “F2”, “F10” or “Esc” keys are used for this. You can read which button to press in the messages that appear immediately after turning on the computer.
In text form
Graphically
If you don’t have time to read, then press the “Pause” button on your keyboard to pause the download. You can continue loading by pressing any key. If you press the key designated to enter Setup, you will immediately be taken to the motherboard setup program.
Classic BIOS
UEFI interface
How to enter BIOS on a desktop computer or laptop
Unlike programs recorded on a hard drive, you cannot enter the BIOS by simply clicking on a certain icon. This must be done after turning on the computer, but before the Windows loading screen appears. Moreover, different manufacturers assign their own methods for their motherboards. Often the user sits and does not know how to enter the BIOS, because the key assigned to enter is not the one that someone advised him, and the start picture on the monitor flashes in a split second, not allowing him to see which key needs to be pressed. In addition, there are several login options, although not all are usually available. Let's take a closer look at them:
Standard login method
The standard method is used most often. As the computer boots, a picture flashes on the screen indicating different combinations of buttons for executing certain commands. Among them is BIOS Setup, or something like: “Press Del to enter BIOS Setup”. Most often you need to press the “del” or “F2” button, but there may be other options, which the start picture informs about. It is recommended to press the desired key continuously so as not to miss the right moment. Sometimes the starting picture is delayed for a few seconds, but most often it flashes too quickly. In order to pause the download, you need to press “Pause/Break” at the right moment. Then you can calmly examine the inscription on the screen. If you couldn’t click on the desired button in time, you can use the Ctrl+Alt+Del key combination to start the system booting again. Alternatively, you can press the restart button.
Basics of working in Setup
3.1. Control keys
The Setup program is a set of various parameters grouped on separate tabs, depending on their purpose. On the right or below there will be a description of the keys with which all actions are performed.
To navigate between tabs, you usually use the “right” and “left” arrows on the keyboard. To move between lines within one tab, use the down and up arrows.
To change values, use the arrows to navigate to the required field, press the Enter key, and then use the arrows to select a new value from the drop-down menu. For this, the “+”, “-” or “Page Up”, “Page Down” keys can also be used.
To return up a level or to the previous page, press the Esc key. The “Esc” key on one of the main tabs will mean exiting the BIOS without saving the settings, which you will need to confirm or refuse to exit.
In the Setup program with the UEFI interface, you can perform all actions using the mouse.
3.2. Saving settings
This is a very important point. After making all the necessary settings, go to the “Exit” tab, select the “Exit and Save Changes” item using the arrows (“Exit and Save Changes”, the word order may be different), press “Enter” and confirm saving the settings by selecting the “OK” arrows or “Yes” and “Enter” again.
You can save the settings much easier and faster by pressing the “F10” key on the keyboard and confirming your decision. This key works in many versions of BIOS, UEFI and is often indicated in tooltips (bottom or right).
3.3. Cancel Settings
If you accidentally changed something or are not sure about the correct settings, then go to the “Exit” tab and select “Exit and Discard Changes” or press the “Esc” key until a message appears about exit without change settings and confirm the action (“OK” or “Yes”).
3.4. Restoring settings
To restore all settings to optimal defaults, go to the “Exit” tab and select “Load Setup Default”. After this, you can immediately change other settings or simply exit the BIOS and save the settings (“Exit and Save Changes” or “F10”).
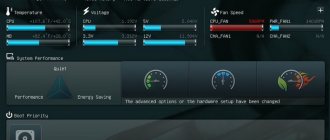
Adjusting PC fan speed
There are cases when the cooling of the computer is excessive and too noisy. You can fix this in the UEFI settings, in the Fan Info .
In my case, it’s convenient to get to these settings from EZ Mode .
MSI B450-A PRO MAX allows you to set the PWM fan speed curve depending on the temperature of the selected components: processor, chipset or power system.
And conventional fans can be adjusted by adjusting the supplied voltage. You should not immediately reduce the fan speed too much. Reduce them by 20% and check the temperature and noise level of the computer under load. If the temperatures are ok but the noise is still present, reduce it further. However, if the power supply or fan speed is reduced by 50% or lower, it may simply not start.
BIOS setup
5.1. Changing boot priority
Go to the "Boot" or "Download" tab.
Install your DVD drive or flash drive first in boot device order.
If you install Windows from a disk, then the first item is to select a device like “ATAPI CD-ROM”, a name indicating the manufacturer or model of the drive. For example, “CDROM:PM-HL-DT-STDVD-RAM GH22NP” (this is an LG DVD drive).
If you plan to install Windows from a flash drive, then first choose something like “Removable Dev.” or the name of the flash drive with an indication (this is a “PATRIOT” flash drive). Transcend JetFlash 790 8Gb
The second should be a hard drive, which is designated as “Hard Drive”, “HDD” or the interface to which it is connected, the manufacturer and model of the disk. For example, “SATA:3M-SAMSUNG HD502HJ” (this is a 500 GB Samsung hard drive with a SATA interface).
Please note that in the “Boot” section there may be other items responsible for boot priority, such as “Hard Disk Drives” or “Removable Device Priority”.
They also need to check that the DVD drive or flash drive comes first.
If you have two hard drives, then the one on which you are installing the system should be higher. But in this case, I recommend disconnecting one of the disks to avoid confusion and possible errors in installing the system. It can be connected after installation.
In the Setup program with the UEFI interface, everything is done similarly. Look for the “Boot” or “Download” section, find your DVD drive or flash drive there and move it to the very top of boot priority. Plus, you can use a mouse for this, which is easier and more convenient.
Don't forget to save your settings in the Exit tab by selecting Exit and Save Changes or pressing F10.
5.2. SATA controller operating mode
In principle, this is not so important, but many people are interested in this issue, so I decided to clarify it a little. SATA drives can operate in compatibility mode with older IDE drives and in the more modern AHCI mode. AHCI gives a small increase in hard disk performance when multiple simultaneous accesses are made to it. This mode of disk operation occurs mainly on servers and is practically useless for an ordinary home computer.
When setting up the BIOS, it is possible to select the operating mode of the SATA controller.
These settings may be located in different places and have slightly different names, but the principle is the same everywhere. You are offered IDE compatibility mode or the new AHCI mode.
In general, IDE compatibility mode is recommended for Windows XP, since it does not natively have SATA drivers and simply will not see the hard drive, which will not allow Windows to be installed. Drivers can be built into the Windows installation distribution, but this makes no sense, since it will not affect the speed of operation and may add problems.
For Windows 7 and older, it is recommended to use AHCI mode, since modern operating systems have the necessary drivers. Also, many experts strongly recommend enabling AHCI for fast SSD drives.
AUTOMATICALLY TURNING ON THE COMPUTER
BIOS American Megatrends Inc. P1.80, 05/20/2011. Go to the “Advanced” section and select “ACPI Configuration”.
Turn on the “Restore on AC/Power Loss” setting to the “Power On” position.
We activate (“Enabled”) the auto-on setting “RTC Alarm Power On”.
We select to turn on the computer every day (“Every Day”) or on a certain date within the current month in the “RTC Alarm Date Every Day” settings. We configure the PC turn-on time: “hour/minute/second” in “RTC Alarm Time”.
After completing the settings, press the F10 key or the “Save Changes and Exit” and “OK” item to save the settings and restart the PC.
BIOS American Megatrends Inc. V4.3, 10/21/2009. We need the “Power Management Setup” section, go to it.
Turn on the “Restore On AC Power Loss” setting to the “On” position.
Activate “Resume By RTC Alarm”.
We set the activation for every day or on a certain date of the month in the “Data” setting and hours/minutes/seconds in “HH:MM:SS”.
Save the settings and exit the BIOS using F10.
BIOS American Megatrends Inc. 0401, 05/05/2010. In the “Power” section, go to “ARM Configuration”.
We activate “Restore on AC Power Loss” to the “Power On” position.
Activate “Power On By RTC Alarm”.
Settings for daily activation at certain hours/minutes/seconds become available.
Or a specific date, hours/minutes/seconds.
We exit the settings, not forgetting to save them.
If you no longer need to automatically turn on your computer on a schedule, simply disable (“Disabled”) the “Power On By RTC Alarm” setting.
Unfortunately, these are all the BIOS versions on which I was able to test the function of automatically turning on the computer. If you have a different basic input/output system (BIOS), then you will already know where to dig. And finally, I suggest watching a short video on the topic:
6. Boot using "Boot Menu"
There is an easier and more convenient way to boot from a DVD or flash drive for both BIOS and UEFI - boot using the “Boot Menu”.
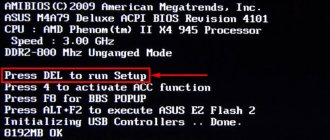
To call the boot menu, the “F8”, “F10”, “F11”, “F12” or “Esc” keys can be used. They can often be seen in prompts on the initial boot screen of your computer. You can also find out this information from the instructions, on the website of the motherboard or laptop manufacturer, by searching on the Internet, or at random.
Immediately after turning on the computer, press and hold the “Boot Menu” key until the boot device selection menu appears.
Use the down and up arrows to navigate to the DVD drive or flash drive and press Enter. Sandisk Cruzer
The advantages of this method are obvious - you don’t need to delve into the BIOS, you don’t need to return the BIOS settings back later (although this is not always necessary), and it’s enough to call this menu just once, since after you start installing Windows, this will no longer be needed. Additionally, using the "Boot Menu" does not change the BIOS or UEFI settings.
Quick Launch Menu
Literally all BIOS systems have a so-called “Boot menu”, which can be accessed at the initial stage of loading the OS. From the material you read above, you learned that versions of basic microsystems are different, and therefore the script for entering the quick boot menu may vary for each computer manufacturer. Moreover, laptops sometimes have a special remote button for such purposes (read this article ).
As a rule, to call the “Boot menu” you need to press the “F12” or “Esc” key intensively while the computer system is going through the initialization process (POST hardware check). In other cases, the manufacturer may have used a different keyboard access scheme (described in more detail here ).
Download problems
Friends, due to the fact that many people had problems loading when installing Windows and some wrote about it in the comments, I decided to make a separate section where I collected methods known to me to solve these problems.
- If the computer stops booting at the very beginning and asks you to press F1, after which it enters the BIOS, then you most likely either have a low battery on the motherboard (the timing may be off), problems with the processor cooler (failure, not connected there) or hard drive (errors in SMART).
- If, when you turn on your PC, the message “Reboot and Select proper Boot device or Insert Boot Media in selected Boot device and press a key” appears, this means that the boot area on the disk or flash drive is not found or is damaged. Try booting from the installation disk or flash drive using the Boot Menu (Section 6 of the article), if that doesn’t help, make the bootable media again using the Windows USB/DVD Download Tool utility.
- If, after restarting the computer, the Windows installation starts from the beginning, then remove the boot disk or flash drive and restart the computer, the installation should continue from the hard drive.
- Disconnect all unnecessary USB devices (flash drive, 3G modem, smartphone, printer) from the computer. You only need to leave the mouse, keyboard, DVD or flash drive from which you are installing Windows.
- If you have several hard drives, then disconnect all drives from the motherboard except the one on which Windows will be installed.
- Reset BIOS settings to default (described in this article).
- If the installer does not see the disk or error 0x0000007B appears at the end, change the SATA controller mode in the BIOS from AHCI to >
Basic I/O system - it all starts here
To install the operating system, you need to use some BIOS settings on the microsystem. In particular, you need to set the priority bootloader, in our case it will be a drive for optical CD/DVD discs.
However, first we need to get into the program's BIOS interface. Due to the diversity of the underlying microsystems, the main manufacturers of which are three leading companies - American Megatrends, Inc. (AMI), Award Software and Phoenix Technologies - a special method of entering the BIOS(a) work area may be provided.
The most common access scheme is to use the "DELITE" and "F2" keys. When the computer starts, you need to use the service key several times (with an intensity of one press every half second) to enter the PC control interface (if you have a laptop, then you should pay attention to the article located here ).