Nowadays it’s difficult to find a person who doesn’t know, at least by hearsay, what it is BIOS
.
Indeed, computers have long been firmly established in our apartments and offices. And if we take into account the pathological passion of the Russian person to get into everything with the slogan “what’s there to repair?!”, then I think the familiar BIOS
has not raised any special questions for a long time.
Judge for yourself - no significant changes have been made to the BIOS
for decades - it has always remained outwardly the same.
Here's the blue Award
:
And here are the gray Phoenix
and
AMI
:
Several generations of people grew up on them, and they practically did not change in appearance at all. But still, evolution has reached the BIOS
—
EFI
, followed by
UEFI
.
I didn't touch anything, it just did it!
What’s most interesting is that everything was exactly like that. The computer turned on every day for several months in a row and started briskly, but on one ordinary day, instead of starting, it threw me into a window with an error: “the computer could not boot, let’s load optimized defaults or go to the BIOS.” I went to the BIOS, checked that all the parameters were normal and dismissed it with the OK button.
Okay, I checked the parameters because I replaced the processor and memory a couple of months ago. With new modules and the new i5, the system could operate at 1600 MHz instead of the previous 1333, but it worked in this mode only when the frequency was specified manually. I checked it, it was 1600, I clicked OK. And then darkness in three acts.
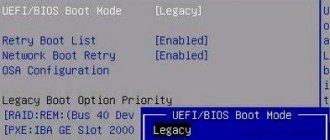
Gigabyte GA-B75-D3V starts the third time
More precisely, the computer went into a deep reboot of three stages, which, without any external action, were repeated as follows:
- The computer turns on, the POST procedure (Power-on Self-test, self-test when turned on, in a successful case ends with a short single sound signal) does not go through, there is silence on the screen, there are no error signals, it turns off after about 8-10 seconds.
- After a couple of seconds it turns on again, POST does not go through, there is silence on the screen, there are no error signals, but it turns off noticeably earlier, after about 4-6 seconds.
- After a couple of seconds, the computer turns on again, POST passes, one signal from the speaker about the successful completion of POST, the manufacturer's splash screen appears on the screen with offers to enter the BIOS, change the boot device, enter the Q-Flash flasher and do other usual things. After a moment, the splash screen is replaced by a blue UEFI DualBIOS window with nothing inside. After another 2-3 seconds of the blue screen, the computer turns off and goes to step 1.
(this is a screenshot from a video I wrote to record actions; the protocol took half an hour of agony, and the actual solution took only 10 seconds)
At the third stage, the computer did not respond to any keyboard chords: Del, End, F9, F12 did not give any result. What to do? Right!
Setting up BIOS to boot from a flash drive/disk
Let's move on to the most important thing. I’ll look at the BIOS settings using the example of one of the most popular BIOS versions - AMI BIOS and Award BIOS (in principle, the main thing is to understand the meaning - everything is done the same way everywhere, there is a slight difference in the menu designation).
AMI BIOS
First you need to go to the Advanced section (advanced, see arrow 1 in the screenshot below), then you need to open the USB Configuration section. Then check that all USB ports are enabled (i.e., that Enabled appears next to them)!
Checking USB ports - are they enabled?
Next, open the Boot section, where the boot queue will be shown. For example, I had this:
- 1st Boot Device - CD/DVD. (means that the first boot device from which the PC will try to boot is the CD/DVD drive. If there is no boot/installation disk in it, the computer will try to boot from the 2nd Boot Device);
- 2nd Boot Device - SATA: 5M-WDC WD5000 (computer hard drive. Windows is installed on it, therefore, it will boot if there is no disk in the CD/DVD drive).
Naturally, with such a download queue, the computer will not boot from the flash drive!
How it was and how it should be for booting from a flash drive // AMI BIOS
In order for the BIOS to see your flash drive, you need to change the boot queue to the following:
- USB: Generic USB SD;
- CD/DVD: 6M-TSST;
- SATA: 5M-WDC WD5000.
In this case, the BIOS will first check the flash drive inserted into the USB port, then the CD/DVD drive, and then boot from the hard drive. In most cases, the best option.
When exiting the BIOS, do not forget to save the settings (F10 key), otherwise all changes made will not be saved and the PC will not see your flash drive again.
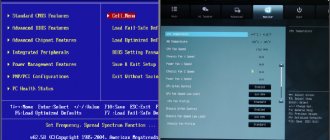
Award BIOS
In principle, it is configured in the same way, with a slight difference in the menu designation. And so, after entering the BIOS, I recommend immediately opening the Standard CMOS Features section.
Award BIOS - main menu
In this section, check whether the USB ports (devices) are enabled. Just check that opposite the lines where “USB” is mentioned, there is [Enabled] everywhere (example in the screenshot below).
USB ports: do they work? They are working!
Next, go to the Advanced CMOS Features section and do the following:
- First Boot Device (first boot device) - USB-HDD (the best choice for booting from a flash drive is a USB-HDD. In exceptional cases, if the BIOS suddenly does not see your flash drive, try USB-FDD);
- Second Boot Device - Hard Disk.
Award: boot from flash drive
Next, press the F10 button (Save & Exit Setup, i.e. save the settings and exit) and try to boot from the flash drive.
Setting up the laptop BIOS
This is done in the same way as for a computer. True, there may be some “serious” differences in individual models, but overall everything is identical.
In laptops, there is a separate BOOT section for boot settings. Once you open it, all boot options are available to you.
Hypothesis No. 1. The problem is starting at 1600 MHz
At first I decided that the computer could not start at exactly 1600 MHz. Because immediately after upgrading the processor and memory, and trying to make the latter work at 1600 MHz, I was faced with the fact that the computer started not the first time, but the second or third time. Now I had to install either an old RAM at 1333 MHz, or an old processor that does not support working with memory at a frequency of 1600 in principle.
Alas, by this time I had neither a processor nor memory modules left. I had to use connections and take two modules to “drive” on 1333. It’s good that there is someone to turn to.
But before leaving for the RAM modules, I tried resetting the CMOS. Even twice: once I closed the contacts with a jumper (according to the instructions), the second time I turned off the power to the machine and removed the battery for 10 minutes. None of the resets solved the problem and did not affect the download progress at all.
An unpleasant feature of the uefi firmware
The saddest feature of this program is the inability to migrate from an installed Windows 8 operating system to a new computer. So if you have 8 pre-installed, then you won’t be able to install 7 so easily. This is due to the presence of a mandatory protocol that Microsoft now requires from all licensed versions of Windows - loading Secure Boot, which is absent in Windows 7 and is not provided in previously released versions of the OS. This can be solved by disabling this option in the program menu. Go to the Security section - Security, disable Secure Boot.
Restoring Gigabyte BIOS using Dual-BIOS
I found two instructions online. The first recommended short-circuiting two legs of the main BIOS chip at a special, experimentally selected moment. I didn’t want to poke the microcircuit with a compass every time, as suggested in the instructions, so I soldered a button onto the contacts.
For 22 minutes I tried to shorten the contacts at various points. I was able to get two new behaviors different from normal startup:
- The download was stuck on the manufacturer's start screen, the computer did not turn off itself
- When the screen was black, the speaker began to beep, producing a long, continuous signal.
But I still couldn’t get into BIOS recovery mode.
(new behavior when trying to short-circuit the M_BIOS chip with a homemade button; stuck on bootlogo)
The second instruction recommended turning on the computer with the power button and not releasing it until it turns off. And then release and press again. And this option worked.
I’m not a fan of posting meaningless and lengthy video instructions on YouTube, so I’ll just rewrite the algorithm with text.
- Turn on the computer by pressing and holding the power button. After a while it will turn itself off.
- Press the power button.
- Press the power button.
After this, the computer went through POST and displayed a window in which it said that the main BIOS was damaged and the backup copy was now being restored.
After restoring the BIOS from a copy (which is stored on the B_BIOS chip, so it can never be touched at all and nothing can be connected to it), the system suggested loading the recommended parameters, which I did.
BIOS restored from Dual-BIOS, what next?
And then we take a field laptop (a native EEEPC under the old WinXP), go to the manufacturer’s website for a fresh BIOS and make a flash drive for flashing the firmware (format and unpack the archive into it).
We insert the flash drive into the computer and go to the Q-flash flasher (End key at the boot screen stage) or from under the BIOS (a mouse is required). First, we copy the existing BIOS to a flash drive as a reserve, then flash the BIOS that we downloaded from the site.
What is UEFI?
EFI
(“
Ifai
” -
Extensible Firmware Interface
) is an interface for connecting the operating system and firmware that controls the equipment at a low level.
In other words , EFI
correctly initializes the hardware when you turn on the computer and then transfers control to the operating system.
EFI
interface was originally developed by Intel for Intel-HP Itanium systems in the early 2000s as a replacement for the old BIOS.
Indeed, existing hardware limitations made it impossible for large servers to run on Itanium processors. Several versions of EFI
, after which Intel contributed the specification to
the UEFI Forum
, which is now responsible for the development and promotion of EFI.
By the way, the name of the interface was also changed a little - it became Unified Extensible Firmware Interface - UEFI
.
Currently, the most current UEFI
is
2.3.1
.
see also
Forgotten things: mobile rack
Resetting the power-on password on hp dc7600
Laptop-Tablet Dexp Ursus kx310 AVA on Windows 10 with keyboard and 3G
Dell Optiplex 330: low-ceiling work machine with BTX
Replacing the broken matrix of the Gateway Profile 5 monoblock
DreamHunter
Dream Hunter
View attachment 30235This topic is dedicated to owners of GIGABYTE motherboards with the Dual Bios option (i.e. with two system flash drives on board).
The instructions described below can greatly help those who, for whatever reason, have permanently ruined their BIOS on such a mat. board
Just yesterday, I decided to reflash the BIOS of the GA-EX38-DS4
to a newer one (F5). I flashed it with @BIOS utility from Windows. During the process of writing information to the chip, a failure occurred and the computer went into a deep reboot.
After rebooting, the computer began to turn on cyclically for a few seconds and then turn off just as quickly. At the same time, the monitor displays absolutely nothing (works in standby mode), emergency disks (including floppy disks) do not start or are read, the keyboard does not respond and if you press something on it, it subsequently freezes.
1. The Dual Bios automatic recovery system did not work because... The sum of the BIOS flash size was most likely correct, but the BIOS itself was not functional.
2. Removing the system battery and shorting the terminals of the BIOS reset jumper did not help.
3. Various “finger touches” on the keyboard during loading: F9, F12, Alt+F2, Alt+F1, Del, End, did not help (the keyboard kept freezing).
4. CD-Rom, FDD and USB drives did not work. There’s simply no point in thinking about restoring the BIOS from recovery media.
What to do with such symptoms. There are usually two options here: 1) Take the mother to the SC, they will unsolder the device and reflash it on the BIOS programmer. 2) Buy a new mother if the first point, for some reason, doesn’t work..
No, friends! There is no need to do any of this.. We have a second chip on the motherboard with a backup working BIOS. So how can you get the Dual Bios system to work if it doesn’t start on its own and the computer literally “dies” before your eyes? Yes, it's very simple:
ATTENTION. Before you begin the steps below, keep in mind that everything you do, you do at your own peril and risk.
1. Open the computer case 2. Find on the motherboard a microcircuit marked on the board as M_BIOS (This is SPI flash 8-pin) 3. Take tweezers, and when you turn on the computer, literally after 0.5-1-2 seconds, short-circuit the pins of the microcircuit once 1
and
8
(a visual screenshot of which legs to shorten is below. Circled in red)
IMPORTANT.
Pay attention to the turquoise (may be a different color on other motherboards) dot on the chip.
This is a marker indicating the first pin, it will serve as a guide so as not to short the wrong legs. Make sure that you are shorting M_BIOS
and not
B_BIOS
. Otherwise, you will reset/damage the backup chip, which will definitely not allow you to restore the board at home.
For those who don’t see the picture, the pinout principle is as follows:
(Where 1
, there should be a point (marker) indicating the 1st pin of the microcircuit) i.e., as can be seen in the above diagram, the
8th
pin is located exactly on the opposite side of the chip.
Always take into account the location of the chip
, it may vary (depending on the motherboard model). The microcircuit can be on its side, upside down, etc. The dot (marker) is your reference point.
PS/K.Z.
If we short-circuit the contacts too early - and the BIOS has not yet reached the stage of calculating the CRC, then we will get, after a few seconds, a constant reboot without any results.
If you close it too late, the BIOS has already checked the CRC of the firmware “successfully” and has been copied to shadow. At the same time, the desired result, as a rule, will not be achieved. The computer, when turned on again, will simply turn on and run “idle”.
It is necessary to repeat the attempt to close with a slight “shift” in time, in one direction or another. Usually, this is no more than 10-20 attempts (it can simply “sort out” time intervals sequentially from zero seconds onwards. The main thing is not to despair, this should help!
Finally - Good Try!:
After simple dances with a tambourine, the dead “patient” should have a “pulse” in the form of a screen with a message about BIOS damage and its further flashing from a backup chip.
You will see the message: Warning: MAIN BIOS CHECKSUM ERROR!
BIOS Auto-Recovering
message that saves you .. Voila! We fixed our computer.
Z.Y. This method cannot be used in case of physical damage to the microcircuits or loss/damage of data from the backup BIOS. Also, this method is applicable exclusively for boards with the Dual Bios system, i.e. for GIGABYTE boards with 8-pin chips
Sometimes when updating the BIOS for a motherboard, a situation arises when after the update the motherboard does not turn on, does not display an image on the screen, or constantly reboots cyclically. This happens quite rarely, but from my experience I will say that approximately 5% of cases of updating or flashing the BIOS of motherboards have a similar result. What to do? How to restore the functionality of the motherboard in case of unsuccessful BIOS firmware? The answer is simple if you own a motherboard with Dual BIOS technology from Gigabyte.
Gigabyte motherboards with Dual BIOS technology have two memory chips containing the BIOS. To make things easier to understand, let’s call them “main” and “backup”. If the “main” copy of the BIOS was damaged, the “backup” one will replace it when the system boots and restore it in the shortest possible time. In case of any damage to the “main” BIOS, whether as a result of a computer virus attack or incorrect flashing, the “backup” chip will replace it and restore it. The process of restoring the "master" copy of the BIOS from the "backup" copy should usually start automatically, but sometimes this does not happen. In this case, you need to forcefully start the process of restoring the “main” copy of the BIOS. On these motherboards there are several ways to force recovery of the “main” copy from the “backup”, these are the methods:
Method 1
- Turn off the computer (motherboard) by holding the Power button for five seconds;
- Press and hold the Power button, the computer will start and hold the Power button until the computer turns off again;
- Press the “Power” button again (this time without holding it down), now the computer will turn on with the “backup” BIOS and will overwrite the “main” BIOS chip if it does not contain the same content as in the “backup” BIOS chip.
Method 2
- Turn off the computer (motherboard) by holding the Power button for five seconds;
- Press and hold the Power button and the Reset button for about 10 seconds, then release these buttons;
- Now, after turning on, booting should occur from the “backup” copy of the BIOS.
Method 3
Use this method only if other methods have already been tried and failed!
- Use tweezers to close pins 1 and 6 on the “main” BIOS chip (pin 1 is usually located near the round mark on the chip, pin 6 is located second from the diagonally opposite corner, see the picture below);
- Ask a friend to press the “Power” button, at this time you must keep contacts 1 and 6 closed;
- Open pins 1 and 6 immediately after the motherboard turns on and you will hear a single beep from the speaker;
- The boot occurred from a “backup” copy of the BIOS.
What are the main advantages of UEFI?
First
, a very significant advantage is that the
UEFI
is the only option to support hard drives larger than 2 TB.
The second
advantage is that
UEFI
, unlike the classic
BIOS
, is not just a microprogram hard-coded into a special chip - it is an entire interface located in the
/EFI
, which can be located on the chip, on a hard drive partition, or even on separate removable disk.
Those.
Any adapted programs can be added
to UEFI Already now, from UEFI BIOS
it is possible to access the Internet.
Of course, PPPoE
or
L2TP UEFI
cannot be raised, but it is quite possible to obtain an IP address via DHCP from the router.
Accordingly, the capabilities and downloads over the network are expanding. Third
, the ability to integrate drivers into
UEFI
.
This driver will be relevant for any operating system that will be installed on the computer, providing versatility and cross-platform functionality. Fourth
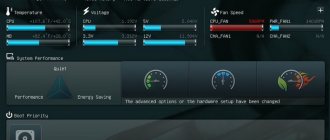
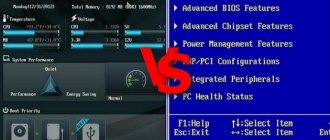
, the interface is very nice in appearance.
This is no longer the modest ascetic interface of the old BIOS
.
Here, for example, is the so-called 3D BIOS
from
GIGABYTE
:
Everything is clear, understandable and beautiful.
There is even a choice of language. True, unfortunately, the language of the 6th landmass of the globe is not yet taken into account by all manufacturers. Another significant plus for many of the new system is significantly faster loading of the operating system than when using BIOS
.
True, the operating system must also fully support UEFI
.
Windows 8
can do this well .