Updated January 1, 2022 634 Author: Dmitry Petrov
Hello, dear readers of the KtoNaNovenkogo.ru blog. Today I want to talk about something that has already become commonplace, like Google Account , which the vast majority of Internet users currently have (I think there is no need to explain what an account is).
This has become especially relevant after the phenomenal growth in popularity of the Chrome browser and Android-based mobile devices.
In the first case, the account allows you to synchronize bookmarks, passwords and other individual Chrome settings with the same browser on another computer or mobile device (smartphone or tablet). Well, in the case of Android, it allows you to access the holy of holies - Google Play.
And as a very useful bonus, in addition to creating an account, you receive a G-Mail email inbox, which can now be considered one of the most convenient and reliable in the world.
How to create an account on Google
An account in Google services is linked to a Gmail email account and is also an identifier, abbreviated as user ID.
To register, you need to go to accounts.google.com, where you click on the “Create an account” link.
If the page is in an unknown language, you can select the desired language from the drop-down list at the bottom left.
Now you need to fill out the form fields and come up with a user name by which you will be known in Google services.
- Last name and first name.
- Specify the user login, which will be the email address.
- Create or generate a password.
Now click Next. If the selected username is already used by someone else, you will be asked to come up with something else.
Next you are prompted to enter additional information. This is necessary in case you forget your username or password. Then additional data will help you get a new password and log into your personal account.
Next, you are asked to read the terms of use of Google services. If you agree, confirm and the creation of your new account can be considered complete.
After this, a personal account will open in front of us.
Registration
First, you will have to register with the Google email service. Otherwise, it will not be possible to cope with the task.
To create a mailbox (also called an account) on Google, you need:
- Open the website google.ru in any browser.
- Click on the “Mail” button in the upper right corner of the page.
- Select the “Registration” function.
- Fill out the registration form. It has hint signatures, which greatly simplifies the process.
- Click on the button responsible for confirming the request.
It is done. Now the user has his own email address and password for authorization. They will come in handy in the future.
Login to the service from your phone and computer
On the left we see a menu with different settings. On the right are tips and recommendations on what else to configure to ensure more complete access, expanded functionality and security.
In fact, above we looked at registering and logging into your account from a personal computer.
The next time, after going to accounts.google.com, you will need to enter the username (login) and password for your existing account to log in.
On an Android or iOS smartphone, you can similarly register and log in using a browser by going to the specified address.
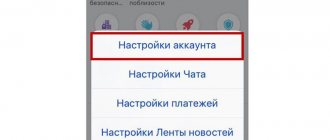
In your phone's Settings, find the "Users and Accounts" item.
Here you can add a new account to link your device to Google services.
Select Google from the list of options.
Then you can log in using your existing username and password or go through the registration procedure in the same way as described above.
Now let's go back to your personal account and take a closer look at the settings and options.
Login to the Play Market on Android using Google
- Launch Google Play, the standard icon in the main menu or on the main screen.
- Click on the “bar” icon (looks like three bars) in the upper left corner of the screen. The Play Store menu will appear there. The name, profile picture, and Gmail address where the store is registered will be displayed.
- View different login methods. Click the down arrow to the right of your Gmail address. A list of tags associated with the gadget will be displayed in the form of a slide-out menu. In order for the required account to appear here, you first need to add it through “Settings”.
- Click “Login”. Any purchases and downloads on Google Play will now be saved in the selected grid.
How to delete a second Google account on an Android phone
Overview of your personal account, settings
Through the “Personal Data” menu you can add a photo, which will become an avatar in the browser and email.
Various information about yourself will be useful in case you lose access to your account. Also, this personal data will be visible to other users if you leave comments on the Internet indicating your Google email address.
The next important section is “Data and Personalization”.
To improve the comfort of its services, Google collects information about the behavior of each user on the Internet. This is useful for improving the quality of information search and shopping services.
Using information about a person's consumption activity, Google can quickly and accurately find answers to all your questions, taking into account your personal preferences.
Login to Android using Gmail
- Launch the Gmail app. Find the Gmail icon in the application menu or on the main screen (an envelope with the letter “G” on it). Click to start.
- In the upper left corner of the screen, click on the “bar” icon, after which the program’s sliding menu will open. The first menu item lists all accounts that are associated with your Android device.
- Click on the current account you want to use for the Gmail application. If synchronization has not been carried out, click “Synchronize now”. This procedure can take a long time, depending on the volume of emails that will be synchronized.
How to protect your account
It is believed that the security system in Google services is better and more reliable than in other similar structures. And it’s also convenient that here you don’t have to strain your brain to find security measures.
There are two sections in your profile that will help you automatically increase the level of account security and receive recommendations for increasing your privacy.
Click the “Protect Account” button and you will see the identified vulnerabilities.
But let’s use the “Privacy Check” function and find out everything about who and what information can be received about your behavior on the Internet and Google services.
For each item, detailed explanations and recommendations are provided on what can be done to improve the situation.
In general, everything is explained quite clearly, there should be no problems with the settings.
How to delete an account and make a backup
In some cases, the account is compromised and it is advisable to delete the account completely.
- The attackers found out your personal and payment information.
- Your mailbox is flooded with spam and fraudulent emails.
- You just want to come up with a more beautiful login.
You can delete your Google account at any time. To do this, log into your personal account. In the “Data and Personalization” section you will find the following subsection “Download, Delete, Plans”.
The first step is to create a backup copy of your account data just in case. Here you will be asked to choose from a long list what exactly you want to save.
After that, select a convenient archive format. Finally, click the “Create Archive” button.
As stated, archiving may take a long time. Upon completion of the process, you will receive a notification by email that the archive is ready and can be downloaded to your computer.
Well, our archive was quickly prepared. To download it, you will need to log in to your account again.
After the archive is saved, you can safely delete your Google account completely.
Click the “Delete service or your account” button. You will again be asked to make a backup and select what exactly you want to delete.
Select what you want to delete and follow further instructions.
How to recover data from Google Account
If your account has been deleted, you can restore your data within 20 days by contacting Google support. But remember, in the previous section we discussed the issue of creating an archive.
So, you have an archive of data. Judging by the “Help for Google Services” section, it is impossible to simply take and upload information from the archive to a new academic record. You will have to obtain the necessary information and files from the archive and manually upload them to a new account.
The situation is simpler if you purchased a new device on the Android platform and want to connect your existing accounts.
- First, during the operation stage, you should go to the settings of your smartphone or tablet, and then enable the backup option.
- Now, as the data is updated, all information about the account settings will be saved in Google Account.
- After purchasing a new gadget, simply log in to the system using your existing Google account (email address).
All settings from your previous account will be restored and updated on the new device.
Check your smartphone's functionality
Before proceeding with authorization, you need to check all the important details that may interfere in order to avoid problems with logging in.
- Be sure to make sure there are no problems with the Internet. It must be fast and stable, otherwise errors will begin to occur during data verification or the verification will not start at all.
- When you log in to your Google account, make sure you enter the correct password and login characters. Just check the box, which removes the asterisks and shows the characters you write in the corresponding field.
- When you sign in to your account on your device, make sure that synchronization with your Google account and other services is active. Usually the synchronization icon is located in the quick settings panel in the notification shade.
- If your device is shaking, reboot it and then log in. Otherwise, due to the brakes, you may enter something incorrectly or another failure will occur.
- If you enabled two-step verification upon sign-in and linked your phone number and changed your SIM card, you may have problems logging into your account.
Now let's look at simple account connection algorithms that you should try before moving on to finding solutions to problems.