The modern user has the opportunity to choose among a fairly wide range of devices of all stripes with different architectures and running on different operating systems. Tablets for the most part run Android OS, but there are many other options, in particular the well-known Windows, which has long migrated from desktop PCs to mobile devices. Fans of “windows” often strive to equip their tablets with the good old operating system, because, whatever one may say, the familiar interface warms the soul, and sometimes is simply necessary for performing certain tasks. All existing operating systems offer users different levels of comfort and functionality. The Windows operating system makes it possible to feel “at home” on portable devices, allowing you to stay within your comfort zone. In addition to differences in the working environment, there is also a difference in hardware requirements; on low-power tablets with a processor of less than two cores, you don’t even have to try to install “windows”.
By the way, for those who cannot decide on a choice or do not consider it necessary to choose, tablets have been created with variable launch of one or another system from those installed nearby. It is possible to implement Dual Boot yourself, if the processor architecture and user skills allow. Of course, the best solution is to buy a device with the system you prefer pre-installed, but the reasons why you need to put Windows on an Android tablet vary from person to person. Often the choice is determined by professional activity, because many programs are tailored specifically for Windows. The user may also be interested in games that run on this platform. Well, if the question is just about the interface and familiar navigation, then the solution is much simpler - in the Google Play Market application store you can download a launcher for Android, which will simulate the outer shell of a “windowed” operating system. In this case, the system itself will not be affected, so there is no question of incorrect operation of the device in this case.
Reinstalling the system on a tablet is not as easy as on a desktop PC. In addition, through the efforts of an amateur, as a result of incorrect actions, things can take a completely undesirable turn. There are risks of turning the device into a brick, even if the hardware fits the platform being installed; among other things, you will immediately be deprived of the warranty on the tablet, so unless absolutely necessary, you should not install a full-fledged OS, and ordinary emulation using special software will be suitable for solving many problems.
What devices can you install Windows on?
Unlike an operating system emulator, a full installation of Windows on a tablet is not always possible. It's all about the large requests of the OS, it is more demanding than Android, and you initially need to determine whether the operating system is supported by a specific device. There are requirements for hardware, memory capacity, but what is equally important, in addition to the desire to personally equip the device with another resource management system, the user also needs appropriate skills. Installing Windows on a tablet instead of Android is a troublesome task, but in the right hands it can be done. To install the OS correctly, the following conditions are required:
- CPU with i386/ARM architecture. Processors from manufacturers VIA, AMD, IDT, Transmeta are cross-platform;
- two, or better yet, a quad-core (with a core frequency of at least 3 GHz) tablet with a RAM capacity of 2 GB or more for Windows 7, 8, 10.
As you understand, to install “windows” you will need to have a high-performance tablet equipped with a powerful processor. Otherwise, even if the system can be installed, the device will freeze. In addition, you need to take care of the latest drivers in advance, which will ensure the correct operation of the operating system.
Alldocube Knote 5 Pro
Price: 26,990 rub.
Don't look at the low price of the Alldocube Knote 5 Pro tablet - this does not spoil its amazing characteristics! Users almost unanimously say that they got a full-fledged laptop for a low price.
If you work remotely, then you will definitely like the functionality of the device: the tablet is suitable for storing files, installing applications, and Windows 10 OS has many useful functions. You can play, work, surf the Internet and much more.
For reference: the only problem with the tablet is that the device runs Chinese Windows out of the box, but it can be easily solved. You need to copy the key and demolish it, install the latest Russian version.
Pros:
- price;
- level of ordinary laptops;
- fast built-in SSD.
Minuses:
- you need to reinstall Windows;
- you will have to tinker with drivers when installing Windows.
Back to contents
Required Tools
Having previously decided which system will be installed, and having found out whether there are enough device resources for it, we prepare the appropriate tools to carry out the work. To install Windows 10, 8, 7 on your tablet, you will need the following tools:
- a bootable flash drive or SD card with a capacity of 8-16 GB (depending on the selected OS version) with Windows recorded on it; you can also use a disk, burn it or buy a ready-made one;
- external DVD drive, if a disc will be used as the distribution media;
- USB hub with three free ports;
- USB mouse, keyboard.
Why might this be needed?
Well, there are many Windows tablets available nowadays. So why install Windows 10 on your Android tablet? This is a very correct question, to which we will try to find an answer further.
Although a large number of Windows tablets are already available, Android tablets continue to dominate the market. Android devices consistently offer more features and technical capabilities, making them one of the best options for custom features.
In fact, some Android tablets also come with a keyboard option, making them even more practical to use as an option with Windows 10. This gives you much more options than Android itself and greatly enriches the enjoyment of everyday use of the device.
Burning Windows to a USB flash drive
In addition to the fact that you need to acquire a copy of the OS, its image must not only be downloaded onto the media, but also make the flash drive bootable, because we need to install the system, and not drag data from one place to another. For this purpose, special software is used, for example, Media Creation Tool, WinSetupFromUSB, UltraISO, Rufus and others. It’s quite easy to burn a bootable USB flash drive using specialized software; the program will create it automatically, you just need to specify the path to the image file and start the process using the existing functionality. Using the simple free Rufus utility as an example, let's look at the procedure for creating a bootable USB flash drive for installing Windows 7 on a tablet:
- download and install Rufus from the official resource, launch the utility;
- in the “Device” section the flash drive on which we will record must be indicated;
- specify the path to the Windows image file;
- The “Partition scheme” item involves selecting a scheme for the disk where Windows will be installed – MBR (for Legacy/CSM) or GPT (for UEFI). The parameters in the Target system column will change automatically;
- the remaining values will be entered by default after selecting the distribution;
- Click the “Start” button, confirm the action and wait for the recording process to complete.
The new version of the Rufus 3 utility does not provide a bootable USB flash drive for XP, so the software is suitable for more recent Windows 7, 8, 10.
DELL Latitude 7285
Price: 122,000 rub.
Are you looking for a worthy work companion? We invite you to take a closer look at the DELL Latitude 7285, a premium tablet running Windows 10. To connect peripheral devices, there are 2 USB Type-C ports with Thunderbolt 3 support.
The hybrid tablet is equipped with a 12.3-inch screen based on a top-end 3K matrix, a resolution of 2880x1920 and a dual-core Intel Core i5 7Y54 processor. The RAM is 8 GB, but it can be expanded if necessary. The user is offered an additional 256 GB.
For reference: Dell was included in the list as one of the most dynamically developing. When Michael Dell was 26 years old, his company was already on the Fortune 500 list. Subsequently, he very quickly became one of the richest people in the United States.
Pros:
- compact;
- easy;
- excellent image quality;
- autonomy.
Minuses:
- not detected.
Back to contents
Practical Ways to Run Windows Platform on Android Devices
Before taking decisive action, it is important to decide on the purpose of installing “windows” on your tablet and resort to the appropriate method of implementation:
- if you are accustomed to the Windows interface, but the functionality is not so necessary, install a launcher, which will be a graphical shell for Windows, while all Android functionality will remain in the same place;
- To be able to play games not intended for the Android system, an emulator that simulates the Windows operating environment is quite suitable;
- if it is absolutely necessary to use an operating system as a working axis, Windows is installed on top of Android;
- If you want to use both operating systems on one device, the best solution would be to purchase a multi-platform device that supports different OSes with the ability to switch between them, or a device with processor characteristics that allow you to install different operating systems side by side.
Having decided what Windows is needed for, we choose how it would be more expedient to port the platform to the device. Let's look at how to install Windows on a tablet in different ways according to your goals.
Windows emulation using Android
Installing a window system emulator on an Android tablet is the safest way to implement the OS environment. Even an inexperienced user can perform the procedure using the instructions. There are various programs that simulate Windows, such as QEMU or BOCSH. The first one is no longer supported by developers, so it will not be possible to emulate the latest versions of the OS using it. But BOCSH is a universal utility and allows you to port any version of Windows as a guest operating system. To carry out the procedure, perform the following steps:
- download and install BOCSH on your Android device;
- download the SDL archive for BOCSH, containing the BIOS and drivers and unpack it into the SDL folder, previously created on the device’s memory card;
- we load the Windows image in IMG format into the same SDL directory (to run eight or a version higher, the image is converted from ISO to IMG, for which there is special software, for example MagicISO, PowerISO, UltraISO and others);
- launch the BOCSH emulator and enjoy the result.
The BOCSH utility is distinguished by its support for sound in the guest OS and its stability, but the speed when emulating the latest versions of Windows leaves much to be desired.
Installing Windows as a second OS
So, you have decided to install the Windows 10, 8 or 7 operating system next to Android. The task before you is not an easy one, which can only be done by confident users who are also ready to part with the device if something happens. To place Windows next to Android, tablets with UEFI firmware are used, because Recovery mode does not provide for the installation of operating systems other than native Android. If everything goes well, you will end up with a device with a Dual Boot system, which provides variable launch of different operating systems that are adjacent and do not conflict with each other. The process is only available on devices whose hardware supports the installation of two software kernels. During the work, by flashing the standard Android Recovery, the standard Android Recovery is replaced with Dual Bootloader, but we remember that incompatibility of the device’s hardware with the software or unexpected failures when replacing consoles can lead to unpleasant consequences.
It is not possible to roll back your actions in the procedure for replacing the kernel preloader, therefore, when getting down to business, you need to have certain skills and be as careful as possible. In case everything doesn’t go as expected, before installing Windows, you need to make a backup copy of Android by writing it to an external drive using standard tools or using third-party software. Next we perform the following steps:
- connect the installation flash drive or SD card with Windows OS to the tablet;
- in the UEFI console, set to boot from the specified media (bootable flash drive);
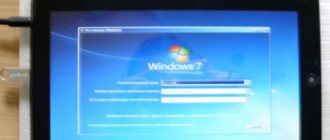
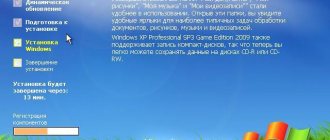
- install Windows 10 (8.7) by analogy with a desktop computer;
- Load the appropriate device drivers (display, Wi-Fi adapter, etc.) for the correct functioning of the system.
The installation can be considered complete, and with great luck, drivers may not be required.
Installing Windows instead of Android
If you decide to install Windows 7, 8 or 10, completely replacing the Android system, and the alternative options do not suit you, and you are not afraid of the risks, then we will consider how to do this. We don’t forget about the condition of compatibility with the device’s hardware, as well as user skills. The process involves the following steps:
- We connect a bootable USB flash drive, mouse, and keyboard to the tablet via a USB hub.
- We restart and go to UEFI mode by pressing the F key
- We set it to boot from a bootable USB flash drive and after launching the installer, select the “Full installation” option.
- We delete it, create a new one and format partition C in the device’s memory, after which its original size will be visible. It can be divided into sections C and D for convenience, similar to installing an operating system on a computer. Partitioning the disk will remove the shell and kernel of the Android OS, in its place Windows will be installed.
- Apply and confirm the selected actions.
- We start the Windows installation.
Once the procedure is completed, you will get Windows on your tablet without the alternative of running Android. If there is space left on drive D, you can return Android by installing the OS as a second one.
Despite the apparent simplicity of porting “windows” to an Android tablet and the analogy with the usual installation of Windows on a PC, in reality the process requires great care on the part of the user, starting from finding out the characteristics of the device and preparing to perform actions and ending with the installation itself. Only in the case of skillfully performed manipulations can one count on the success of implementing a “non-native” platform on the device.
In stores, of course, there are several Windows 10 tablets that you can buy, but tablets based on Andro >
Please be aware that this application is not supported by third party software and is not authorized by Google or Microsoft. Additionally, your tablet's hardware may not be suitable for running Windows on it, even with Change My Software. In other words, you download and use this program at your own risk.
Now we will tell you how to install Windows on Android tablets using Change My Software.
Note: Since you are not actually purchasing a licensed copy of Windows for this experiment, you should be aware that you are dealing with pirated content. In other words, proceed with caution.
Microsoft Surface Go 2
Price: 51,840 rub.
If you're looking for a good budget tablet, you've probably found it. Microsoft Surface Go 2 pleases in all respects: it is fast, compact, and roomy. For many, the priority is light weight so that you can take the device with you on the road (the tablet weighs only 540 grams, which makes it stand out from other models).
Despite the fact that the tablet is budget, it can be called a real workhorse on Windows from Microsoft itself. The model has a stand, which is very convenient (under the stand there is space for MicroSD, which is also very nice). You can do whatever you want on this tablet - its functionality is so rich!
Pros:
- compact;
- nimble;
- spacious;
- productive.
Minuses:
- price.
Back to contents
Installing Windows on Android
Once you install Change My Software on your PC, to install Windows on Android tablet using this tool, you need to follow the steps below.
- Make sure your Windows PC has a high-speed and stable internet connection.
- Connect your Android tablet to your PC via USB cable.
- Open the version of Change My Software you want to use.
- Select the Android and then select the language you want.
- The Change My Software app should begin downloading the necessary drivers from your PC to your tablet.
- After that, click Install to start the process. Obviously, your tablet must be connected to your PC throughout the entire process. If you want to be able to run both systems (Windows and Android) on your tablet after the process is completed, do not select the Uninstall Android .
- Once Windows is installed on your tablet, it should either boot directly to Windows OS, or to the Select Operating System if you choose to leave the option to switch between systems. Windows should then begin its own standard installation process.
Introduction
Don’t forget that the era of weak gadgets from five years ago has already sunk into oblivion and small devices the size of a netbook screen now have hardware no worse than entry-level laptops. Nowadays, a tablet can be considered a full-fledged computer, which means you can install absolutely any operating system on it. It’s really a little more work than with a regular PC or laptop. You will learn further how to reinstall the operating system on your tablet.
Windows operating system
Preliminary work
It is important to understand that the firmware you install may not work fully, that is, some functions may simply be missing. In addition, it is not possible to get the Dual Boot system on every device; on Intel x86 processors the procedure is quite successful, so if you intend to take decisive action, you need to find out whether the hardware supports Android. When you have decided on the choice of how to launch Android, replace the axis or add it with the ability to switch between operating systems, you can get down to business. The whole process consists of several stages and begins with preparation. It is necessary to prepare the tablet and bootable USB flash drive before installing the system. The bootable USB flash drive must be written using Rufus, WinImage, UNetbootin or LiLi. It is not recommended to use UltraISO for this purpose, since the flash drive may not boot on the device.
Tools
So, for work you will need the following tools:
- required Android OS version x86;
- Rufus for burning a flash drive (download programs from the official source);
- GParted for working with partitions (bootable flash drive);
- USB hub;
- USB mouse, keyboard;
- USB flash drive.
Creating an installation flash drive with Android OS
We select the desired OS assembly, which we download from a trusted resource. We unpack the archive with the Android installation, then begin the procedure for writing a bootable USB flash drive:
- launch Rufus;
- select a GPT partition scheme for computers with a UEFI interface;
- file system type – FAT32;
- Click the image selection button and specify the path to the ISO GParted file, after which a new volume label will be determined;
- press the “Start” button;
- Confirm the action in a new window and wait for the end of recording to the flash drive.
Preparing the tablet
We remember that incorrect actions can lead to undesirable consequences and first save important information from the device to any media. To implement Android on a tablet running Windows, you need to prepare the system settings by disabling Secure Boot (a UEFI function that prevents the launch of unauthorized OSes when starting a device running Windows 8, 10). This is done in the settings by deactivating the “Recovery” option in the “Update and recovery” tab. Here you need to reboot the device, do it. The next step is to enter BIOS mode by selecting “Troubleshoot” – “Advanced Options” – “UEFI Firmware Setting”. Here in the “Security” item we set “Supervisor Password”, go to “Boot” - “Boot Security” and set “Disabled” to reset the password, then turn off the tablet.
Microsoft Surface Pro 7
Price: 70,890 rub.
Every year Surface Pro tablets become more and more advanced, and not so long ago the new Microsoft Surface Pro 7 , featuring unparalleled characteristics. The manufacturer gave it the same design, but endowed it with expanded functionality.
The device runs Windows 10 - it can be used as a tablet or turned into a laptop using accessories: the Surface Pen, keyboard, mouse and stand to fix the gadget in a comfortable position. One battery charge lasts up to 10.5 hours of battery life.
Pros:
- clear screen;
- compact;
- autonomy;
- fast Wi-Fi.
Minuses:
- not suitable for video rendering (heats up quickly under load);
- not all programs are optimized for 2k and scaling;
- It’s uncomfortable to work without a keyboard.
Back to contents
Ways to implement the Android platform on a Windows tablet
Having decided on the goals, we choose the method of installing the operating system. Let's look at how to install Android on a tablet with Windows 10 in different ways. Among all the methods of getting what you want, the simplest and safest will be the first one - OS emulation. Running Android is not difficult with the help of special software. So, using this simple method, you can enjoy the benefits of the Android environment without the risk of turning your tablet (or other device) into a brick. No preliminary work will be required.
Android emulation
Everything here is extremely simple, and even an inexperienced user can cope with the task. To painlessly install Android on Windows 10, 8, 7, you need to use software that simulates the working environment of the Android firmware. We recommend choosing BlueStacks for this purpose; this utility is free, has a Russian interface and a lot of other advantages, which is why it is quite popular. You can download the emulator from the official resource; installation takes place in a standard way and does not require special knowledge from the user. You just need to click the “Next” button when starting the installation wizard and “Install”. The procedure for launching the system for the first time involves selecting a language and entering data - to use Android you need to have a Google account (if you don’t have one, then you will have to create an account, otherwise working with the application store and other services will be impossible). After installing and configuring BlueStacks, the capabilities of the Android operating system open to you.
Installing Android as a second operating system
The tablet's battery must be fully charged, and while it is turned off, you need to connect the USB hub to the device's port. We also connect the keyboard. After these manipulations, turn on the tablet by holding down the F12 key. The menu that appears will provide the opportunity to select a bootable USB flash drive, select it and install Android, following the prompts. During the installation, prompts will appear that determine the OS parameters; the user only needs to enter the value “Yes” (Y) everywhere. The execution process and requests differ slightly for different versions of operating systems, but not critically. The completion of the procedure is indicated by a message indicating that the configuration is installed, press Enter to continue. If the system has successfully installed on the device, you will see an OS selection menu when you start the tablet, but in some cases you have to load Android by holding down the F12 key.
Installing Android instead of Windows
If, after weighing all the risks and positive aspects, you have come to the conclusion that you no longer need Windows at all, we will proceed to more drastic measures that will allow you to completely remove Windows, leaving the Android OS installed. To the switched off tablet we connect the hub and to it a keyboard, a mouse, a bootable GParted flash drive, then press the Esc key several times to display the Bios system, where we perform the following actions:
- select Boot Manager;
- indicate the flash drive on which GParted is located, press Enter and boot from the drive;
- select the fourth line of the “Gparted Live Safe gfraphic setting (vga = normal)” window that opens, press Enter and wait;
- in the next window, select the line “Keep kernel keymap”, press Enter, wait;
- you will be able to select a language; to do this, turn on the Num Lock key on the keyboard (if it is not active) and enter “24” (Russian), press Enter;
- For the next request, enter “0”, then Enter, wait for the graphical shell to load;
- Now you can see all the partitions, here we find those that concern Windows (MSR partition, main and recovery partition). By right-clicking on each of them, select the “Delete” option from the context menu and delete them one by one;
- at the bottom of the window, call the context menu and activate the “Apply all operations” option, these sections will be deleted;
- after that, click on the “Data Android” section with the right button of the manipulator to open the menu and select the “Change partition” option, apply the largest size value and confirm;
- At the bottom of the program window, call the context menu again, select the “Apply all operations” option, and the section for Android will be enlarged.
After the above manipulations, exit the program, turn off the tablet and disconnect the USB devices. When you turn on your device while booting Android, you can now use more space that was previously occupied by Windows.
The user's skill level must match the complexity of the task. Remember that the procedure is always fraught with risks, therefore, unless absolutely necessary and skilled, you should not use methods for completely installing the system, and for most tasks an emulator is sufficient.
Getac T800 G2 Z8750
Price: 273,855 rub.
Getac T800 G2 Z8750 tablet has a high price, of course, not everyone will be able to become its owner, but we will highlight the characteristics for those who are planning to make an expensive purchase. The Windows 10 tablet has high performance due to the INTEL HD GRAPHICS (CHERRY TRAIL) video processor and the INTEL ATOM X7 Z8750 1600 MHz processor.
Equipped with an IPS screen, screen diagonal - 8.1, 4 cores. There is support for Wi-Fi 802.11ac. Features of the rear camera include flash and autofocus. There is a built-in speaker and microphone, as well as the ability to connect a headset.
Pros:
- 6 function keys;
- additional battery;
- moisture and shock protection;
- microSD reader.
Minuses:
- not detected.
Back to contents
What are the system requirements for the gadget?
For Windows to work stably, your tablet must meet only two requirements - processor and RAM. Below are the recommended system requirements:
- Dual or quad core processor with a minimum clock speed of 3 GHz.
- RAM - at least 4 GB.
- 8 GB internal memory or Micro SD.
Installing Windows as a second system
You can install Windows without uninstalling your existing operating system. This allows you to switch between operating systems, but of course not work at the same time.
Important: This method requires replacing stock Android firmware with Dual Bootloader. If flashing is done incorrectly, the device may be damaged. The same risk arises if the technical requirements are not met (the same requirements as for reinstallation).
Replacement of Android Recovery is carried out only in qualified service centers (not authorized), as it requires an individual approach for each chipset. I don't recommend doing this yourself.
Users are lucky if their mobile device already has a bootloader for two operating systems. Basically, devices with Intel chipset are Onda, Teclast and Cube.
How to install Windows on a tablet as a second operating system:
- Save the Windows image to an external drive.
- Connect a USB flash drive or hard drive, as well as a mouse and keyboard, to the USB hub.
- Restart your device and press F2 (Del/F4/F7/F12).
- In UEFI, select the option to install from a connected external drive.
- Follow the installation program's instructions without deleting or formatting any directories, just make room for a new directory and specify the new location as the path for the second operating system.
- Confirm all subsequent actions.
As you can see, the instructions are almost identical to a regular installation.
Creating a bootable USB flash drive
One of the methods will require a bootable flash drive, so here's how to make one.
Via Windows Media Creation Tool
Windows Media Creation Tool is Microsoft's simple and free tool for creating installation media yourself. It downloads OS files from Microsoft servers over the Internet and then allows you to save them to an ISO file, which can then be saved to a flash drive to create installation media.
- Launch Media Creation Tool and accept the license terms.
- The program will begin preparing the system installer components.
- Now click on “Create installation media”.
- Select your system architecture (32-bit or 64-bit) from the list and click Next. Most modern processors support both versions of the system, but for a tablet it is better to choose 32-bit.
- Connect an empty flash drive with a capacity of at least 8 GB to your computer, then select it in the program.
- The application will begin downloading operating system installation files from the Internet. Depending on the speed of your connection and flash drive, this process takes from a few minutes to several hours.
- After the program is completed, you can remove the finished flash drive from the USB port and use it to begin installing Windows on your tablet.