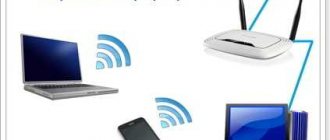
The MTS company has recently begun to expand and now, in addition to mobile communications, provides widespread use of unlimited 3G/4G Internet, as well as access to television. But today in the article we will talk about how to go into the settings of the MTS router, configure it or make some changes in the configurations. Regular devices like this already have the necessary settings, so let’s figure it out.
REQUEST! Write your reviews about the quality of the Internet connection below in the comments. Feedback from every client is very important to us.
How to connect
Let's start from the very beginning, to enter the configurator you need to connect to the router. You don't need to install any additional software. You can connect in two ways:
- Via a network cable, if the model has a LAN port on the back. Just take the wire and plug one end into the network card of your computer or laptop, and the other end into the network port on the router.
- Via Wi-Fi - after turning on, you should see the key for the WiFi network on the screen. After the first turn on, it will work immediately, so you just need to connect from any device: laptop, tablet or phone.
Internet router
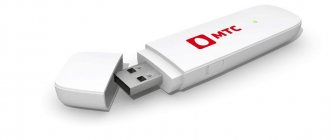
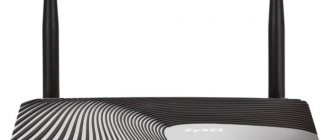
Routers from are fairly compact devices that receive radio signals from a mobile network according to 3G and 4G standards, and then send them to client devices: phones, tablets, computers, and so on. Over the entire sales period, the operator has offered its subscribers devices with different characteristics and appearance. At the end of 2022, the main model was the 874FT 4G Wi-Fi router.
You can buy the device on the official MTS website. Its price is 3,300 rubles*. For this money, a person receives not only equipment, but also a special SIM card with the archived MTS Connect-4 tariff plan, money in his account and the opportunity to use it to activate additional offers. In addition to the SIM card and the device itself, its packaging contains a brochure with a user manual, a USB cord, a power supply and some documents
Important! The device is firmware only for working in the MTS network and cannot be used with SIM cards from Beeline, Megafon or Tele2. If you want to change the operator, but keep the router, you will have to reflash it.
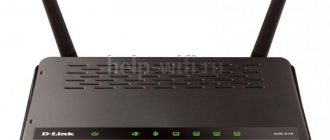
Most devices from MTS are made of black plastic. The device itself is very compact and pleasant to the touch, but there is one caveat: fingerprints always remain on it, and in order for it to look beautiful, you need to constantly wipe the case.
The following control and monitoring elements are compactly located on the front and rear panels of the device:
- Power key containing battery level.
- Micro-USB port for charging and connecting to a PC.
- Key to enable WPS mode.
- Indicators for WPS, Wi-Fi, data transfer and mobile network operation.
- Ports for inserting a special SIM card and memory card.
- Reset and restart button.
Connection
- The Internet center has a built-in Web configurator, so you need to open any browser to access it. We go to the address 192.168.1.1.
- Enter your login and password as admin-admin.
- Internet settings are located in the “Internet Settings” – “WAN” section. Don't confuse it with "LAN".
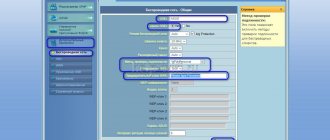
Further instructions will differ depending on the type of Internet connection. If you have a portable 4G or 3G modem, then you don’t need to configure anything, and you can change the Wi-Fi settings in the “Wireless Mode” section. There you simply indicate the name of the Wi-Fi network and the password for it.
To understand how to set up an MTS WiFi router for home Internet, you need to clarify the type of connection. It is specified in the contract that was given to you upon connection. You can also check this type by calling 8 800 250 0890.
Peculiarities
The Sericomm router has the following features:
- The characteristics of the router allow you to use the frequency ranges of 2.4 and 5.0 GHz.
- Devices that have WPS function can be connected to the router in an instant. If the smartphone runs the Android operating system, then it usually has this capability.
- The router has a USB port. It allows you to connect a modem, network printer, external hard drive or other device. For example, it is possible to update the router firmware from a flash drive connected to this port.
Settings
IPoE
“ DHCP Client” as the type . The hostname is " MTSRouter" . Also make sure that the “Automatically obtain DNS addresses” checkbox is checked. After that, at the very bottom, click the “Apply” and reboot the router.
Modem firmware update
This procedure is necessary if there are problems with communication, a drop in connection speed, or if errors occur in the operation of the modem. Flashing is required for some methods of unlocking the device in order for it to work with SIM cards from other operators.
It is best to look for new software versions on the official websites of device manufacturers using information about the full name of the equipment used, which can be found on a sticker on the product body or in the user manual. On the website you need to pay attention to the “Software Updates” section, where you need to find the updated version - the latest by release date. After clicking on the link, the download of the archive begins. It is saved on your computer in the "Downloads" section.
After unzipping, 3 files are available: update instructions, “Dashboard UTPS” and “Firmware Update”. The last 2 files are launched one by one. You must agree to the terms of the license agreement before downloading. The completion of the download of each file is accompanied by a message indicating the completion of the update, indicating the name of the installed new version and the IMEI number.
When flashing, do not allow the computer to turn off. To do this, it is advisable to use a UPS with a built-in battery. After updating the firmware, the modem will subsequently need to be used to work on the same port. This especially applies to routers that have a dedicated connector for USB modems.
PPTP or L2TP
Select one of the connections “PPTP” or “L2TP”.
Look, by default the automatic detection of settings is checked. There is no need to enter them manually, since the router is already flashed with the necessary IP, mask and gateway data. You need to enter the server address, login and password. At the very bottom, click the apply button and restart the transmitter.
Characteristics
This device has the following capabilities:
- A firewall may be used in operation.
- If necessary, you can connect a repeater to repeat the signal.
- The router has a powerful antenna that allows you to establish a reliable connection anywhere in the apartment.
- It is possible to connect a network printer.
- As you know, the 2.4 GHz frequency range is the most common. However, it uses a maximum of 13 channels. In some cases, they may be overloaded and you have to change your WiFi settings. The 5 GHz band allows you to expand the capabilities of the router; here you don’t have to face such a problem. However, it is less common. This router allows you to work in both frequency ranges, choosing the one that will be more useful.
- Static routing and NAT are used.
- It is possible to install the latest firmware.
- This device can provide the highest speed access to the World Wide Web. It will be able to constantly operate in access mode up to 300 Mbit per second.
- The router has 4 LAN ports where devices can connect using a network cable. These ports provide access speeds of 100 Mbit per second.
- The USB 2.0 port is used.
Technical characteristics and functionality of Wifi adapter Lumax DV0002HD
Device dimensions – 155 × 35 × 124 mm. The package also includes two cables for connecting devices via LAN ports.
Note! The use of an external antenna for the router is not provided.
Static PPtP, L2TP, Static IP
Specify the type. Next, check the box “Set IP address manually:”. You need to manually enter from the contract: IP, Mask, gateway, server address, login and password (for Static IP you do not need to enter). DNS addresses should also be indicated there. I would also advise you to enter them by clicking “manually enter DNS addresses”. But you can click on automatic detection. If there are problems with any sites, you can always go back and enter this data manually. At the very end, do not forget to save the settings and reboot.
Possible problems
How to enter the router settings and what to set there is described above. Even if everything is configured correctly, sometimes problems with connecting to the Internet may occur. Causes:
- The device is discharged. In this case, it is enough to charge the equipment.
- Hardware problems. All cables are connected, the settings are set correctly, but the router refuses to work, moreover, the indicators on it do not light up. The equipment has simply become obsolete. It is not recommended to disassemble and repair it yourself. If the warranty is still valid, return the router to the store. If not, get a new model.
- Battery problems. The device requires a battery to operate. Try to take it out and put it back.
- System failure. A computer, like a router, can “lock up”. This is usually cured by rebooting. Use the “Reset” button on the back of the router case. To do this you will need a thin object, such as a paper clip. Of course, you can unplug the power supply from the socket and plug it back in, but this may cause the firmware to crash.
- If there is no Internet, then there may be problems on the part of the provider (technical work, line break). Contact MTS technical support and ask when the connection will be restored.
If nothing brings results, contact a specialist. Perhaps there was a defect.
802.1x
Specify “ DHCP Client” .
Scroll to the very bottom, find and check the box “Enable 802.1 x Authentification for WAN” . We set the EAP method as “ MD5” . Carefully enter your username and password and click “Apply”.
Connect
Describe your question
MTS Home Internet is a service for providing Internet connections to individuals in residential apartments and private houses. If your address is within the company's service area, then you can easily connect to a fiber optic connection at high speed. Contents
Clients of this service have the opportunity to access a separate personal home Internet account , which has the following capabilities:
- clarify the tariff plan;
- view status;
- check the current balance;
- use the promised payment;
- measure connection speed;
- Change password;
- set up a notification with information about consumption;
- find out information about the owner.
Access to the account is carried out on the official website page - https://internet.mts.by/
Types of routers
Conventionally, routers that support WiFi networks can be divided into two large groups. The first of them is universal devices that are not tied to the equipment of one specific provider. They cost more and need to be configured properly. For example, setting up a Tp-Link WiFi router can be done either using a wizard or using a WEB interface. It is easier for beginners to use the first method. But the second one is more suitable for professionals. By the way, it is recommended to implement the settings using the second method.
The second large group of routers includes specialized solutions. They are sold by providers to their clients. Such devices are already initially configured to work as part of the computer network of a particular company. But such routers will not work with equipment from other providers. In this case, you just need to connect the device and turn it on.
Personal account pages
Home page (personal account)
The page displays information about your account: user name, phone number, tariff plan, Internet connection status, current balance.
* You can make payments using the phone number specified in your account, because... it is synonymous with personal account.
Settings
The following functions are available in the settings:
- setting up expense notifications;
- Change Password;
- voluntary blocking.
Setting up notifications
The page configures a subscription to notifications about the used traffic quota.
Notifications can be received in the form of SMS messages or email.
To complete, select a method convenient for you: SMS and email, and enter your mobile phone number or email, respectively, to which you will receive information about traffic consumption.
Voluntary number blocking
You can set a voluntary block if you do not plan to use the Internet for a long time. The duration of voluntary blocking is up to 30 days. After 30 days, the blocking is automatically disabled.
You can activate voluntary blocking no more than 3 times during a calendar year.
* Connection cost is 2 Belarusian rubles (including VAT). Unblocking is free of charge. In case of early deactivation, unused days are reset to zero, their cost is not subject to return or compensation.
Change Password
To change your password you must be logged into your account. Go to the tab for changing the password and enter a new password and repeat it. The password must consist only of numbers, the length of which must be in the range from 4 to 7 characters.
On Windows
The computer exchanges data with devices connected to it and automatically reads the network address from the router. The user can find it out in two ways: using the ipconfig or tracert commands, in the connection status information. You can also install a special utility on your computer that collects information about your network connection.
In Windows network settings
- Open Start > Settings > Network and Internet > Network and Sharing Center.
- Click on “Ethernet” or “Wireless”.
- In the window that opens, click on the “Details” button.
- The IPv4 default gateway value specifies the router's IP.
When checking IP through network settings, you only need to check IPv4 parameters. The local IPv6 address is not used to access the modem web interface.
In Windows 10, you can find out the IP address in the network profile properties. For this:
- Click on the network icon in the lower right corner.
- In the tab that opens, click the properties of your network connection.
- Scroll down the list of options to properties. The value of the IPv4 DNS servers item will indicate the router address.
Via command line
- Using the Win+R combination, launch the Run dialog box. This keyboard shortcut works on Windows 8, 10 and other OS versions. In the window that opens, enter cmd.
- In the command line that opens, enter ipconfig and press Enter. The main gateway will contain an IP address for configuring the router.
Another way to find out the access point address is to use the tracert command. It determines the route for the data. On the command line you must enter tracert and the address of any website. In the example this is google.com. The first identifier is the router's IP.
If the Win+R combination did not work and you were unable to open the Run window, you can launch the command line from the Start menu. Open it and scroll to the "System" folder. There will be a command line and other tools for setting up and working with Windows.
Using utilities
Advanced IP Scanner is a free program for collecting information about your network connection. Scans all devices connected to the local network, provides access to FTP servers and shared folders. Runs without installation.
The program is Russified. To determine the IP address, click on the “Scan” button.
Information about all devices, their names on the network and addresses of access points will appear on the screen. The first IP in the list belongs to the router.
The program “10-Strike: Network Scan” has similar functionality. The utility scans the LAN, finds active computers, hosts, and open ports. Completely free.
Users' opinions
Setting up a WiFi router is a very simple task, and even a novice user can handle it. The widespread appearance of such devices has radically changed life. Most owners of mobile systems can no longer imagine their lives without the World Wide Web. The Internet is gradually replacing television, radio, newspapers and magazines. In any case, the future belongs to him.
The indicator lights up
The presence of light in the indicator indicates, at a minimum, that the device is working properly. But what to do if even in this case the MTS modem does not connect to the Internet? We need to check the system settings, for this we will need to open Device Manager. Detailed instructions:
- Call up the “Run” window and enter the command “devmgmt.msc" to call the Dispatcher.
- A window will open with a list of all equipment installed on the system. We need to find the line “Modems” and expand it, and then click on the desired device. It may not appear in this line, then try looking for it in the “Other devices” section.
- If there is a yellow exclamation mark next to the device icon, it means that drivers for this equipment have not been installed.
- To install drivers, you need to right-click on the device, then in the context menu click on the first line “Update drivers”. To update drivers, you will need the Internet; connect, for example, to a WiFi network. Next, you need to select search for drivers on Microsoft servers.
You also need to check whether the device is firmly inserted into the USB port.
If there are no problems with the drivers, and the device itself is displayed correctly in the Manager, you can try removing the modem from the system, and then installing it back by expanding the “Other devices” line and updating the drivers. Perhaps after reinstalling the device into the system, the problem will disappear.
Testing
After completing the software configuration of the network node, you need to check its functionality. To do this, activate the WiFi transmitter on any device, wait for the connection to be established and launch the browser on it. After this, open any information resource from the global web in the latter’s window.
If after this the site appears, then everything is in order. Otherwise, it is necessary to additionally check the switching and parameters. After this, re-check the functionality of the created computer network.
Selecting an installation location. General recommendations and wiring
Setting up a WiFi network begins with choosing the right location to install the router. The first important condition is that the network access point should be located as close to the center of the room as possible. If the coverage is not enough, then it is necessary to additionally purchase so-called repeaters and use them.
Another important point is metal surfaces. They simply shouldn’t be near the router. If this condition is not met, the level of the received signal and the quality of the coverage will significantly deteriorate.
Also, at the installation site of the network node there must be a socket for organizing its power supply. The second important point is the possibility of supplying a twisted pair cable from the provider to the router installation site. It is based on these conditions that we choose the location for installing the router.
How to register and log in to your personal home Internet account?
No additional registration procedures are required. Once the service contract is concluded, your user account will be created automatically.
All you have to do is authorize. To do this, enter your phone number, password and the “Login” button.
* The telephone number is connected separately when concluding a service agreement. This number is allocated specifically for the Internet.
Using programs
There are many special utilities that allow the user to find out the local address of the IP router. One of the simpler and more effective options is the NetAdapter Repair All In One program.
The main task of this software is to eliminate system errors and diagnose network equipment. In addition, the utility displays detailed information about connection types and parameters of wireless devices. You can find the network address using this utility as follows:
- Install and enable the software.
- On the right side of the screen, find the “Default Gateway” item.
- The router address will be displayed opposite the line name.
