- 12shared
- 0Facebook
- 12Twitter
- 0VKontakte
- 0Odnoklassniki
Windows 10 users sometimes face the need to add new fonts to the system. This task is quite simple and does not require special knowledge, however, as in any other procedure, there are certain nuances that can cause difficulties for unprepared users. So, let's try to install some new font on Windows 10.
Font format and arrangement in Windows 10
Before we begin, let's tell you a little about what fonts are and where they are located. The fonts used by Windows are nothing more than files in TrueType (.ttf extension) or OpenType (.otf) format. They are located in a special folder C:/Windows/Fonts, which can be accessed through Explorer or Control Panel.
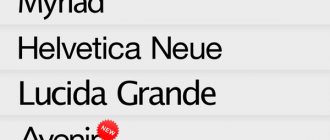
By going to the specified directory, we will find all the fonts already installed on the system. To manage them, the “View”, “Delete” and “Hide” buttons located at the top are intended. By double-clicking on the desired font, you can view the styles included in the family.
The “Fonts” section is also available in the interface of the standard “Options” utility. More detailed information about fonts is available here in the form of extended metadata.
Tips and tricks
Fonts installed in this way are placed in the fonts folder of the Windows operating system and, as a rule, work in Photoshop, Word, Coreldraw and other programs.
If you need to install a large number of fonts for a specific program and do not want to overload the OS, then use other methods that will send the necessary fonts to the folder of the specific program you have selected. This option will not make any changes to the overall operation of your computer.
How to install fonts on Windows 10
Let's move on to adding new fonts. You can download them from the Internet, from thematic sites, of which there are now a great many. We liked the resource Dafont.com , which offers a fairly wide range of fonts to suit any needs. Select one of the fonts (for example, Quentell CF) and click the “Download” button, then save the archive with the files to your computer. Next, let's unpack it. Typically, one font family includes several files, the number of which corresponds to the number of styles. We ended up with three files.
How to install a font in Windows 10? The easiest way is to drag and drop files into the Fonts folder. The second option is to use the right-click context menu. However, there is one caveat. The fact is that you may have font files (ttf or otf) associated with graphic editors like ACDSee or Paint. In this case, the necessary “Install” item will not be in the context menu. To make it appear there, let's change the default program for opening font files. This is done through the file properties (RMB – Properties). On the “General” tab, click “Change...”, select “Font viewer” in the window that opens and save the settings by clicking “Apply”. That's it, from now on the font files are associated with a special application.
Now, by right-clicking on the file, select “Install” or “Install for all users” from the menu. A new font will be added to Windows 10.
There is another way. Double-click to open the file, and then click “Install” in the window that appears.
You can make sure that the font collection has been replenished with a new copy in the “Fonts” subsection of the Settings utility.
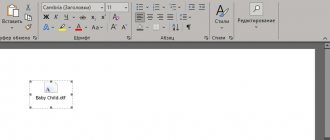
All that remains is to check whether the installed font is available for use. Create a new Word document and find the required font in the drop-down list. Let's apply it to the text.
Optimization
Choosing a modern font format that has a good compression ratio is only the first step towards optimization. Much more can be done to improve page loading speed and improve the user experience when interacting with the interface.
FOIT, FOUT and FOFT
While the font is loading, you can see different text behavior when rendering.
FOIT (Flash of Invisible Text) - from English. "flickering of invisible text." With this behavior, until the font is loaded, the text is not displayed and appears only after the font is loaded. A significant problem is that there is no access to text content during loading.
FOUT (Flash of Unstyled Text) - from English. “flickering of unformed text.” During loading, the default font (system, for example) is used, and after loading the page is redrawn using the loaded font. This redrawing is quite noticeable and may be undesirable.
FOFT (Flash of Faux Text) - from English. “flash of synthesized text.” This behavior can be observed in the interval when the main style has already loaded, but the additional ones (bold, italic, etc.) have not. The browser simulates the desired style before loading the real version. In this case, the page may be redrawn several times as styles are loaded.
Different browsers have different logic for rendering text while loading a font. For example, Chrome and Firefox do not render anything for three seconds, then use a web safe font, and after loading the text is redrawn. IE does something similar, but doesn't wait three seconds. This behavior can be unified across browsers using the font‑display property.
font-display property
The property has several values that determine how the text behaves when the font is loaded:
- auto - default behavior, depends on the browser.
- block - the text is not displayed for a short period (3 seconds), then a backup font is drawn if the main one has not yet loaded. Once loading is complete, the text is redrawn again.
- swap - the spare font is immediately rendered, after loading the font - re-rendering.
- fallback - nothing is displayed for a very short period (100 milliseconds), then the browser uses a fallback font and waits 3 seconds - if the font still hasn't loaded, the fallback font remains. Further, it does not matter whether the font has loaded or not, the replacement will not occur. If the font is loaded, it will only be applied when the page is refreshed.
- optional - The text is not displayed for 100 milliseconds, and then is rendered in a fallback font. Even if the font is loaded after this, the replacement will only occur when the page is refreshed.
The optimal value is swap, it can be used in most cases, it is convenient for users. When connecting a font using Google Fonts, this value is set by default. If there is a need to avoid text flickering (for example, for thoughtful reading), optional is suitable.
Preloading fonts
Another optimization method is pre-loading fonts. With its help, you can change the usual prioritization of loading resources, thereby telling the browser that it is important to download the font first.
It is worth considering that the browser will download the font in any case - even if it is not used on the page. And, having a high priority, this download can block the loading of other resources, so you need to wisely choose what to preload. For example, if a page uses three different fonts, it is worth preloading only the main font without additional styles.
In order for preload to work, you need to place in
link to the font and set the rel attribute to preload:
You also need to add a resource type, in this case font. You can also preload other resources - CSS files, images, and so on.
Reducing the number of font glyphs
By default, the font may contain glyphs (letters, symbols) of different languages and simply rarely used. Using the unicode-range property, you can set the range of the desired characters in the Unicode system, then the browser will load the subset (subset) of the font only at the moment when a character from this range appears on the page. First you need to prepare the font files, dividing them into groups.
For example, you can separately connect the Latin and Cyrillic alphabet if the site contains versions in two languages. And with the help of unicode-range, the browser will understand which subset is needed for a specific page and will load only that. Such a file will have less weight and will speed up page loading.
You can also analyze which specific glyphs are used on the site and create a custom subset exclusively with them. There are special tools for this.
Google Fonts uses subsets by default. This can be seen by opening the CSS file that is included in
when using the service. There is a separate subset for each language. Example for Latin and Cyrillic: /* latin */ @font-face { font-family: “Roboto”; font-style: normal; font-weight: 400; font-display: swap; src: local("Roboto"), local("Roboto-Regular"), url(https://fonts.gstatic.com/s/roboto/v20/KFOmCnqEu92Fr1Mu4mxK.woff2) format("woff2"); unicode-range: U+0000-00FF, U+0131, U+0152-0153, U+02BB-02BC, U+02C6, U+02DA, U+02DC, U+2000-206F, U+2074, U+ 20AC, U+2122, U+2191, U+2193, U+2212, U+2215, U+FEFF, U+FFFD; } /* cyrillic */ @font-face { font-family: "Roboto"; font-style: normal; font-weight: 400; font-display: swap; src: local("Roboto"), local("Roboto-Regular"), url(https://fonts.gstatic.com/s/roboto/v20/KFOmCnqEu92Fr1Mu5mxKOzY.woff2) format("woff2"); unicode-range: U+0400-045F, U+0490-0491, U+04B0-04B1, U+2116; }
The article discusses only basic methods of font optimization. But even these are enough to improve the user experience and significantly reduce the weight of font files, thereby speeding up page loading.
Installation through the Microsoft Store
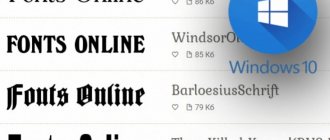
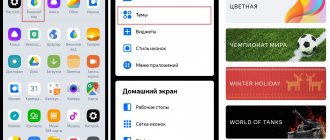
In the latest versions of "tens" it became possible to download fonts from the Microsoft store. To do this, go to the “Fonts” page of the “Settings” application and click on the “Get additional fonts from the Microsoft Store” link at the top.
There will be a transition to a store where free and paid fonts for Windows 10 are presented. However, the choice here is still very small.
Problems adding fonts
We have already discussed the issue with the wrong associated application for ttf or otf files above. There are other problems too. Sometimes fonts for Windows 10 have a specific format that differs from the standard ones. You can try to install them in the usual way, but most likely you will get the error “the file is not a font file.” Here you will have to use converters. A similar message in some cases appears when the standard Windows 10 firewall is disabled, even if the fonts added to the system are saved in the correct format. Enabling the firewall will fix the problem.
- 12shared
- 0Facebook
- 12Twitter
- 0VKontakte
- 0Odnoklassniki
The easiest way to connect fonts
Using the Google Fonts service:
- Go to the website https://fonts.google.com;
- Find the required font or several:
- Click on the red circle in the upper right corner in the font block;
- At the bottom, click on the black field that appears:
- If desired, we can customize the font;
- Copy the link and paste it into the tag head: