A universal solution for most errors like “The program cannot start because XXXXX.dll is missing on the computer. Try reinstalling the program."
Currently, the article has a solution for the following DLLs (suitable for Windows 11, 10, 7, 8, XP):
- api-ms-win-crt-runtime-l1-1-0.dll
- MSVCP140.dll
- MSVCP120.dll
- MSVCP110.dll
- MSVCP100.dll
- physxloader.dll
- openal32.dll
- xlive.dll
- tes4r.dll
Reasons for the error
The appearance of messages about the impossibility of launching programs due to the lack of one or another library is not a rare occurrence. The reasons may be:
- Incorrect Windows update;
- A problem with the hard drive that could lead to file corruption, this could also include viruses;
- Removing games and programs, which also delete system files;
- Installing Windows add-ons from unverified sources.
Moreover, there are a lot of options for missing libraries, and the solution options for all missing libraries are the same:
- Reinstall the required package (distribution, patch), of which the missing DLL is part.
- Download only the missing file and write it to the system.
Both the first and second can be found below in the article.
Part 1, What is a DLL?
A DLL, which stands for Dynamic Link Library, is a file that stores instructions that programs can call to perform specific tasks, including built-in and third-party programs. In fact, multiple programs can share capabilities in a single DLL file and even do so at the same time. Unlike a client program file, which ends with an EXE extension, DLL files cannot be opened or read directly. And they remain silent on your hard drive until they are called by certain code that is running. In other words, a DLL error can cause programs and some features in Windows to become corrupted.
Most DLL files end with the extension .DLL; others may use .EXE, .OCX, .CPL or .DRV.
Part 4, How to Recover Missing DLL Files
If you just want to quickly recover missing DLL files, we recommend that you try Apeaksoft Data Recovery. Its main features are:
1. Recover DLL files in one click, so even beginners can understand it in a few seconds.
2. Recover missing DLL files in various situations, such as the file was accidentally deleted, corrupted, corrupted, affected by viruses, etc.
3. Support various data types and formats, including DLL, EXE, OCX, CPL, DRV, etc.
4. Recover deleted DLL files in original format and quality.
5. Look at all the lost DLL files organized by format and decide to recover all of them or a few specific ones.
6. Besides DLL files, you can also recover music, videos, photos, documents and other data from your computer.
7. Additionally, data recovery is available for Windows 10/8.1/8/Vista/XP.
In short, this is the best option to quickly repair missing DLL files and get rid of DLL file related problems.
How to Recover Missing DLL Files in One Click
Step 1. Scan the entire system for DLL files
Download and install Data Recovery on your computer. When the DLL error message appears, run the program, you will get two parts in the home window.
Free Download Free Download
Go to the data type area, select the "Other" option. Then go to the location area and select where the DLL file was originally located, such as "Local Disk". Data recovery will work as soon as you click the "Scan" button.
Step 2: Preview Missing DLL Files Before Repairing
When the scan results window appears, click "Other" on the left side and open the folders named "DLL" on the right panel to preview the deleted DLL files. In addition, the "Filter" function on the top ribbon allows you to quickly find a file using keywords. If you cannot find the corresponding DLL file, click the "Deep Scan" button to perform a deep scan of the system.
Step 3: Recover Missing DLL File in One Click
Finally, select the orphaned DLL file in the results window and click the "Recover" button to restore it to its original state.
Disabling third party processes
To resolve the missing dll error, you may need to disable third-party processes, which often conflict with each other. You can't even imagine how many of them there are in your PC. Empty and incorrect registry keys are often involved in conflict situations.
All together, one utility will help solve these problems - Autoruns. It is recommended by the creators of Windows themselves. And the link leads to the official Microsoft website. The utility is very easy to use. You need to download it and run the Autoruns file corresponding to the bitness of your OS. You need to open the file immediately as an administrator.
Autoruns files for running the utility
Each yellow line with the name of the program is the path in the registry to non-existent files.
Autoruns utility window with registry keys and system processes
Each one needs to be unchecked. Files without a digital signature are marked with a pink background. If its name is not familiar to you, then it is better to uncheck it as well. When the entire list has been processed, close the utility and restart your PC.
Checking the hard drive for damage
One of the reasons for a registry malfunction may be damage to the hard drive ; you can use the built-in CHKDISK program to check and fix it.
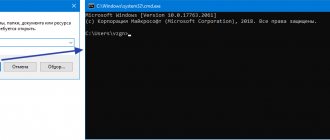
- Enable command line , as described earlier, in any of the ways.
- Enter command CHKDISK C:/F/R (C: is the disk to check, /F is a parameter that says that errors need to be corrected, /R is a parameter to restore information in damaged sectors).
- Press enter and Y to start the program.
Removing a faulty application
In some cases, installing components may not help, because the problem lies in a faulty program that uses DLL libraries.
To identify a faulty application, you must:
Step 1. Left- “Search” icon (the magnifying glass image next to the “Start” button) and enter the phrase “Control Panel” , after which we go directly to the “Control Panel” .
the “Category” display mode and go to “Uninstall a program” .
Step 3. In the list of installed programs, select the sorting method by date and find the application after which problems with DLL files began. This could be a computer game, an outdated version of a program, or any other application. To remove a program, just double-click on its name with the left mouse button and uninstall it.
How to search for a "lost" file in Windows 7
A lost file can be easily found using some programs and applications, especially if you have Windows 7. You can use the capabilities that the operating system provides
One of the applications that will help you quickly find lost files is Effective File Search. This is the simplest tool that many users resort to. First you have to activate it, and then start searching for files.
1. Enter the file name in the “Name” line. If there is no name or you don’t remember it, search by extension. To do this, enter an asterisk, a period, and then the extension itself, for example, doc.
2. In the “Folder” field, select a partition, or select “Local hard drives”. If you want to perform a narrower search, click on the ellipsis next to the field.
3. The “Browse for Folders” will open, from which select the desired folder and click OK.
4. Click Add to add a folder to the Folders field.
Part 3, Fix missing DLL files error
Method 1: Fix Missing DLL Files Using SFC Tool
SFC Scan is a built-in Windows feature that aims to scan system files and restore any damaged or deleted ones.
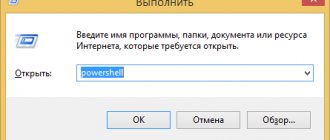
Step 1: Go to the Start menu and run Command Prompt as Administrator.
Step 2: Type “sfc /scannow” and press Enter to start the scanning process. After this, the system should automatically restore the missing DLL files.
Method 2: Fix missing DLL files using DISM
Another method is DISM, an image and maintenance management tool.
Step 1: Also launch CMD and run the command “DISM/Online/Cleanup-Image/RestoreHealth”.
Step 2: 10 minutes later, when you find that the process is completed, you can restart your computer. The DLL error should go away.
Method 3: Reinstall the programs
As mentioned earlier, DLL files are associated with programs. If the error appears when opening a specific program, such as Internet Explorer or a third-party application, update the program or reinstall it. The update and installation may contain a missing DLL file.
This solution will also help you recover lost files and other system files easily. Of course, you will lose the DLL files on the C drive.
Method 4: Download a specific DLL file online
If you have tried the above methods and the problem persists, you can download the specific DLL file online.
Step 1: Note down the name of the missing DLL file in the error message.
Step 2: Go to dll-files.com in your browser, enter the DLL name in the search bar and click "Find DLL File".
Step 3: On the download page, click the Download button next to the version you want and move the DLL file to the original path. If you are prompted to replace the original file, confirm it.
Method 5: Fix missing DLL files by resetting your Windows PC
Step 1: Open the Start menu, go to Settings > Update & Security and select Recovery from the left pane.
Step 2: Click the "Get Started" button under "Reset this PC" and select "Keep my files" to begin resetting Windows and fixing missing DLL files.
Method 6: Fix DLL Error by System Restore
Step 1: If the DLL error occurs, restart your computer and keep pressing F8 until the Windows logo appears. Then select "Safe Mode with Command Prompt" from the boot menu.
Step 2: Run the command below when the command prompt window appears: "%systemroot%\system32\restore\rstrui.exe".
Step 3: Then follow the on-screen instructions to repair your computer and the missing DLL files.
Solving problems with DDL files
DLL libraries are closely woven into various system processes, so if some of them are damaged, the operating system may simply stop starting. If this happens, you should resort to the built-in system recovery tools . To get into the recovery environment, you just need to insert a bootable USB flash drive or disk with Windows, or automatically get into the environment after three unsuccessful boot attempts .
To quickly restore system functionality, the user can select one of three recovery options presented on the left side of the recovery environment window.
If the problem lies in incorrect operation of the bootloader, we recommend that you familiarize yourself with ways to solve this problem in the article “How to restore the Windows 10 bootloader.”
Using Live CD for recovery
If you have a flash drive or Live CD, recovery can be done as follows:
- Insert a flash drive or Live CD into the computer.
- Reboot system unit, and constantly pressing F8, wait for the menu in which we select the drive we need to boot.
- After loading the OS, use Explorer to open the folder with the incorrect file C:\Windows\System32\config\ , the path may be different.
- Create a folder C:\Windows\System32\config\ about ld\ .
- Move the corrupted System to the newly created folder.
- Copy new from C:\Windows\repair\ to the folder C:\Windows\System32\config\.
- Reboot.
Fixing error 0x80070422 on Windows 7, 10