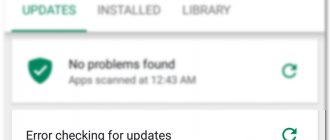
Google Play Services is standard software for the Android mobile OS. Thanks to it, the functioning of Google applications and services is possible, ranging from software updates in the official store to synchronization of services on the device. The occurrence of software failures affects the performance of the operating system or some components. One of the errors often encountered by users reports that services have stopped. You can fix the problem yourself, without resorting to the services of specialists, and there are several ways to fix the problem.
Method 1: Reboot your phone
The error where a pop-up notification “Google app has stopped” appears on the screen occurs on many Android devices, including Samsung smartphones.
This problem may be related to the incorrect operation of certain system components, the restoration of which can be performed in many ways. Read more: How to reboot Samsung on Android
First of all, you need to reboot your phone using one of the available methods, be it a combination of several buttons or a special section of system parameters. After a successful restart, the problem in question should go away.
Why do errors occur?
Everything breaks down someday. Applications are no exception: like any thing, they can fail at any time. Usually, when an application breaks, an error appears on the screen like: “The application has stopped.”
Errors appear for various reasons:
• The application is initially of poor quality; • The application has become corrupted after the update; • The application was not installed or updated correctly; • Application errors appeared; • The firmware is installed incorrectly.
Why does the program close?
The best ways to fix the err_cert_date_invalid error in your Google
Google Play Services closes all the time - this is a system error in Android, which is caused by a failure to send or receive data to the Google servers. When actively working online with your phone, your OS constantly sends the necessary data packets to the developer servers. In terms of sent data, the most important and active program is Google Play Services, which combines most of the processes and services built into Android.
The app keeps closing on Samsung
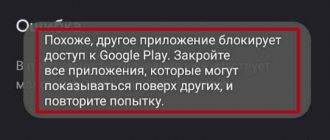
If there are failures as a result of sending packets, the application crashes, and the Samsung user may see the following warnings:
- “The GP services application has stopped”;
- “An error occurred in the GP services application”;
- “GP services are closing all the time.”
There can be many real reasons for this kind of bugs, but only a few points are the most likely. Next, we will try to indicate the main reasons for such dysfunction and clearly describe each solution. Let's make a reservation right away - the bug may be temporary and come from Google servers, so at first you should wait a few hours.
Why is this happening
No one knows the specific root causes that lead to this error. There are many options that can lead to a condition where Google Play services closes all the time on Samsung.
The only thing that is known for sure is that the bug is directly related to the operating system used. And as you know, modern smartphones from Samsung operate on the Android OS.
The consequences of such an error are wide-ranging
For example, the ability to download music or a mobile game or some important software disappears. Watching movies online is also becoming impossible
Not to mention the opportunity to enjoy some interactive Internet entertainment.
How to fix the error?
How to fix error code 907 in google play
The first and simplest thing we recommend doing is clearing the Contacts app cache and deleting temporary data. This is necessary in order to return contacts to their original state and eliminate a variety of errors that may arise due to the accumulation of a large volume of temporary files and data
Please note that the phone book entries themselves will not be affected!
- Open Settings and select the Applications category.
- Find the Contacts app and open its properties page.
- Click the Clear cache and Erase data buttons one by one.
- Restart your device and try saving the new contact again.
If the error is displayed again while saving the information, proceed to the next step.
Since contacts are saved in the device's memory as separate files, errors may occur during the process of saving files in the smartphone's memory. Some errors may be due to an incorrectly set date in the smartphone settings or a date format conflict.
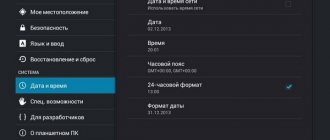
- Open your smartphone's Settings and select More.
- Find Date and Time.
- Depending on the default format, change it to an alternative - 12 hours or 24 hours.
- Restart your device and try saving the new contact again. As a rule, after these procedures, the Contacts application error will no longer bother you.
Probably the most common mistake among Android users is a crash in Google applications. Today we will tell you about one of them: “The Play Market application has stopped.” This notification constantly pops up when you try to download or update any application. You will learn what to do first when this error occurs and what options will be useful to you.
Numbered errors
If you see a Google Play Services error number on the screen of your device, this will help the user identify the problem that has arisen and quickly fix it.
Here is a list of the most common mistakes and give specific advice on what to do in this or that case:
№ 24
This problem can be caused by incorrect installation of the service service, when the user decided to first remove and then install the Market service again. The fact is that in this case, many traces remain in the system, not deleted folders, which prevent the installation from being done correctly, that is, they cause a conflict.
How to fix:
- First, from a third-party site, download to your phone or tablet any program with which you can easily get unlimited access to system settings, that is, root rights. Such a program could be, for example, Kingo Android ROOT.
- After gaining access to the system folders, find the path to the sdcard/android/data/ folder, in which the old Google Play files that have not been deleted remain. Click on them and calmly remove them from the system.
- After these steps, the new installation of the service should proceed without errors.
№ 101
Actually, this cannot be called a problem; the system simply tells you that there is not enough space in the memory of your device. Google Play is a system application, and it must be installed in the memory of the device itself, and if there is not enough space, then a message about this error pops up.
To ensure the system runs smoothly, do the following:
- Go to the system settings menu.
- Find "Application Manager" and open it.
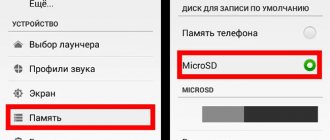
- Select the largest programs and components, and transfer them using the device to a memory card.
- Check the sufficiency of space from the main menu in the "Memory" section: the free space should be marked green.
Cache entries also take up a lot of space, and it would be good to get rid of them; we explained how to clean the device in the example above.
№ 403
This problem may appear due to the presence of several Google accounts at once, both on the device itself and in services. To solve the problem, go to the settings from your main account, delete the service, and then install it again. There shouldn't be any problems.
Problems may also arise due to connecting to a proxy server (used to open sites prohibited in Russia); when redirected to another country, it is impossible to receive updates, so the number of this particular problem pops up. To get rid of the problem, you must first stop Google Services and then clear all data.
№ 481
This problem occurs when the created account is incorrectly identified, and to get rid of it, you first need to delete the incorrect account, and then create it again on your device. After deleting, be sure to restart your device for the changes to take effect!
№ 491
This Google Play services error is due to the inability to delete and reinstall an application from a specific account.
For solutions:
- First, delete cache entries in Google Play, reboot.
- After the system starts, go to the settings menu, select “Accounts and synchronization”.
- Find your account and click "Delete".
- Restart the device again, set a new account value or restore the old one. The service should work.
№ 492
In this case, the Dalvik virtual machine, which uses Java-based software, crashed. And in this case, in principle, like the first action in all others, you need to clear all entries of the created cache in the Google Play and Play Market services from the main settings menu. Clean and restart one by one.
If these steps do not lead to success, then you can reset all device settings to factory settings from the main settings menu. If there is valuable information, then transfer it to a memory card or computer, and only then reset it.
Error code rh-01
This has been a fairly common problem lately. It can be solved in several ways. We wrote about this in the article “”.
How to update
How to fix a 403 error that denies access to the site
We will look at two main ways to update services:
- using the application store;
- without using Play Market.
In other words, through specialized software and directly. We will also talk about errors that occur due to Google Play Services not working properly and how to solve problems with them.
Via Play Market
This method does not cause difficulties, because all the indicated actions are done quite simply. Most likely, you already have Google Play installed - it can be found on your desktop or in the application menu. To start downloading applications and installing/updating services, you will need to log in with your Google account - you can create a new profile there or use an existing one.
When you use your smartphone for the first time, the system automatically takes you to the appropriate page to activate your profile or create a new one. If for some reason this did not happen and you do not know how to log in, follow the instructions:
- Go to the device settings and find the “Accounts” item.
- Select the "Add Account" option.
- From the list, select the desired service, in our case, “Google”.
- Your device will be checked, after which the last step remains - filling out the profile data.
After logging in, you will be able to use all the functions described above and update the service software.
Updates from the app store can be divided into two types:
- automatic, carried out by the system and the Play Market itself;
- custom made by you personally.
In the first case, if you checked the “auto-update” function in the Market settings, new versions of installed applications will be downloaded and installed by the system automatically. Typically, the update process occurs immediately when a fast Internet connection is connected - Wi-Fi, or until the user himself enters the store.
In order to enable the auto-update function, you need to go to the Play Market and follow the instructions step by step:
- Open the side tab of the Market main menu by swiping to the right and go to “Settings”.
- In the window that opens, the general settings will first appear, where the “Auto-update” item is located.
- You need to configure the option by changing the value to “Always” or “Only via Wi-Fi”.
The “Always” option should be treated with caution, because the next time you connect to the mobile Internet, Google Play will start downloading resource-intensive application updates. Such automatic downloading can lead to the exhaustion of available Internet megabytes, excess traffic and, thus, unnecessary expenses.
Now, having configured the auto-update function, the system will immediately begin updating existing software, including service applications and Google Play Services, immediately after connecting to Wi-Fi. If you don’t have the desire or time to install all the available updates, you can independently command the Market to download the new version of Google. To do this, you need to install it manually:
- Enter “Google Services” in the Market search.
- On the application page, click on the “Update” button.
If this feature is not available and you only see the “Delete” and “Open” options, then you already have the latest version of the service software. In this case, no update is required.
Installation from a third party source
This is an extreme case and should be addressed if for some reason your standard Play Market does not work properly or your smartphone is left without the Internet and you were unable to update via the previous method. You can always solve the problem by downloading a free APK file and installing it. You can also download via a computer, after which the file should be transferred to your phone via Bluetooth or via a USB cable.
Before installing without the Play Market, you need to pay attention to the source from which you are going to install/update services. Some sites may offer APK files with a virus, so to ensure safety it is better to check the installer for threats
After a successful check and a message that there are no pests, you can begin the installation process.
You will not be able to install the program if installation of applications from unverified sources is prohibited on your device. To continue you need:
- Go to the settings of your smartphone or tablet.
- Go to the “Applications” or “Security” tab.
- Check the box next to “Unknown sources”.
After this, you will be able to run the APK file without errors. Agree with all installation points and wait until the installation process comes to an end. Once completed, you will be able to see the Google Services icon in the application menu.
Checking for problems on the user side
All tips are arranged in order from simple to complex. The problem can be solved by both the very first and fourth points, or their joint implementation. Therefore, read the information carefully and follow the recommendations consistently.
Since the Google Play Market is capricious even over the most basic things, first check the time settings and the network itself to which the gadget is connected.
Method 1: Checking the Date and Time Settings
Open the home screen of your smartphone or tablet:
- Go to “Settings” – “System” – “Date and Time”.
- Disable automatic time and time zone settings so you can set them manually.
- Enter the date, time and GMT.
- Reboot your device.
Method 2: checking the Internet connection
Check the Google Play application on mobile data and Wi-Fi networks. When checking, it is advisable that:
- the smartphone received a strong, non-intermittent signal from a 3G, 4G mobile operator;
- the router was in the same room with the smartphone, thereby eliminating the possibility of interference, such as a concrete wall, metal partitions, etc.
To check Wi-Fi, do the following:
- Open the notification panel and long-press the Wi-Fi icon.
- In the window that opens, in the available networks, select your network and connect.
- Pay attention to the note for the network you are using - “Connected (good signal)”.
- Turn off the Wi-Fi+ smart internet feature, which switches between Wi-Fi and mobile data.
- Launch Google Play and check for the error.
The absence of an error indicates several reasons for its occurrence:
- a weak Wi-Fi signal could not load application data, which provoked an emergency shutdown.
- The application crashed with an error when trying to switch the smartphone to a mobile Internet point.
Do a similar operation for mobile networks:
- Turn off Wi-Fi in the notification panel and make sure that “Data transfer” is active there.
- Launch the Market and check its operation.
If the result is unsuccessful, turn the smart grid function back on and move on to the next step.
Method 2 Clear the program data cache
Each program, both system and third-party, becomes covered with useless junk files over time. This garbage sometimes causes failures and errors in their functioning. Google Play Services are no exception. Perhaps they were stopped precisely because of this reason. Hence, we are obliged to remove this reason. To do this:
- Go to “Settings”
Let's use the "Applications and notifications" command.
After that we need to look at all the applications;
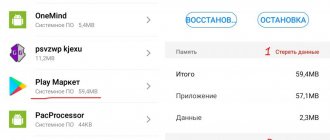
- Next, we need to find "Google Play Services"
tap on this command to get to the “Storage” section;
- Click on the “Clear cache” button
after that “Manage place”.
Tap “Delete all data”
and confirm the work we have done in the window that appears;
As before, now you need to restart your smartphone, then you need to start checking for errors. Apparently, they should not arise further.
conclusions
These and other types of errors are in most cases corrected by clearing cache entries. Well, a type like No. 911 is associated with an unsuccessful attempt to access the Internet via a Wi-Fi wireless network; here you just need to check all the settings and set new login values.
Have you ever encountered a situation where you were working with several settings on your phone to make certain changes, or just exploring the options for customizing your device, and suddenly you received a message that Google Play Services has stopped working " Google Play Services app has stopped"
“, after which they could no longer continue their manipulations?
Let's say right away: if you receive such an error message, then there is absolutely no reason to panic. You just need to try to correct the situation using one of the methods that we will offer today, and continue to calmly work with the smartphone settings. The Google Play services error that occurs is not related to your actions or your device, but to the loss of some transmitted data at one of the setup stages. It's not even a bug, but a technological glitch that caused some data to get lost or couldn't be tracked, and Google Play Services eventually lost that connection, causing it to stop working.
There are various reasons why the Google Play services error can happen and we will accordingly discuss different methods to solve this problem. As mentioned above, the reasons for stopping Google services cannot be stated with absolute certainty, since they lie in the peculiarities of data transfer technology. But the crash usually happens when you make some changes in the settings of the Android operating system. Try to take the steps we suggest sequentially - depending on what exactly went wrong, you can fix the error in one of these ways.
How to fix?
It is necessary to carry out a set of technical procedures, which in 90% of cases help solve the problem.
First try clearing the cache of the application that is throwing the error. This is done in the settings:
Check functionality.
Rolling back to its original state may also help (if it is a pre-installed application):
Check to see if the problem is resolved. If this is the case, I recommend not updating the application for a while until a new update is released.
For user-installed programs, try a normal reinstallation (that is, uninstall and install). Then check if everything is in order.
Important! If the error prevents you from interacting normally with the interface, go to and follow the specified procedures. If the problem is in the application, clear the cache and reset them to their original state.
If the problem is in the application, clear the cache and reset them to their original state.
Blog about modems, routers and gpon ont terminals.
Clearing cache
This is the very first and simplest scenario to start with. It works in almost half of the cases and allows you to avoid resetting the OS settings. Open Settings and select the “Programs” section.
Here you need to open the “All” tab:
In the list, find the program that crashes with the error “Application has stopped.”
In its properties, first click the “Stop” button, then click the “Clear cache” button and then click “Delete data”. Reboot the device and check the operation of the program.
Reinstalling the program.
If the previous step did not give a positive result, try reinstalling the application. To do this, open the Google Play Store and select the “My Applications” menu item. Here you need to find the desired program in the list and click the “Delete” button.
After that, restart Android and install it again. Let's check how the program works.
Reset your phone to factory settings.
You need to press it and then follow the system prompts. The result will be a pristine Android, on which you need to install the desired program and check its operation. This step usually resolves the problem completely.
Did it help? Recommend to your friends!
Solution #5 – Reset Google Account
Is the error still showing on your screen: "Sorry, Google Play Services has stopped"? There is another way that can help solve the problem.
- Once you open your phone's Settings, go to the Accounts section.
Tap on your Google account ID that you use to sign in to your Android device. Next, select the “Delete account” option.
Now return to the main menu and launch the Google Play application. When prompted to sign in or create an account, sign back in to your Google account.
Find out what to do if an error occurs in Google Play services.
The fourth reason why it does not work on the Android play market is the use of a VPN or proxy server
If you use VPN or proxy servers, this may be the cause of problems connecting to the Play Market.
Proxy server settings can be easily checked. When connecting via Wi-Fi, go to Settings => Wi-Fi, and then click on the network you are connected to. From the context menu, select “Change network”.
There will be options for Wi-Fi networks. Check the "Show advanced options" box and make sure that under "Proxy Server Settings" the position is set to "None".
The second option is VPN - it can be different here. The first option is to use a VPN app.
If you have it, try disabling it or removing it completely. The second way to connect to a VPN network is to add VPN network settings.
Go to Settings, then select More details... under Wireless & Networks.
Open "VPN" and make sure that the list does not have a VPN connection configured. If you have one, remove it.
Why delete services
One of the following reasons may prompt you to remove GApps:
- Invasion of privacy. Unfortunately, the company's employees do not see anything terrible in collecting all available information about the owner of the phone. To do this, various tools are used: from monitoring requests to reading personal Gmail messages. The company claims that this is necessary for proper advertising integrations. In fact, no one knows how closely the company’s employees are friends with the intelligence services or the government. In addition, due to such processes, traffic consumption increases significantly.
- Negative impact on smartphone performance. Avast Software conducted a study in which they determined that 60% of autorun applications belong to Google. Because of this, the user has to carry the battery with him, which is not very convenient.
- Space in RAM and ROM. The problem is irrelevant for flagship owners, but state employees face it all the time. For example, in old Meizu Google services take up quite a lot of RAM relative to the total volume. The appetite for services is growing, and the device is working slower.
How to remove Google services from Android
There are several methods to uninstalling a program. To destroy some programs, you will need to obtain superuser rights. Removal options are divided into the following types:
- standard means;
- through programs;
- file manager;
- removal via computer.
You can remove it using standard or built-in tools that are on your phone. To do this you need to do the following:
- in the settings, go to the “Device” tab, open “Applications”;
- Some Google applications can be deleted without superuser rights, these include games, music, movies, books;
- by selecting one of the utilities, you can see the inscription “Delete”, click on it and confirm the action;
- if you cannot simply remove the program from the directory, you will need to use root rights;
- after receiving them, you need to go to the program and delete it either from the list of all applications, or when entering the menu of the program itself.
You can obtain superuser rights in various ways, both using system commands and using an application. The Root Explorer program is most often used to fine-tune the system.
There are many programs for Android gadgets that allow you to quickly clean files and remove some software. Many of them require extended powers; you must respond affirmatively to this notice. To remove Google services using programs you need:
- download the desired application to the device, Titanium Backup is most often used;
- after installation, you should go to the utility and go to “Backups” with a list of all applications;
- select one of Google services;
- a window will appear in which you should click on the “Freeze” button to stop the software;
- then click “Delete”, the program will be uninstalled from the device.
The method is considered effective, since all options for removal are presented here at once. Using Titanium Backup, you can remove any of the company's services from applications.
You can also remove the Google service by downloading a file manager that already supports ROOT rights. ES Explorer has this functionality. After downloading it, you need to do the following:
- open the downloaded application, expand the menu and click on the “ROOT Explorer” item;
- grant superuser rights and check the box next to “Show hidden files”;
- reload the program;
- go into it again, select the “Local Storage” section, “Device” folder, go to “System”;
- open the “App” or “Priv-app” directory, the files to be deleted will be in one of them;
- select one of the folders that has the name of one of the Google services in English, for example, Google Play Games - com.google.android.play.games and so on;
- hold down the desired directory for a few seconds, a window with options will appear, select “Delete”;
- return to the root directory and click on “Data”;
- in this directory there will be a folder with the same name “Data”, from it you also need to remove the same element that was uninstalled earlier.
The last option involves using a personal computer. A smartphone is connected to it via a USB cable, and unnecessary software is removed. Before the operation, you need to prepare the equipment. To do this you need:
- Enable the “USB Debugging” function on your phone; it can be found in the “For Developers” item;
- ADB drivers should be loaded onto the PC to perform the process correctly;
- The Debloater program is also installed on the computer.
The order of the procedure is as follows:
- the program opens on a PC, the smartphone is connected via USB;
- “Synced” and “Device Connected” items will appear in the application;
- click the “Read Device Package” button;
- After a while, a list of programs on the phone that can be deleted will appear;
- select the required elements by checking the box next to them and press the “Apply” button;
- a window with the results will appear.
Root rights may be required. They can be given when connecting the gadget to the computer. On the device in a special ram you will need to press the “Allow” button, after which extended permissions will be given.
Ways to fix the bug
Enabling the “Download Manager”
First, check if you have an Internet connection. Open your browser and try to navigate to any page. If everything is fine and the sites open, move on to other ways to solve the problem.
Regularly rebooting the smartphone, in some cases, also helps fix the problem.
The next step is activation in the settings of the “Download Manager” system application:
1. Go to Android Settings.
2. Go to the "Applications" section.
3. Find the “Download Manager” line there and open it (if you can’t find the application, use the search in settings).
4. Make sure the application is running - the Stop button should be active. If the “Enable” option is available, select it and activate the application.
- Why applications are not downloaded from the Play Market and how to fix it
Clear local data and cache
Deleting the update files stored on your phone can help you fix the Google Play Services app has stopped error without affecting your personal data.
- Go to "Settings - Applications"
- In the list that opens, find the standard application “Google Play Services”
- Now open the menu item "Memory"
- Select “Memory management” and click “Delete all data” in the menu that opens
- Go back a step to the “Memory” section and press the bottom button, “Clear cache”
Google account reactivation
In some cases, reconnecting your Google account on Android may help. Please note that deleting your account means that all unsynced personal data (contacts, files, etc.) will also be deleted. Therefore, it is recommended to make a backup copy of all necessary information, and only after that proceed to troubleshooting the problem.
So, the process of reconnecting a Google user account is as follows:
- Open your device's Settings.
- Find the menu item “Accounts”, “Accounts and Backup”, or simply “Accounts” (the name depends on the version of Android).
- In the list that opens, select the Google account associated with your phone.
- Before deleting your account, you can synchronize the data that is saved on the device (menu item “Account synchronization”).
- When all the necessary information is synchronized, select “Delete account” in the same menu. record" and confirm the action.
- Return to the list of accounts and click “Add account” – Google.
- A Google account login form will open, enter your username and password.
- Accept the terms of the user agreement and follow further instructions.
Done, the account has been reactivated. Now you can check if the “google play store stopped working” error appears again. If this method does not help, continue further in the text.
Reinstalling Android updates
Another way to overcome a bug associated with Google Play is to update the current version of the Google Play application or return to the standard version and then update to the latest one.
- Open the general settings of the device, find the “Applications” section.
- Select the line "Google Play Store". Important: do not confuse the Market with the Google Play Services application - they have similar icons and names.
- Open the menu (three vertical dots in the upper right corner) and click on the only available option - “Uninstall updates”.
- Confirm the action and return to the home screen of your smartphone.
- Now launch the Play Store and agree to Google's user agreement.
- Open the menu (three horizontal bars in the upper left corner of the screen) and select Settings.
- Click on the line “Play Store Version”. The application update process will begin.
- Wait until the application is downloaded and updated.
Google Play Services app update
If none of the presented error resolution options work, you can try reinstalling the problematic application using the APKMirror file archive.
On the website apkmirror.com you can download a signed installation file for the Google Play application if for some reason your phone blocks downloading updates using standard methods:
- Go to the Google Play Services page on apkmirror.com.
- Open the page with the latest version of the application - usually this is the top item in the “All versions” list.
- Find your version of Android (you can check the version in Settings > Phone info > Software info > Android version) and download the version of Google Play that matches your phone's settings.
- If you find it difficult to choose, try different versions of the files until you find the right one. Or use the Droid Hardware Info app to find out all the information you need.
- Go to the page of the selected file and click “Download APK” (the button will become active within a few seconds after the transition).
- Run the downloaded file and follow the Android OS instructions.
Restoring factory settings (hard reset)
To resolve the error, you can reset your phone to factory settings. At the same time - attention! – you will lose all information stored in the memory of your mobile device.
Important ! Save everything you need in advance in cloud storage or on a memory card. Read how to do this here: https://softdroid.net/kak-sozdat-rezervnuyu-kopiyu-android-foto-i-video-v-oblake.
- Error DF DFERH 01 in Play Market when receiving data from the server - what to do?
Resetting to factory settings is performed as follows:
- Open “Settings” – “General settings”.
- Find "Backup and reset" (or "Reset"). If your phone is running Android 8 or higher, go to System > Reset.
- Next, select “Reset settings” and confirm your intentions. If your phone has a PIN or pattern, you will need to enter it to apply the changes.
You can find more information about the reset here:
Flashing the phone
A rather dangerous, but effective way to eliminate errors is to flash the device. This process is labor-intensive and requires careful preparation and understanding of everything that happens during the firmware. Therefore, it is recommended to use this option only if none of the previously proposed methods worked, and the “google play store has stopped” error interferes with the normal use of the phone.
For high-quality flashing, it is better to contact a trusted service center so that the issue can be dealt with by experienced specialists. Carrying out this operation on your own without a sufficient level of knowledge can lead to the fact that the phone will stop turning on altogether and will have to be sent in for repair. Also remember that flashing is not a warranty case and is performed at your own peril and risk.
Please rate the article:
Every day, many Android device users face a number of problems. Most often they are related to the performance of certain services, processes or applications. “Google app has stopped” is an error that can appear on every smartphone.
How to fix the "Google Play Services application has stopped" error
To fix the “Google Play Services application has stopped” error on Samsung, use one of the following methods:
- Change the auto-time settings.
- Clear the Google Play Services or Google Service Framework cache.
- Enable Download Manager.
- Install Google Services separately.
- Restart your Google account.
- Reset to factory settings.
Detailed instructions for each method are described below.
Method 1: Disable/enable auto-time detection
Google Play Services crashes due to desynchronization with central servers. Most often this happens precisely because of a failure to determine the time. The following steps will help fix this. Here's what to do:
Go to Settings and find Date and Time. If it is not there, then open the “System” item and find it there.
Now either turn on auto-time detection or, if it's already on, turn it off.
If you have turned off auto detection, set the date and time manually if necessary.
Now reboot your Samsung and try to trigger the message again. If it does not repeat, then you have fixed the problem. Otherwise, proceed to the next steps.
Method 2: Clear cache
Software failures can occur due to file “garbage” in memory. The program downloads data that is out of date and causes desynchronization. To erase unnecessary files, follow these steps:
Open the menu, then “Applications”.
Click on the "All applications" line.
Search for "Google Play Services".
Find the "Memory" button, click "Clear cache".
- Confirm the action.
- Restart your Samsung smartphone and check if the error occurs again.
These steps can be repeated for the Google Service Framework program, which may also be responsible for the error.
Method 3: Enable Download Manager
Updates may not be working, or the software may not be able to connect to the servers. Here's what to do to fix this error:
- Check that your Samsung smartphone has internet. To do this, you can open your browser and try to go to a site.
- Go to Settings and Applications as described in the previous options.
- Find "Download Manager".
If the Enable button is available, click it. If not, try turning it off and then on.
Restart the gadget and double-check whether the “Google Play Services application has stopped” message persists.
Method 4. Third-party installation of the application
Perhaps you have that rare error on Samsung “the Play Market services application has stopped” when the “native” Google Play software is damaged. Then you can download the apk file with the “Google Play Services Application” from a third-party source and install it on your gadget. Remember that you must trust the site from which you are downloading the file so as not to “catch” a virus or malware. Here are the steps to take in this case:
- Launch the browser on your Samsung smartphone.
- Enter the query “Google Play Services apk”.
- Go to a site you trust.
- Download the file.
- If necessary, go to Settings and allow installation of applications from third-party sources.
- Open the file. Start the installation.
- Restart your Samsung and check if the problem is gone.
Method 5. “Re-login” to your Google account
This option on how to fix the error “Google Play Services application has stopped” can erase all unsaved data on a Samsung phone
Therefore, before starting it, it is necessary to create a backup copy of important information. Another important point is to remember your account email and password.
Here's what to do:
Go to “Settings” – “Accounts”.
Find your Google account.
Delete your account.
Return to the previous menu and add a new account.
Select Google from the list and follow the instructions that appear on the screen.
After adding your account, reboot Samsung.
Method 6. Reset smartphone data
In this option, all your phone data will be deleted. The reset should be done when none of the previous options worked, and it is still unclear what to do when Samsung reports “the Google Play services application has stopped.” As in the previous case, back up your data and make sure you know the login and password of your Google account.
Open Menu – “General Settings”.
Select Reset.
Confirm the action by clicking the button at the bottom of the screen.
Once the reset is completed, Samsung will reboot.
Radical solutions
If fixing two applications does not bring results, move on to radical solutions.
Method 1: Deleting and re-entering the Google account on the device
All Google programs use a single account and interact with it. Removing it from the device and then logging in again can fix the error that occurred with the Play Market:
- Go to “Settings” – “Accounts” – “Google” – “Your Profile”.
- Select "Delete" and confirm your decision.
- Then, return to the Accounts menu and select Add Account.
- From the list, open Google.
- Follow the procedure for logging into your Google profile.
- Upon completion, check the operation of the programs.
Method 2: Check your disabled applications
The method may help those who have optimized their smartphone and disabled pre-installed unused applications. There is a possibility that among them there is software indirectly related to Google services. Enable apps and then check for Google Play error.
You can find disabled applications like this: “Settings” - “Applications and notifications” - “Applications” - sort “Disabled”.
Method 3: VPN manipulation
If you use a VPN connection installed on your smartphone to access the Internet, try checking the functionality of Google directly, without it. If you have not used a VPN on your smartphone, you can do the opposite - install the appropriate application. This should be done even if there are no problems with access restrictions in your location.
To install a VPN client to bypass a broken Play Market:
- Open your browser and go to the web version of the store.
- Use the search to find a relevant application, for example VPN-Master.
- Replace https://play.google.com in the browser line with https://apk-dl.com without changing the entire URL.
- Download the apk file and install the utility (disabling the option to block software from unknown sources).
Method 4: Cleaning the hosts.txt file (for rooted devices)
Users of smartphones and tablets with root rights can clean the hosts file, which is responsible for blocking resources and redirecting domains. Some installed programs may have made adjustments to the text file, which ultimately lead to errors in many Google services.
For the cleaning:
- Open a file manager that can work on a rooted device.
- Go to “system” – “etc” – “hosts”.
- Open the hosts file as a text file with any editor.
- Remove all lines in the file except the first 127.0.0.1 localhost.
- Click "Save".
- Restart the system.
- Check the market's operation.
Method 5: Reset your device to factory settings
A factory reset involves completely erasing user data and returning the device to its out-of-the-box state. The procedure is not complicated, but before you do it, create a backup copy of your data:
- Go to “Settings” – “System” – “Backup” and select the “Google backup” method.
- Copy the data to Google Drive.
- Additionally, you can use any other data backup methods.
To reset, do the following:
- In the settings, select “System” - “Reset”.
- Click "Restore Factory Settings".
- Agree to the deletion of all data.
- Wait for the procedure to complete.
Deleting does not affect data located on the SD card. Additionally, on devices with Android OS 7.0 and higher, you can save “music” and “photo” data by unchecking “Clear internal memory”.
Method 6: Recovery Tips
After resetting Android to factory settings, activate the device and connect your Google profile. If there is no problem with Google Play on a clean device, but it appears after the recovery procedure, then you can do the following:
- Reset the device again, and when restoring, select the recovery process not “automatically”, but “manually”.
- Restore everything you see fit, except application data.
- Temporarily, in the settings, cancel synchronization with applications.
- Check the functionality of Google Play.
If the error returns periodically, then use another Google profile as the main one or completely disable synchronization in the old one, and enter the necessary data manually.
Helpful 4
Adding an account
So, you cleared the cache, but the problem remains. The error “Google Play Services application has stopped” appears, what should I do next? Try deleting and adding your Google account again. The user profile performs a huge number of functions, so reinstalling it can have a positive effect on the work of the built-in Android applications.
- Open the “Accounts” section in the settings (on some firmware you just need to find the “Accounts” field).
- Find your Google account.
- Click on it to open the sync settings. Expand the additional menu and select “Delete account.”
Please note: deleting your account will result in the loss of data associated with it. Therefore, it is recommended to back them up
After deleting your profile, go to settings again and click “Add account.” Select Google, enter your email and password to activate your existing account. After re-authorization, check whether you managed to get rid of the error with stopping Google services.
Additional Information
In a situation where none of the suggested options helped fix the “Application has stopped” error on your Android device, pay attention to the following points that may be useful:
In general, they like to stop Samsung Galaxy, and everything in a row: either some application is stopped, then a process is stopped, or the system interface is stopped.
But we won’t talk about sad things, but rather, we’ll talk about what to do in the event of such sudden stops. So
“The application has stopped” - what does this mean?
Of course, when a user sees such a notification on the screen of his Samsung Galaxy, he at least guesses that one of the active programs is malfunctioning.
And that means that it would be necessary to restart it, because it is in this simple way that such problems, as a rule, are solved.
But what to do if the system writes that not just the application has stopped, but “Samsung Galaxy application has stopped,” and besides, after a normal restart, the ill-fated sign appears again, and again, and again...
"Samsung Galaxy app has stopped" message
But you can go the other way, and instead of resetting the settings completely, you can try deleting and reinstalling only the problematic application and/or clearing the cache. This often helps resolve these types of problems.
Now briefly about how to clear the cache of a problematic application in Android OS:
STEP 1 . Open the settings menu and find “Application Manager” (if you do not have a Galaxy, but another Android smartphone, then in “Settings” open “Applications“);
STEP 2 . Tap the “ALL” tab at the top of the screen and find the problematic application in the list (in our case, “Samsung Galaxy”);
STEP 3 . Next, in the “About the application” window, press the following buttons in order: first “STOP”, then “CLEAR CACHE” and lastly – “ERASE DATA”;
STEP 4 . We reboot the smartphone and remember the procedure in case the Galaxy stops something again.
Solution #4 – Update or remove Google Play updates
In many cases, the cause of the error is an outdated version of Google Play Services. So, check whether the update is available or not. If so, then update the services and see if that fixes the problem.
If there are no updates available, it means the service has already been updated. And it often happens that it is the updated Google Play service that causes the error. There is a possibility that the updated version has compatibility issues. So in such a case, you need to uninstall the latest app updates.
Just follow the instructions:
- Open the Settings menu.
Go to Apps & Notifications and open Google Play Services.
At the top right of the screen, click the Three Dots button and select Uninstall Updates. The system will ask you if you really want to carry out this operation. Confirm the action by clicking the “Ok” button.
The first reason why it doesn’t work on the Android Play Market is a problem with the cache.
In most cases, clearing the cache solves the problem. This is the place where temporary data is stored to speed up the opening of Google Play Market.
They can make mistakes there that cause the application to not work properly.
To delete the cache, go to the Android settings, and then go to the “Applications” section.
There you will see the application manager. After clicking on it, a tab with all programs will open - look for “Play Market” and click on it.
NOTE: I am describing and inserting pictures from Android 6, or rather Android 6.0 on a Samsung Galaxy smartphone. You may have a different version and a smartphone or tablet, so some inaccuracies may occur.
Now select “Memory” and at the very bottom click “clear cache”.
Then go back and click “Clear data” and then click “delete”.
Now check if the play market is working, if not, then in the same device manager, click on it. You will see “turn off” and “stop”, and at the very top right: “options”. Click on these options and click on the “Uninstall updates” line that pops up.
We check the functionality. If it doesn’t work, we carry out exactly the same operations with the Google Play Services application. To do this, after opening, click on the “Memory” option and click on the line: “clear cache”
If it works now, great; if it doesn’t work, move on. In the window where you went to memory, click another option: “Data Management”, and then click “Delete all data”.
NOTE: If you cannot find the required options yourself, then completely clear the entire cache of your phone.
Causes
If Google Play services are not working and the store keeps closing on Samsung or other devices, the cause may be system crashes, viruses, or other problems. Such difficulties are usually due to the complex operating principle of the store. Online, the smartphone constantly sends information to Google servers.
When failures occur in various processes and services, errors appear. As a result, Google closes all the time, and corresponding messages appear on the smartphone screen. Let's highlight the main ones:
- The Google Play services application has stopped.
- Google Play Services closes all the time.
- An error occurred in the Google Play services application, etc.
There can be many reasons for this situation, but let’s highlight the main ones:
- wrong date and time;
- lack of necessary permits;
- clearing cache;
- failures when logging into your account;
- problems in some program;
- viruses, etc.
Knowing why Google Play services close all the time, you can solve the problem and restore the functionality of the device.
Deleting a Google account
In some cases, when Google Play Market does not work, deleting your Google account helps, but be careful. This can lead to the loss of important information for you, so it is better to set up data synchronization in advance so that you have a backup copy from which you can restore it if necessary. Go to settings, and there select “Accounts”. In the window that appears, look for your Google profile, after which a synchronization window will appear on the screen. In it you need to select all the data you want to backup: “Contacts”, “Calendar” and many others. Now you can delete your Google account, for which we return to the previous menu, click “Delete” and confirm the action. We reboot the phone and log in to your account again, after which all synchronized data will be restored from the backup. If the Play Store application still does not work, then proceed to the next step.
Fixing the “Google app has stopped” error
In general, there are several ways by which you can improve the performance of the application and remove the pop-up screen with this error directly while using the program. All methods are standard procedures for optimizing device settings. Thus, those users who have already encountered various errors of this kind most likely already know the algorithm of actions.
Method 1: Reboot your device
The first thing you should do when application errors appear is to restart your device, since there is always a chance that some glitches and malfunctions could have occurred in the smartphone system, which most often leads to the application not working correctly.
Method 2: Clear cache
Clearing the application cache is a common thing when it comes to unstable operation of specific programs. Clearing the cache often helps fix system errors and can speed up the operation of the device as a whole. In order to clear the cache, you must:
- Open your phone’s “Settings” from the corresponding menu.
- Find the “Storage” section and go into it.
- Find the “Other applications” item and click on it.
- Find the Google Play Services application and click on it.
- Clear the application cache using the button of the same name.
Method 3: Update apps
For normal operation of Google services, you need to monitor the release of new versions of certain applications. Failure to update or remove key Google elements can result in an unstable user experience. To automatically update Google Play applications to the latest version, you must do the following:
- Open Google Play Market on your device.
- Find the “More” icon in the upper left corner of the store, click on it.
- Click on the “Settings” item in the pop-up menu.
- Find the item “Auto-update applications”, click on it.
- Choose how to update the application - only using Wi-Fi or with additional use of the mobile network.
Method 4: Reset settings
There is an option to reset application settings, which will likely help fix the error. This can be done if:
- Open your phone’s “Settings” from the corresponding menu.
- Find the “Applications and Notifications” section and go to it.
- Click on “Show all applications”.
- Click on the “More” menu in the upper right corner of the screen.
- Select "Reset application settings".
- Confirm the action using the “Reset” button.
Method 5: Deleting your account
One way to resolve the error is to delete your Google account and then add it to your device. To delete your account you must:
- Open your phone’s “Settings” from the corresponding menu.
- Find the “Google” section and go to it.
- Find the “Account Settings” item and click on it.
- Click on the “Delete Google Account” option, then enter the account password to confirm the deletion.
You can always re-add the deleted account later. This can be done through the device settings.
Read more: How to add a Google account
Method 6: Reset the device
A radical method that should be tried as a last resort. A complete reset of the smartphone to factory settings often helps when errors that cannot be resolved in other ways occur. To reset you need:
- Open your phone’s “Settings” from the corresponding menu.
- Find the “System” section and go into it.
- Click on the “Reset settings” item.
- Select the line “Delete all data”, after which the device will be reset to factory settings.
One of these methods will definitely help fix the unpleasant error that has appeared. We hope the article helped you.
Describe what didn't work for you. Our specialists will try to answer as quickly as possible.
Working on bugs in the Google Play Store
Every Android app can be fixed, and the Play Store (Market) is no exception. You can clear the cache, reset data, roll back the application to its original state, or completely remove it, and then install it by updating to the latest current version. These steps will help return the gadget to a working state.
Method 1: Clear Cache
In the Android operating system, the data caching function is used to load the graphical component of programs faster. For the Google Play Store, it saves copies of interface elements downloaded from the Internet, which speeds up the download process.
When the error “Google Play application has stopped” appears, there is a possibility that there is a conflict in the system when processing cache data. To avoid this, you can clear this data:
- Open "Settings" - "Applications and notifications" - "Applications" - "Google Play Store".
- Go to the "Memory" section.
- Below, click the “Clear Cache” button.
- Launch and check the error in the Play Market.
Method 2: data clearing
The next step if there is a problem is to clear the market data. In the same section where you cleared the cache, click “Reset Data”.
This function will reset all settings in the Play Market if they were performed (including security data for the device and personal settings). Other data (for example, “Payment methods”) will be automatically pulled from your Google account.
Method 3: Rollback to the pre-installed version
Reinstalling Google Play completely eliminates the problem if it is in this application. To reinstall manually, you must first remove it. Since many devices have pre-installed applications, the Play Market is one of them, and you cannot completely remove it without root rights. This is not critical, as it can be done simpler:
- Go to “Settings” – “Applications and notifications” – “Applications” – “Google Play Store”.
- Click Stop, then Disable.
- Confirm your decision.
- Reboot your device.
After the reboot, you should check the operation of the stock version. When connected to the Internet, the application will request an update to the latest version. If no errors are observed, feel free to update.
Method 4: Install the latest version
To install the latest version for the pre-installed Google Play, just update it in the application manager (where you deleted it). If you manage to completely remove it, then you have the following options:
- Open the application store of your smartphone manufacturer, install Play Market from it or download Google Installer (Google software installer).
- Download the Google Play installation apk file from trusted sites 4PDA or Trashbox.
- In Security and Privacy settings, enable the “Install unknown applications” feature.
- Launch the installation through the built-in file manager “My Files”.
- Open Google Play and check if it works.
- If necessary, update the software to the latest version in the settings of this application.
Solution #1 – Restart the device
Sometimes restarting your phone helps solve a particular problem. So why not try such a simple operation in this case too.
- Press and hold the Power button until the menu appears. Depending on the smartphone model and the Android shell used in it, the menu that appears may contain a “Restart”, “Shut Down”, “Screenshot” and others button.
- If you have a “Restart” button, then feel free to press it. The system will reboot, which will take about 30-60 seconds.
- If there is only a “Turn Off” button, then use it. Wait a few seconds. Then, with your device turned off, press and hold the Power button to start the system again.
After that, see if this fixes your problem or not.
What to do if nothing helps
If Google Chrome does not start despite all the measures taken, the last resort is to remove the old version of the browser and install a new one. It's easy to do:
- find the program shortcut on the desktop;
- click on it until an icon in the form of a cross or a basket appears;
- drag the program icon to the delete area;
- confirm this action.
The new version can be downloaded from Google Play Market. In order for all bookmarks, logins, passwords and other data to be available after logging in, they should be saved in advance using the synchronization option.
Solution #2 – Checking the date and time
The relevance of the date and time is a necessary condition for the correct operation of the entire Android system. The settings must be set to the correct settings. To be more precise, they should automatically pull up from the network.
Since most components and services of the operating system, including Google Play, are tied to servers and regularly access them, sending and receiving data, an incorrectly set date and your time zone can cause many errors.
- You need to find the “Date and time” item in “Settings”. Depending on the version and Android shell of your phone, this menu item may be located in the general “Settings” list or in a section called “System”. In our example (Xiaomi MI A2 smartphone), it is included in the “System” section.
Now check that the date, time and time zone are detected automatically. They must “pull up” through the network. Move the switches located opposite them to the active position.
Read why the time and date on your phone get lost.
Causes of the problem
The causes of the problem can be very different: from lack of memory to incorrect application settings. To identify the cause and start finding a solution, you first need to look at exactly how Google Chrome does not work on Android: it crashes, glitches, or does not start at all.
If the browser does not open
Sometimes Google Chrome on a smartphone cannot even be launched. This can happen for various reasons:
- A virus has entered the device and damaged the system files of the application.
- There is not enough RAM.
- Protected firewall settings are in place.
- The path of the shortcut when starting the application is incorrect.
- The antivirus program is blocking the browser from launching.
Google Chrome on Android
It is quite difficult to determine what exactly is happening, and each of these problems requires its own solution, they will have to be applied sequentially until the situation can be corrected.
If the browser crashes
It also happens differently: the application can be launched, but then it suddenly closes.
Many users faced this problem in 2022, and it affected not only Google Chrome - many applications crashed. As it turned out, the reason was not the browser itself, but an update to one of the system components, namely WebView, which led to failures.
If Google Chrome crashes on Android for this reason, you can deal with it as follows:
- Through the settings menu, go to the “Applications” section;
- click the icon in the form of three dots;
- in the menu that opens, enable the display of system applications;
- find among them using the Android System WebView search;
- select "Uninstall updates".
If it was not possible to remove the updates, the browser itself can be uninstalled and installed again - of course, this must be the current version.
If pages do not open
One of the most unpleasant situations that users of any browser, including Google, encounter is the inability to open a particular page. Sometimes the reason is problems on a particular site, but if you can’t access any site, then you need to deal with the browser.
The most obvious reason is the lack of Internet connection, this can very well happen if you are far enough from a populated area. But such a nuisance is also possible in the city - for example, in densely built areas or in a basement.
It’s easy to check this, just run any other application that needs the Internet, but if they work properly, it means that the problem is not in the connection, but in the browser.
If the browser is buggy
There are different types of problems with the application, for example, the browser may be too slow. The reason may not be the application itself, but the network speed. This can be checked like this:
- open Google Chrome;
- go to the Speedtest website for online testing;
- click the “Start” button;
- wait for the results.
At a speed of less than 1.2 Mbit/s, problems arise with watching videos, and below 0.5 Mbit/s, even with viewing images.
You can optimize your browser's performance in conditions of reduced speed in different ways: disable everything that uses the Internet in the background, for example, torrents, close all tabs that are not particularly necessary at the moment.
Speedtest on Android
Solution #3. Reinstall Google Play Services
We have already tried clearing the cache in the first method, so now you can try reinstalling the services. Google Play Services is the base app on an Android device that is required for everything else to work. Therefore, it will not be possible to completely remove it. But you can reinstall all Google Play Services updates and thus get the latest version. To do this, you just need to deactivate the Device Administrator. After deactivating the administrator, you can remove the updates and install them again.
To deactivate the Device Administrator, go to “Security” in the settings, tap the “Device Administrators” section and check the box. The Administrator Shutdown screen appears.
The administrator has been deactivated.
Now go to Application Manager, select Google Play Services. You will see the “Uninstall updates” button appear.
- Remove them.
- To install the updates again, try using any application. Now they won't earn money right away. First, you will be prompted to install service updates. Install them.
- After reinstalling the updates, activate the Device Administrator again
- Reboot your device
The error should now go away
Method 2: Reset app settings
To reset the application settings, you need to use the Application Manager to go to the Google Play services settings in the same way as in the previous method, and then click on the “All” tab. Now find the “More” sign in the upper right corner of the screen and click on it. Next, a menu will appear that will offer among the options “ Reset application settings
”. Click on this line. To ensure the changes you make take effect, simply restart your phone and the “Google Play Services app has stopped” message should disappear forever.
Reset your Samsung phone to factory settings
Each smartphone has a special menu from which you can perform different actions: clear memory, reset settings, test device modules. Your Samsung certainly has such a menu as well. We need it to reset the settings and return the smartphone system to its original state in which it was in the store.
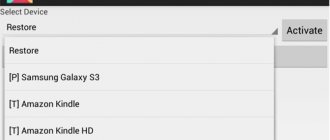
Use the special Smart Switch application. This is a utility that allows you to transfer files to a computer or any other device. Which after the reset you can “take” back.
Let's look at an example of a reset on the Samsung A30 model if Google services are closed:
- Turn off your phone. You can also start the reset process while your device is turned on in some newer Samsung models. To do this, press the Power button and volume down;
- You must hold these buttons until the screen goes dark and goes black. After this, you need to release the buttons and immediately change the volume down button to increase. And hold down simultaneously with Power;
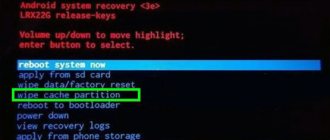
- Next, you need to release Power, but continue to hold the volume control key “+”. After this, your smartphone will show the Recovery menu;
- To navigate through its items, press the volume keys “+” and “–”. We need to select Wipe data/Factory Reset. To select this line, click on the Power button;
- Confirm your reset selection.
Below on the screen you will see the process of cleaning files and other system processes. No further action will be required from you. The next time you turn it on, you will need to log in to Google again.
Resetting Android OS settings
If the Play Market still does not work via Wi-Fi and displays an error, then you need to reset all Android settings. This is a radical measure, but in most cases it helps to completely solve the problem.
How to reset settings to factory settings on Android?
- We go to the settings, where we are interested in the “Restore and reset” section;
- Click “Reset settings” and confirm the action. Before doing this, it is better to make sure that data synchronization is enabled, otherwise you will lose all applications, photos and contacts from the smartphone’s memory;
- After rebooting the phone, we restore all the data and check if the Play Market is working.
What is Google Play Services for Instant Apps
Google Play Services for Instant Apps is a category of applications with instant launch and access. To put it in more understandable and simple terms, these are special trial versions of software (Trials), which you can try completely free in the Play Market and do not install them in the usual form.
Google services are regularly updated, new features appear
How does it work
Google Play Services for Instant Apps allows you to greatly simplify the process of downloading or purchasing any game or program through the official Google Play Market. It makes it possible to refuse a full download and save space on the SD card or internal storage.
For your information! This does not mean that the application is launched on Google Play. The smartphone downloads a small trial data file and activates it without any notifications or installations.
What does Instant access look like?
How to connect instant apps
If the function of applications with quick launch is enabled on your phone or tablet, then in the Play Market store in the program window next to the “Install” button a “Try” button will appear. You can check the option on any application that is not installed in the device memory.
Note! It's easy to connect Google Play Services for Instant Apps. Just go to the smartphone configuration, select the “Google Accounts” section and the “Services” subsection.
It will have an "Instant Apps" option. It is enough to switch the toggle switch to the “Active” state.
How to use
As has already become clear, the service allows you to try out a program or game, evaluate its design and functionality, and only then buy it or download a full installation package. Instant Apps has been implemented and is being actively updated from Android 6.0. In new devices, everything happens without any user participation.
Using the service is quite simple. If the application supports the quick launch function, then the inscription “Instant” will appear next to it on the page in the official store. By clicking on it, the program will open with limited functionality literally in an instant.
For your information! As planned by the authors, the technology should also be supported by web browsers on some resources and in stores. It will download and open a small file about the product with a “Buy” button. That is, a person will not have to download data that he does not need.
Not all programs have a quick launch feature
The third reason why it does not work on the Android play market is the wrong date and time
This may seem minor, but setting the correct date and time may be required to log in to Google's servers.
If you have the wrong date or time set, Google servers will have problems synchronizing your settings. As a result, you will not be able to log into the Google Play Store.
To set the correct date and time, go to “Settings => Date and Time” and it is best to select automatic setting.
If, until now, everything was set to automatic, try switching to manual and entering the exact time and date.