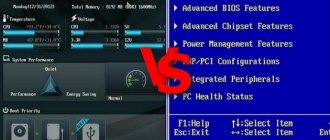
Some newer computers that ship with UEFI still call it "BIOS" to avoid confusion for users accustomed to traditional PC BIOSes. But even if you see it mentioned, know that your new computer will most likely be equipped with UEFI, not BIOS.
UEFI INTERFACE
Attempts to replace the BIOS system, which has existed since the days of disk OS, with the most advanced one have been made since 1988, but only in 2007 did Intel, AMD, Microsoft and PC computing device suppliers settle on the latest model of the UEFI I/O subsystem.
This event marked a significant milestone and the Unified Extensible Firmware Interface (UEFI) became an industry standard and was supported by operating systems including Windows Vista, Server 2008 and Windows 7. However, the use of the later model is not limited to the x86 framework (IBM PC).
The main purpose of UEFI is to replace the BIOS, which has exhausted all its resources and the vast majority of the limitations inherent in it. The built-in extended code topology, called “driverism,” has views of a standard that is not associated with a particular platform.
The function of initializing equipment with transferring control to the operating system remains the same, but it is based on completely different algorithms. However, the UEFI interface has the properties of a miniature operating system. It represents a kind of virtual platform and acts as a coordinating link between the main OS of a PC or laptop and the microcode of its components.
UEFI operation algorithm
Unlike the BIOS, the UEFI parameter storage is not ROM, but non-volatile shared random access memory (NVRAM). It usually includes static SRAM memory with its own battery, but can be used in conjunction with, for example, flash memory.
Defined UEFI system configurations are stored in a special file with an efi extension in NVRAM or in the system storage partition (ESP). The same section contains the boot loader software for the installed OS. Data is stored in the form of variables with attributes “parameter name” = “value”, which include many characteristics. They are available not only to development engineers, but also to computer owners.
If the BIOS task was to find the master boot record (MBR) on the primary storage medium and transfer control to the operating system, then the sequence of actions of the last subsystem is different. This model relies on a custom UEFI Boot Manager with full functionality as a standard module. It differs in its structure and is stored in a storage element of the NVRAM type.
The Boot Manager module has an extensive set of instructions, but among their many, UEFI images stand out: initial OS boot loaders, drivers and applications. To install an operating system, any image saved on various types of physical media is suitable.
The global array of the BootOrder module contains boot descriptor variables of the form Boot####. Each element is assigned a specific physical boot component or even a file in the form of a UEFI image located on it.
Each boot device is characterized by a full path containing the name of the boot file added to the menu.
The complete algorithm for the functioning of the interface ultimately includes 4 phases with stricter rules for each. The first three processes (SEC, PEI, DXE) prepare conditions directly for the OS bootloader. The last phase (BSD) is responsible for the operation of the operating system loader itself.
Benefits of UEFI
The introduction of UEFI instead of BIOS facilitates quick startup of the OS and protects the safety of primary information from the influence of unauthorized code even at the stage of initialization of the operating system. A completely acceptable UEFI graphical interface, multilingual capabilities and the use of a mouse during setup make boot management more efficient.
The modular architecture of the model makes it easy to use its applications and allows you to load your own drivers via the UEFI shell. The ability to easily control a computer or laptop without loading the main operating system is another step forward.
The main advantages of UEFI contrast with the disadvantages of BIOS, among which the following should be highlighted:
- 1. Initially, the interface is oriented towards a 32-bit or 64-bit version, which fits perfectly with the 64-bit GPT technology of modern storage media. This removes the strict limitation on the number and size of their partitions. The subsystem can create up to 128 partitions, the total volume of which reaches 9 zettabytes, that is, the number 9 with 21 zero bytes, which is 3 times more data circulating on the modern Internet.
- 2. If a 64-bit version of UEFI is used, it must be consistent with the OS bit depth. Backward compatibility in the vast majority of interface versions on PCs is emulated by the Legasy BIOS mode for drives with MBR. Therefore, loading a 32-bit OS is also allowed, since a special CSM mode is provided in accordance with the principle that “it is advantageous to have a gig on the railway.”
- 3. The UEFI interface ensures safe OS startup thanks to Secure Boot technology, because the entire boot process is under its control. It allows you to rely only on authenticated services and drivers when loading the OS, which protects the device from the penetration of malware.
- 4. This system supports the ability to boot the OS from images located on network data sources, and the main protocols UDP, DHCP and TFTP, as well as IPv4 and IPv6. UEFI boot loader software is not associated with boot sectors and automatically detects their file system (FAT32, FAT16 or FAT12). It is also important to support information input means such as a virtual keyboard and touch screens of mobile devices.
- 5. An accessible shell (EFI shell) allows you to perform a number of operations without installing the main OS. Platform-independent native UEFI drivers allow access to the device hardware, and the OS is able to use these same drivers instead of its own.
- 6. Platform independence of the interface, parallel initialization of equipment, the use of I/O blocks up to 1 MB (in BIOS 64 KB), as well as code written from scratch significantly reduce OS boot time.
- 7. Updating UEFI firmware and expanding its functionality has become more convenient and possible, for example, from a USB drive. This creates the ability to connect from external equipment, connect additional drivers and applications, and also install the driver of new hardware before the OS starts loading.
How UEFI replaces and improves BIOS
UEFI replaces the traditional BIOS on PCs. There is no way to change the BIOS to UEFI on an existing PC. You need to buy hardware that supports UEFI. Most versions of UEFI support BIOS emulation so you can install and run a legacy OS that expects a BIOS instead of UEFI - so they are backwards compatible.
The new standard bypasses BIOS limitations. UEFI firmware can boot from drives larger than 2.2 TB - the theoretical limit for them is 9.4 zettabytes. This is approximately three times the amount of data contained on the Internet today. UEFI supports such volumes due to the use of GPT partitioning instead of MBR. It also has a standardized boot process and runs EFI executable programs instead of code located in the MBR.
UEFI can operate in 32-bit or 64-bit modes and its address space is larger than that of the BIOS - which means faster booting. This also means that UEFI setup screens can be made more beautiful than those of the BIOS, including graphics and mouse support. But this is optional. Many computers to this day run UEFI with text mode, which look and work just like the old BIOS screens.
There are many other features built into UEFI. It supports Secure Boot, in which you can verify that the OS boot has not been modified by any malicious program. It can support network operation, which allows for remote configuration and debugging. With a traditional BIOS, you had to sit directly in front of the computer to set up your computer.
And this is not just a BIOS replacement. UEFI is a small operating system that runs on top of the PC's firmware, so it can do much more than BIOS. It can be stored in flash memory on the motherboard or loaded from a hard drive or network.
Different computers have different interfaces and UEFI properties. It all depends on the computer manufacturer, but the basic capabilities are the same for everyone.
How to Access UEFI Settings on a Modern PC
If you are a regular user, you will not notice the transition to a computer with UEFI.
The computer will boot and shut down faster, and you will also have access to disks larger than 2.2 TB. But the procedure for accessing the settings will be slightly different. To access the UEFI settings screen, you may need to use the Windows boot menu. PC manufacturers didn't want to slow down a fast booting computer by waiting for a key to be pressed. But we also came across UEFIs in which manufacturers left the ability to enter the settings in the same way as in the BIOS - by pressing a key during boot.
UEFI is a big update, but it happened quietly. Most PC users won't notice it and don't have to worry about their new computer using UEFI instead of the regular BIOS. PCs will simply perform better and support more modern hardware and features.
For a more detailed explanation of the differences in the UEFI boot process, see this article by Adam Williamson from Red Hat, and the official UEFI FAQ.
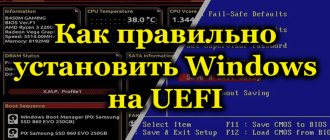
Now let's configure uefi for installation from a flash drive.
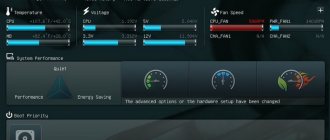
- The uefi firmware menu is no different from bios: press “F2” or “delete” while the reboot process is in progress.
- In the firmware window, press the “F7” key to get to the “Advanced” section.
- In this section, look for the “Download” item, select the USB support sub-item. In it we set the Full Initialization mode.
- In the “Secure Boot” sub-item we set the parameter we need - Windows uefi mode.
- Find the tab called CSM, there you need to use the arrows to turn off the CSM launch option. Go to additional options at the “Boot device settings” item, find and confirm the choice of mode - “only uefi”. Then in “boot the system from storage devices” you need to select both, uefi first.
- Changing the download priority. Find the boot priority item in the bios settings. Swap the flash drive with the hard drive using the arrows. Save, the computer will reboot.
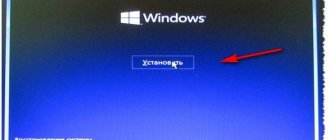
- Now the standard installation of Windows 7 will begin in the usual window.
In order to increase the number of available fonts in Microsoft Office or other programs that use them, you need to learn how to install them. With the help of new fonts, you will be able to surprise the person to whom you send the document with a new one.
As you know, everything new is an improvement on the old, so many are in a hurry to try Windows 10. This article describes how to install Windows.
The parental control function is the organization of restrictions or prohibitions on the use of certain computer programs, the Internet or games by children. There are many special applications for this, but provide a protection function.
All the best to everyone!
One of the most common questions from users when installing Windows is: “why doesn’t the computer (BIOS) see my flash drive?” Naturally, I answered it several times, and more than once presented my recommendations on the blog. Now I decided to put them all together in this one article.
I’ll say right away that in order for the computer (laptop) to “see” your bootable USB flash drive (you can find out how to create it correctly here) - you need to configure the BIOS (UEFI) accordingly. If you don’t do this, then no matter how much you fight, nothing will come of it.
In this article I will show, using the example of several BIOS (UEFI) versions, how to do this correctly. I think this note will be very useful for those who do not reinstall the system very often.
Basics
Note: for those who are already more or less familiar with BIOS controls, this section of the article can be skipped.
Control keys, changing settings
In the BIOS you will have to manage and set settings without using the mouse (this scares many novice users. By the way, UEFI supports the Russian language and mouse).
In fact, even on Windows (where the mouse works) - many actions are much faster to do using the keyboard!
Where to download the BIOS update
The final chapter of this article will be information on where to download the update! No matter how trivial it may be, the files we need are on the website of your motherboard manufacturer! If you don’t know what kind of motherboard it is, open the cover of the system blog and look at the name written on it
Fig.8 How to find out the name of the motherboard
In our example, this is the manufacturer Asus, for you it could be Gigabyte, MSI, etc.
Next, go to the manufacturer’s website and use the search to find your motherboard and in the list of drivers look for items with Bios and download it to a USB flash drive
Fig 9. download BIOS

