A network drive is a logical drive (folder) created for sharing files among PC users. The disk can be located on a PC, server or network storage device, used on the same local network.
How to connect a network drive
A network drive is often created by businesses and educational institutions that store documents on servers, providing more space for storing and backing up files. However, as the amount of data grows, the disk becomes relevant on the home network.
Connecting a shared folder as a network drive
To connect a network folder, you must transfer all PCs connected to it to a common workgroup.
Step 1. Press the Win+R key combination. Type sysdm.cpl into the menu and click OK.
Press the Win+R keys together, type sysdm.cpl in the line and click “OK”
Step 2: Click the Computer Name tab and click Change.
Select the “Computer name” tab and click “Change”
Step 3. Type the name in “Is a member” of the “working group” in English letters. You can choose any “Computer name” or leave it the same. Click "OK".
Click "OK"
Step 4. Restart your PC for the changes to take effect.
Step 5. Complete Steps 1-4 on all computers on the shared network, specifying the same workgroup name for them.
Reference! You can connect several computers to a common workgroup, for example, through a router with a DHCP server enabled.
Standard connection diagram
NET SHARE
The NET SHARE command allows other network users to use server resources. When the command is used without parameters, information about all shared resources on the computer is displayed. For each resource, the device name or path and the corresponding comment are displayed.
The syntax for this command is:
NET SHARE
NET SHARE
shared_resource
NET SHARE
share=drive:path [/GRANT:user, [/REMARK:"text"] [/CACHE:Manual | Documents| Programs | BranchCache | None]
NET SHARE
shared_resource [/USERS:number | /UNLIMITED] [/REMARK:»text»] [/CACHE:Manual | Documents | Programs | BranchCache | None]
NET SHARE
{share_resource | device_name | drive:path} /DELETE
NET SHARE
share\\computername/DELETE
resource_name
Specifies the network name of the share. Enter NET SHARE with the resource name to display information about that resource only.
drive:path
Specifies the absolute path to the shared folder.
/GRANT:user
— permission for the specified user. Creates a share with a security descriptor that grants the requested permissions to the specified user. This setting can be used multiple times to grant permissions to multiple users.
/USERS:number
Sets the maximum number of users who can simultaneously use a shared resource.
/UNLIMITED
Removes the limit on the number of users who can simultaneously use a shared resource.
/REMARK:»text»
Adds a brief note describing the resource. The text must be enclosed in quotation marks.
device_name
Specifies one or more printers (LPT1: through LPT9:) provided as part of a share.
/DELETE
Stops sharing the resource.
/CACHE:Manual
Enables manual caching of documents and programs on a shared resource.
/CACHE:Documents
Enables automatic caching of documents on the shared resource.
/CACHE:Programs
Enables automatic caching of documents and programs on a shared resource.
/CACHE:BranchCache
Manually cache documents with BranchCache enabled on this share.
/CACHE:None
Disables caching on the share.
Examples of use:
net share
— display a list of shared resources on this computer.
Example of information displayed:
Share name Resource Notes ——————————————————————————- C$ C:\ Standard share IPC$ Remote IPC print$ C:\WINDOWS\system32\spool\drivers Printer drivers X$ X:\ Standard share ADMIN$ C:\WINDOWS Remote Admin
net share Admin$
— display information about the shared resource
Admin$
net share Temp=%temp% /remark:"Temp folder on Computer"
— create a shared resource
Temp
, which will use the directory of temporary files specified by the value of the environment variable
TEMP
net share TMP=%TEMP% /GRANT:user1,Full
— create a shared resource named TMP and grant full access rights to it for the user
user1
net share TMP=%TEMP% /GRANT:user1,Read
- the same as in the previous case, but with the provision of the “Read Only” right
net share TMP$=%TEMP% /GRANT:user,Read
- the same as in the previous example, but the name of the shared resource ends with a
$
. In operating systems of the Windows family, if the $ sign is used at the end of the name of a shared resource, then such a resource is hidden and is not displayed in Explorer when viewing the network environment. This rule applies not only to automatically created resources for system administration (C$, D$, ADMIN$, etc.), but also to any user shared resource. If, for example, a folder under the name “movies” is selected for network access, then it will be visible in the network environment, but if it is under the name “movies$”, then it will not.
net share TMP$=%TEMP% /GRANT:user,Read /users:1
— The
/users:1
means that no more than one user can connect to this resource at the same time.
net share TMP /delete
- delete a shared resource named
TMP
Setting up folder access
Before making a connection, you need to create a folder on the selected device located on the public network, naming it in English letters.
Step 1. Click on the created network folder and select “Properties”.
Select “Properties”
Step 2. Click on the “Sharing” shortcut and click “Sharing”.
Click “Sharing”
Step 3. Select “All” from the drop-down list and click “Add”.
Select “All” and click “Add”
Step 4. Select the “Everyone” access level for the user in the “Permission Level” drop-down list. Click "Share" at the bottom of the window.
Click "Share"
Step 5. Click “Done”.
Click “Finish”
The folder will be shared.
NET USER
The NET USER command is used to create and change user accounts on computers. When you run the command without parameters, a list of user accounts for this computer is displayed. User account information is stored in the user account database.
The syntax for this command is:
NET USER [username [password |
*] [options]] [/DOMAIN] username {password | *} /ADD [options] [/DOMAIN] username [/DELETE] [/DOMAIN] username [/TIMES:{time | ALL}] username [/ACTIVE: {YES | NO}] Command line options:
Username
The name of the user account to add, delete, change, or view. The user account name must not exceed 20 characters.
password
Assigns or changes a password for a user account. The password length must not be less than the minimum length specified by the /MINPWLEN parameter of the NET ACCOUNTS command. The password length must not exceed 14 characters.
*
Displays a password prompt. The password is not displayed when entered.
/DOMAIN
Perform an operation on the current domain controller.
/ADD
Adding a user account to the user account database.
/DELETE
Remove a user account from the user account database.
Extra options:
Parameters Description ———————————————————————
/ACTIVE:{YES |
NO} Activate or deactivate an account.
If the account is inactive, the user will not be able to access the server. Default value: YES (account is active). /COMMENT:"text"
Add a description of the user account.
The text must be enclosed in quotation marks. /COUNTRYCODE:nnn
Uses the operating system country code to include the appropriate language files when displaying user help and error messages.
A value of "0" is the default country/region code. /EXPIRES:{date |
NEVER} Account expiration date.
The NEVER value corresponds to an unlimited account validity period. The expiration date should be entered in mm/dd/yy(yy) format. The month is indicated by a number or name (full or abbreviated to three letters). The year is indicated by two or four digits. Use forward slashes (/) to separate date elements. /FULLNAME:"name"
The user's full name (not the username in the account).
The name must be enclosed in quotation marks. /HOMEDIR:path
Path to the user's home directory.
This path must exist. /PASSWORDCHG:{YES |
NO} Determines whether the user can change the password.
Default value: YES. /PASSWORDREQ:{YES |
NO} Determines whether a user account needs a password.
Default value: YES. /LOGONPASSWORDCHG:{YES|NO}
Specifies whether to change the password the next time you log in.
Default value: NO. /PROFILEPATH[:path]
Path to the user's login profile.
/SCRIPTPATH:path
Path to the user login script.
/TIMES:{time |
ALL} Login hours.
The TIMES parameter value should be specified in the format day[-day][,day[-day]],time[-time][,time [-time]], with the time increment being 1 hour. The names of the days can be indicated in full or abbreviated. The clock is set in 12- or 24-hour format. For the 12-hour clock, the notation is am, pm, am, or pm. A value of ALL indicates no restrictions on login times, and an empty value indicates no login restrictions at all. Days of the week and time values are separated by a comma. Multiple entries of day of week and time values are separated by a semicolon. /USERCOMMENT:"text"
Adding or changing the user's comment to the account by the administrator.
/WORKSTATIONS:{computer_name[,…] |
*} Ability to specify up to 8 computers from which the user can log into the network. If /WORKSTATIONS is not listed or is set to *, the user can log on to the network from any computer.
Examples of using:
net user
— display a list of users on this computer.
net user user1
— display information about user
user1
.
Example: User name user1 Full name user Comment User comment Country code 000 (Standard system Account active Yes Account expired Never Last password set 07/09/2015 10:32:11 Password expires Never Password can be changed 07/09/2015 10:32: 11 Password required Yes User can change password No Allowed workstations All Login scenario User configuration Main directory Last login 05/04/2016 13:56:13 Allowed login hours All Local group membership *Users Global group membership *None
net user vasya /add
— add a new user to the system
vasya
net user vasya *
— set a password for the user
vasya
. The password will be requested when the command is executed.
net user vasya passwd
— set the
passwd
for the user
vasya
net user VASYA passwd /USERCOMMENT:"Test user" /add
— add a new user with a comment.
net user vasya /del
— remove user
vasya
Disable network credential entry
When connecting online, it is often necessary to disable the prompt for network credentials in Windows 7, 8 and 10 (this setting is not required on XP). To disable the request, you need to change the PC access settings.
Step 1. Click on the network icon in notifications (bottom right of the screen) and select “Control Center...”.
Select “Network and Sharing Center”
Step 2 : Click “Change sharing...”.
Click “Change advanced sharing settings”
Step 3. Check in all profiles (by opening the drop-down list) whether the network discovery and public access points are set.
Enable all profiles
Step 4. Scroll your mouse wheel down the list of permissions and select “Disable password protection.” Click “Save Changes.”
Click “Save changes”
Reference! To connect to a network share, you may also need to disable and then re-enable the Windows Firewall.
NET TIME
The NET TIME command synchronizes a computer's clock with the clock of another computer or domain, or displays the time of a computer or domain. When used without parameters in a Windows Server domain, the command displays the current date and time set on the computer designated as the time server for that domain.
The syntax for this command is:
NET TIME [\\computername | /DOMAIN[:domain_name] | /RTSDOMAIN[:domain_name]] [/SET]
\\computer_name
Specifies the name of the computer that you want to check or with which you want to synchronize your clock.
/DOMAIN[:domain_name]
Specifies time synchronization with the PDC of the specified domain.
/RTSDOMAIN[:domain_name]
Specifies time synchronization with a trusted time server from the specified domain.
/SET
Synchronizes the computer's time with the time of the specified computer or domain.
The /QUERYSNTP and /SETSNTP options are deprecated and are deprecated. Currently, the w32tm.exe
.
Examples of using:
net time\\win10
— display the time on a computer named
win10
net time \\win10 /SET
— set the time for the local computer to match the time on the remote computer
Win10
When executing this command, confirmation of the time change will be required:
The current time on \\win10 is 05/23/2016 15:59:06 Current local clock 05/23/2016 15:59:46 Set the local computer's time to match the time on \\win10?
(Y-yes/N-no) [Y]: When using this command in bat files, it is advisable to suppress the request and perform clock synchronization without human intervention:
net time \\win10 /SET /YES
— set the local time according to the
Win10
using the
Yes
to the request.
To ensure that the clock on your local computer always displays the actual current time, it is most convenient to synchronize the clock with a time server on the Internet, after making some simple preliminary settings - How to correctly set up the date and time setting via the Internet
Connecting Yandex.Disk as a network folder
When Yandex.Disk is installed on a PC, it organizes a folder on it for storing copies of files transferred to the server. This is quite inconvenient if the backed up files are too large and take up a lot of space on the PC.
At the same time, Yandex.Disk supports WebDAV, allowing you to connect the service as a regular network folder without saving files on your PC.
Step 1. Select a network drive connection ( see above ) and click on the “Connect to a site...” link.
Selecting a network drive connection
Step 2: Click Next twice.
Click “Next”
Step 3. Enter the address: https://webdav.yandex.ru and click “Next”.
Enter the specified address and click “Next”
Step 4. Select a name for the connection and click “Next”.
Select a name for the connection and click “Next”
Step 5. Enter a name and password to connect to the service.
Enter your name and password to connect to the service
Important! The item indicated by the arrow in the photo must be marked only if one account is used for the service!
Step 6. Oh, click "Done".
Oh, click “Done”
The Yandex.Disk folder will open.
A location will appear in the “Computer” folder that can already be used.
New folder in “Network location”
Step 7. Next, click “Map network drive” and enter the address: https://webdav.yandex.ru , clicking “Finish”.
After entering the address, click “Done”
Yandex.Disk will be connected as a network folder.
Yandex.Disk is connected as a network folder
NET STATISTICS
The syntax for this command is:
NET STATISTICS
The NET STATISTICS command displays the statistics log for the local workstation service or server service. When the NET STATISTICS command is used without parameters, it displays a list of services for which statistics can be collected.
SERVER
Displays statistics for the server service.
WORKSTATION
Displays statistics for the workstation service.
Example of statistics displayed:
Workstation statistics for \\WINSRV1 Statistics after 05/23/2016 12:09:05 Byte 38455 received SMB server message blocks received 1 Byte 4156 transmitted SMB server message blocks 0 Read operations 0 Write operations 0 Read denied 0 Refused in record 0 Network errors 0 Connections made 0 Reconnections 0 Disconnections from server 0 Running sessions 0 Hanging sessions 0 Session failures 0 Operation failures 0 Usage counter 3 Usage failure counter 0
How to connect your computer to Wi-Fi
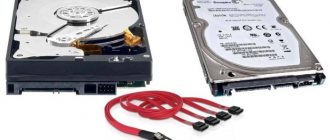
To connect your computer to a Wi-Fi access point, you will need to purchase a Wi-Fi adapter, or connect an existing adapter to the network.
Adapter for connecting a computer to a Wi-Fi access point
Step 1. To turn on Wi-Fi on your PC, click on the network in the notifications (bottom right) and select “Network Center...”.
Select “Network and Sharing Center...”
- Click "Change adapter settings."
Select “Change adapter settings” - Click on “Wireless Network” and select “Enable”.
In “Wireless Network” and select “Enable”
Step 2. After turning on the adapter, click on the network and select “Connect” to the desired Wi-Fi network.
Select “Connect” to the desired Wi-Fi network
Step 3. Enter the access point password and click OK.
Enter the access point password and click “OK”
A wireless Wi-Fi connection will be established.
Checking connection with a remote computer using ping
So, you have found out the address of the desired computer, but this does not guarantee that it is accessible. Standard Windows tools allow you to check communication with any remote resource by IP address. Before the connection procedure, we definitely recommend checking the accessibility of the remote computer using the ping utility. This is done very simply:
- open a command line (the process was described in the instructions above);
- enter the word ping, followed by the IP address of the remote computer you want to access, and press Enter once;
- if all packets were successful, with 0% losses, you can safely establish access to the network drive of the remote PC.
One or more packets may be lost. The cause may be physical damage to communications, software problems, or a failure in the local network. If all packets fail, check whether you are entering the correct IP address. Make sure both devices are on the same local network.
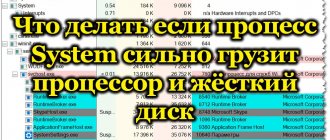
If the disk is 100% loaded in Windows 10
In Windows 10, sometimes there is an error that causes the hard drive to be 100% loaded. At the same time, PC performance decreases until it freezes completely. If your computer running Windows 10 starts to slow down a lot, you need to look at what is causing this situation.
Step 1. Press Ctrl+Shift+Esc. The "Task Manager" will launch. Click on the “Processes” tab and view the status of the CPU, memory, disk and network.
CPU, memory, disk and network status in Task Manager
If the disk is 90-100% loaded, you need to take actions to reduce the load on it. Most often, high HDD load is associated with the system “looping” on file indexing, carried out to speed up access to them.
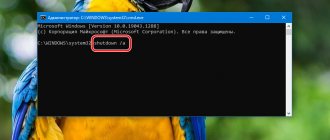
Step 2. Click on the magnifying glass icon next to the “Start” button and type cmd in the line. Click on the found “Command Prompt” utility and select “Run as administrator”.
Run cmd as administrator
Step 3. Type the command in the window that appears: NET STOP “Windows Search” by pressing Enter.
Type the command in the window that appears
Step 4. Follow Step 1 of this section and see if the load on the HDD has decreased. If the load has not decreased, disable the indexing service completely.
Note! Next Step 1 after each completed item in order to see in time when the load on the HDD has decreased.
Step 5. Press Win+R, type services.msc in the window that opens and press Enter.
Press Win+R, type services.msc in the window that opens and press Enter
Step 6: Click on the Windows Search service and select Properties.
Select “Properties”
Step 7: Click Stop, then select Disabled. Click “Apply” and “OK”.
Perform the necessary actions, click “Apply” and “OK”
Step 8. Complete Step 2 of this sub-item and in the window that opens, type the following commands to disable the Windows diagnostic service, pressing Enter after each command.
- sc config “DiagTrack” start= disabled
- sc stop “DiagTrack”
We write the commands and press Enter
Step 9. Without closing the previous window, type the following command, which disables the SuperFetch service, which improves the launch of frequently used applications, by pressing Enter. In practice, the SuperFetch service is often the cause of high load on the HDD: net.exe stop superfetch
We write a command that disables the SuperFetch service
Step 10. Without closing the previous window, type the following command to disable the Windows Automatic Update service by pressing Enter: net stop wuauserv.
Also enter the following command by pressing Enter: sc config wuauserv start= disabled.
Enter the following command
Step 11. Without closing the previous window, type the command that disables the page file if the main disk in the system is an SSD solid-state drive by pressing Enter. The page file on the SSD drive sometimes loads the HDD at 100%: wmic pagefileset where name=”C:\pagefile.sys” delete (where: name=”C:\pagefile.sys” – file location)
Without closing the previous window, type the command that disables the paging file
Step 12. Without closing the previous window, type the following command to check and correct errors on the HDD by pressing Enter. To complete the HDD check, the computer will need to reboot: chkdsk /F /R
Without closing the previous window, type the following command to check and correct errors on the HDD
Step 13: After Windows restarts, follow Step 1 of this section and see if the load on your hard drive has decreased.
Disabling these services in most cases allows you to get rid of high HDD load.
Total Commander
This method involves using a third-party file manager instead of the standard Explorer. After downloading and installing Total Commander, follow these steps:
- Launch the application.
- Left-click on the “Network” tab.
- Specify the name of the disk, as well as its location.
- Click on the "Done" button.
Thus, adding a drive using Total Commander is completely no different from the method that required accessing the “This PC” program. You just use a different application, but the algorithm itself remains unchanged. In addition, the added disk will be available in both Total Commander and Explorer.