09/07/2021 for beginners | mobile devices
Among the frequent questions of Android smartphone owners is why photos are not saved in the Gallery and what to do in this case: it happens that there are no photos taken with the camera in the Gallery, sometimes photos from instant messengers such as WhatsApp, Viber and Telegram or other applications are not saved.
This instruction details why photos may not be shown or saved in the Gallery on pure Android, Samsung Galaxy or other smartphones and how to fix the problem depending on the specific situation.
- Simple ways to solve the problem
- If photos from the Camera are not saved in the Gallery
- Saving photos of WhatsApp, other instant messengers and applications in the Gallery
- Video instruction
In camera settings
Of course, you can do it in the old and proven way, namely, not change any settings, but simply at some point transfer all the files to external media (in our case, to a memory card). Yes, this method does exist, but it takes quite a lot of time, especially if the device’s memory is slow or initially small. However, we are for automation and offer instant transfer methods.
For the first method, you only need a pre-installed application for working with the camera, which is on every gadget (which has the camera itself, of course). Algorithm of actions:
- Open the Camera app.
- Go to the settings section. For example, in MIUI, to do this, you need to click on the three horizontal lines in the upper right corner, and then click on the gear icon.
- Find the Save Folder option. And open it.
- Select a suitable folder on the SD card.
- Save your changes.
Sometimes, instead of all these manipulations, in the settings there is only a “Save to SD card” switch that just needs to be turned on. Now all photos will be redirected to the Camera folder at the SD/DCIM address. This is usually the only way when working with a standard camera. If you are using a third-party application, go to its settings and select the path to save the files. Additionally, the program will request access to external storage (not always).
Why doesn't the camera save photos on the phone?
If the camera is not saving your pictures to your phone, there could be several reasons for this. The most common of them:
• Viral infection of your smartphone
• Using an outdated version of the operating system,
• Damage to the application,
• Problems with the memory card
• Too many apps that limit your phone's performance.
Smartphone settings
This method leads to the same result as the previous one. However, it will help if for some reason you couldn't find the settings inside the Camera app. Sometimes this button is not there initially. To implement, follow the steps below:
- Open your device settings. To do this, lower the notification shade (control center) and click on the gear icon.
- Go to the "Applications" section.
- Select the "System Applications" section.
- Find the "Camera" subsection. Open it. It is the application settings that open, not the device settings.
- All that remains is to change the path to the new folder on the SD card.
The algorithm of actions is slightly different, but the result is the same. In some models, you have to search a little for the desired section, since developers sometimes add other sections, for example, “Memory” or “Resources”. In general, it is impossible to describe all models, experiment. By the way, add a plus sign to your karma and indicate your setup method in the comments. This way you can help other site visitors. And we move on.
How to solve the problem: “An error occurred in the gallery”
Android mobile phones often experience a gallery error that prevents photos and videos from opening. System crashes begin to occur when the user loads his phone with various programs and games. Often no one pays attention to the system requirements of certain applications. Because of what the OS is overloaded. This is the critical point.
To get rid of the error and save photos in the gallery:
- You need to open your phone settings; Open settings on your phone
- Scroll down the settings window and find the “About phone” item; Select the line “About phone”
- On the item “Build number” you need to tap several times quickly so that the inscription appears: “You have become a developer”; Switching to developer mode
- Then you need to go back one step and find the line “For Developers”; Select "For Developers"
- In the next window at the top, enable developer settings; Enable the item at the top “For Developers”
- Find the item “Enable 4x SMAA” and uncheck the box if it is there; Uncheck "Enable 4x MSAA"
- Now you need to return to the main settings screen and select “Applications”; Find "Applications"
- Find the “All” tab and go to it; Select the All tab
- Among all applications, find “Gallery” and click on the “Stop” button and at the bottom “Clear cache”. Clear cache and delete app data
Also clear the app data to make it work properly again. Now check if the photos are saved in your phone's gallery now.
Restoring camera settings to default
There are rare cases when the default camera program prefers to save photos to an SD drive. In the absence of the latter, the device resigns itself and loads media files into the internal memory. In this case, the easiest way to return to external media is to reset the settings. To do this, follow these steps:
- Open the camera.
- Go to settings (we have already described two ways to do this above).
- Scroll to the very bottom of Settings.
- Click on the “Reset settings” command.
- Restart the camera app.
In practice, I have not come across this approach yet, but some forums offer just such a solution if suddenly the developers forgot to add a button for selecting where to save files. Please note that all settings will be reset, including the flash, mode settings and the presence of watermarks (text over the photo).
Xiaomi Redmi 7A specifications
Performance
I had concerns about the possible low performance of the budget Snapdragon 439 processor on the Xiaomi Redmi 7A in tandem with only two gigabytes of RAM. But applications, including games, run smoothly and smoothly. The processor power is more than enough for everyday use. However, two gigabytes of RAM is still not enough - the device periodically pauses when switching between applications. I think the version with 3 GB of RAM will not cause any problems at all.
By the way, during use, the device never got so hot that you could clearly feel it with your hands - the new 12 nm technological process makes this clear. Only once, during a long call (about 45 minutes), did the display at the top become noticeably warm.
Photo/video
The Samsung Galaxy Note 3 used a back-illuminated sensor (BSI), thanks to which shots at dusk are better than those of budget smartphones.
Xiaomi Redmi 7A also uses a matrix from Sony, but a more modern one: IMX486, made using Exmor RS technology. Unlike traditional back-illuminated CMOS sensors, Sony's new sensor devotes almost the entire area exposed to light to light-sensitive elements, with the auxiliary circuitry located on a separate layer.
At night it is better to use AI, which makes pictures contrasting and clear.
The camera is more than decent; it can be used for various tasks, including artistic ones. In good lighting it shows excellent results: uniform sharpness, good detail, correct white balance, clearly set exposure.
Under average lighting conditions it shoots well, but when there is not enough light, it takes too long a shutter speed, which can cause blurring. But there is a Pro mode - this shortcoming can be compensated for.
In the dark, it takes pictures rather poorly, as expected - strong digital “noise”, which is smeared by noise reduction - but at the same time it is not at all “horror-horror”.
Video, there is a peculiarity here - if you do not explicitly set the focus point with your finger on the screen, then the focus can “float” and go completely out of focus.
Discussion of the Xiaomi Redmi 7A camera on the 4pda forum.
Battery
With normal use, without fanaticism in games, the smartphone lasts for 2 full days. Even if you “stick” to your smartphone throughout the day, it is guaranteed to last the whole day, and will still remain. A good battery was one of the reasons for choosing this particular model.
If you have a Samsung phone (with Android 9 and above)
In principle, the interface of Samsung phones is not much different from alternative models, but this model does have a number of small features. Firstly, in addition to the internal storage and external cards, Samsung's service allows you to immediately send newly taken photos to the cloud. To take advantage of this opportunity, follow the steps below:
- Open the Camera app.
- Click on the white gear icon in the bottom panel.
- The settings menu will open. Find the "Storage Location" item.
- In the section that opens, select “Internal memory”, “Memory card” or cloud services. This choice depends on your current tasks and goals.
- Confirm the changes.
However, this is a feature not only of Samsung phones. We have given this model only as an example, so as not to limit ourselves to abstract descriptions of application and memory card configuration algorithms. By the way, for phones that fit the description from this subheading, the following method will not work. Manufacturers cut it out on purpose because it can damage the file system device.
How to transfer apps to SD card on Xiaomi
The problem is that not all Xiaomi smartphones can transfer applications to a memory card, so a lot has to be stored in the system memory.
On Xiaomi, almost all models do not have a standard transfer function. That is, if you go to the settings and select one of the programs in the “Applications” item, then in most cases the “Transfer to SD” button will be inactive. Therefore, you have to use additional software.
- The most banal way: open the program Clean master, select “Application Manager”. Check the boxes for the applications to be transferred and click the “Move” button.
- By using Activity launcher. In this case, the SD partition disappears from the storage (it becomes the system partition). Now the SD card has become an internal drive and everything will be installed into it by default.
In the settings, in the “Storage” menu, the memory volume may show incorrect information. There is no way to solve this problem yet; it is a visual defect, since MIUI at the system level does not support combining internal and external drives.
Another article to help.
Problems with the memory card
First of all, you need to make sure that the memory card is working and ready to accept files. What to do:
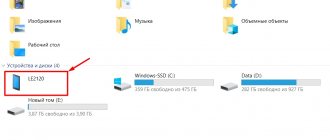
- Make sure there is free space on your external drive. Open the “Storage” section in your phone settings or connect your device to your computer.
- If there is free space, but you cannot write anything to it, check the file system of the memory card.
The Android flash drive needs to be formatted in FAT32. You can do this on your computer/laptop, or directly on your phone. Increase - Make sure the drive's hardware is in good working order. If another memory card with similar parameters and file system works without errors, then the reason should be sought in the media itself.
The memory card may be incompatible with the smartphone – for example, it may exceed the capacity allowed for a specific phone model. If the flash drive is larger than a certain size of gigabytes (32, 64, 128, etc.), then it simply does not recognize it, because not programmed for such volume. In this case, the only way out is to use another microSD storage device with a smaller capacity.
also: Android does not recognize the microSD memory card (flash drive)
If no card is detected, it makes sense to contact the service center. There may be hardware problems with the phone that prevent it from working with external drives.
Using Clean Master to transfer data to a memory card
As noted above, this method is analogous to the previous option of transferring to an SD card
. We invite you to immediately begin reviewing the instructions:
- Download the app. It is distributed absolutely free on the Play Store;
- Launch it;
- Tap on the “App Manager” icon;
by checking the box next to it. You can also select several at once;
Wait for the operation to complete.