Why are photos not saved on Android in the “Gallery” and memory card? This question interests many users of phones and other devices. The advantage of modern smartphones and tablets is the quality of photographs. They replace the camera and camera. The pictures will be bright, high-quality, and can be quickly shared with others. When using, there may be problems when saving pictures to a memory card. We’ll look at how to solve them in the article.
Why are photos not saved in the “Gallery” on Android?
Problems can happen on any smartphone. If the pictures are not displayed in the Gallery application, you must follow the instructions:
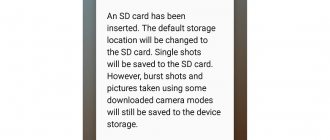
- go to the camera personalization item and select the “Save to flash card” function, but it is not present on all devices;
- next step: find, select and click the “Erase data” option;
- clear the cache and restart the device.
- It happens that during operation the drive may display files incorrectly.
Therefore, you need to periodically dump information onto a computer or other storage device.
System failure
If there are system failures, restart the equipment. Several errors may have accumulated during use. This is done by holding down the power button and selecting the “Reboot” function. Take a photo and see if it will be on your smartphone or not.
Cache full
It often happens that images end up somewhere in the drive, but are not displayed. This is because the cache is full of information. Therefore it needs to be cleaned. If, even after deletion, the pictures are not displayed in the “Gallery”, you need to download an additional program to view the files.
Why is it hard to hear the interlocutor on a Huawei and Honor smartphone: reasons, what to do?
Insufficient memory on internal storage or MicroSD/SD card
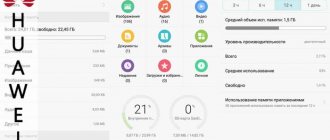
One of the main reasons is not enough space. That is why review the information in the device, and then release it. To do this, you must follow the instructions:
- In the settings, find the “Memory” section, and also check the flash drive.
- If there is no free space, transfer music, videos, books and more to your computer or to the cloud.
- You can also remove unnecessary programs, thereby freeing up space.
If the phone does not display the flash drive, first remove it and then insert it again. This will update the connection between the phone and the flash drive. iPhone does not support installation of additional SD storage devices.
Access permission problem
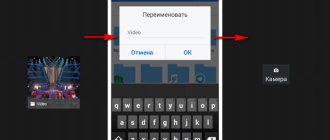
Also, the reason for not saving photos may be lack of access to the album where the photos are stored. To troubleshoot, you need to change the name and reboot the device. A new folder is created automatically. To check, take a photo and see if it can stay in the catalog. If all is well, then place the information in a new location.
Camera malfunctions
The reason why the pictures do not remain in the gadget may also be hidden in the camera itself. Go to its settings, press the “Reset data” button. Then restart your smartphone, take a photo and check if they are there.
But if this does not help, then there are big failures in the system. Contact the service center for assistance.
What is the cloud and how to use it
The cloud is a special platform where you can upload various files and documents. All information is stored on the company’s servers, and to access it you just need to connect to the Internet . In most cases, using the service in the initial stages is free. That is, you are allocated a certain amount of space that you can occupy with different files.
The main advantage of cloud services is the ability to access downloaded information from anywhere in the world. You don’t need to carry a flash drive with you all the time, because you just need to connect to the Internet and log into your own account. All data in the cloud is safe, as it cannot disappear without user intervention. The same cannot be said about a phone, information from which can be deleted as a result of a system error.
Using the cloud service is easy. The first step is to create an account on one of the platforms, most often by providing an email address and creating a password . Subsequently, you will need to install a mobile application on your smartphone, since it is much more convenient to perform all actions through it. But also no one forbids you to use the online version of the service, that is, the website.
Where are photos saved on Android that are not included in the “Gallery”?
The presence of images can only be checked if they appear on the phone. For this:
- connect the gadget to your computer via USB;
- go to the “Galleries” section, where pictures are mostly saved. When they are not there, it means that the system simply did not save the pictures;
- restart the device, then free up space, first of all the Directory cache;
- create an additional folder and reset the camera settings.
How to scan a QR code on Huawei and Honor: where is it located, how to enable it?
If no action produces results, you need to reflash the gadget.
How to save a photo from an avatar or from an interlocutor’s status
What to do if you need to save the profile photo of your interlocutor from WhatsApp? To do this, you can view your avatar in full screen and take a screenshot.
Instructions on how to expand a friend’s avatar and save it:
- Tap on the avatar of your interlocutor in the chat menu or in the phone book.
- Click the button to view the contact details.
- Tap your avatar at the top of the window and it will expand to full screen.
- Take a screenshot of the screen, tap on the thumbnail that appears on the phone display.
- Edit the screenshot by removing unnecessary edges.
- Save your changes.
Note. How to take a screenshot on your phone? This depends on the device model and the installed operating system. Typically you need to hold down the Home , swipe down with three fingers, or press Power + Volume Down at the same time.
In the same way, you can save a photo in WhatsApp from the status of your interlocutor. Just expand the status to full screen, take a screenshot of the screen and trim off the excess edges.
Photos are not saved to the memory card
Often images are not saved to additional storage because it is not displayed on the device.
In this case, do the following:
- Remove the external drive, restart the device, and reinsert it.
- Monitor the flash drive for errors, format it.
- Unlock the device.
- If no card format is visible, then there is a problem in the internal system of the device. So you need to contact the service src=”https://mobi-insider.com/wp-content/uploads/2019/11/ne-sohranjajutsja-foto-na-telefone.jpg” class=”aligncenter” width=”520″ height=”516″[/img]
- Not all gadgets support cards. After all, today the micro standard is mainly used.
This way you increase the storage of your device.
If you have any questions or complaints, please let us know
Ask a Question
Popular cloud storages
Cloud storage has become a popular platform for storing many files and documents. That is why today there are several hundred, if not thousands, of such services. We suggest you familiarize yourself with the most popular of them below.
Google Drive
The Google Drive service was discussed a little above. It is on this platform that all documents and other types of files are saved. For the convenience of working on a smartphone, you do not need to use the web version of the storage. All you need to do is launch the Google Drive application, which is installed by default on phones with the Android operating system.
Initially, all users of the service are provided with 15 GB of free space, but this can be expanded by purchasing a paid package. Among the advantages of this cloud storage is the ability to scan documents through the camera . Of course, the option does not always work perfectly, but its presence will not be superfluous.
You can work with documents directly in the application, without having to download them to your device. To upload files to the cloud, use the following instructions:
- Click on the “ + ” icon located on the main screen of the program.
- Select the format of the downloaded file by clicking on the “ Download ” button. If you wish, you can create a thematic folder where documents of the same type will be uploaded.
- Select one or more files and wait for the download to complete.
You can monitor the download process in your phone's notification panel.
Google Cloud works with well-known document extensions, and even allows you to download APK files of applications.
Yandex.Disk
Yandex Disk is an equally well-known service from a Russian company. To work with it, you need to register a Yandex email in advance. By default, each user is provided with 10 GB of free space, but this can always be increased by participating in promotions and offers on the platform . We also cannot fail to mention the unlimited photo uploading. That is, images downloaded from the phone will not be counted towards the total amount of occupied space.
An interesting feature of the service is the ability to edit photos. The uploaded photo can be rotated, cropped, or sharpened. There are also special effects, including an automatic option to improve the beauty of the eyes. Background downloading works reliably, but when saving large files, minor interface freezes may occur. So, to upload a photo to the cloud, follow these steps:
- Go to the “ Feed ” tab and click on the plus icon.
- To upload a photo from your phone, select “ Picture from gallery ”, and to add files – “ Files from device ”.
- We mark the required document and wait for it to be added to the cloud.
The cloud storage has background loading, so the program can be minimized.
To protect personal data from unauthorized users, we recommend setting a password to enter the application. The following instructions will help you do everything correctly:
- Click on the profile icon located in the left corner of the screen.
- Select “ Settings ”.
- Near the line “ Set PIN ” move the slider to the right. We come up with a strong login password, and if necessary, activate fingerprint authorization.
By the way, how to set a password for applications is described in detail in one of our articles.
Cloud Mail.ru
Mail.ru cloud is another high-quality cloud storage from Russian developers. Initially, the user is provided with 8 GB of free space, which can be expanded in the future by purchasing additional packages. To access the service, you must log in to your Mail.ru account, that is, enter the data from your email account .
The application interface is clear and simple. The side menu contains interesting sections, including a menu with download statistics for a certain period of time. If desired, you can set up shared access, that is, one file can be viewed by several people at the same time. There is also a built-in recycle bin where files deleted from the cloud will be moved, although only for 14 days.
To download files, follow these steps:
- Go to the “ Files ” tab and click on the “ + ” button.
- Select the desired file format.
- Select a specific object and click on the “ Add ” button.
In principle, the functionality of the application is standard. There is background loading, it is possible to set up automatic backup, activate a photo search for a specific person, and so on. If necessary, you can set a password to enter the program:
- Open the side menu and click on the gear icon.
- Go to the “ Protection and Security ” section.
- Check the box “ PIN code protection ”.
- We create a good password, and if desired, set up fingerprint unlocking.
Overall, the Mail.ru cloud is high quality and easy to use.
Mega
Mega is a very interesting cloud storage that provides as much as 65 GB of free space. All files are stored in encrypted form, which ensures a high level of security . You can transfer photos to this cloud very quickly using automatic backup or manual copying. The service has its own mobile application that works on almost all Android phones.
To add a photo or other file to the cloud, follow these steps:
- Click on the plus icon located on the main screen of the program.
- Select the location from which the files will be downloaded.
- Select the required file and wait for the procedure to complete.
You can monitor the file downloading in the notification panel of your smartphone.
The application interface is clear, so you won’t have to spend a lot of time understanding it. And the main advantage is the ability to add files to work with them offline.
What to do if photos are not saved on your phone
Often the pictures do not remain on the device. This can happen on a new smartphone you know nothing about, or on one you've had for many years. If the photos are not saved in the “Gallery”, you must adhere to the following steps.
- Go to the settings and set the “Save to flash card” mode. This feature is not present in all gadgets.
- On your phone, find the “Erase data” function in the camera.
Then format and reboot the gadget. Do not forget to periodically transmit information on other media.
How to make photos automatically upload to Google Photos
By default, files are not automatically saved to the remote service. To change this, you need to adjust your Google Photos settings.
- Launch the application and select the profile icon.
- Select line Settings Google Photos.
- Click on the first item - Autoload and synchronization.
- And in the first parameter we enable this function.
- Pay attention to the last point - Folders on the device. By selecting it, you can specify from which folders photos can be automatically uploaded to Google Photos.
These settings can also be enabled the first time you log into the application. Enable the synchronization function for other folders to add videos and downloaded pictures from the Internet to the cloud service.
Rules for saving photos
Often the problem cannot be solved on its own. Then this is an error in the system, and you need to contact the center to debug the installed programs. Step-by-step instructions for saving.
- Open settings, find “Files”.
- Open photo folder.
- Transfer information to an additional folder.
- Delete folder.
- Restart your phone.
- The folder will appear automatically without error.
The problems when photos are not saved to the memory card on Android are varied. But with the help of step-by-step instructions you can find ways to solve them.
How to download all files from Google Photos
Google Cloud Gallery can contain a large number of your photos and videos. You have the opportunity to download them in one file to your computer or phone. Google allows you to export any of your data, including emails, tasks, search history - everything that the service itself owns. For the purposes of our topic, we will only talk about Google Photos. To download them all in one file, go to the additional service - Google Archive.
You can access it through a browser (on your phone or computer) at: https://takeout.google.com/. The page prompts you to download all data. But we don't need everything.
- Therefore, immediately click on the button at the top Cancel selection.
- And in the list we find Google Photos, next to which you need to put a tick.
- Scroll down the list and click Next .
- Now you need to select the method for obtaining the archive and the file type.
- Click the Create export .
When archiving is completed, an email with a link will be sent to the email address linked to your account. It will be possible to download an archive with photographs. ZIP folders open on your phone and computer. Therefore, there will be no problems with opening the photo archive.
If the archive is not too large, you can wait until the service completes its work. After a few seconds, a button for downloading photos from Google will appear here. You can transfer photos from the archive to your phone gallery.
How to empty the Google Photos Trash
In the cloud service, you can delete files that you no longer need. They cannot be immediately deleted, but end up in the trash, from which they can be restored if they are still useful. The entire recycle bin can be emptied at once.
- Select Google Photos - Library .
- Then click on Trash .
- Select the three dots at the top and click Empty trash.
According to the terms of the new service use policy, all files in the trash that are more than 60 days old will be deleted automatically. Therefore, there is no need to periodically clean out your photo storage. Delete files carefully. Those that are important to you can be uploaded to your smartphone gallery from Google Photos or stored in another cloud service.