- MapKeyboard
- SharpKeys
- KeyTweak
- Key Manager
- Mkey
Programs for reassigning keys are usually small utilities whose main task is to replace the function of a particular keyboard button (some programs also work with the mouse).
They can be useful in various situations. For example, if a certain key is faulty, such a program will allow you to quickly “repair” it by assigning its function to another key. Many keys are never used at all in the everyday life of the average user. Is it possible to make them really useful? For example, make it so that the “F8” key takes screenshots, and “Pause Break” launches some program? All this is possible with the help of specialized programs.
MapKeyboard
One of the simplest programs for reassigning keys, and it’s completely free. The MapKeyboard utility allows you to assign any key the function of any other key - this is where the functionality of the program ends. It is not capable of executing any macros (pressing multiple keys in succession) or assigning a keyboard button to launch external programs.
In general, MapKeyboard does not work with the keyboard itself, but with the operating system settings that are responsible for the functioning of the keys pressed. This also means that the program does not load the computer in any way during operation. All it does is change certain parameters of the system. After saving the settings, MapKeyboard can be closed altogether - changes made to the keyboard will remain active until they are canceled by launching the corresponding program function.
How to use MapKeyboard?
The MapKeyboard program, although it does not have a translation into Russian, is extremely easy to use:
- Click on the keyboard image of the desired key that you want to reassign.
- Then, in the lower left corner, expand the “Remap selected key to” list and define a new function for the selected key.
- Click the "Save layout" button.
- After clicking “Yes” in the dialog box that appears, the program will end the operating system session. After logging in again, the key will be reassigned.
To return the keyboard settings to their original state, simply click the “Reset keyboard layout” button in the lower right corner of the program.
Why reassign keys
Despite the classic arrangement of keys in any keyboard, the computer owner can use the buttons for other purposes. There may be several reasons for changing the default keyboard configuration:
- acceleration and improvement of various processes;
- improvement of brain activity;
- changes to use the other hand (if the user is left-handed);
- improvement for the purpose of correct hand positioning.
KeyTweak
Another analogue of the two previous programs. The KeyTweak utility combines the functionality of SharpKeys (in that it is able to work with multimedia buttons and in the mode of reading keys when pressed) and the convenient user interface of MapKeyboard (there is an image of the keyboard).
Instructions for using KeyTweak
You can reassign a key using KeyTweak in two ways - either by using the keyboard image, similar to MapKeyboard, or by using the mode for reading the code of the reassigned key, as is the case with SharpKeys.
First way:
- Click on the image of the key to be reassigned. Difficulties may arise here, because... Instead of letters/symbols/designations, the picture shows only numbers - these are key codes. But if you hover your mouse over the button image, the actual value of the key will appear below it.
- Select a new function for the key from the Choose New Remapping list, then click the Remap Key button.
- An entry about the key reassignment will appear in the “Pending Changes” list. Click on the “Apply” button to apply the setting.
- In the upper left corner, in the “Remapped Keys currently in effects” block, you can view a list of all previously remapped keys. It will be displayed even if the reassignment was performed in another program.
Second way:
- For example, let’s reassign the “Play/Pause” multimedia key. Images of some of them can be seen to the right of the keyboard image, but we will not use them.
- Click on the “Full Teach Mode” button and a small window will open.
- Click on the “Begin Teach Mode” button.
- Press the key on the keyboard that you want to reassign; its code will be displayed in the “Scancode of Key #1” block. In our case, this is code 57344 (the “Play/Pause” key).
- Immediately after clicking on the key that will replace the previous one, its code will be displayed in the “Scancode of Key #1” block. For us it is 57399 (key “Print/Screen/SysRq”).
- Click the "Remap Key#1 to Key#2" button.
- Click "Apply" in the main program window to save the changes.
If you use the “Half Teach Mode” button:
- Click the “Scan Single Key” button, then the key you want to reassign.
- From the Destination Key drop-down list, select the newly assigned key.
- Click the "Remap" button, then "Apply" in the main program window.
To cancel changes, click on the “Restore All Defaults” button in the main KeyTweak window.
Method 1: Registry
You can redefine keys using the operating system registry editor, without third-party software, but doing this is not particularly convenient and even difficult for inexperienced users.
- Open Registry Editor.
- In the left column, find the position HKEY_LOCAL_MACHINE\SYSTEM\CurrentControlSet\Control\Keyboard Layout, then in the empty area on the right, right-click and select New > Binary Parameter, specifying “Scancode Map” as the name.
- Double-click the left mouse button to open the newly created “Scancode Map” parameter and type its value. In the example, we will swap the operation of the Page Up and Page Down keys, and also disable the operation of the End key altogether. The value itself must consist of the following parts of the code (strictly in the same sequence):
- 8 pairs of zeros;
- the number of reassigned keys with one added to it. If the number is single-digit, then we add a zero in front of it (for example, we change the operation of three keys, then we will need to write “04” in the code);
- 3 pairs of zeros;
- the scan codes of the keys themselves (all of them are in Wikipedia at this link);
- 4 pairs of zeros.
- We've decided on the structure, let's look at it in practice. Scan codes for keys on Wikipedia are located in the “XT Press Code” column. Copy the values of the keys you need into one convenient place. In our case, these will be “Page Up - E0 49”, “Page Down - E0 51”, “End - E0 4F”.
- Now we swap the bytes (a pair of digits) of each key. We will get “Page Up – 49 E0”, “Page Down – 51 E0”, “End – 4F E0”.
- Now you need to directly reassign the keys. To swap the operation of two keys, you need to assign the value of the second key to the first key, and vice versa. To disable a key, just write two pairs of zeros in front of its code. For us it looks like this:
- reassigning Page Down to Page Up - 49 E0 51 E0;
- reassigning Page Up to Page Down - 51 E0 49 E0;
- complete shutdown End - 00 00 4F E0.
- The final code, which will be entered into the registry, looks like this: 00 00 00 00 00 00 00 00 04 00 00 00 49 E0 51 E0 51 E0 49 E0 00 4F E0 00 00 00 00. You, of course, will get your own option.
- Save the changes with the “OK” button and restart your computer or log out of your account and log in again. Perhaps something will not work out the first time - in this case, carefully read the instructions again and try to compose the code again. To cancel the reassignment, you just need to delete the created “Scancode Map” parameter.
Please note that some keys may not consist of two pairs of numbers, but of one: for example, Esc has the value “01”. We add zeros to it (“01 00”) and swap the pairs (“00 01”).
Key Manager
And this is a much more powerful program that allows you not only to reassign keys, but also to perform a number of other functions related to them.
Unfortunately, Key Manager is not a free program (the license cost at the time of writing this review is from $24.97), and the main reason for this is its extensive functionality. Here are some of them:
- Reassigning keys and mouse buttons.
- Assigning various functions to the keys - opening files, launching programs, opening sites in the browser, managing open windows, inserting predefined text, etc.
- Assigning key combinations for various functions (similar to the previous point).
- Assigning functions to mouse buttons by first pressing any key or combination.
- Mouse cursor control (moving to a specified point, automatically pressing buttons, etc.).
- Creating your own context menu in addition to/replacing the existing menu in Windows or in any program.
- Creation of macros, i.e. sequential pressing of any number of keys with the ability to configure time delays between keystrokes and other features.
Key Manager usage example
Because This review is devoted to programs for reassigning keys; here is an example of how this is implemented in the Key Manager application:
- In the main program window, click on the “(double click to add)” element.
- The settings window will open.
- In the upper left corner of the window, click on the “(click to define)” element.
- Press the key on the keyboard that you want to reassign (you can also use a multimedia key).
- Next, you need to select an action for a given key. To simply reassign it, in the “Assign action” block, open the “Key or mouse button” tab.
- A new function for a key can be set in the “(click to define)” block. In this case, first click on the inscription with the mouse, and then press the desired key.
- Or you can use the “Key or Mouse Button” drop-down list by selecting the appropriate function for the key to be reassigned.
- In our case, the “Insert” key is reassigned to the “Calculator” multimedia button (in the program it is called “Program 2 (Calculator)”).
- Click "OK" when you complete the settings.
- Now the newly created command will be displayed in the main program window.
The Key Manager utility does not make any changes to the system, so it should always be running. If you need to cancel key reassignment or any other function, you can pause the program using the corresponding button in the main window:
The functionality of Key Manager is amazing, but there is no point in purchasing the program solely for the sake of reassigning keys, because... There are free analogues for this.
Setting up the keyboard on Windows
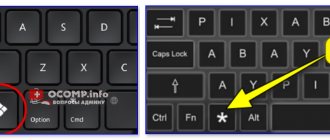
Windows does not allow you to reassign actions for all keys. For example, the key with the icon of the operating system itself - Windows - is inviolable. It cannot be reassigned, it can only be disabled. In other cases, to reassign a key action, you must perform the following steps:
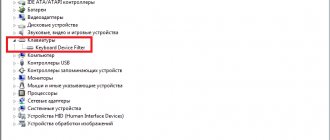
- Make sure the keyboard you are about to configure is connected to the system. This can be done through the "Device Manager" in the "Control Panel".
Make sure the keyboard is connected - Launch “Mouse and Keyboard Center” (if it is not there, download and install it from the official Microsoft website).
Install "Mouse and Keyboard Center" and launch it - Select from the list of keys the one for which you want to reassign the action, and double-click on it.
- Select the command required for the key in the list that appears.
Unlike versions 7 and 8 of Windows, Windows 10 does not allow the user to customize the keys, but they can be reassigned using third-party utilities.
Mkey
In conclusion, we will give an example of a program that is close in functionality to Key Manager, but still not as advanced, but completely free.
The Mkey utility is also capable of not only reassigning keys, but also performing other keyboard and mouse related actions:
- Control of various multimedia players: WinAmp, AIMP, KMPlayer, Media Player Classic, Foobar2000 and others.
- Managing Volume Settings
- Opening folders and files, managing open windows, launching programs, managing the browser and other similar tasks.
- Mouse control from the keyboard: clicks, cursor movement, emulation of working with the mouse wheel (scrolling).
- Recording and playback of macros.
Among other things, in Mkey you can set applications in which the program will automatically turn off, as well as create multiple profiles with their own set of functions and then quickly switch between them.
How to set up Mkey?
At first glance, it is not very clear how to work with the Mkey program. But in fact, everything is very simple there. Setting up any Mkey function is carried out according to the following scheme: assigning a key (or key combination), selecting the desired function, setting the function. Let's look at this using an example of key reassignment:
- Click the “Add” button in the main program window, then click the key you want to reassign (multimedia keys are also supported).
- The program counts the key pressed and displays its designation on the screen as the name for the new function (you can leave everything as it is or set your own name).
- Click "OK" to continue.
- Next, you need to assign an action to the selected key. To simply reassign it, open the “Keyboard” tab in the central column of the main window, and then select the “Keys” section.
- In the right column of the main window, check the box next to “Emulate clicking”.
- Just below, select a new key from the drop-down list, then click on the image of the floppy disk (lower right corner) to save the settings.
As with Key Manager, the Mkey program must be running for remapped keys and any other functions to work.
Installation on a key: launching a calculator, opening “my computer”, favorites, etc.
Agree, repairing the keyboard by reassigning the keys is not bad. But it would be great if you could assign other options to rarely used keys: say, so that when you click on them, the necessary applications open: a calculator, “my computer,” etc.
To do this, you will need one small utility - SharpKeys.
———————————————————
SharpKeys is a multifunctional utility for quickly and easily changing the registry values of keyboard buttons. Those. you can easily change the assignment of one key to another: for example, you pressed the number “1”, and the number “2” will be pressed instead. It is very convenient in cases where some button does not work, but there are no plans to change the keyboard yet. The utility also has one convenient option: you can add additional options to the keys, for example, open favorites or a calculator. Very comfortably!
The utility does not require installation; in addition, once you launch it and make changes, you don’t have to run it again, everything will work.
———————————————————
After launching the utility, you will see a window at the bottom of which there will be several buttons - click on “Add”. Next, in the left column, select the button to which you want to give another task (for example, I chose the number “0”). In the right column, select a task for this button - for example, some other button, or task (I indicated “App: Calculator” - i.e. launching a calculator). After that, click "OK".
Next, you can add a task for another button (in the screenshot below, I added a task for the number “1” - open my computer).
When you have reassigned all the keys and assigned tasks for them, just click the “Write to registry” button and restart the computer (maybe it’s enough to just log out of Windows and then log in again).
After the reboot - if you click on the button to which you gave a new task, you will see how it will be executed! Actually, this is what they were trying to achieve...
Creating a restore point
Before reassigning keyboard keys, it is highly recommended to create a system restore point.
This will save your current keyboard settings in case you need to return to them without being able to do so through other means.
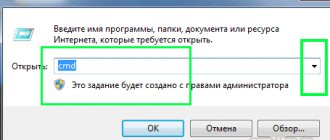
Step 1. Press the key combination “Win+R”.
Press the key combination “Win + R”
Step 2: Type “sysdm.cpl” into the menu and click “OK.”
Type “sysdm.cpl” into the menu and click “OK”
Step 3. Click on the “System Protection” tab, select the desired disk and click “Create”.
Click on the “System Protection” tab, select the desired disk and click “Create”
Step 4. Enter the name of the recovery point and click “Create”.
Write the name of the recovery point and click “Create”
Step 5. After creating a restore point, click “Close”.
Click “Close”
How to set up a layout and “make” it switch ✔
STEP 1: Keyboard Test
It’s logical to start this article by checking the functionality of the keyboard (why it could fail: flooding, physical wear, dust and crumbs under the keys, etc.).
We are primarily interested in the ALT, SHIFT, CTRL keys. For these purposes, it is best to use special. utility - Keyboard Test Utility (see screenshot below). Ideally, you need to click through all the keys and make sure that each of them lights up blue (i.e. works) ...
Keyboard testing
STEP 2: Configure language settings in the OS
Next we need to open the date, time and language settings (in Windows they are located in the same section). A universal way to open these parameters is to press the Win+R combination (the “Run” window should appear) and use the intl.cpl command.
intl.cpl - setting language, date, time (time zone)
Further, depending on the version of Windows, there may be slightly different windows:
Language options
In the “Language” tab, you need to open the link “Select an input method that is always used by default.”
Select input method...
Afterwards, open the language bar settings.
Language bar options
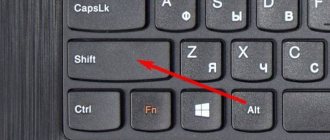
And in the “Keyboard switching” tab, set the key combination that is most convenient for your work (by default it is: ALT (left) + SHIFT).
Change keyboard shortcut (Windows 10)
Actually, having changed (recognized) the key combination, all that remains is to press them, and the layout will change to English (Russian)...
STEP 3: Alternative Switching Utility
I recommend paying attention to the special. programs that allow you to automatically switch layouts in Windows (they help speed up typing on the keyboard and solve problems changing the language)
For example, one of the leaders today is Punto Switcher. The utility allows you to assign any keys to switch layouts (see screenshot below).
Help with switching from Punto Switcher
I can’t help but add that Punto Switcher also corrects text you typed incorrectly and will help you avoid various bugs...
STEP 4: system rollback/reinstallation
If your layout stops changing after installing some programs, drivers, changing settings, etc., it makes sense to try to roll back the system to a checkpoint (i.e. restore it. By the way, checkpoints are created automatically, if, of course, this option included...).
To check if there are rollback points: press WIN+R and use the rstrui command.
rstrui - start recovery
Next, a window will appear containing a list of several points to which you can roll back the system (orient by date). Such a rollback will not affect documents (but you may have to reinstall programs and drivers).
To perform a system rollback, just select points and agree to restore
By the way, in some cases (for example, when installing various non-official assemblies of Windows), only reinstalling the OS will help correct the situation. Below is a link to how this can be done without losing data...
PS
A couple more tips:
- try using a wireless keyboard (this is both more convenient and in some cases helps resolve the issue);
- if you have a USB keyboard, look at which port it is connected to. If you use ports on the front wall of the PC, various adapters, etc., for diagnostics, try connecting it to the USB on the back wall of the system unit;
- a USB keyboard can also be connected to a PS/2 port (via a small adapter);
- Some laptops have special ones. keyboard operating modes in which some keys will be disabled (more about this here).
Thanks in advance, good luck!
Other entries:
- How to find out the IP address of a computer or laptop
- Combining 2 disks into 1: setting up a RAID array on a home computer (simply about the complex ones)
- How to make a photo album, photo book (programs for beginners)
- How to perform a stress test of the processor and the system as a whole, whether it maintains frequencies, whether there is overheating...
- Tables of keyboard shortcuts: for working with text, entering special characters, hot keys...
- Why is there no sound in the browser? Solving the problem using Chrome as an example
- What programs are needed immediately after installing Windows: 10 most important!
- How to see hidden files and folders on a disk
- https://www.remnabor.net/kak-perenaznachit-klavishi-na-klaviature
- https://fb.ru/article/331541/kak-perenaznachit-klavishi-na-klaviature-poshagovaya-instruktsiya-sochetanie-klavish-na-klaviature
- https://ocomp.info/kak-pomenyat-raskladku-klaviaturyi.html
Instead of an afterword
The most important question remains to be clarified: what exactly should be preferred for setting such settings? I think most users will agree that using the Registry Editor is quite a hassle. And of the programs reviewed, it is perhaps best to choose MKey, since the application has greater capabilities compared to the first two applets and is completely Russified
By the way, please note that before using any of the presented methods, it is recommended to first create a restore point for an emergency. But in any program, even after reassignment, you can set the standard default settings by completely resetting the settings
And, of course, only the most popular methods and programs were considered here, since today you can find quite a lot of similar applications on the computer software market. But they all work on similar principles, and the interface is not particularly different.
Changing language selection in Windows 10
Step 1. Press the combination “Win + I”.
Step 2. Click "Devices", select "Input", and click "Advanced options...".
Step 3. Select “Options...”.
Step 4. Click the “Switch keyboard” tab and click “Change combination ...”.
Step 5. Specify the desired combination and click “OK”.
Now you can use a more convenient way to switch language layouts in Windows.
