04/17/2017 windows | for beginners
Even if you know perfectly well how screenshots are taken, I’m almost sure that in this article you will find some new ways for you to take a screenshot in Windows 10, without using third-party programs: only with the tools offered by Microsoft.
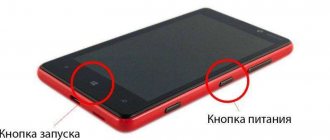
For complete beginners: a screenshot of the screen or its area can be useful if you need to show someone something depicted on it. It is an image (snapshot) that you can save on your disk, send by email, share on social networks, use in documents, etc. Note: To take a screenshot on a Windows 10 tablet without a physical keyboard, you can use the Win key + Volume Down button combination.
Print Screen key and combinations involving it
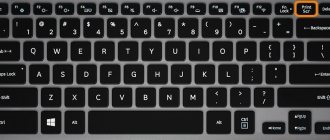
The first way to take a screenshot of your desktop or program window in Windows 10 is to use the Print Screen key, which on a computer or laptop keyboard is usually located in the upper right part and may have an abbreviated signature, for example, PrtScn.
When you press it, a screenshot of the entire screen is placed on the clipboard (i.e. in memory), which you can then paste using the standard key combination Ctrl+V (or the menu of any program Edit - Paste) into a Word document, as an image in graphic editor Paint for later saving the picture and almost any other program that supports working with images.
If you use the key combination Alt + Print Screen, then a snapshot of not the entire screen, but only the active program window, will be placed on the clipboard.
And the last option: if you don’t want to deal with the clipboard, but want to take a screenshot directly as an image, then in Windows 10 you can use the key combination Win (the key with the OS logo) + Print Screen. After clicking it, the screenshot will be immediately saved to the Pictures - Screenshots folder. You can change the default screenshot saving folder.
PrintScreen
The PrintScreen key - can be labeled as "PrtScr" or "PrntScr" - is designed to take screenshots. With its help, the entire screen is captured . When you press the PrntScr key, the screen is placed on the clipboard (intermediate storage of the operating system for copying data), after which it can be pasted into any program (Paint, Photoshop, Word, etc.) by pressing Ctrl + V on the keyboard.
Additional features of PrintScreen:
- Pressing Alt + PrntScr will take a screenshot of an open application window or folder on your computer, rather than the entire screen. The image will also be saved to the clipboard - to extract it, press Ctrl + V in any program where you can work with pictures.
Note: If you don't want to enter a code every time you start your laptop, find out how to disable the password on Windows 10.
- If you type the combination Win + PrntScr , the screen will immediately be saved on your computer in PNG format (the “Windows” key looks like the operating system logo). Full path to the file: Drive “C” → “Users” → “Username” → “Images” → “Screenshots”. This way you can take a screenshot without having to extract it from the clipboard.
New way to take a screenshot in Windows 10
One of the Windows 10 updates introduced an additional way to take a screenshot - the key combination Win+Shift+S. When you press these keys, the screen is shaded, the mouse pointer changes to a “cross” and using it, while holding the left mouse button, you can select any rectangular area of the screen, the screenshot of which you want to take.
And in the latest versions of Windows 10, this method has been further updated and is now a “Fragment and Sketch” tool, which allows you to create screenshots of an arbitrary area of the screen and perform their simple editing. Read more about this method in the instructions: How to use a screen fragment to create screenshots of Windows 10.
After the mouse button is released, the selected area of the screen is placed on the clipboard and can be pasted into a graphics editor or into a document.
Third party programs
Despite the wide selection of built-in tools for creating screenshots, the user can always turn to the help of programs from third-party developers. Next, let's look at three applications that have proven themselves best, both in terms of functionality and convenience.
Nimbus Capture
Nimbus Capture is a browser extension. That is, you won’t be able to take a screenshot of the game using it. But you can freeze an area of the screen while surfing the web.
To get started, install Nimbus Capture using your browser's built-in extension store. Next, the plugin icon should appear on the top panel. Clicking on the shortcut will automatically create a screenshot.
PicPick
A more functional tool, which is a full-fledged photo editor with the function of creating screenshots. In the program settings you can configure hotkeys for quick screenshots. Next, the user has the opportunity to save the image in any of the available formats, be it “.jpg” or “.png”.
LightShot
Another good program with an extremely simple and understandable tool. Unlike PicPick, LightShot does not have a full editor. But this is only a plus for the utility.
To take a screenshot, you need to install the program. Its icon will appear in the Taskbar. Clicking on the shortcut will launch a dialog box with the selection of the display area. Next, all you have to do is click on the save button.
On a note. There is also the LightShot extension, which combines almost all the functions of a full-fledged application. The only difference is that the extension allows you to take screenshots only inside the browser.
Screenshot program "Scissors"
Windows 10 has a standard Snipping program that allows you to easily create snapshots of areas of the screen (or the entire screen), including time-lapse ones, edit them and save them in the desired format.
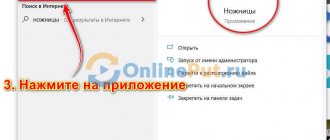
To launch the Scissors application, find it in the “All Programs” list, or, more simply, start typing the application name in the search.
After launch, the following options are available to you:
- By clicking on the arrow in the “Create” item, you can choose what type of photo you want to take - freeform, rectangle, whole screen.
- In the “Delay” option, you can set a screenshot delay for a few seconds.
After the snapshot is created, a window with this screenshot will open, to which you can add certain annotations using a pen and marker, erase any information and, of course, save (in the file-save as menu) as an image file desired format (PNG, GIF, JPG).
Windows + Shift + S
Windows 10 has a keyboard shortcut that allows you to take a photo of a selected part of the screen. To use it, you need:
- Type Windows + Shift + S . After entering this combination, a special tool for creating screenshots will appear on the laptop or computer monitor. Hold down the left mouse button to start selecting and release it when the desired area is outlined.
- The clipboard is the place where a screenshot of the computer screen is initially saved. To get an image in a graphic file format, you need to paste it into a drawing application (for example, Paint) using the Ctrl + V .
Let's sum it up
Windows 10 has built-in tools for taking screenshots. You can place a screenshot to the clipboard using the PrntScr key and the combination Win + Shift + S. To extract an image, you must use Paint or any other picture processing program. Also, for screenshots in Windows 10, the standard “Scissors” application is installed with minimal functionality for editing.
Note: If you need a screenshot of an Apple phone's display, learn how to take a screenshot on an iPhone.
Thank the author and share the article on social networks.
If you have Windows 10 installed on your computer or laptop and you don’t know how to take a screenshot, then you’ve come to the right place. In this article, I will compile some of the easiest and best ways in which you can take a screenshot in Windows 10.
In Windows 10, there are at least 4 different standard ways in which you can take and even edit a screenshot on a computer, laptop, or tablet. By the way, if you have a tablet, then to take a screenshot, press the Win key + volume down button. These are all standard operating system features. Without installing special programs for creating screenshots, etc. And all these methods are very simple and working. You can take a screenshot in a few seconds. Save it, edit it, and if necessary, share it on social networks or in another way.
If you need to take screenshots every day and edit them immediately, then of course it is better to install some third-party program. There are a lot of them. Free, paid, and with a different set of functions. Personally, I use the PicPick program. There is a free version for home. The program is in Russian, easy and functional. Completely suitable for creating screenshots in Windows 10. There is a small editor in which you can draw arrows, write something, draw, etc. I will tell you about this program at the end of the article. Let's look at the standard features first.
How to take a screenshot of a program window
Quite often there is a need to show someone a program window or save what we see on the screen. The easiest way to do this is to take a screenshot (or screenshot). However, not everyone knows exactly how this can be done. In this article you will learn how to take a screenshot of the entire screen or active window. There are several ways to do this depending on your operating system. Let's look at each of them in detail.
Method No. 1 (for Windows)
- Click on the Print Screen button on your keyboard. It is usually designated as prt scr, prt scrn or prt sc.
- If you are interested in how to take a screenshot of only the active window, and not the entire screen, you need to simultaneously press the Alt and Print Screen keys.
- Not all keyboards have such keys. Alternatively, you can use a key combination. For example, it could be Fn + Insert. For more information, see your computer's manual or your keyboard's manual.
- Next, open an image program (Paint is a unified image editor for Windows). To launch the program, go to the “Start” menu, select “Accessories”, find “Paint” in the list that appears. If you have Windows 8, first open the desktop by pressing the “Window” key. Then type "Paint" into the search bar. To launch the Paint editor, click on the program icon.
- Paste your saved screenshot. To do this, click the Paste button at the top left. This can also be done using the keyboard shortcut Ctrl + V.
- Click on the “File” button and in the list that opens, click “Save As”. You will be asked to select a file format in which to save the screenshot. The formats you can choose from are PNG, JPEG, BMP and GIF. In order to save the file in an alternative format, you need to click on “Other formats”.
- Enter a name for the screenshot in the File name field. Make sure you save the file in an easily accessible location. For example, this could be your computer's desktop (Desktop) or your Documents folder. You can change the file format in the “File type” line in the “Save as” window.
- After making sure that you have specified all the parameters, click the “Save” button. Screenshot ready!
Method number 2 (for Windows). Utility scissors
- This method is only available in Windows 7, Windows Vista and Windows 8.
- If you have Windows 7 or Windows Vista, go to the “Start” menu, select “All Programs”, select “Accessories” from the list that opens, find “Snipping Tool” among them. If you have Windows 8, first open the desktop by pressing the “Window” key. After that, enter “Scissors” into the search bar. Click on the program icon to open it.
- Click on the arrow next to the “Create” button. You will see a list of options. When you simply click on “Create”, a rectangular outline will appear on your screen, with which you will need to highlight the boundaries of the screenshot.
- Select the screen area you need for the screenshot: freeform (this way you can capture an area of any shape), rectangle (capture a rectangular part of the picture on the screen), window (only one active program window) or the entire screen.
- Select the part of the screen that you need to photograph. Outline the area of the screenshot if you previously selected a free-form area or a rectangle.
- In the window that opens, click: “File” - “Save As”.
- Write the name of the file and select one of the possible types: PNG, GIF, JPEG or HTML. Make sure you save the file in an easily accessible location: on your computer desktop (Desktop), in the Documents folder, etc.
- Click the “Save” button. Screenshot ready!
Method No. 3 (for Mac OS X)
- If you want to take a photo of the entire screen, press Cmd + Shift +3 on your keyboard at the same time. In this operating system, the default screenshot will be saved on your desktop in PNG format.
- If you need to take a photo of a specific area of the screen, press the keyboard shortcut Cmd + Shift +4. Your cursor transforms into a paint brush. They will need to circle the area of the screen that you want a snapshot of. The file will also be saved to your desktop in PNG format.
- If you are interested in how to take a screenshot of a program window, use the following keyboard shortcut: Cmd + Shift +4 + Space. Your cursor transforms into a camera image. You need to point it and click on the desired program window. You will be able to find the saved screenshot in PNG format on your desktop.
Method No. 4 (for Mac OS X). Grab utility
- To launch the Grab utility, click at the bottom of the “Applications” screen, select “Utilities”, find “Grab” in the list.
- In the window that opens, click the “Capture” button.
- Next you will see a drop-down menu. There you need to select one of 4 types of screenshot: “Area” (Selection), “Window” (Window), “Screen” (Screen), “Timed Screen”.
- The "Area" screenshot type allows you to take a photo of a specific part of the screen.
- The Window screenshot type allows you to take a photo of an open window.
- When you select the Screenshot type, you will get a screenshot of the entire screen.
- Selecting the "Temporary Screen" screenshot type allows you to delay taking a screenshot for 10 seconds.
- Next, you need to select the area for the screenshot. If you previously selected the “Area” type, select the desired area with a rectangular dotted line. After the cursor turns into a paint brush, select with it the part of the screen that you want to take a picture of.
- Go to the “File” menu in the upper left corner and click “Save”. The file will automatically be saved in Tiff format.
- If you need to save the screenshot to a specific folder, you can change the saving location in the Save window. After that, click the “Save” button. Screenshot ready!
Method No. 5 (For Mac OS X). Terminal
- To open the terminal, click at the bottom of the “Applications” screen, select “Utilities”, find “Terminal” among them.
- In the window that opens, enter the following command: screencapture -iW ~/Desktop/screen.jpg
- If you want to save the screenshot to a folder other than your desktop, enter the path to the desired folder instead of Desktop.
- To save the file under the name you want, enter it instead of “screen.jpg”.
- Press the Enter key on your keyboard. The screenshot is ready!
Method No. 6 (For Ubuntu Linux)
- If you need to take a screenshot of the entire screen, press Print Screen (or prt sc) on your keyboard.
- If you are interested in how to take a screenshot of a window, you can use the following keyboard shortcut: Alt + Print Screen.
- If you do not have such a button on your keyboard, use the information provided in your computer's instruction manual or your keyboard's instruction manual.
- Next, as in Windows, you need to open a program for working with images. Ubuntu Linux doesn't have a single image editor, so open the editor you have installed.
- Paste the screenshot into the program. This can be done using the "Insert" button in the "File" or "Edit" menu. You can also press Ctrl + V on your keyboard.
- Click the “Save” button. In most editors it is located in the File menu. There you can select “Save” or “Save as”.
- In the window that opens, enter the name of the file and the folder to save it, if your program allows it.
- Click on “Save”. Screenshot ready!
Method No. 7 (For Ubuntu Linux). Gnome environment
- This method is only possible in the GNOME desktop environment.
- Click on the “Applications” button, select “Accessories” from them, and in the list that appears, click on “Take Screenshot”. A special utility for taking screenshots will open.
- In the window that appears, select one of the image capture methods: “Grab the whole desktop”, “Grab the current window”, “Select area to grab”. You can also enter a time interval (in seconds) if you want to delay taking the screenshot.
- When you select the "Grab the whole desktop" method, you will automatically take and save a screenshot of the entire screen.
- When you select the “Grab the current window” method, you will automatically take and save a snapshot of one window.
- When you select the “Select area to grab” method, you will be able to circle the desired part of the screen using the cursor.
- When you enter a time interval, a screenshot will be taken after the specified number of seconds.
- You can add effects: display a cursor or a window frame on a screenshot. To do this, check the box next to the corresponding option: “Display the cursor” (Include pointer) or “Display the window frame” (Include the window border).
- Click “Take Screenshot”. Screenshot ready!
Method No. 8 (For Ubuntu Linux). GIMP program
- Launch the program. GIMP is a graphics editor that allows you to take screenshots directly in it.
- Click: File - Create - Screenshot.
- In the window that opens, select the method for creating a screenshot: Take a screenshot of a single window, Take a screenshot of the entire screen, or Select a region to grab.
- When you select the “Screenshot of one window” method, you will receive a snapshot of only the active window.
- When you select the Full Screen Screenshot method, you will get a snapshot of everything on the screen.
- When you select the “Select area to capture” method, you will be able to outline the area you need for the screenshot.
- Enter the time (in seconds) to delay taking a screenshot in the seconds field. In case you want to take a screenshot immediately, enter the number 0.
- Click the Snap button. After this, the dialog box will be closed and the program will take a photo according to the entered parameters.
- Once you see the screenshot in GIMP, go to the File menu and click Save as.
- In the window that opens, enter the file name, file type and location to save it.
- Click the "Save" button. The screenshot is ready!
Additionally:
- Quite often the question arises of how to take a screenshot on a Windows Mac. In this case, you need to use the key combination: Fn + Shift + F11. Next, you need to follow the instructions specified in method No. 1 or No. 2. The keyboard shortcut will help you insert the file into the image editor: Ctrl + C.
- The clipboard is an intermediate data storage with which you can transfer and copy data from one application to another using the operations: cut, copy, paste. When you click Paste, the object is transferred to the program you are currently working with. In this case, when cutting or copying a new object, the old object from the clipboard is erased. This intermediate storage is used for copy and paste purposes only and is not directly managed.
kak-za4em.ru
"Scissors"
“Scissors” is a standard program on Windows 10 designed for creating and editing screenshots. It is installed on a computer or laptop by default along with the operating system. To take a screenshot in the application, you will need:
- Launch “Scissors” through the “Start” menu (located in the “Accessories - Windows” folder).
- Click on the “Create” button in the application.
- Select the desired portion of the screen by holding down the left mouse button.
- Click on the floppy disk icon to save the screenshot to your computer. You can first add marks to the image using the Pen and Marker tools.
Note: Find out how to disable Windows 10 Defender on a laptop if you are using an unlicensed version of the operating system.
How to “share” a screenshot?
The system has another function with which you can immediately share your photo on social networks or send it by mail. It's called "Share".
To open the function, press the Win+H keys. A menu will open on the right, in which applications will be visible through which you can share the material. Select the desired application and start sending.