In Windows 10, “Some settings are managed by your organization” is not an error or a glitch. This is a kind of system protection. This restriction prevents the user from changing system settings. You won't be able to accidentally break the OS.
In certain cases, this function interferes with normal operation of the PC. Let's say you know what options you need, and you can set them yourself without damaging the system. But Windows 10 Defender will interfere with you. You will not be able to customize the system for yourself. And you will use limited functionality. However, you can get rid of the "Some settings are managed by your organization" alert.
This message indicates limited functionality of Windows
What does the inscription mean
A red “Some parameters are controlled by your organization” sign means that you are currently denied access to certain parameters so that you cannot change their values. In builds "tens" 1703 and 1707, the error may have a slightly different text - "Some parameters are hidden or managed by your organization."
Why is the control function needed?
This error is typical for office computers that are part of a corporate local network. Typically, such a network has its own server - a main central PC (administrator) that manages the shared network resources on the network (other PCs, called workstations). In simple words, he decides what information and parameters a particular workstation has access to and what not, since each employee has his own authority, which he should not exceed.
All computers in the corporate local network are subordinate to the server - the main PC, which distributes powers
Why the message may appear on a home computer
The message in question can also appear on home devices that are in no way connected to the corporate network. This happens for the following reasons:
- Changing system settings in the Registry Editor or Local Group Policy Editor. If you made any changes before, just put everything back in place and the error will disappear. You can also reset all settings at once using the instructions in the sections of this article.
- Deactivation of Windows Defender, automatic updates of the operating system and other important system functions.
- Disabling various Windows system services, for example, functionality for connected users and telemetry.
- Using various programs to disable Microsoft tracking. Simply disable or uninstall the utility to remove the inscription.
What actions will cause the message “Some parameters are managed by your organization” to appear?
In general, the inscription “Some settings are hidden or managed by your organization” does not interfere with work on the PC, but there are situations when the user has to resort to one or another solution to remove it: changing important system parameters, searching for and installing updates, turning on and using "Developer Mode".
The error occurs for users mainly in the Windows Update sections. For example, when you try to manually search for an update for a system on the network.
Often, due to this error, users cannot manually search for an update in the Update Center.
If a red message appears in the additional settings of the Update Center, the user will not be able to choose the method of installing updates: with a notification about restarting the PC, etc.
With this error, users cannot customize the update process for themselves
The message also appears in Windows Defender - both in the corresponding section of Settings and in a separate window of the standard antivirus. The user may lose the ability to activate limited periodic scanning, disable real-time protection and some other options.
Due to the error "Some settings are managed by your organization" the user is unable to enable periodic scanning only
With this entry, it becomes impossible to edit the list of exceptions for Windows Defender, that is, the list of files and folders that it does not scan: you cannot add or remove this or that item.
With the inscription “Some settings are managed by your organization,” the ability to temporarily disable the standard antivirus disappears
Also, the inscription may appear when the “Developer Mode” option is activated in the same “Options” window. The fact is that to enable the mode you need access to the computer with administrator rights. If you are not the administrator of your PC (do not work under this type of account), the system may consider that your device belongs to the organization. Accordingly, it may disable some options that are available in developer mode so that you cannot change them.
In some cases, an error occurs when enabling developer mode
Problem with home PC
When installing a new operating system, all registry values are set by default, and management of the OS is completely in the hands of the user. Only the local user can add a new value that will block some functions. How? Yes, whatever you want: from accidental to a banal error when changing the registry. Often, when a user wants to change the lock screen, “some settings are managed by your organization” prevents him from doing this. Then it turns out that somewhere the system has failed. Perhaps she independently suggested accepting the group policy, and the user agreed without looking, as often happens. One way or another, the problem needs to be solved, and now we will figure out how to do it.
How to remove this error
You need to choose a solution based on the reason. If you have not yet identified it, proceed sequentially: from method to method.
Changing the value in "Options"
You can use this method only if you have not previously turned off Microsoft tracking or changed anything in the registry. Otherwise it will not give results. Follow these steps:
- Expand the Windows Settings menu. Just hold down I and Win on your keyboard. If the tile window does not appear, go to the Start menu, and then click on the gear sign.
In the Start menu, click on the gear to open the Windows Settings window. - Switch to the “Privacy” section by clicking on the corresponding tile.
Open the Privacy tile in the Options window - In the left column with the list of blocks with parameters, open the third “Diagnostics and reviews”.
- In the first parameter, set the circle mark next to the “Full” value. Close all windows and immediately restart your computer for all changes to take effect.
In the “Diagnostics and Feedback” tab, check the box next to “Full” - If it turns out that the values are not clickable (it is therefore impossible to change them), proceed to other methods of solving the problem (“Registry Editor” and “Local Group Policy Editor”).
Cleaning the registry
Editing the registry is a responsible process, so it must be approached with the utmost seriousness. Proceed strictly according to the instructions:
- Call up the “Run” window on the display by holding down the R and Win buttons. In the currently empty field, write the regedit command - you can simply copy and paste it. Now let the system execute the command by clicking OK. Run the regedit command in the window to launch Registry Editor
- You can enter the same command in the Search panel. Click on the item in the results.
The regedit command is recognized in the “ten” and the “Search” panel - In the gray-blue window, click “Yes” to give permission to the editor to change anything in the OS.
Click on “Yes” to allow the editor to make changes in the operating system - Before you begin this task, create a copy of the registry. On the top panel, open the first menu “File” - select the second option “Export”.
Click "Export" in the "File" menu - In the dialog box, specify a name for the file (a backup copy of the registry with which you can restore the database if problems occur during or after editing). Save the document in any place convenient for you - remember this location.
Save the resttra backup file in any location convenient for you - Now start searching for the desired parameter. Open the second menu at the top “Edit” - click on “Find”. Or bring up a small search window using the Ctrl + F keys.
Click Find in the Edit menu - Enter the name of the NoLockScreen parameter in the line. Leave checkboxes next to the items about searching for the entire string and parameter names. Uncheck all other boxes. Start your search.
Enter NoLockScreen in the line and search among the parameter names - Wait while the editor tries to find the required registry entry.
You need to wait while the editor searches for the parameter - If the search is unsuccessful, find the parameter manually. Expand the third section of HKLM, and there is already a fifth SOFTWARE directory in it.
Launch the SOFTWARE folder in the HKLM directory - Now run the nested blocks one by one: Policies - Microsoft - Windows - Personalization.
In the Personalization folder we need the NoLockScreen parameter - In the last folder with personalization settings there will be an entry NoLockScreen - right-click on it. From the context menu, select the delete option.
Click on “Delete” in the NoLockScreen context menu - Confirm your action in the warning window.
Click “Yes” to permanently remove NoLockScreen
Changing Group Policy
If editing the registry does not help you, try resetting all system settings in the Local Group Policy Editor window:
- “Local Group Policy Editor” can also be called up on the display through the “Run” window: hold down R and Win, write the gpedit.msc key and click OK.
In the “Open” line, paste and run the command gpedit.msc - In the editor, we immediately open the first main section with the PC configuration.
Expand the contents of the first section “Computer Configuration” - Now we launch the block with administrative templates.
Open your Administrative Templates folder - A list of Windows components opens before us. We select all components.
Expand all Administrative Template options - The list of policies will be large - scroll through it all, paying attention to the “Status” column. Each item must have a value other than “Specified”.
Make sure that each parameter is set to “Not Configured” - If you suddenly see that some policy is “Enabled” or “Disabled”, double-click on it. In the gray window, set the value to “Not specified” and apply the changes using the button in the lower right corner. In this way, we will remove all restrictions in the operation of the operating system - the error in question should disappear.
If any option has been set to Enabled or Disabled, check the
Via the Command Line console
You can also reset all policy values using another faster method using the standard Windows application called “Command Line”:
- The console must be launched with administrator rights: open the system search panel (magnifying glass sign on the “Taskbar”) and enter the cmd key or “Command Prompt” into the line.
Enter cmd into the search field - In the search results, right-click on the desired item - click on the first action “Run as administrator”.
From the context menu, select "Run as administrator" - In the black window, copy and paste the request secedit /configure /cfg %windir%\inf\defltbase.inf /db defltbase.sdb /verbose. To have the console start executing the command, press “Enter” on your keyboard.
Paste the command into the editor and press Enter - Wait a few seconds or minutes until all policies are reset. As a result, a notification about a successfully completed operation will appear in the black editor. Close all windows and restart the system and check if the error appears.
Close your console and restart your PC
Changing the value from domain to workgroup in system properties
Your PC settings may be messed up. Follow these steps to check this:
- Open a window with information about the system and PC - right-click on “This PC” and select “Properties”. Or you can go the other way: hold down R and Win, write the word control in the line and press Enter.
In the Run window, type control and click OK - On the “Control Panel”, click on the “System” link. In the panel window, open the “System” block
- In the block with the name of the PC, domain and workgroup parameters, click on the “Change” link with the image of a yellow-blue shield.
Follow the link on the right “Change settings” - In the “Computer name” tab, click on the “Change” button.
In the “Computer name” tab, click on “Change” - The outlined "Is a Member" panel should show "workgroup" rather than "domain". If there is a domain, change it. Click OK to save the changes.
Set the value to “Workgroup” and click OK - Now return to the system properties window - click on the “Identification” button. Check the box next to the second value indicating that you do not belong to a corporate network. Click “Next”.
Check the second box and click on “Next” - A window will ask you to restart the device. Close all application windows whose icons are located on the Taskbar. Click “Finish” and reboot the system - the changes will take effect.
Close all windows and restart your PC
Video: how to quickly remove the error “Some parameters are managed by your organization”
We use the O&O ShutUp10 utility
You can solve the problem using a third-party anti-spyware program called O&O ShutUp10 - it is free and has a Russian interface. It also does not require installation - it works immediately after downloading the executable file. Let's look at how to use it to solve the problem with the inscription:
- Let's go to the official resource of the developer of the anti-spyware utility. On the right side of the window, click on the Download button.
Click Download to download the file - We wait for the file to download and launch it through the downloads panel.
Open the downloaded utility executable file - In the utility window, scroll through the list of parameters in the “Preventing the transfer of user and diagnostic data” section. There will be items related to telemetry here. Despite the fact that the program recommends leaving these parameters activated, we disable them. Disable the options in the Prevent transmission of user and diagnostic data list
- Eventually the switches should turn red. Check to see if the inscription has disappeared.
Check if the inscription issue has been resolved
System Restore
If none of the described methods gives a positive result, take advantage of the opportunity to restore Windows to the point. A recovery point is a PC state for a certain period of time, which is saved in a separate file. Using it, you can return to the computer’s operating state and undo the changes that were made to the system after the point was created.
Typically, the operating system itself creates points before updating or other important action. They can be created by the user himself. We will tell you how to do a rollback in detailed instructions:
- Find the standard “This PC” shortcut on the “Desktop” - right-click on it and select the latest “Properties” option in the gray panel. In the context menu, select “Properties”
- Let’s look at the left area of the window with general information about the “OS” and the PC as a whole. Click on the fourth link from the top “System Protection”.
Click the "System Protection" link on the left side of the screen - In the new window, click on the “Restore” button. In the “System Protection” tab, click on “Restore”
- The initial window of the built-in recovery utility will open. Click on “Next”.
Click “Next” to begin recovery - Place a checkmark next to the item under the list “Show other restore points.” We select a point in the list - you need to remember when the error “Some parameters are managed by your organization” was not on your PC, and then correlate this date with the desired point. Select it with the left mouse button and click on “Next”. Select the required point and click “Next”
- We start the recovery - click on “Finish”. After this, we confirm in the window the intention to return one or another state of the PC. Your device will reboot - wait for the recovery process to complete successfully. As a result, the operating system will boot in the state that you previously selected - the error should disappear.
Click “Finish” for the system to start the recovery
If it turns out that you do not have a single recovery point on your PC (the corresponding message is on the initial screen of the recovery wizard), you can go the other way - return the PC to its original state using the built-in Windows tools.
If you don't have restore points on your PC, return your PC to its original state
Let's briefly tell you how to do this:
- Launch Windows Settings through the Start menu or using the I and Win key combination. Launch the Security & Updates tile.
- In the “Recovery” block, click on the first gray “Start” button.
In the “Recovery” tab, click on “Start” - Next, the system will prompt you to reinstall the operating system with or without saving personal data (the media files will be saved, but the applications will still be deleted). At the same time, you do not need a Windows distribution kit - the system uses the operating system files that are already on the PC. Select your option and click on it.
Decide whether to save your personal files or not, and click on the desired item - If you chose the deletion option, you will once again be asked to completely delete all files (irrevocably - the method takes longer) or simply delete (with the possibility of recovery - the process is faster). Make your selection and start automatic reinstallation using the Reset button. Click “Reset” to start the recovery
- Wait until the system reinstallation is complete - the PC will constantly reboot. After this, you will receive a fresh “OS” with initial settings and a clean system. If you chose to save your personal files, they will be located in the Windows.old folder on your system drive.
The disadvantage of this method is that if the OS file system was previously seriously damaged or if the hard drive has failed, you will not be able to restore the “OS” using this method. In this case, a recovery disk or creating a full backup of Windows 10 using the system’s built-in tools on a separate hard drive will help.
You can also use another tens function - “Start over”. A clean installation of Windows will also be performed, removing all applications, but preserving personal data - a distribution kit is also not needed.
You can restore system files using the “Getting Started” function
Solution 1: change the registry
Let's start with an easier and safer method - cleaning the registry. First you need to call it with the command
Next, go to the personalization section, which is located at the address (follow it in the system of subfolders on the left side of the registry): As you can see, this method is quite simple, but it does not always save. Now we will get rid of group policy settings by changing them.
Method 2
The “Some settings are managed by your organization” problem, the solution to which is not so difficult, can be resolved by another method based on resetting group policies. So, let's go through the steps:
- Call the console with the cmd command, which should be entered in the “Run…” line (called Win+R).
- You must enter the following command into it:
After execution, you need to reboot the system.
Why change default settings
Of course, now we are not talking about disabling the lock screen in order to conduct some experiments with the system. In most cases, even in case of critical failures, it can be restored.
The question here, rather, is that the user wants to remove the blocking in order to create his own settings and parameters that are most convenient for him. Naturally, it is not recommended to carry out such procedures without the necessary knowledge, but for advanced users this makes sense. Most often, this may concern specific software, which simply will not work without the ability to change the system configuration, or personalization of permission settings for some of your own purposes, but you never know. Some may object, say, install yourself a virtual machine and do whatever you want in it. What if this feature is not available (if only because of a weak computer configuration or lack of RAM or disk space), or the user simply does not want to install it?
It often happens that the system itself, at a certain stage of operation, suggested changing group policy settings, and the user agreed, simply without looking. This is where additional knowledge comes in handy.
Command line
Using the Windows 10 command line, you can disable or enable Update Center. This will force you to start the “wuauserv” service.
- Open a command prompt with administrator rights. Type the command “net start wuauserv” and press Enter.
- The program will start the service, after which you will see a corresponding message. The process will start every time you turn on your PC, so you won't have to repeat this procedure. To disable the Windows 10 CO, you must enter the command “net stop wuauserv”.
- Now it remains to check whether the system will be updated.
Why change default settings
Of course, now we are not talking about disabling the lock screen in order to conduct some experiments with the system. In most cases, even in case of critical failures, it can be restored.
The question here, rather, is that the user wants to remove the blocking in order to create his own settings and parameters that are most convenient for him. Naturally, it is not recommended to carry out such procedures without the necessary knowledge, but for advanced users this makes sense. Most often, this may concern specific software, which simply will not work without the ability to change the system configuration, or personalization of permission settings for some of your own purposes, but you never know. Some may object, say, install yourself a virtual machine and do whatever you want in it. What if this feature is not available (if only because of a weak computer configuration or lack of RAM or disk space), or the user simply does not want to install it?
It often happens that the system itself, at a certain stage of operation, suggested changing group policy settings, and the user agreed, simply without looking. This is where additional knowledge comes in handy.
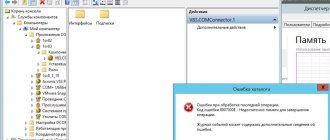
Reasons for the error: “Your organization manages your virus and threat protection settings.”
This program status appears as a result of a user attempting to enable Windows Defender antivirus. A message about a program refusing to launch may appear after you have used an additional antivirus. Two active antiviruses on the system cannot work. You most likely chose to run additional antivirus software yourself, so the system had to partially disable the built-in Defender.
Such actions could cause file system errors. As a result, some registry entries associated with the Defender were changed or deleted. This may have been done by virus programs that tried to disable Windows protection. They are capable of replacing registry files to bypass obstacles in their path. As a result, the antivirus is almost impossible for the average user to enable, and the error “Your organization manages your virus and threat protection settings” appears.
Can't enable Windows Hello - some settings are controlled by your organization
I found a solution. The reason is that Windows Hello is managed differently on domain-joined computers starting with the Anniversary Update. To make it work you must follow these steps:
1) Setup a Group Policy Central Store (you should already have this)
2) Get Windows 10 Anniversary Update Group Policy Templates. You can do this by copying the files from PolicyDefinitions (in windir on Win10 Anniversary Computer Update) to PolicyDefinitions Central Store. You may want to copy these files to a shared folder first, as a normal user should not have access rights to the central storage.
3) Configure a new GPO or add to an existing one the following settings to enable Windows Hello:
Computer Configuration/Policies/Administrative Templates
.../Windows Components/Windows Hello for Business/Use Biometrics => Enabled
.../Windows Components/Windows Hello for Business/Use hardware security device => enabled (if you want to use TPM instead of a Windows Hello activation key or certificate)
Please note that in general, all business computers should have a TPM. …/System/Login/ enable convenience Login PIN code => enabled (this is the key
This allows you to sign in using a PIN code, which in turn enables the Hello feature along with other settings.)
.../System/Login/Enable convenience Login PIN => enabled (This is the key. This allows you to log in using a PIN code, which in turn enables the Hello feature along with other settings.)
.../Windows Components/Biometrics/ allow domain users to log in using biometrics => enabled (I think this is enabled by default, but making it explicit makes GP management much easier.)
Additional customization options can be found under System/Sign-in and Windows Features/Biometrics and Windows Features/Windows Hello for Business.
you will find more background here: https://blogs.technet.microsoft.com/ash/2016/08/13/changes-to-convenience-pin-and-thus-windows-hello-behaviour-in-windows-10- version-1607/
and here
https://technet.microsoft.com/en-us/itpro/windows/keep-secure/implement-microsoft-passport-in-your-organization
most important excerpt:
If you want to use a Windows Hello based key or certificate, you can follow the instructions in the links. Don't get confused though. You can still use regular TPM for regular Windows Hello.
Archiving with password and other parameters in 7-Zip
For the resulting archive, you can set a password for subsequent unpacking, a data compression level, and a maximum archive size in order to split it into several parts. To do this, right-click on the file that you want to archive and select “7-Zip”, sub-item “Add to archive...”.
The archiving settings window will open. In it you can specify the name of the archive that will be created, the size of the archive part, the compression level and fill in the “enter password” and “repeat password” fields to set a password for unpacking the archive.
There is no need to change the default settings; install only what you need. By clicking the button, an archive file will be created.
Why does BSOD appear in Windows 10
There are several fatal OS errors that can cause BSOD. Most often these include:
- Errors in drivers.
- Failures in the operating system kernel (low-level software).
- Failure of computer components (for example, a broken video card).
- Connecting conflicting devices (scanner, printer, etc.)
- Incorrectly configured BIOS.
- Lack of RAM on the hard drive.
- Installing damaged firmware.
- Removing important registry keys.
- CPU overheating.
- Various viruses.
Only after finding out the reason for the system crash can you begin to fix the problem.
What causes such an alert to occur?
For the most part, such an alert appears in the settings in the “Update and Security” tab. In addition, the message may also appear in the Windows Defender window. In general, this alert occurs if:
- Something has been changed in a certain part of the registry;
- Changes were made to group policies;
- Windows 10 you banned spying for Microsoft (this is my case);
- You have disabled a certain feature. For example, Windows Defender or automatic updates were disabled;
- Some Windows 10 services have been disabled. For example, the Telemetry service (spy service, I disabled it).
Conclusion: if you have disabled the Windows 10 spy service (Telemetry) on your computer or made changes to the update settings, then most likely you will receive a notification in your “update settings” or “Defender” about how your organization manages some of the settings.
Of course, no organization has anything to do with it, and the reason is the changed parameters (the registry, group policy editor, telemetry, etc. were changed). Therefore, Windows 10 cannot control the computer using the Settings utility.
Whether in this case there is a need to remove this notification or not is your business, since this inscription appears as a result of changes made by you. There is no harm from this inscription. As for me, it is better to let this inscription remain, but the computer will stop engaging in espionage activities.
To disable blocking or not: that is the question
Finally, the most important thing: is it worth disabling the system blocking? If the problem is that the screen appears only in cases of installation or operation of specific programs and their components that are official and should work in the Windows 10 environment, as they say, iron-clad, then, of course. But if the user is trying to experiment with setting critical parameters, this is not recommended. As a last resort, it is better to make a backup copy of the registry in advance, as well as user files stored on the computer, since the result may not be what you expected. The same applies to restrictions imposed on network terminals by system administrators.
All methods
This procedure can only be performed using the built-in functionality of the operating system. You don't need third-party software. First, check if Update is running by default on your computer. You can do it like this:
- Launch Task Manager using the combination Ctrl + Shift + Esc.
- Open the Services tab. Here, look for a service named "wuauserv".
Thanks to it, auto-update works in the background in the operating system. If you don’t have “wuauserv”, then go to one of the inclusion methods:
- through group policy;
- through "Windows Settings";
- using the command line;
- through registry settings;
- via Services.